


The solution is usually simple. Replacement and reproduction brushplates are available for many Lionel and other motors. But I came up with an inexpensive repair that can save you the trouble of finding replacement brushplates, and it can be applied to other more obscure motors for which parts are even harder to find.
My repair requires just a few hand tools and an easy-to-find brake-shoe relining rivet made for semi trucks.
Checking the problem
The first step is to be sure that a loose armature bushing is, in fact, the problem. At the end of the armature where it extends through the brushplate, try to wiggle the shaft from side to side. (Note: Many toy train motors have no true bushings for the armature, but simply turn in the hole through the brushplate itself.) A worn bushing or brushplate hole will result in a noticeably loose fit. If the fit is not wobbly, you may need to examine the rest of the motor for other problems.
Although it is more common for the bushing on the brushplate side of a locomotive motor to show wear (as is the example discussed here), the gear-side armature bushing can also wear out. In either case, the bushing repair process is similar.
Disassembling the motor
After confirming the problem, the next step is to disassemble the motor and remove and carefully clean the armature. Use a small strip of 400-grit emery sandpaper to lightly polish any small burrs or irregularities from the shaft, then clean the shaft and armature again using contact cleaner.
Take the armature to an automotive or truck parts supplier that carries brake-shoe relining rivets. These rivets are brass and are available in a variety of sizes that are well suited for toy train motor repairs. I’ve found the no. 5-10 rivet (five is the rivet’s diameter and ten is its length) to be a perfect size for most of my bushing repairs. The rivet you choose should have an inside diameter that either fits the armature shaft very snugly or is just a little bit smaller than the diameter of the shaft, and it should be long enough to make it easy to hold during the drilling operations. The external dimension of the rivet is usually unimportant as long as it is large enough to accommodate a hole the size of the armature shaft.
Enlarging the holes
For the third step, clean the armature shaft and, using a micrometer, measure the diameter of the shaft at the approximate point where it rotates in the brushplate. The sizes of the armature shafts for which I have made most of my bushings are about .112″ and .124″. Find a drill bit at least .003″ to .005″ smaller than the shaft measurement. (Start small, as the hole can always be enlarged if needed.)
Hold the head end of the rivet in a suitable holding fixture, and enlarge the hole in the other end of the rivet by drilling as straight and evenly as possible. After drilling, test fit the armature in the rivet. The armature shaft should fit in the end of the rivet as close as possible but without binding as the armature is rotated.
Use the same procedure for fitting the new rivet bushing into the brushplate hole. You’ll want a tighter fit since the bushing should not turn at all in the brushplate hole. Measure the outside diameter of the rivet (my bushing measured .138″) and start with a drill bit at least .005″ smaller, and enlarge the hole in the brushplate by drilling as straight as possible. Work slowly – if the hole in the brushplate gets too large, the brushplate could be rendered useless. On the flip side, if the hole is not large enough, and too much force is used when installing the bushing, the brushplate could break or split in half.
Installing the rivet
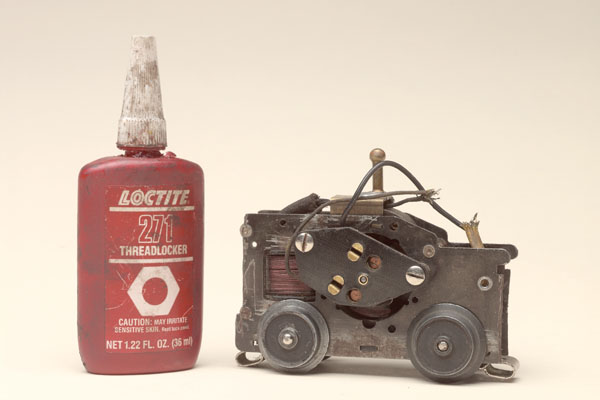
The fourth and final step is to insert the rivet bushing into the brushplate, with a few drops of red Locktite adhesive on the external surface of the new bushing to keep it in place. Be careful not to get any Locktite on the inside of the bushing where the armature will need to turn.
Carefully trim the rivet bushing to the proper length using a cutoff tool for a clean cut. The bushing need not be cut flush with the brushplate. I usually leave about 1/16″ or more of the rivet extending if there will be no locomotive shell clearance problems.
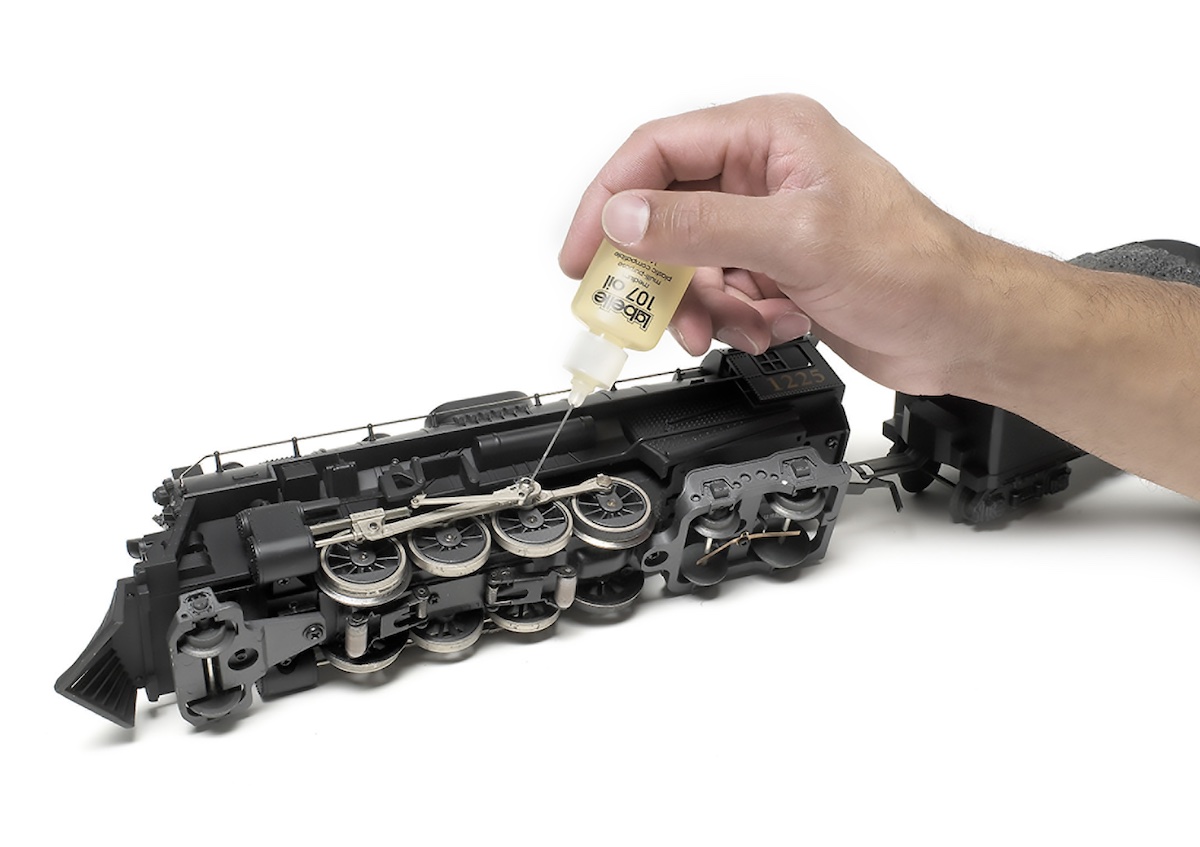
Oil and carefully assemble the armature and brushplate onto the motor and test the armature movement. If the armature does not fit, or turns too hard, the interior hole of the new bushing may need to be resized. (It’s possible that it became distorted or developed a burr during the installation.) Regardless, it may take some breaking in before it turns freely.
If you’d like, you can try your hand at repairing a loose bushing in a noisy Lionel air whistle motor brushplate using this rivet procedure. This repair can dramatically improve sound performance.
You don’t have to put up with a growling motor. Once you’ve eliminated the problem, you should have a happy, well-adjusted locomotive that runs with the best of them.


Thank you. Very informative.
I recently acquired an 0-4-0 1625 switcher. I have removed the brush plate, cleaned the armature etc. How do I get the brushes back into their slot in the brush plate without the springs spitting them back out?
Where are the pictures? I don't know a brushplate from a dinner plate. I need to see the parts so I know what I'm looking for. Thanks
I'm going to try this, too. Thanks!
Beautifuly written article on how to give new life to your worn locomotive and save it from the scrap yard. With the aid of installing new brusch plate and new brusches Keep up the good work model railroaders live on Info
Great article!!
I am still learning engine repair and this information will really help me.
Thank you, all help is appreciated.
Excellent article!