


In 1931, a propeller-driven German railcar built by Franz Kruckenberg ran between Hamburg and Berlin. The Rail Zeppelin reached a speed of 142 mph, a record that stood for 20 years. The Rail Zeppelin, with a body similar to the Zeppelin airships, never went into production. Perhaps the idea of an open propeller operating so close to passenger platforms had a bad effect on investors.
Over the years, the German toy company Märklin made electric and windup models of the Rail Zeppelin.
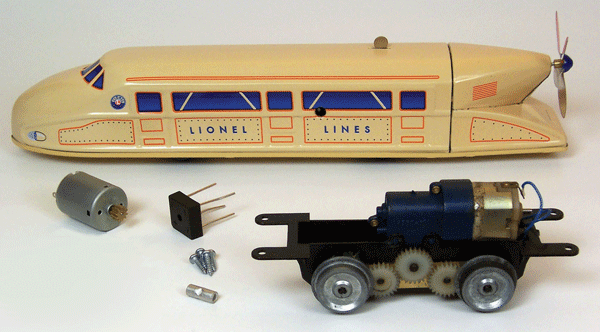
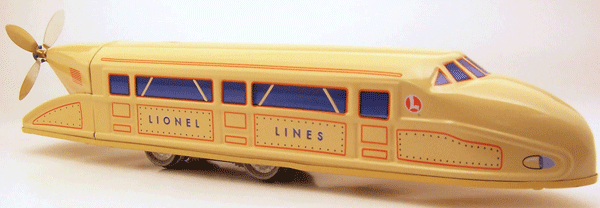
More recently, the Schylling Co. made two tinplate versions, one decorated for Lionel Lines and the other with a chrome finish. The O gauge sheet-metal Rail Zeppelin is a windup toy that can run on three-rail track and sells for about $25.
I figured there must be a way to convert it to powered three-rail operation.
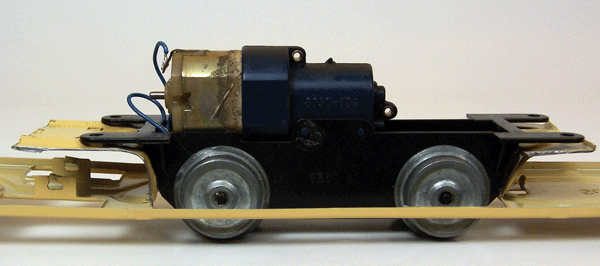
Looking around my local train store, I found an old Lionel diesel switcher that looked right for my conversion. The chassis of the 1970s-era Lionel DC switcher has a mounting bracket that makes it relatively easy to attach the Rail Zeppelin body. The locomotive I used was a no. 8769 Republic Steel switcher. Similar models are the nos. 8161, 8350, and 8670. I also added a separate motor to power the propeller.
I have a lot of fun running the Rail Zeppelin at various public events. It’s very popular with kids and gets long stares from adults.
Disassemble
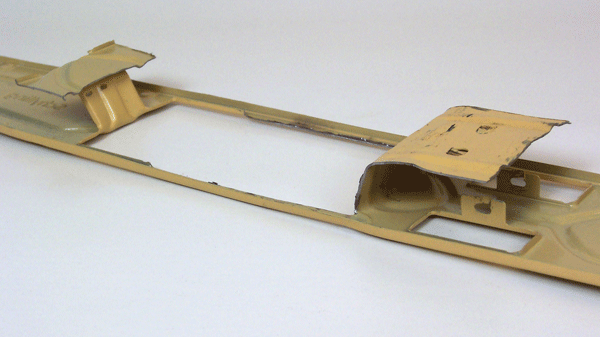
Make two cuts
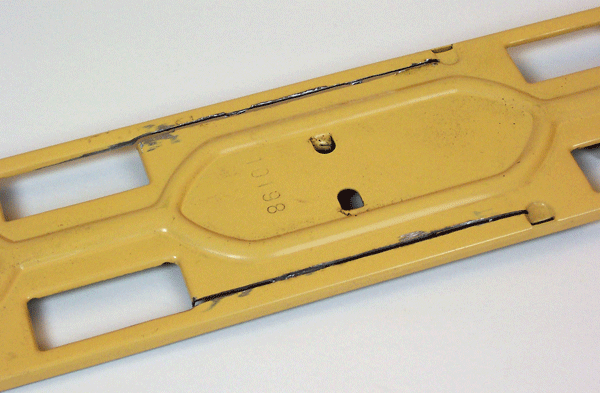
Make a third cut
Cut across between the first two cuts, at the midpoint between the back of the rear wheel holes and the front end of the first cuts. Phillip K. Denslow photo
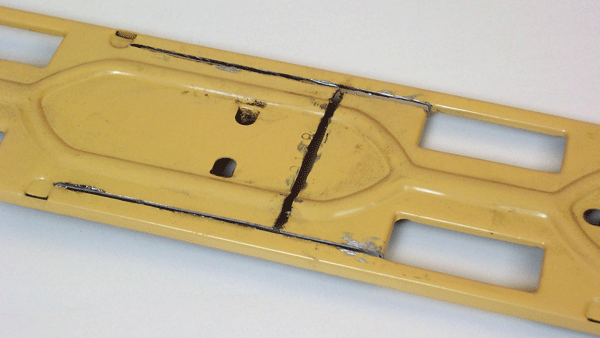
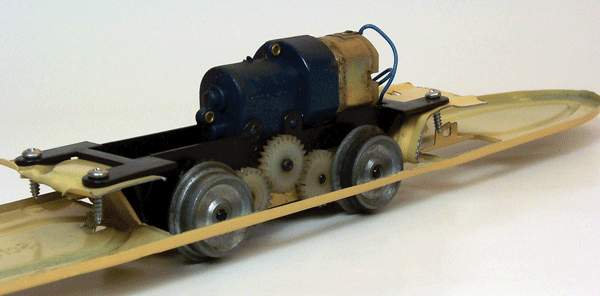
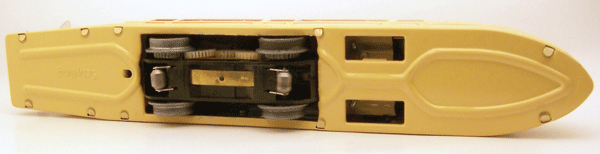
Make the chassis mounts
Tweak the alignment
Test-fit the switcher chassis to the bottom plate. You may have to re-bend the flaps to get the right alignment. Lift the bottom plate up with the chassis in place until the wheels just touch your work surface. Make sure the bottom plate will be horizontal when the chassis is supporting it, and ensure all four tabs on the chassis are resting on the horizontal sections of the bent flaps. Phillip K. Denslow photo
Attach the chassis
Connect the rectifier
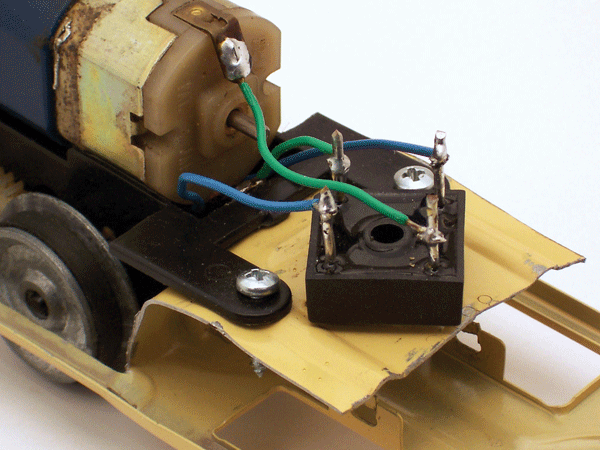
Attach the propeller motor
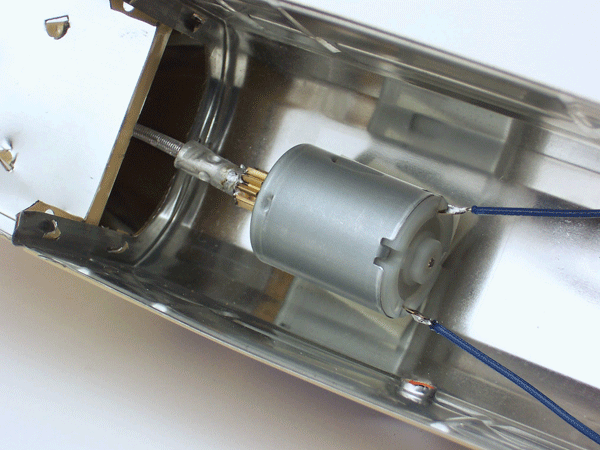
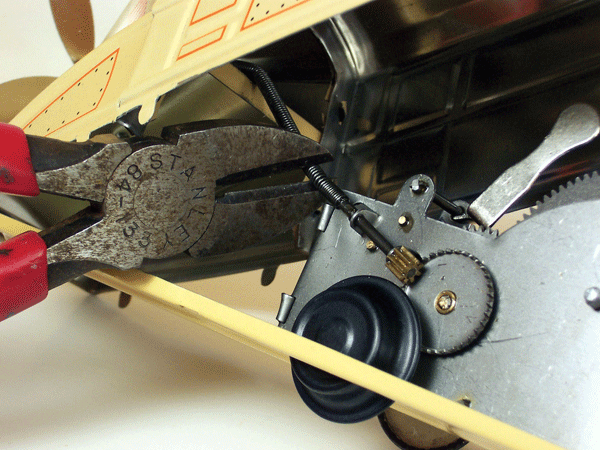
I used a Lionel No. 600-8903-120 DC can motor with spur gear to power the propeller. Solder one end of a 12-10 AWG metal-butt splice connector to the spur gear so that the connector is parallel and centered to the motor shaft. Cut the propeller spring so a ½-inch length is available beyond the rear body section. Next, insert the end of the spring into the connector and use a crimping tool to attach it.
Use hook-and-loop fastener or adhesive pad to attach the motor to the Rail Zeppelin body ceiling so that the propeller is just shy of snug against the body.
Solder the wires from the propeller motor to the +/- terminals of the rectifier. Phillip K. Denslow photo
Reassemble


very interesting! has any other wind up or batter toy perhaps a bus ever been converted and motorized to run on an O-27 gauge train?
Would a front lead truck be needed for this projuct?