


Until recently, you had to be content with whatever advertisement was printed on the thin cardboard that’s packed with the billboard. Wouldn’t it be more fun to use your home computer to make billboards featuring your own photographs? It’s easier than you think.
This technique is made possible by a small color printer that, when attached to your computer, can produce photographic-quality 4 x 6-inch prints. Making your own billboards is not a complex procedure, and it involves the same kind of desktop publishing procedures many of you may already be using.
To make your billboard, here’s what you do:
Remove the insert from the billboard and measure it. You will notice the insert for Lionel’s no. 410 billboard blinker has two distinct rectangular areas. The top area shows through the front of the billboard, while below it is an unseen white space that provides additional contact with a second set of plastic tabs that grip the insert and hold it in place.
The insert used with a billboard blinker measures 4-15⁄16 inches wide. The top image area is 2-1⁄2 inches high, and the clear space below measures 1-7⁄32 of an inch.
Use your favorite graphics or desktop publishing program to create a working area that is 4-15⁄16 inches wide and 3-1⁄32 inches high.
For my own billboards, I used the Adobe’s PageMaker desktop publishing program to create a working space the full size of the insert. I drew a non-printing blue line 2-1⁄2 inches from the top to separate the two areas, and show where to place a drawing or photograph.
Don’t have desktop publishing software on your computer? Don’t worry. Depending on what you have bundled on your computer, you may be able to use word processing software like Microsoft Word, which has a graphics element, to create the working space for a billboard and then import those graphics into a text document. While it may not be terribly sophisticated, it is functional.
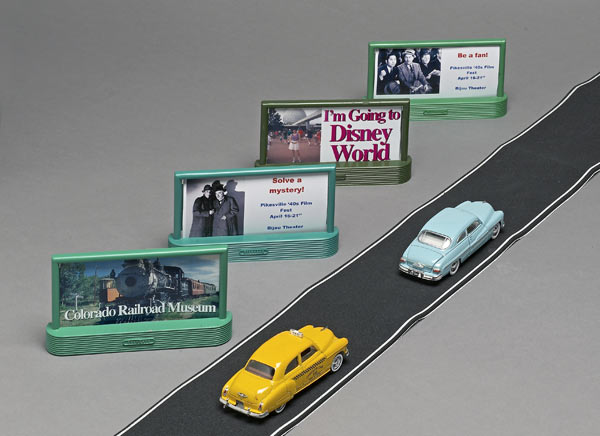
Next, import or paste a photograph or drawing into your billboard’s image area. I think it’s fun to use your own photos to make billboards that reflect your layout’s personality. For example, for one sign I pasted an image of a brachiosaurus I shot at the Utah Field House museum in Vernal, Utah.
Tip: To get the best results, use the highest quality (or resolution) photographic file you can. A file that is stripped down for e-mailing may look great on a monitor, but it may not print in clean, crisp detail.
Getting images in digital form to use is easier than you think. Digital cameras no longer cost a fortune – so you can shoot them yourself, or you can dig into your old photos and slides and have them scanned into digital form. This is what I did. Most photo labs offer this service for a modest fee.
Check the PDF below for some ideas for your railroad billboards.
All billboards for your layout need lettering to make them look real, but keep in mind an important rule of thumb. Billboards rarely contain more than eight words – preferably fewer – so they can be read by passing motorists. Follow that same rule and your billboards will look more realistic.
To add type to the billboard, I used PageMaker’s type tool and typed “Visit Jurassic Park.” Be sure to use a type color that contrasts with the photo.
Black type looked lost against the green background, so I changed it to white to make it stand out.
To give added depth, I copied the type, changed the color to black, and placed it behind and slightly to the right of the white type. This gives a three-dimensional, drop-shadow look.
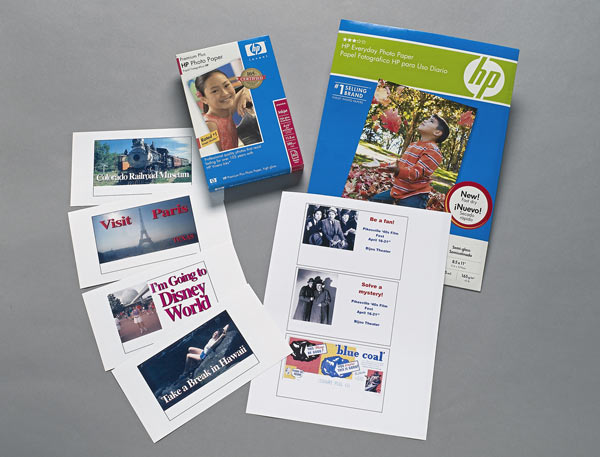
At this point the hard work is done; next is printing the sign. In recent years there has been an explosion of small, economical all-in-one printers and specialty photo printers. Many printers can be used with photo paper to produce clean, clear images.
The steps for setup and printing may differ by brand, but generally you need to accomplish the following:
1. Establish the size of the document to be printed.
2. Establish the type, quality, and size of paper to be used (for example Hewlett Packard photo paper comes in regular and premium grades).
3. Determine the quality of the printing level (always select “best”).
4. Hit “print” and let the machine do its job!
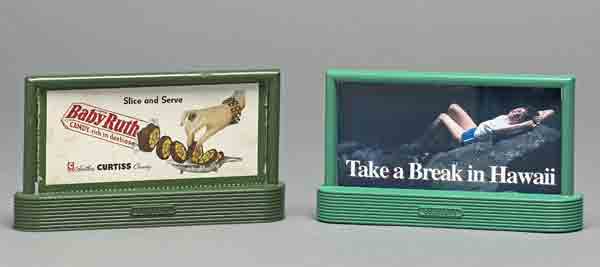
The last step is trimming the 4 x 6-inch print to the finished billboard size. Take your time, use sharp scissors or a hobby knife and steel straightedge, and trim conservatively. You can always make additional cuts so it will fit your billboard. You may want to strengthen your billboard by using the old cardboard insert as a backing for your brand-new billboard.
At this point thrifty operators and hi-railers may be asking, “How much does this cost?”
A quick search of the Internet revealed sellers of Hewlett Packard all-in-one printers offering complete packages from $44 to $299; Kodak EasyShare all-in-one printers ranging from $100 to $268; and Canon all-in-one printers from $109 to $299. Hewlett Packard 4 x 6-inch premium-quality photo paper costs roughly $20 for a 100-sheet pack, and 8½ x 11-inch paper costs roughly $25 for a 50-count package.
Either way, that is a lot of potential billboard building!
OTHER BILLBOARDS, OTHER SIGNS
This technique works especially well with the 410 billboard blinker cataloged in the 1950s and brought back in 1995, but you can use it with any billboard that has a removable insert no larger than a 4 x 6-inch print area. All the techniques are the same for making photographic billboards or signs for your layout.
Just go to step number one and measure the size of the billboard or sign. Technology finally allows you to unleash your own creativity on your layout!


Albert Carranza, please follow the rules of thumb of my IT son, never pay for content.
I'm new to this and I like this article. I plan on making some of my own. Any suggestions as to where I can buy the billboards?