Creating a focal point within your railway is the easiest of the design principles discussed in this three-part series. In part 1, I showed how to draw the trackplan, after researching the basics. Now, we’ll see how experienced railroaders have arranged elements to create an obvious theme. Visually, it’s common sense; we see that the roundhouse needs a turntable, but positioning all the components for optimal viewing is the art. Stories, movies, books—even gardens—convey some drama, as in a theatrical play.
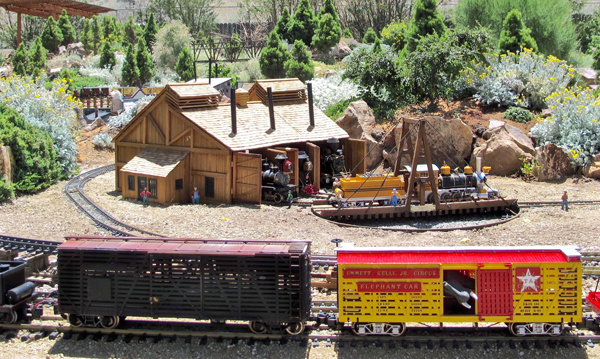
Joe and Mary Schrock’s first scene as we enter their backyard makes a dynamic statement about the era, theme, and authenticity (photo 1). We don’t have to guess what the story’s about because all of the elements unify the scene with a common, uncluttered thread. Even the gravel, rocks, and blooming plants are repeated on either side to contain your field of vision.
Manifest drama, then diminish it
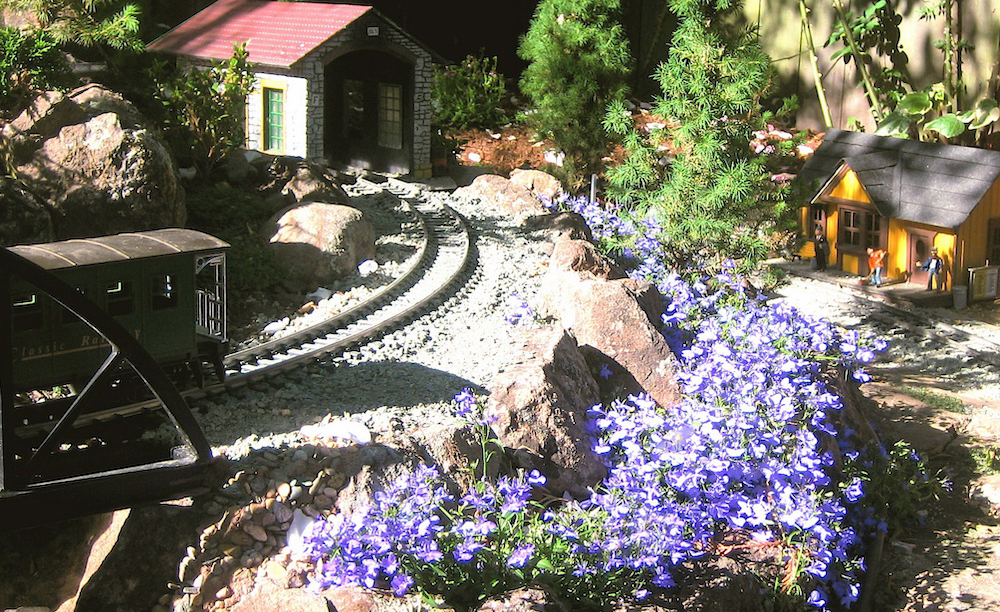
For each new perspective of the main theme, you, as the director of your backyard play, get to produce each area within the larger garden as a subplot (photo 2). Here’s how: 1) set the stage with a level platform and backdrop of hardscape; 2) provide a mood with harmonious plants and natural gravel; 3) cast the players with structures and figures busy on the railroad; 4) thicken the plot with a problem (like how will they fit that engine into a full roundhouse?); 5) then surprise us as a train emerges from a tunnel; and finally, 6) give us enough story to let us draw our own conclusions.
Between acts in the theater, an interlude of music gives us breathing space from the drama. Likewise, expanses of landscaping act as transition areas between subplots. A length of groundcover, a forest, or a rock formation prepares us for yet another view to investigate. Two photos show this concept in different ways. In Indiana, Taltree Arboretum’s vast garden of trees (photo 3) forms a backdrop for a whole town as the focal point. The train then becomes the point of focus as it travels behind Main Street’s stretch of buildings. In photo 4, the train is always visible on a tiny railway, but Denny and Judy LaMusga grouped the buildings into two focal points, surrounded by a single species of groundcover, which allows us to perceive distance between the two showpieces.
Framed!
Without distraction, a focal point can tell its tale. Take the Styrofoam bridge in photo 5, built by Julie Barber as a vista, underscored by an attention-grabbing stream. It’s simple but not too simple. The bridge’s great detail matches the color of the riverbank’s rocks but contrasts the rich green thyme meadow (Thymus serpyllum ‘Elfin’, Zones 4-9). Thyme lays out the matting for this picture, and then the boxwood trees (Buxus sp.) make the frame. What is the couple talking about? We get to imagine our own story when there’s breathing room between scenes.
Frames point to openings. Use portals, dooryards, canyons, mountaintops, industrial yards, bridges, meadows, cemeteries, and parks. All provide framing for shining a light on a short story. Warren Eckman designed the portal in photo 6 to highlight a mining industry—he even installed a lamp for nighttime runs. The ore cars imply action but a sleepy lizard wants to get into the act.
One way to frame the stage is to flank a structure with plants. Two trees on either side of a home would encompass the picture of a snug place worthy of highlighting. Tall, stately trees may give the impression of wealth but could grow too big and dwarf a house. In photo 7, Katy and Dan Hill planted seemingly overgrown grasses, like parentheses, around a small cabin where country folk play jug-band music. In a garden railway you may find stage footlights made of living yellow flowers.
True to your theme
Simple is a good way to start out when confused about the direction to take in designing your railway. Some of us can handle copious amounts of detail and trains traveling over mazes of track amid wall-to-wall stuff. I do like “busy” but I’m not a multi-tasker. In fact, as a teacher, I’ve learned that our brains can’t focus on more than one thing at a time.
Other than grouping or framing, another way to keep your railway from looking cluttered is to stay on track with your theme. Ask if your elements “belong” to the scene, or are you spreading out all your scale goodies as in a smorgasbord? It’s always okay to partially hide some items in a group to help us make sense of the story. Once you invite us in for the meat and potatoes of your theme, we’ll search for dessert.
When reading about featured railways in this magazine, notice the section called, “Railway at a glance.” This list offers two more clues on how to keep your railway on theme: the era and the scale. While smaller-scale items may be positioned far away to lend perspective, the era should be consistent unless you’re modeling a historical theme park. Some modelers suggest that it’s prototypical for rolling stock to be of different sizes and yes, that’s so.
Balance the budget
Nothing’s wasted in Bill Smith’s railway (photo 8). Bill kept to his theme and still packed in loads of items. From eye level to our toes, the “story of water” flows down a waterfall painted on the fence, turns liquid at the back of the railway, then gushes under three bridges (all visible because of the choice of styles). Next, the shores open up to a boating/swimming beach and, finally, the stream runs under a captivating predicament.
In photo 9, at the front of Bill’s garden, just parallel to an active dual-track railroad bridge, a de-construction company takes apart an automobile bridge. Bill gives each member of that crew a job, grouped as a team. Nature frames it all: the water continues to flow under that scene, past green embankments, over the retaining wall, into a grate at our feet. Suddenly, under the bridge on the left bank, is that an EPA official? (Or make up your own story.)
In the next issue we’ll compare and contrast details to draw viewers into your show. One last thing—the concept of “theme” is not an edict but a suggestion. If fantasy is your theme, then embrace it and let the track tie it all together. I saw a Snoopy train on eBay you can have for “peanuts.”
Related reading
“Greening your railway: Dramatize your railway with plants” (February 2008 GR)
“Greening your railway: Mass planting to frame a focal point” (August 2009 GR)
Miniature Garden Guidebook (Ch.4), “Mass planting to frame a focal point” https://kalmbachhobbystore.com/product/book/12444
Zones are USDA Hardiness Zones
How did you create a focal point within your railway?
Mike Walls
Near Columbus, Ohio, Zone 5
Elevated and dominant
I scratchbuilt my lodge building using Garden-Texture blueprints and lumber cut from red cedar, glued with Titebond II glue and fastened with a pin nailer. The roof panel is Precision Products plastic. I sealed the Grandt Line windows with Minwax spray stain sealer. This took many hours in the wood shop. Since this photo was taken, the lodge was relocated to its new home at the Cobblestone Railroad and is currently undergoing a much-needed renovation to reopen as a ski lodge, complete with a new accessory—an aerial tram service to the mountaintop.
Ray Turner
San Jose, California, Zone 9
Surrounded by hardscape
I think a key thing about focal points on your railroad is that they be visually separate from one another. While a guest is focusing on one element of my railroad, I don’t want him/her distracted by a nearby scene. I use tree lines, hills, and cast-rock mountains to separate areas. The yard at one end of my railroad has several custom-made structures, including a turntable and detailed roundhouse under construction.
Use your browser to read Design your railway, part 1 at
https://www.trains.com/?s=Design+your+railway%2C+Part+1
And see Design your railway, part 3 at
https://www.trains.com/?s=Design+your+railway%2C+Part+3