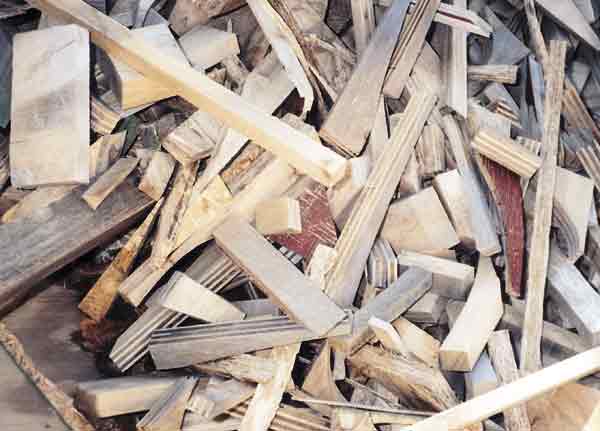
The most common choices of wood for outdoor timber construction are redwood or Spanish cedar. These are rot resistant, light, easy to cut and drill, but rather pricey. However, you shouldn’t have to pay for your stock. Most lumberyards throw away scraps less than 3′ long, as do most fence and deck contractors. A little bit of scrounging and personal contact will guarantee a steady supply of these commodities for the cost of a few phone calls and gas money.
The use of hardwoods for rolling stock can certainly get pricey, unless you know of a handy cabinet shop. They throw out plenty of oak, walnut, birch, hickory, mahogany,, and such, and are usually happy to have someone go through their dumpster for scraps, as they pay by the pound to dump it. Ask the person in charge about it and find out what materials they work with.
You will also find particle-board pieces that work well for shelves, jigboards, and the like. Any industry that works in wood is a potential gold mine for the outdoor railroader, so learn to keep your eyes open and develop contacts among the industrial tracts.
Here’s a tip on weathering and waterproofing your timber after it’s been cut to scale stock size. Buy a couple of plastic wallpaper troughs. Cut your stock lengths, but do not assemble the parts. Pour an ink-and-alcohol mix into one of the troughs and dip the pieces, setting them aside to dry. Pour wood preservative into the other trough and repeat the process. This method of application will cut your preparation time down dramatically. When finished, pour the remaining weathering solution and preservative back into their respective containers for the next job. I suggest you use separate funnels for each solution and mark them accordingly, along with the plastic troughs.
After everything has dried, assembly proceeds using hardware (instead of glue) for all my attachments. Using hardware means I don’t need to worry about incompatibility between wood preservative and glue.
However, if you bolt your bridges and trestles together, you can spend an outrageous amount of money on hardware unless you make use of the hardware surplus outlets. I buy 4-40 screws, bolts, washers, and nuts by the pound. These are a little large for scale, but they are common enough that you can rely on them being available, plus most wire-stripping tools have a thread cutter in this size, making custom cuts a snap. You can let steel hardware rust, but I prefer to use stainless or aluminum and rust” with paint.
For the long truss rods on Warren or similar bridges, I strip the spokes out of bicycle wheels at a scrap yard. Spokes come in all sorts of sizes and have the threaded attachments included. I simply straighten out the knob portion and use it on the top of the structure (with a washer), and use the spokenuts on the bottom where they don’t show. While this means that the design of the bridge is somewhat determined by the length of the spokes, it also means that each rod can be adjusted and actually help maintain the structure of the bridge, just like on a prototype.
Some of these methods may not tickle your fancy, but I suspect anyone who has fed 2 x 4s into a table saw to create stripwood will find something in this article that will help save effort or cash.