


One of the wonderful things about our hobby is that there is no absolutely right way of doing things. There are many different methods that work. Granted, some work better than others, and some will work in one climate and not in another, but many paths can lead to the same destination.
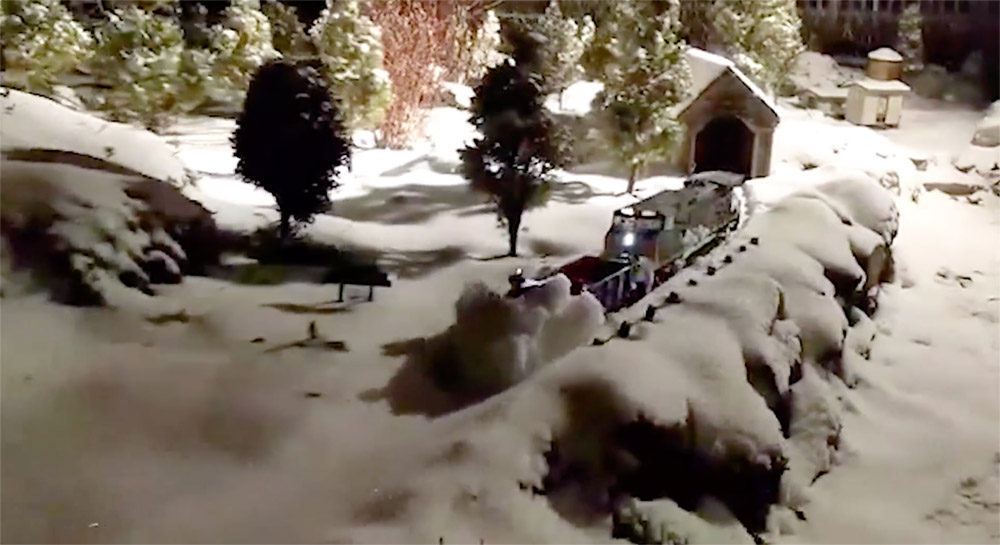
When Rod Wentler and I set out to design and build the Colorado & Pacific, we chose methods that should work well in most climates. The methods presented here are certainly not the only ones that can be used in building an outdoor line, but they are good ones, tried and true. The C&P was not built quickly, but it was built to last. Helping us build the railroad were Rod’s son Max and my daughter Adriane.
If you use this series as a guide when building your own railroad, examine the techniques described and make your own decisions as to whether or not they are right for you. Consult others in your area to see what they’ve done and what has worked well for them.
I’ve heard it said that the most difficult step in any project is the first one, so just get out there and make a start. Once you know where you are going, the rest will just flow.
The site on which the Colorado & Pacific was to be built is in the Bay Area of California. It is at the far end of a sloping backyard, and over the years it had become overgrown with weeds and blackberries. The first job was to clear the site right down to the ground.
Not wanting to use chemical herbicides, we did this by hand. This was undoubtedly the worst part of the project. We first cut the plants down, just so we could gain access to the area, and hauled them away. We suffered the heat and thorn scratches gallantly. Then, to prevent (or at least inhibit) the weeds from returning, we dug up as many roots as we could. The dirt was hard and full of rocks, making for a long and arduous task.
Once the ground was clear, we were left with an area roughly 12-by-18 feet in which to build our railway. On the south it was bounded by the neighbor’s garage, on the east by a fence, on the west by an old concrete half wall, and on the north by the remains of the weed patch, not yet cleared.
The site
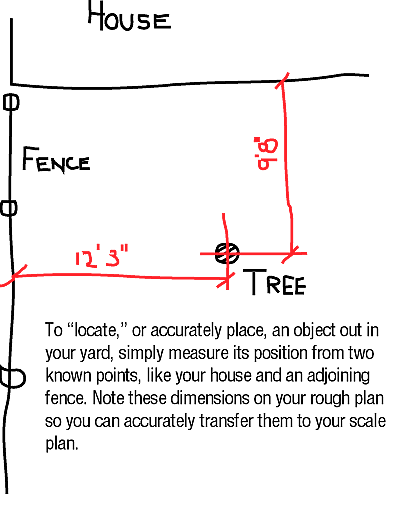
The first thing we needed to do was to make an accurate site drawing that showed the overall dimensions, any slope to the land, and other physical features. We first drew a rough sketch of the site and took its measurements: length, width, distance to walls and fences, and so forth, noting them on the sketch. If you have an obstacle that is in the middle of your site, say a tree or a rock, it can be easily “located” (placed accurately on your map) by measuring its distance in two directions from known objects, say the back of your house and the adjoining fence.
We then drew a simple but accurate map of the site on graph paper based on our sketch. Since our site was small, we were able to get it onto an 8-by-10-inch sheet, using a scale of 1/2 inch = 1 foot. This scale map allowed us to better visualize the area we had to work with.
The next step, and an important one, was to figure out the grade of the site. We needed to know how much it sloped and in what directions. This was important, not only because of how the trackplan would be influenced, but also to allow for drainage.
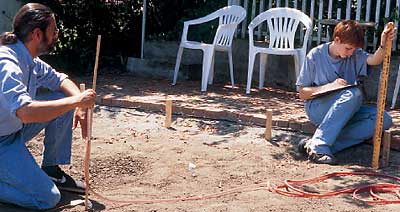
To accurately figure the grade, we first gridded off our site map in 3-foot squares. We then had to grid off the property to match. To do this, we measured from the neighbor’s garage at the upper end of the site to the furthest point away on the railway to establish a starting point, and pounded a wooden stake into the ground. This coincided with the same point on the map. Along the line from the garage to the stake, we pounded in additional stakes, 3 feet apart. Next we did the same at the lower end of the site, giving us two parallel lines of stakes.
Then we took a string and tied little flags along it, also at 3-foot intervals. By tying the string to the first stake at the upper end of the site and to the corresponding first stake at the lower end, we quickly established the grid points along the line that coincided with those on our graph paper.
To establish the grade along that line, we used a water level. Adriane stayed at the starting point with one end of the level and a clipboard with our gridded site plan. I moved along the string line with my end of the level, calling out measurements to her at each flag while she noted them at the appropriate points on the grid. When we got to the end of the string, we moved it over 3 feet to the next set of stakes. Adriane stayed at the starting point while I moved down the string on the second line. This process was repeated until all of the elevations on the grid had been calculated and noted on the graph paper. The first stake was our reference point, so Adriane never moved from there.
When we had finished, Rod and I had a look at our site map. From the elevation measurements we could see that the site sloped away toward the southeast, with a total drop of about 16 inches. There was an area in the middle that was more level, while the ground dropped away more steeply toward the garage and the back fence. Now we knew not only how large an area we had to work with, but we had a good idea of its topography as well. It was time to start thinking about our railroad.


Interesting, I would not of thought of using a water type measuring device for the elevation drops. Thanks