Gluing it all together
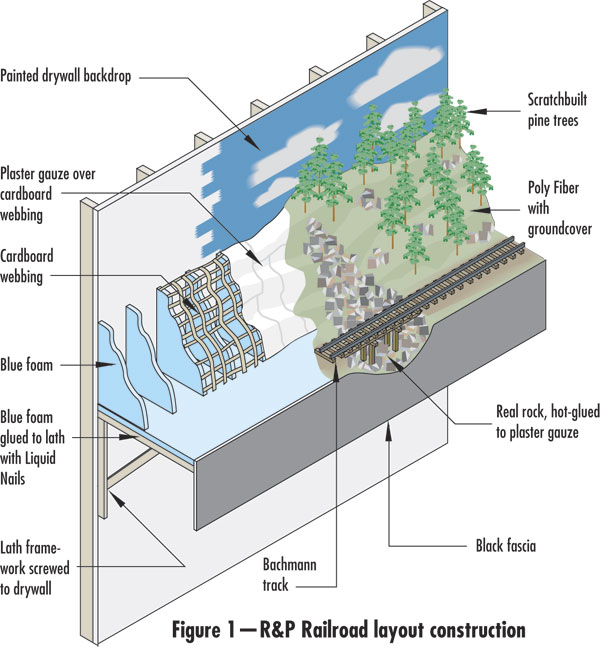
The R&P Lumber Company is my second indoor, large-scale layout. It is a basic shelf-type layout, cantilevered from the wall. The bulk of the scenery substructure, as well as the wooden supporting framework, was glued together using a hot-glue gun and very hot glue sticks. (I wore out at least five glue guns in the process of building this layout.) Hot glue was also used as a third hand to hold plywood in place while screws were driven through drywall and studs.
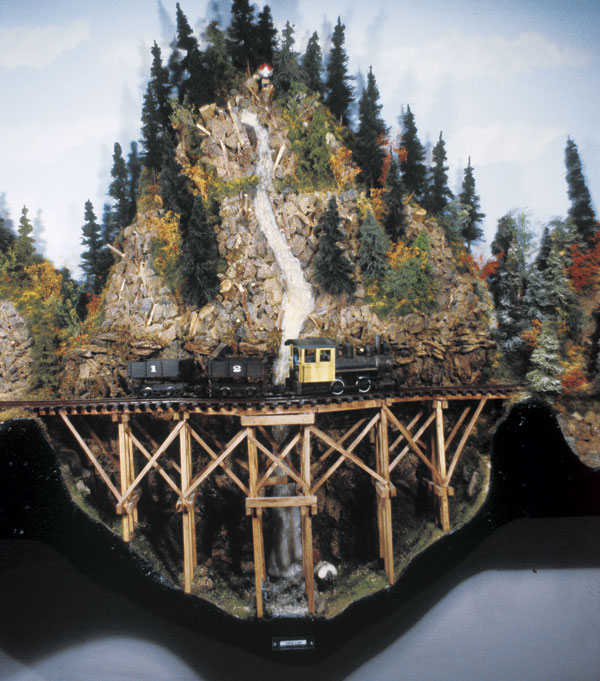
Using real rock instead of plaster was an obvious choice on this layout. I did not want to spend a lot of money on plaster and my yard was full of leftover rocks from a landscaping project my wife and I had recently completed. I had never worked with real rock before, so I was up for the challenge of working with raw natural material, as well as trying a new technique with the hot-glue gun.
After going through hundreds of glue sticks, I was able to obtain the rocky-outcrop effect I was after. This turned out to be a long, tedious, and expensive process, much like putting together a really big jigsaw puzzle with no end in sight.
Scenery techniques
Building scenery is what I enjoy most in our hobby. For you large-scale modelers who are building indoor logging layouts, Poly Fiber, a ground, synthetic, green fiber from Woodland Scenics, is your best friend. It’s cheap and a little bit goes a long way if used properly. I use it for groundcover and to make trees. I’ve used this stuff on all but three of my 12 layouts in the past and I’ve found it to be recyclable when a layout is torn down. I just rip it out, bag it up, and use it again and again.
Poly Fiber works well with white glue or a hot-glue gun. I prefer the glue gun, as it’s faster, but I have to be careful because the Poly Fiber is really thin and the hot glue will melt it to your fingers.
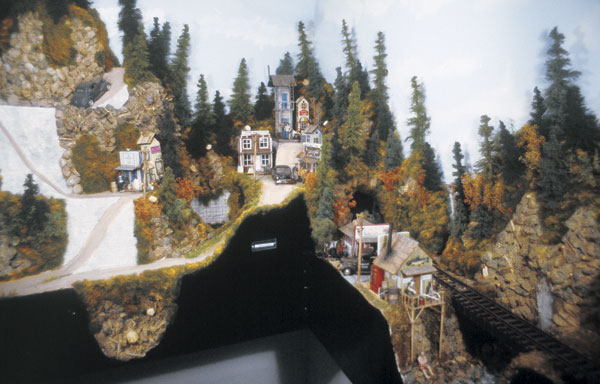
Poly Fiber is great to use as filler for background and foreground spaces on the layout. It helps to give a dense-woods affect. I just glue it into place, sprinkle some fall-colored groundcover over it, wet it heavily with a 50-50 white-glue-and-water mix, and let it set overnight. Then I add twigs, rocks, dirt, and sawdust.
I use baby’s breath to represent aspens. I clump a bunch together and spray-paint it with light and dark fall colors. Then I dip it in white glue, poke it into the Poly Fiber, wet it with the 50-50 mix, and let it dry overnight.
Structures and tall timber
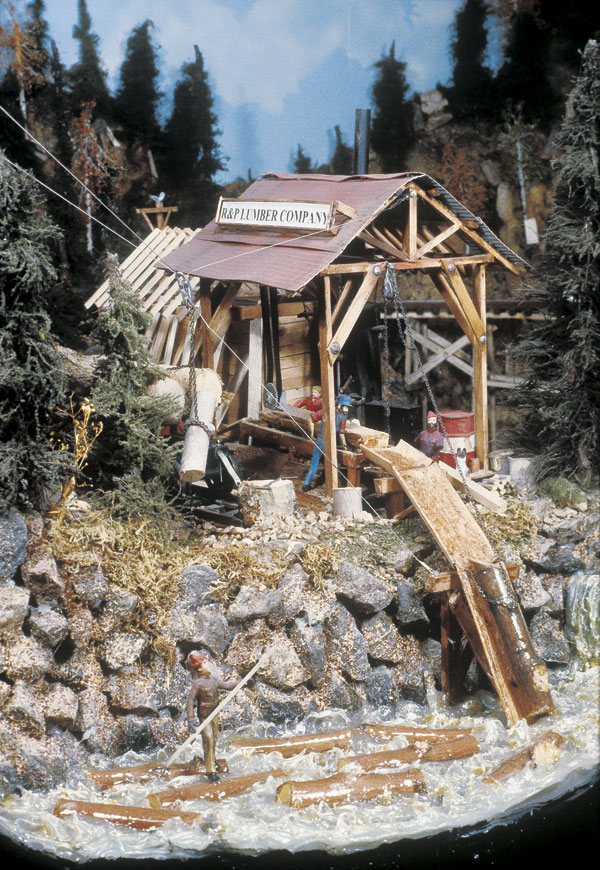
All the buildings on the indoor portion of layout were scratchbuilt. I used a board-by-board technique over a foamcore backing. All of the buildings on the outdoor portion are modified birdhouses, sprayed with weather seal to hold up outside. All of the buildings on the railroad were named after friends and family members to reflect their personalities.
There are close to 500 shrubs and pine trees on the R&P. I used several different techniques to obtain the backwoods logging look I was after. A large majority of the pine trees were built from floral wire and hemp rope spun in a vise. Others were made using wooden dowels for the trunks, carved to a point, with holes drilled into them for branches. Floral material was white-glued into place to form the branches. Small ferns, twigs, broken branches, and balsa-wood chips were also used for tree branches. All these materials were used to make the rest of the trees on the line. Tree making was a time consuming process that spanned two years.
Switch controllers
There are several hard-to-reach and hidden switches on the layout, so I choose to use pull knobs on the front of the layout structure to do my switching. This was an inexpensive way to add switch controllers to the layout.
I purchased a pack of large wooden balls from my local Hobby Lobby craft store and used old coat hangers for the actuating rods. I first drilled a hole through the tie bar on the switch points. Then I bent the hanger end to an L-shape to thread it through the hole, then drilled another hole through front of the fascia where I wanted the ball to be positioned (see figure 2). I removed the bent coat hanger and soldered a diagonal piece across the L-section. This became the pull rod. I placed the bent end back in the hole in the switch and the other through the hole of the fascia. The stub in the switch I then bent down, across the switch’s tie bar and glued it into place. The other end of the hanger I put through the fascia. I applied some Liquid Nails to the hanger and pushed the wooden ball onto it, using a pair of Vise-Grip pliers to hold the wire in place while the Liquid Nails dried.
Modifying the locomotives
After each of my locomotives is removed from its box, it gets modified. First, if there’s any road name on it, this is sand-papered off. The cab is then removed, primed, and painted. Stain, and sometimes cracked glass, is then added to the windows. Wood-deck flooring is also added.
Detail parts are sometimes added to the boilers. One or two figures are usually added to help bring the locomotive to life. The rest of the locomotive is then spray painted with flat-black paint from Wal-Mart, with a light coat of gray primer to bring out the rust, which is dry-brushed on as rust-colored chalk, all over the locomotive. Dipping a small paint brush in alcohol and dry-brushing it over the chalk helps the rust effects to set. (You can also obtain this affect with alcohol and brown acrylic paint.)
After the locomotive is reassembled, many Ozark Miniatures detail parts are added to the running board, cab, boiler shell, domes, and smoke stack.
Power pack
The layout is controlled by a single Chicago Train Works power pack in conjunction with a hand-held Aristo-Craft Train Engineer controller. This gives me the option of running the trains with the power pack or with the wireless, hand-held remote, so I can watch the train as it passes through scenery.
I’ve gotten a lot of satisfaction from building a layout like this and also some heartache . But all in all, I’ve enjoyed every minute of it.


