Enhanced RailBoss for 2.4Ghz R/C
G-Scale Graphics
4118 Clayton Ct.
Fort Collins CO 80525
Price: $95 + $7 s&h
Web site: www.GScaleGraphics.net
Train-control system to be used in conjunction with third-party R/C set
Pros: Ease of installation and operation; clear instructions; simple programming; lower cost than other systems; adds endless possibilities for both manual and automated operation
Cons: None
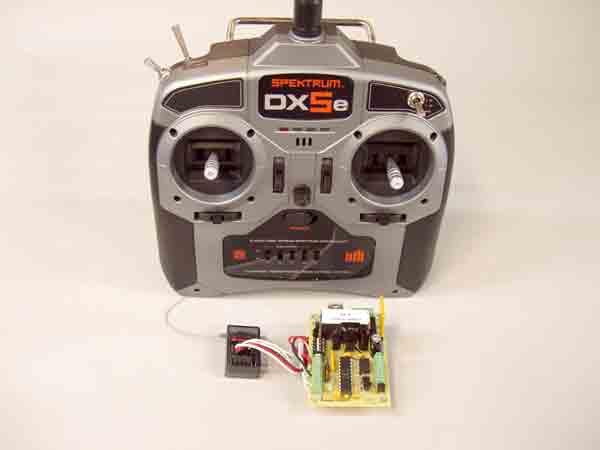
All aspects of operation are easily programmable by using DIP switches, push buttons, and LED lights. A low-cost 2.4Ghz radio-control set must be purchased separately. Suggestions are
provided for suitable radios. I bought a Spektrum DX5E four-channel transmitter and AR500 receiver, available at the local HobbyTown store for around $100.
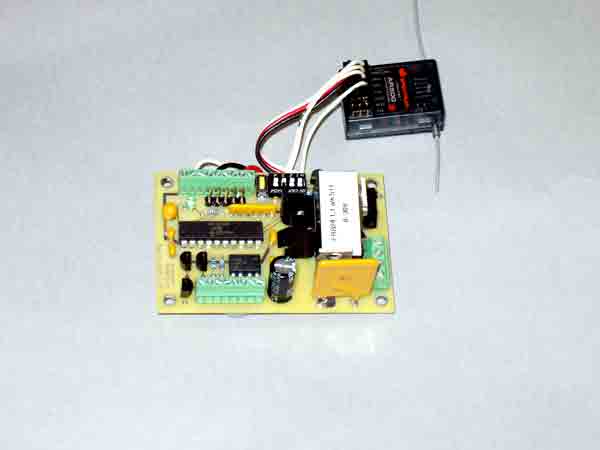
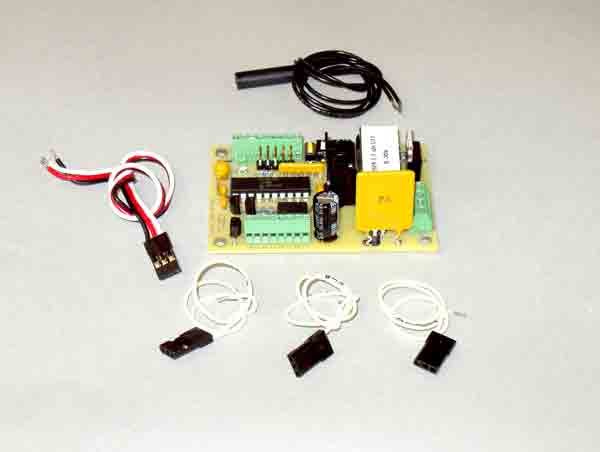
The RailBoss control board converts signals, normally used to drive an analog servo, into commands that operate the five amp, pulse-width-modulation motor driver. The proportional throttle stick is used in conjunction with 256 speed steps to obtain smooth, slow starts. Several adjustments can be programmed in and functions can be disabled from the transmitter if desired. A separate battery to operate the receiver is not needed because power is supplied by the control board, which needs a minimum of eight and a maximum of 30 volts. Battery input is protected from potential damage caused by reversed polarity and there is an onboard, resettable fuse. There are directional outputs for incandescent or LED lights.
I started by reading the 24-page manual, which covers installation and operation. This includes easy-to-follow instructions, several color photos of various components, drawings of the transmitter controls, wiring diagrams, and suggestions for compatible radios. The overview page lists operating options available and explains how the amazing spread spectrum, frequency hopping, 2.4Ghz radio technology works. Advantages for garden railroaders include excellent range, no interference from locomotive motor noise, and the ability to use the same transmitter with multiple receivers.
To begin the actual installation, you must decide where to locate the components: inside a locomotive, inside a tender, or in a trailing car. Then you need to choose the type of batteries and decide how they will be charged. The options are to charge them in place or remove them.
I chose a trailing car, which has the advantage of being able to be plugged into any locomotive that has been properly modified. Most trailing cars have plenty of room and easy access to the various components.The main drawback for me is that the same car will be always be behind the locomotive, which is an aesthetic consideration.
The trailing car that I used already had a fuse, battery plugs, and an on/off switch. If you prefer, G-Scale Graphics offers a battery-conversion module (BMC-2) that has an on/off switch, charging jack, five-amp fuse, and power-distribution terminal. All of my installations use NiMH 7.2V batteries of various amperages, hooked up in series to give 14.4V. This is well within the 8-30V range for the RailBoss. Lead acid, NiCad, or lithium batteries can also be used. You will need to modify your locomotive for battery power. If you are not familiar with this procedure, there is a thorough set of instructions supplied that covers the conversion.
The 2.9″ x 1.9″ x 1.0″ size of the control board offers a lot of flexibility in locating the unit. Since parts of the board can become hot during use, good ventilation must be provided and contact with nearby objects must be avoided. A large, helpful color image of the board, with components clearly labeled, is shown on page 5.
A Bachmann 2-6-6-2 Mallet that had been previously modified for battery power was used for testing. This locomotive has a Phoenix sound system that is set up for voltage-triggering of chuff and whistle. It is also modified to use 12V incandescent lights. I added temporary jumper wires from the RailBoss board to the sound system and lights for testing of the automatic and manual capabilities.
My trailing car is a flatcar with a large tool box and separate water tank. I mounted the receiver in the tool box, and the RailBoss board, batteries, and fuse in the water tank. The on/off switch is just underneath the tank. The tank lifts off for access to the components and to expose the board for easy programming.
I freely admit to being a little annoyed with the overly complicated programming and operating that some brands of battery R/C systems require. This could be due to my lack of patience or to some manufactures’ “more is better” mindset. Programming the RailBoss is simple and straightforward. The control sticks are used to light up the LED on the control board and headlight to confirm that the various programming steps have been successfully completed. The sound-trigger section includes a chart that shows the wiring terminal locations for Phoenix 2K2, PB9, P5T, and Sierra sound systems.
The first step was to calibrate the receiver and control board to work with the transmitter. The instructions prompt you to move the transmitter direction stick up and down to trigger the LED/headlight. Following that procedure, throttle, direction, momentum, and sound are programmed in. Next, the operation of reed switches is checked out.
There are separate instructions for using manual and automatic control. The manual-operation section covers power-up, setting direction, directional lighting, speed, momentum, emergency stops, and sound triggers. Emergency stops are quick but not sudden, which might strip gears. A neat feature is that the automated station-stop function and momentum can be turned on and off from the transmitter. A large drawing of the transmitter face with control sticks and a command summary chart are helpful and show just how the inputs work.
Following the manual-control set up are the instructions for the unique automated operation. This includes station stops, reversing, and sound. An included drawing shows a typical set up for station stops for single direction or both directions. This is done through the use of a reed switch and properly placed magnets between the rails. There is no limit to the number of triggers that can be used. Only one reed switch is supplied with the RailBoss kit; other reed switches and magnets are available at electronics-supply stores such as Radio Shack. Reed switches can be mounted vertically or horizontally, allowing some flexibility in location. It is suggested that the magnets be easily movable, both to accommodate track cleaning and when it is necessary to use a snow plow. A drawing and description are included for making a frame to support movable magnets.
A whistle or horn can also be triggered by the same reed switch that is used for station stops. A separate reed switch can be added for randomized triggering to avoid receptive operation.
The next section is on DIP-switch programming for dwell time at station stops, rate of momentum, acceleration, and variability for sound and direction controls. Again there is a large, easy-to-follow drawing that clearly shows the position of the DIP switches for each feature. There is a section on optional throttle programming, using the circuit-board LED or front headlight as indicators. This includes starting voltage, speed limiting, speed matching for multiple locomotives, saving settings, and original factory settings. A chart shows a throttle-command summary.
I started testing by using the basic radio-control operation at factory settings. Starts and stops were smooth and emergency stops were quick but not jolting. After that I added the station stop and sound-triggering functions. This is where this system really shines and it was easy to set up the various triggering points. I did have to give consideration when locating the track magnets for animation for this test because the reed switches are located well behind the locomotive in the trailing car. After watching the train running in the automated function, it became apparent there were even more operational possibilities. The station-stop feature could be used to haul trees from the forest to a saw mill or from a mine to a mill. If you add a spring switch or two you could have all sorts of interesting and entertaining operations, limited only by your imagination. I had no spring switches available on the railway that I was using so I threw the switches manually. This was a lot of fun and added more operational possibilities.
I found the Enhanced RailBoss easy to install and operate, thanks to the thorough instructions. The various photographs, drawings, and charts were a great help. Adding automated operation with battery radio control will enhance just about any garden railway.