


Black Bear Construction Company
316 Crafts Prairie Road
Bastrop TX 78602
Price: TJ-5LG, $107
Website: www.blackbearcc.com
Acrylic jigs and drawings to aid in the construction of trestle bents; different jigs available for different numbers and orientations of legs
Pros: Sturdy construction; suitable for trestles built to a range of scales by using different slots set into the jig
Cons: Square nuts that hold the plastic guides onto the jig prone to getting lost when the guides are removed for bent assembly
Step one in any trestle-building project is “build a jig.” You’ll need lots of bents (the vertical pieces that support the track), and they’ve all got to be the same (except for height, of course). For some, figuring out how to build a jig is about as daunting as figuring out how to build the trestle itself. That’s where Black Bear Construction’s trestle-bent jigs can help out. Black Bear has done all of the (pardon the pun) legwork of laying out where things go, so “all you have to do” is insert the wood and start cutting and nailing. This considerably simplifies matters but there’s still a little figuring involved.
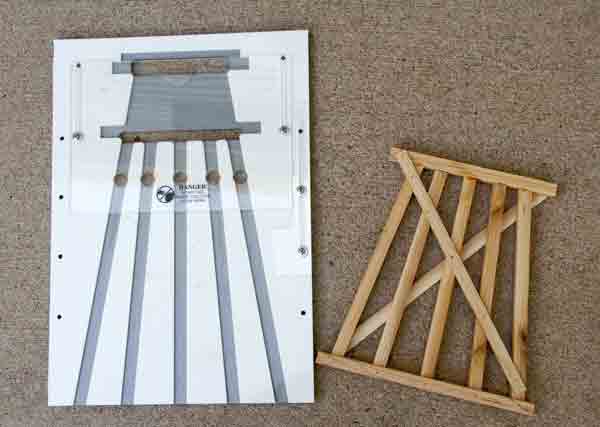
Black Bear offers three different trestle jigs, each with different leg arrangements. They shipped two for review—their five-leg jig and the Rio Grande Southern jig, though I used only the five-leg for construction purposes. (Their use is identical; the only difference is in the layout of the legs.) They also shipped a pack of “leg extenders,” which will hold the legs of tall bents in place during construction, once the jig is attached to a suitable firm base.
Construction of the jig is sturdy, made of two-tone acrylic sheet—gray on the bottom and white on top—with channels for laying out the legs and cap pieces. Attached to this jig are clear acrylic guides that aid in cutting the individual legs to length, making sure the lengths are consistent. These are attached to the jig with small screws and nuts—more on that later. There are different places in the jig for different length cap pieces. Which one you’ll use depends on the scale of the trains you’re running.
I’d recommend reading through the instructions that come with the jig to learn how it’s designed to be used. It looks intuitive at first but there were some things that I initially didn’t understand but that were clearly explained in the documentation. The instructions also show how the jigs can be used to accommodate the different scales we commonly run.
To begin, you need to figure out how tall your bents should be (or a range of heights, if they’re going to be different). You’ll also need to decide if your trestle will have multiple sections on each bent, like the protoype, or “cheat” and make bents with really long legs. I decided, for the purposes of this review, to build a 9″-tall trestle bent.
The first step is to cut the legs to the right size. The jig is set up to accommodate 12″-square legs, which are prototypical for most scales, though a bit oversized for 1:29 and 1:32. The instructions recommend using 38″ for those scales, shimming the jig the extra 18″. If you’re using lumber from a commercial model supplier, just order the appropriate-size wood and go from there. If you’re cheap, like me, fire up the table saw and rip some cedar fence slats to 58″, let them dry for a month, then pick the ones with the least amount of twisting and trim them to 12″ square.
Cutting the legs to the right length is the next step. I wanted mine to be 9″ long, so I rough-cut them to 10″. I then cut the angles on the ends so the legs butted flush against the cap piece. There are a few ways to do this. You can set the miter gauge on a chop saw to the appropriate angle (the plans tell you specifically what this angle is—in my case, 5° and 10° for the non-vertical legs) or you can set the legs in the jig, set the jig against the rip fence on your table saw, and carefully cut the ends of the legs that way. (Watch your fingers and cut only one leg at a time.) Do this for the top end of all the legs.
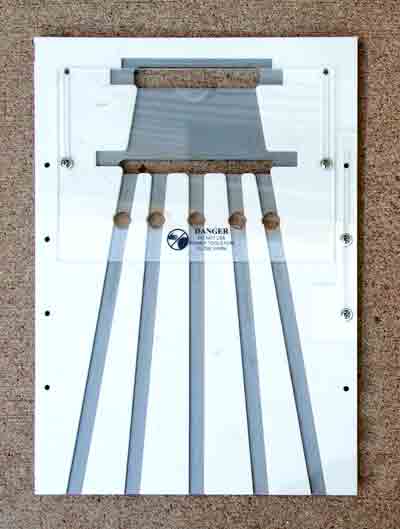
The next step is to cut the legs down to the 9″ length. This is where the clear acrylic guide on the jig comes in handy. You set that so the top end of the legs butt up against the acrylic, then set the distance on your table saw so that the distance from the edge of that acrylic stop to the blade is the desired length—in my case 9″. Then carefully cut each leg to length, making sure the legs are properly oriented in the jig and also in the right leg slot. Otherwise, there will be a mismatch in angles at the top and bottom of the legs. The instructions recommend marking each leg as you go through the cutting process to keep from getting confused. I heartily second that recommendation. I only did five legs (one bent) and I can see how it would easily get confusing.
When all the legs were cut, I then cut the cap piece to the appropriate length and placed it in the slot in the jig. At this point, you have to remove the clear acrylic guide from the jig. Be careful not to lose the little square nuts that are on the underside of the jig. I’d recommend putting tape or something over the bottom to help keep the nuts in their place if the screws are removed.
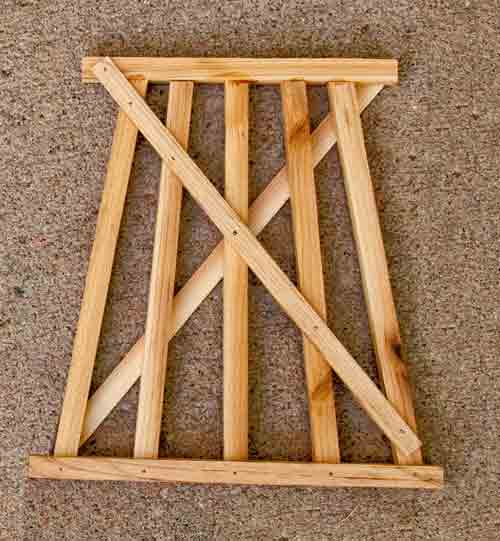
The instructions tell you to glue the legs to the cap. When I first saw the jigs, I wondered why there were slots milled into the bottom of the jig near the place where the cap sits. That question was answered when I went to glue the first leg in place. The glue naturally wants to drip, and the slot is there so the glue falls away from the joint and doesn’t glue the bent to the jig. Pretty slick. Once the glue is more-or-less dry, you can nail the diagonal and cross braces in place on the front of the bent. That and the glue will provide enough support so you can remove the bent from the jig in one piece. (There are finger-sized holes drilled into the back of the jig so you can push from behind.)
Once the bent is out of the jig, you can nail the cross bracing to the other side, then nail the cap piece onto each leg (reinforcing the glue joint).
Once I figured out my plan, cutting and assembling my trestle bent didn’t take much time at all. The jig really did make things fairly simple. Figuring out your plan would be part of any trestle project. Having this jig to help in the construction made that plan easier to put into motion.


Nice informative article… too bad Black Bear is no longer in business, but I’ve seen a couple of their kits on eBay and this one as of Feb. 14th, 2023 – which looks pretty intensive with loads of subkits included! https://www.ebay.com/itm/115696513746