Iron Horse Engraving
207 Canterbury Dr
State College PA 16803
Prices: $500 for 1; $475 each for 2; $450 each for 3
Website:
www.ironhorseengraving.com
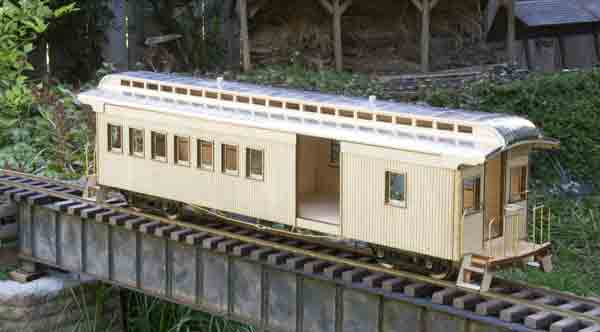
1:20.3 scale, gauge 1, laser-cut wood kits for baggage/express car, coach, and combine car that ran on the East Broad Top (and other) railroads. Dimensions: length, 241/2″; width, 47⁄8″; height, 61/2″. In 1:20.3 scale, this works out to 41’5″ x 8’3″ x 11’0″, respectively
Pros: Well-engineered and thought-out design; tight-fitting tabs and slots; accurate to the prototypes they model
Cons: Instructions overlook some minor steps in the construction and do not take painting the model into consideration during the process
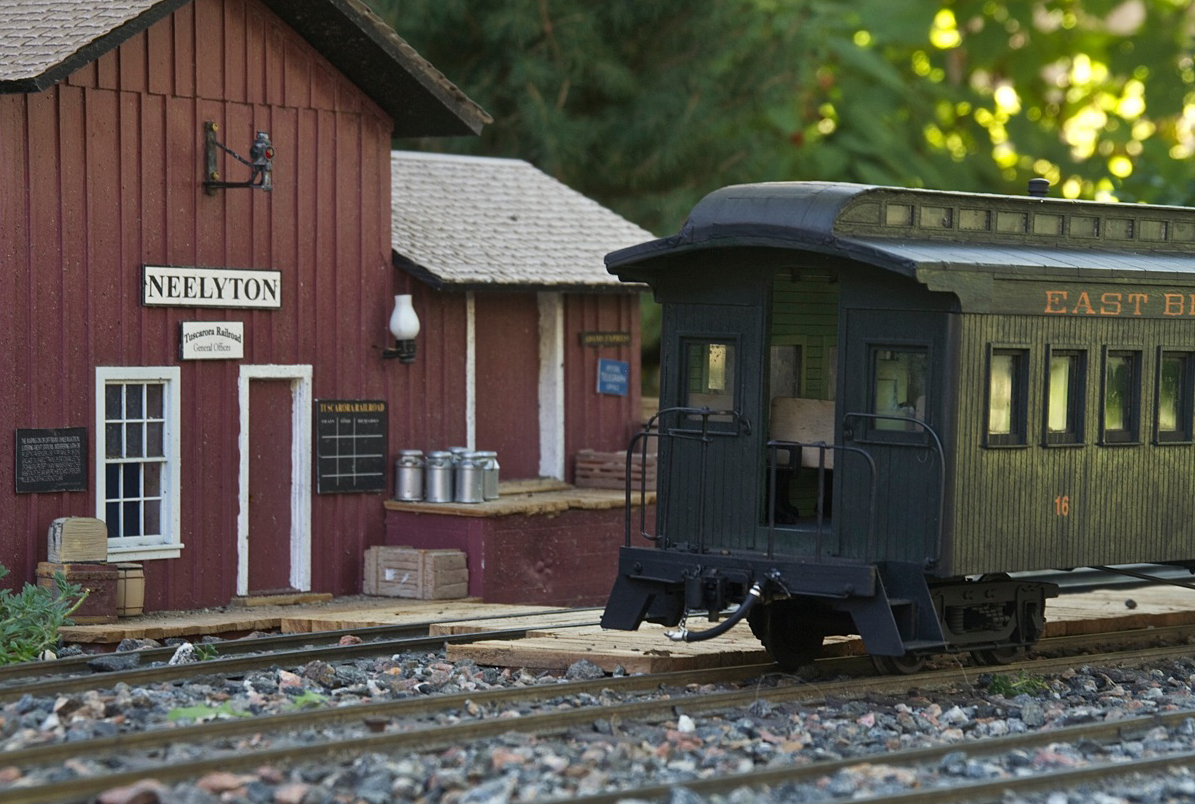
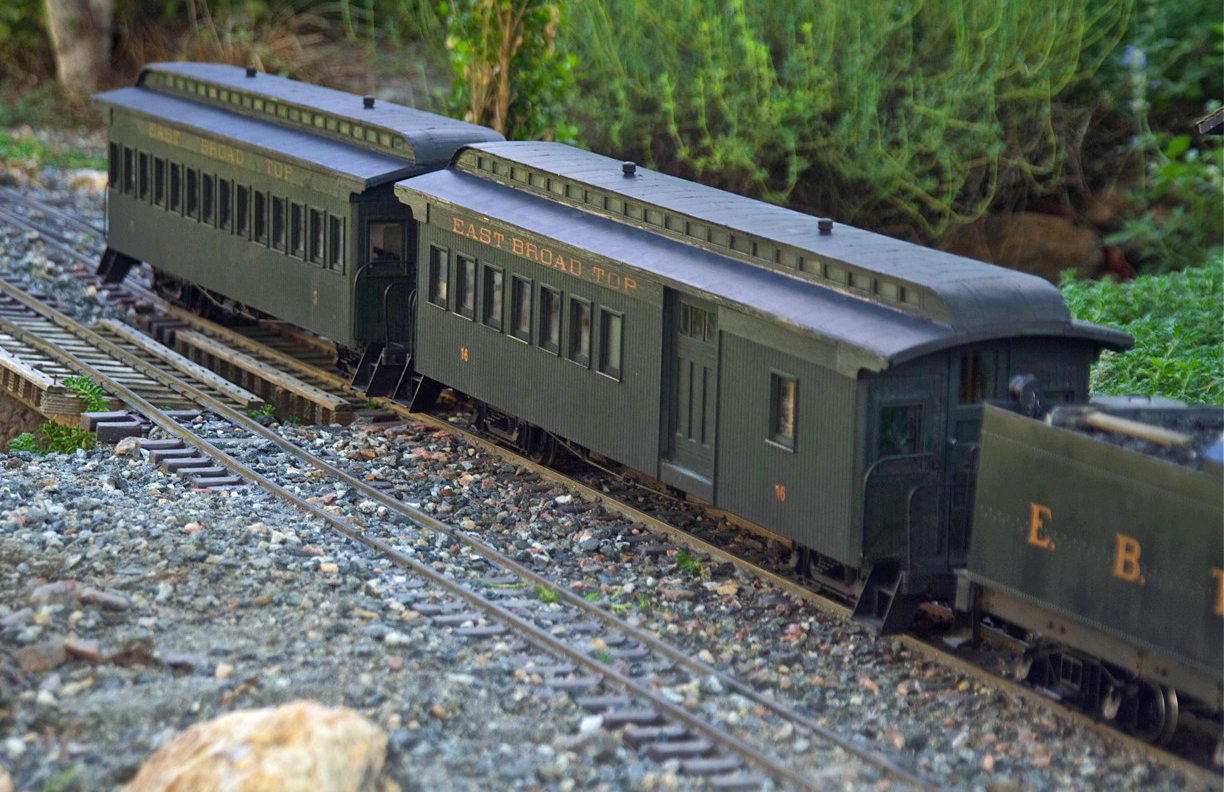
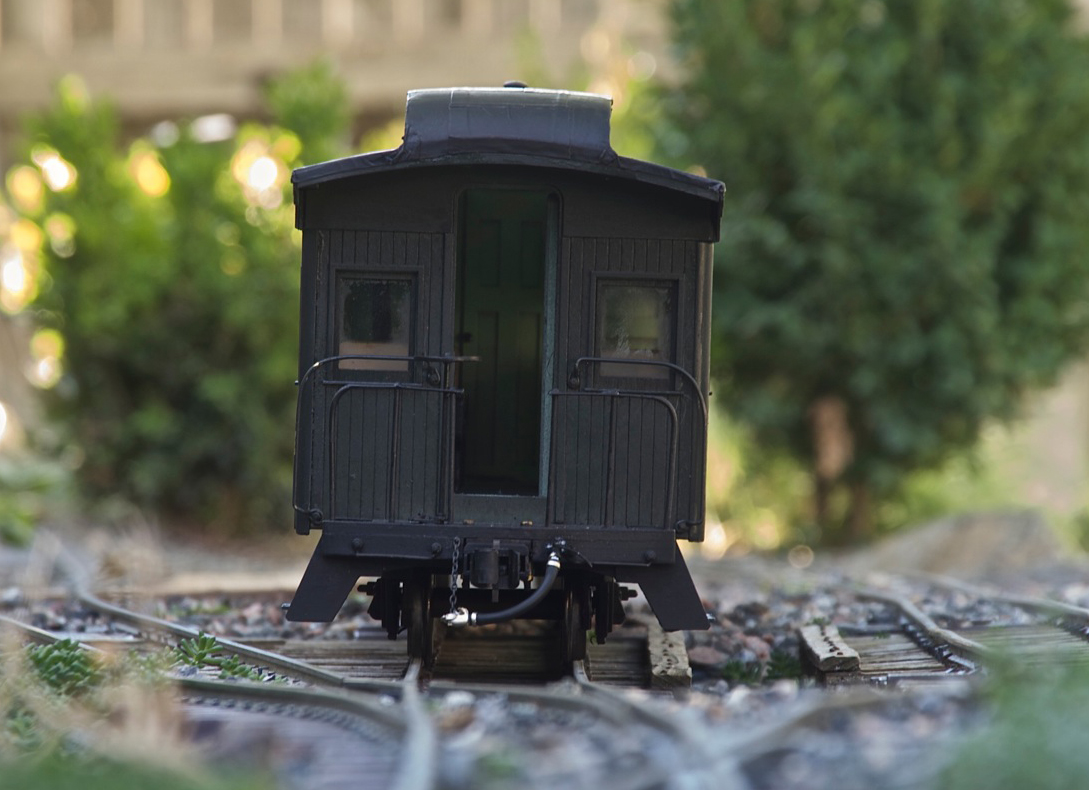
The coach is a model of East Broad Top coach Nº 5, which was classified as a “miners’ coach” by the railroad. Much of the passenger traffic on the East Broad Top consisted of miners traveling to and from work—dirty work—so the interiors of these cars were less plush than other passenger accommodations. It’s believed this car was originally built prior to 1916 by the East Broad Top. This particular coach now runs on the Tweetsie Railroad in North Carolina, restored well beyond its former glory.
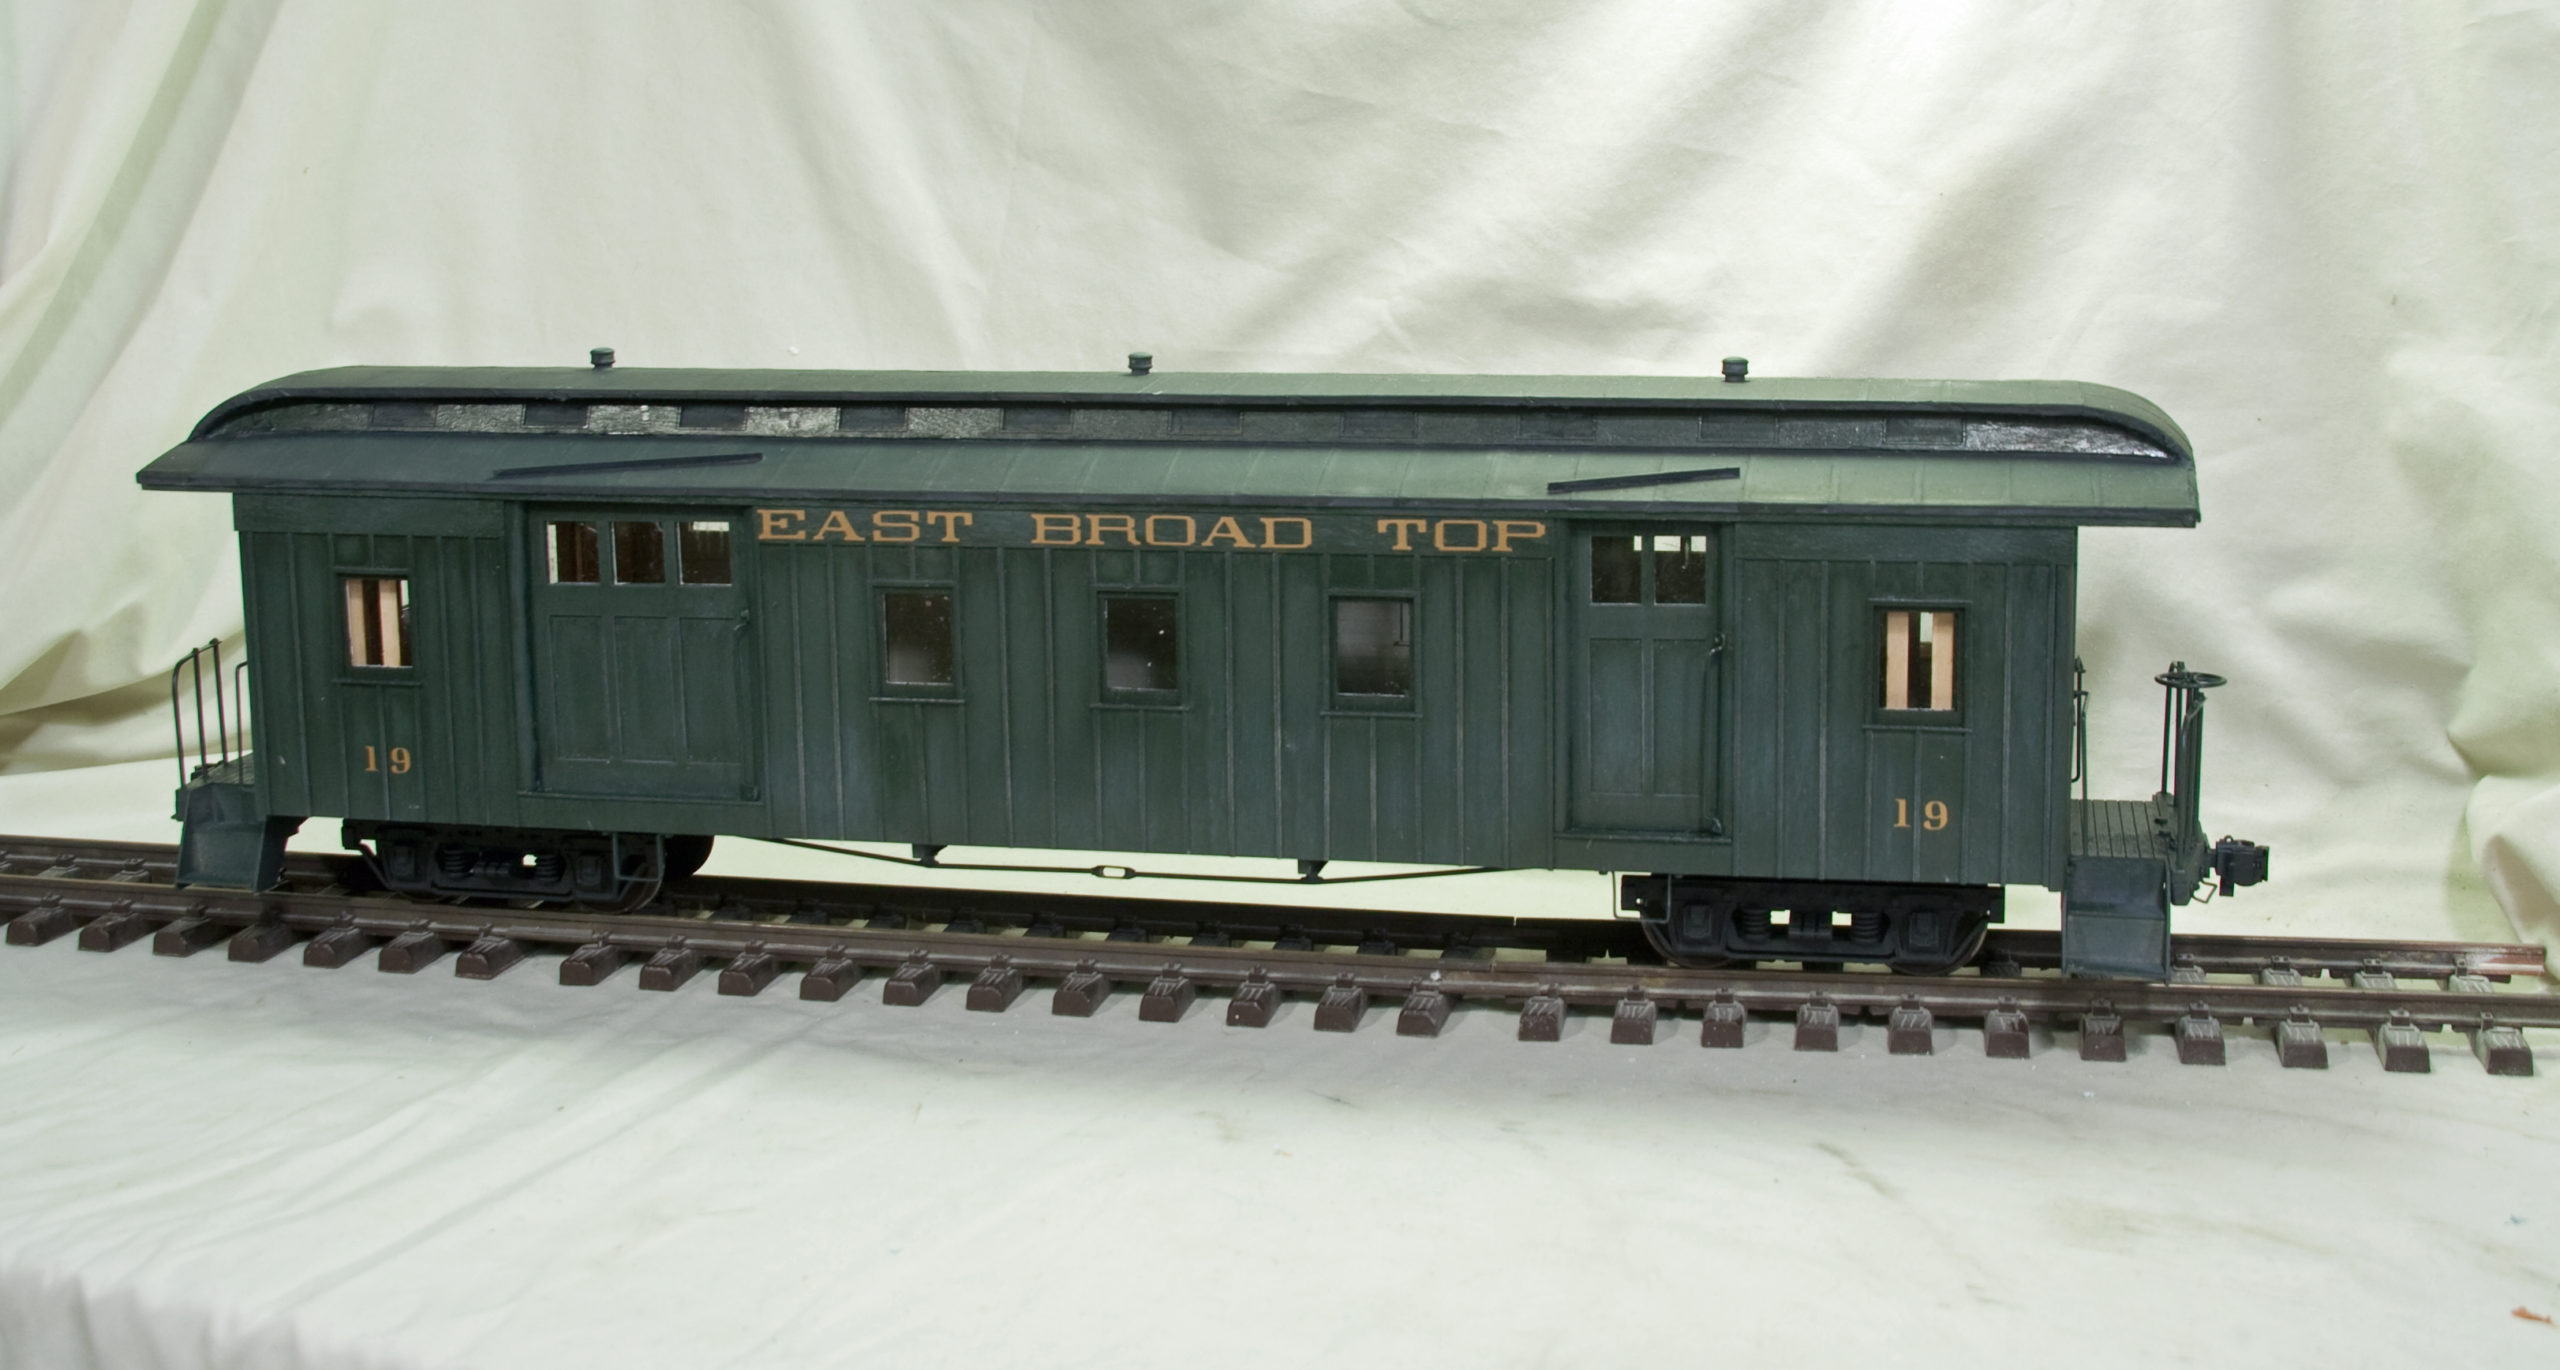
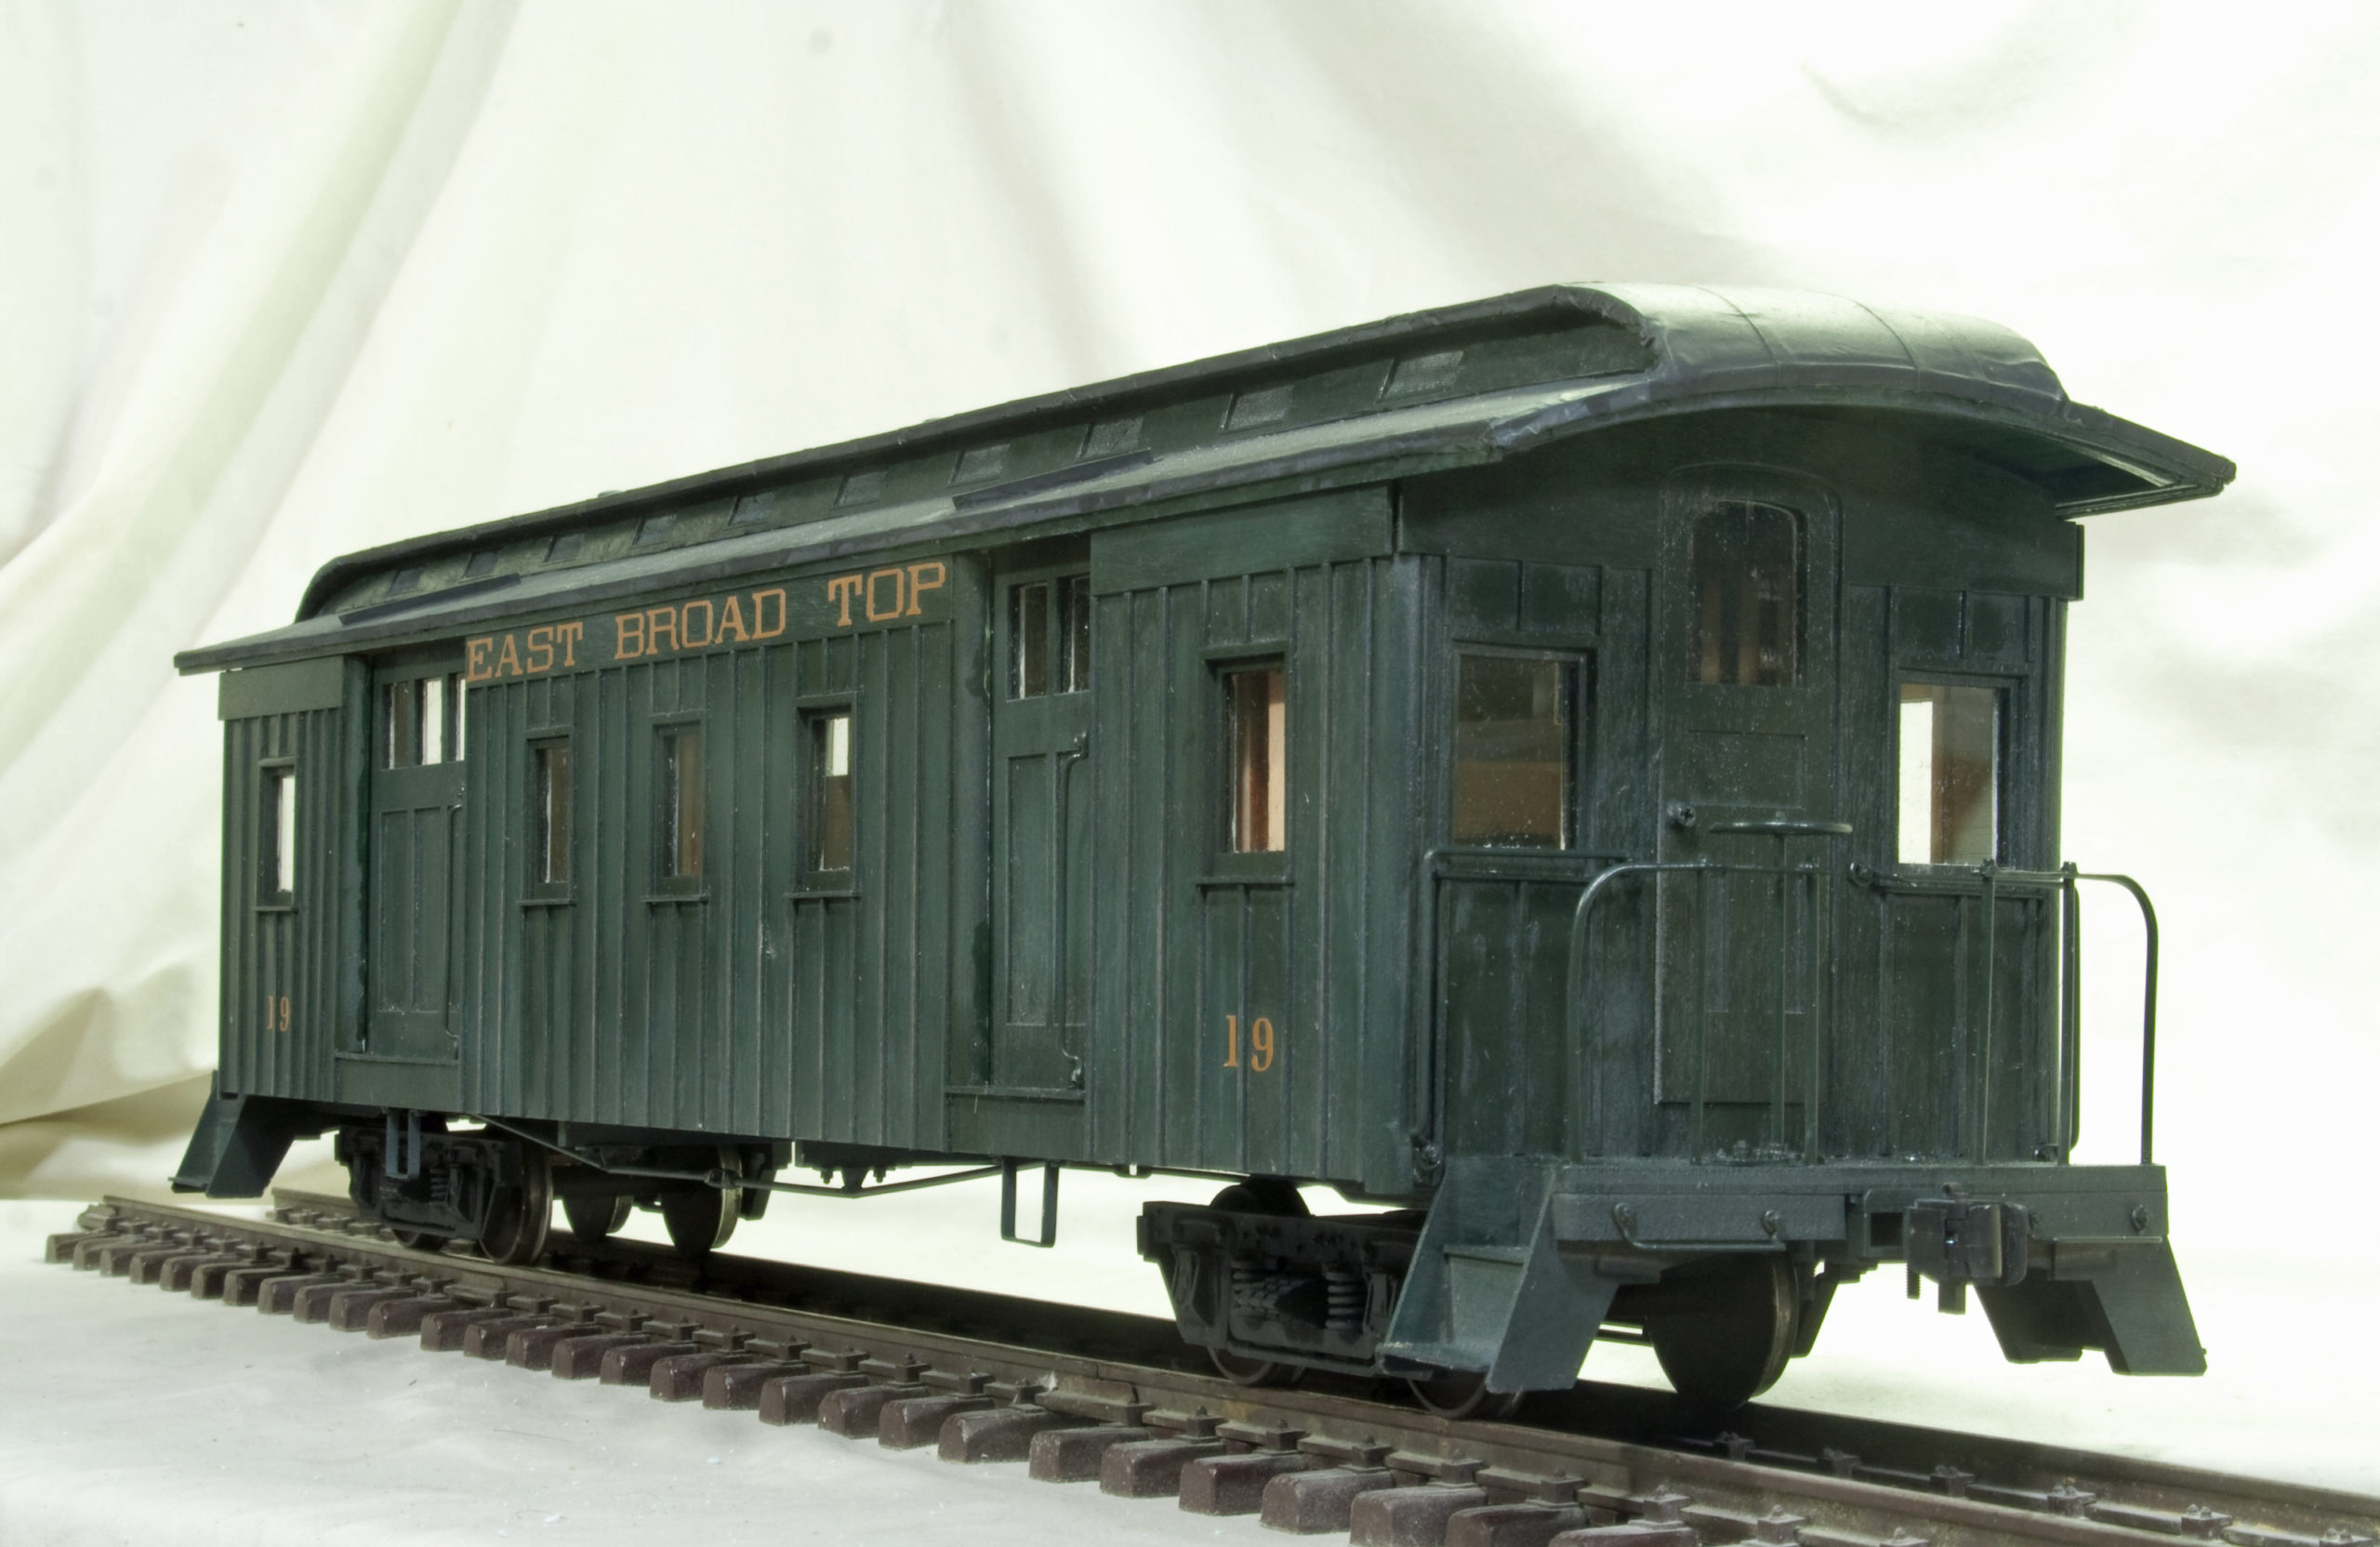
The combine is a model of East Broad Top combine Nº 16, also believed to have been built by the railroad. It’s being restored by the Friends of the EBT at a site in New Jersey. The baggage/express car was originally built for the Au Sable & Northwestern in Michigan, and later purchased by the EBT with three other cars. It became their Nº 29 and would eventually become part of their work train. It awaits restoration on the EBT.
Iron Horse Engraving sent all three kits for review. I was able to finish two of them, but my deadline for this review arrived before I could make a lot of progress on the baggage/express car. However, its construction is virtually identical to the other two. I don’t foresee there being anything out of the ordinary. I’ll post finished photos and any pertinent details to the online version of this review (scroll down to read the addendum).
When you open the kit box, everything is laid out and bundled neatly. Small parts are enclosed in labeled plastic bags; the sides, floors, and “skins” for the sides lie neatly at the bottom of the box. I dug around and compared what’s in the instructions to what’s in the box. After a once-over of the instructions, I was ready to dig in.
One key thing to keep in mind is that the instructions are written without regard to how you’re going to paint the model. Fortunately this is fairly easy to work around, as it mostly just affects the windows and bathroom walls, which can easily be added after everything’s painted. So, something to think about as you’re building is, “Is what I’m gluing going to get in the way of painting?”
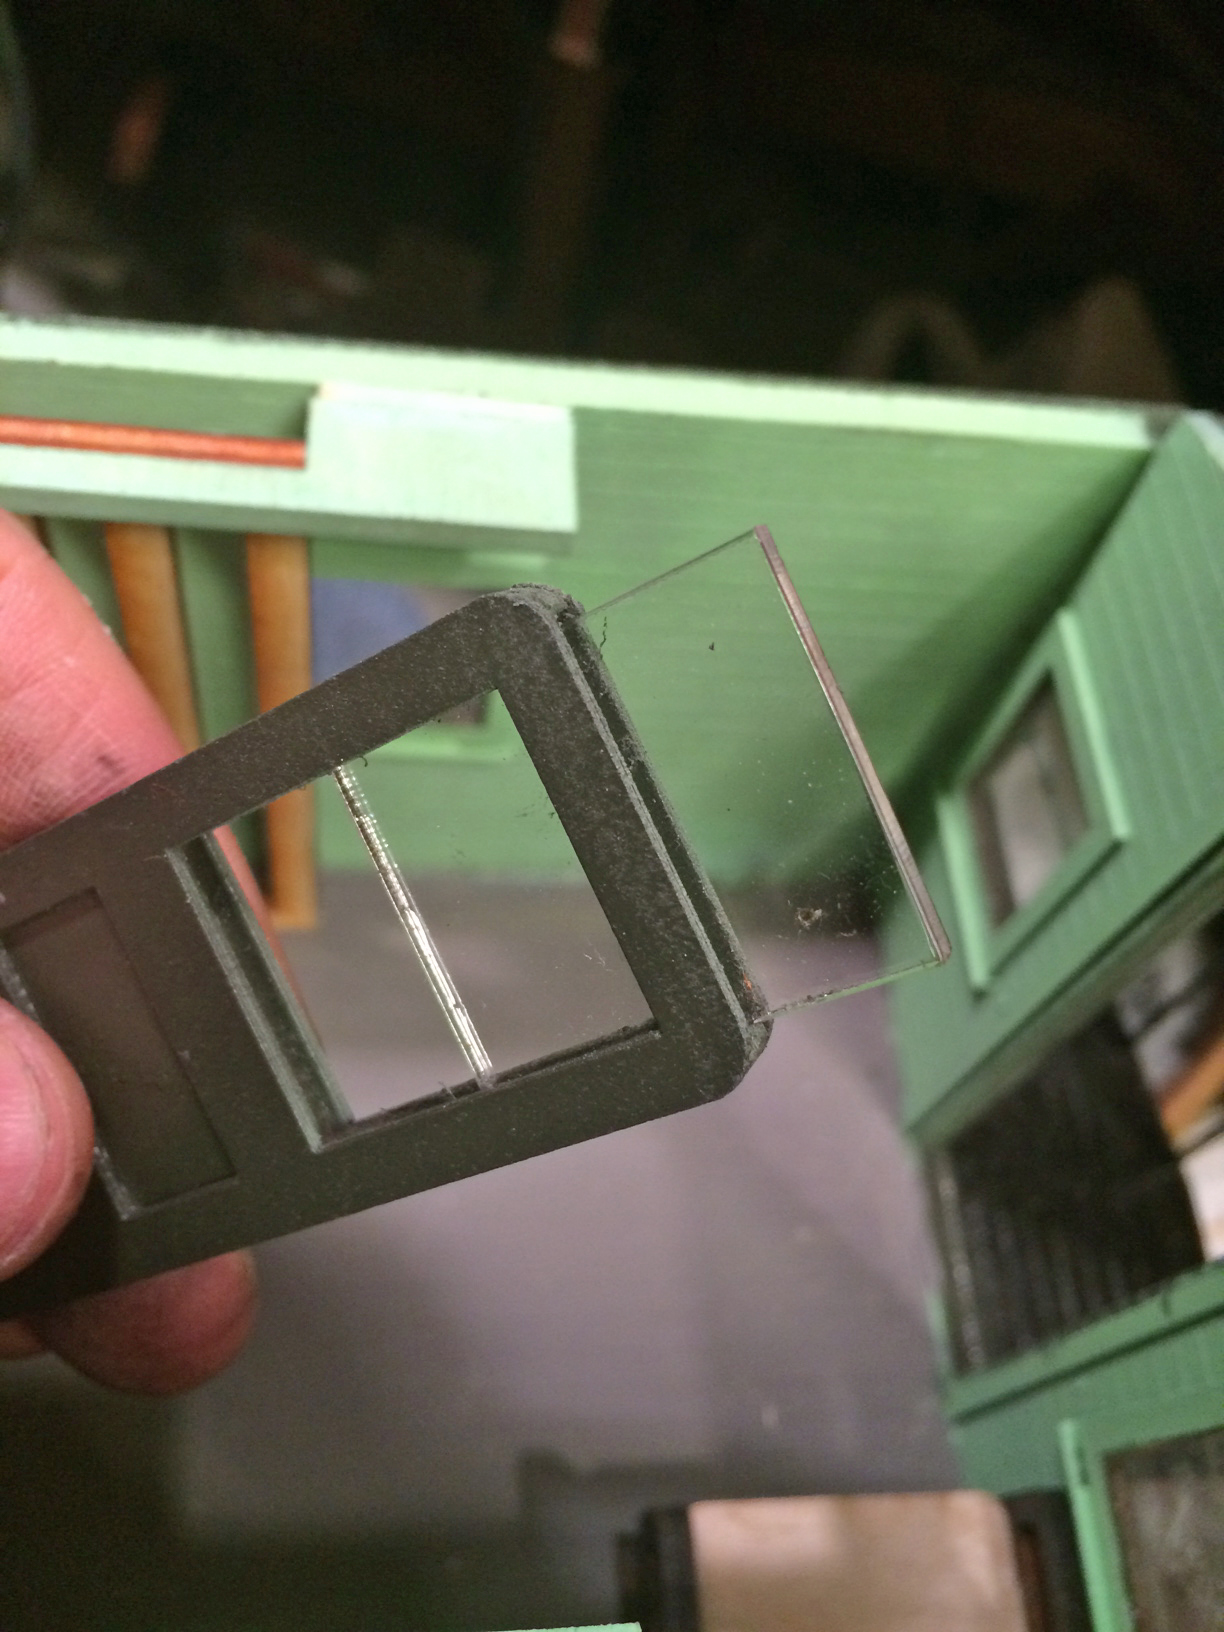
The kit consists of 1/8″ plywood walls and 1/32″ plywood “skins,” the latter with self-adhesive backing. Construction begins with the basic car body. The tabs and slots line up well on this kit, so construction is simple in that regard. I used Titebond II glue for most of the joints. With the body built, I applied the skin to the outside of the cars. Be careful to keep things lined up; once this stuff is down, it’s not going anywhere. Window details are likewise made from adhesive-backed plywood, and are added next. I did not add the glazing or the frame piece that attaches to the glazing. I’d add that after the car was painted.
The roof was probably the biggest challenge. Because it’s an arched roof and I was gluing flat pieces of plywood to it, it took copious amounts of CA cement and clamps to keep things from popping up when I didn’t want them to. Patience is the key here. The ends of the clerestory were also challenging. There are guides to help shape these but the clerestory end is a compound curve, and the plywood skin doesn’t allow you to bend it in two directions at once. I cut slots, like teeth of a comb, along the outside edges of the end skins to allow them to bend easier. Wood putty filled the gaps and the result is a smooth, even end.
The instructions have you add both the exterior and interior panels to the roof at this point. I would leave off the interior panels until after everything is painted. That way, you can add the clerestory windows after painting. Also, if you’re going to add lights to the car, you can run the wires between the outer and inner skins to hide them.
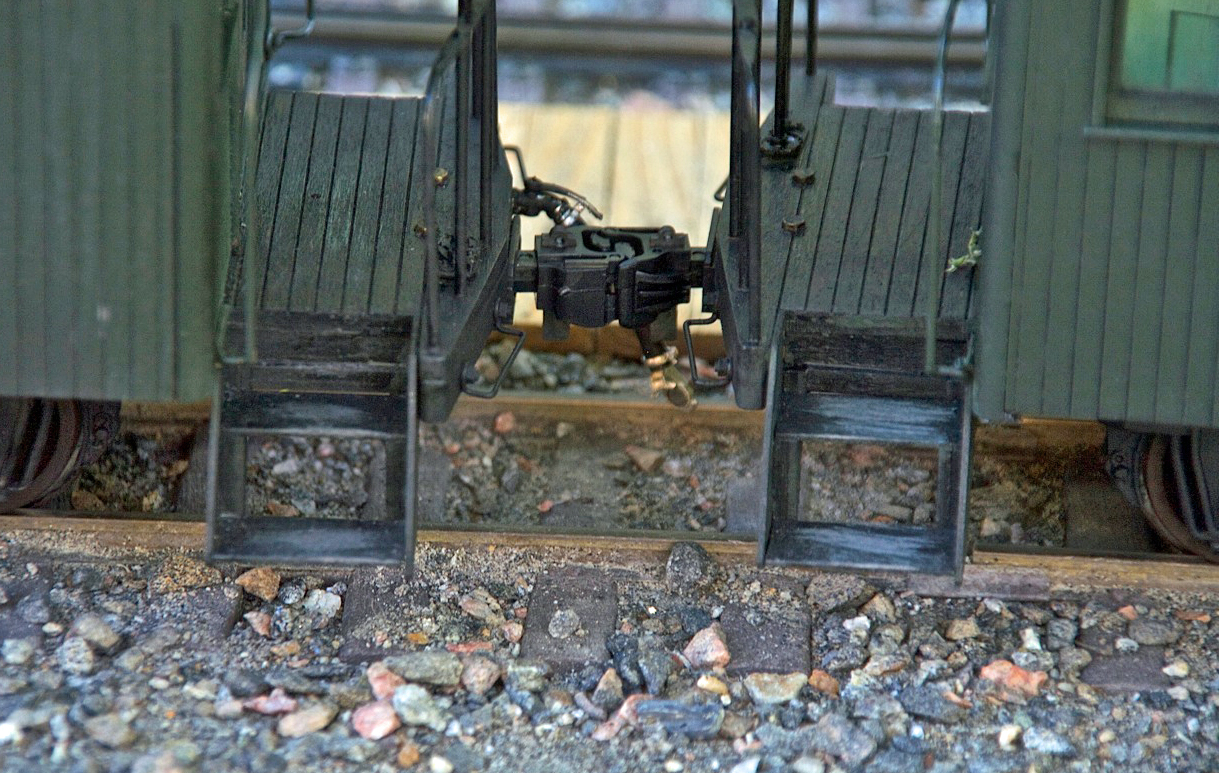
The frame goes together easily. Look for the scribed guides along the long frame members to tell you where to add the needle beams. You’re on your own for trucks and couplers. I used Bachmann’s passenger-car trucks, as they are—coincidentally—almost spot on for the size of the trucks under the prototype cars. If you’re comfortable building a kit like this, mounting the couplers will not present any undue challenges.
The kit provides wire for grab irons, end railings, and truss rods. End railings come pre-bent and drilled for the vertical posts, making soldering them easy. I did have to drill out the holes in the platform to accommodate the 1/16″ wire used for the end railings. (The holes are drilled for the 3/64″ wire used for the other handrails.) Those other handrails (that attach to the body of the car) need to be bent to shape. I wish the instructions had a template for bending them, but photos are provided as a guide. Once bent, the handrails press into pre-drilled holes in the car body.
The kits have full interiors. In the coach, that includes a bathroom (complete with toilet), seats, and stove. The toilet and stove are built up from “wafers” of plywood. I opted to use other castings I had on hand for the stove, and I omitted the toilet so I could use the bathroom to hold the battery to power the lights that will eventually grace the car. Seats go together easily, with tight fits that really don’t need any glue. You can reverse the seats so they don’t all face the same direction if you so desire. I painted the end-frame pieces black but left the seats natural wood, since these cars were used by miners and wouldn’t have had plush upholstery. You could easily paint the seats or use cloth to give them a more elegant appearance.
I painted the coach to match EBT practice—dark green with orange or gold lettering and a light-green interior. The lettering is vinyl, and came from Shawmut Car Shops. I also did some additional detailing on the kit, adding roof vents, turnbuckles on the truss rods, door knobs, and other little things. These aren’t included in the kit, and the car builds up realistically without them, but they do add a little bit of flair.
Perhaps my favorite element of “typical” narrow-gauge passenger trains is that they’re made up of a hodge-podge of rolling stock from various different car builders. These cars, in conjunction with cars from other manufacturers, fit that pattern beautifully. The cars are prototypically accurate in their own right and, when placed in a train with other commercial passenger cars, convey that rural, make-do-with-what-we’ve-got attitude prevalent in so many narrow-gauge railroads.
As such, I think these cars will appeal, not only with EBT fans, but fans of narrow-gauge railroads in general.
From a construction standpoint, it is virtually identical to the coach and combine—so much so that after building the coach and combine, I had little need to even refer to the instructions. The pieces of the kit were by now very familiar. The only difference, really, is the walls.
The siding on this car represents board-and-batten construction. Like the coach and combine, there is an adhesive “skin” layer that gets stuck to the outside of the wall sections. There are then very narrow battens (also self-adhesive) which you then stick to this outer skin. There are laser-etched guides on the walls to aid in placement. The rest of the construction and painting is identical to the other cars in this series, and I ran into no troubles. I did replace the 1/8” plywood cores for the doors with 3/32” basswood, as I wanted the doors to be the same thickness as the window glazing.
Because this car uses the components as the other two cars, there are some subtle differences between it and the prototype baggage/express car. Unless you’re an EBT purist (or, perhaps, an Au Sable & Northwestern purist) you probably wouldn’t even know what the differences are, or at least care about them. But since we’re talking about them, the biggest difference is that the roofline and end platforms are not correct compared to the prototype. The prototype roof is much more rounded, and tapers down at the end of the car. Also, the walls of the clerestory are not vertical, but slant inward. I took the liberty of making some “adjustments” to the roof such that it matches this profile a bit closer. Building the roof as “stock” would in no way detract from this coach, but I’m so used to looking at the prototype, the difference stood out to me. The end platforms are also lower than the prototype, but that wasn’t nearly as obvious to me, thus I left it “stock.”
Overall, this—like the other two cars–build fairly easily, resulting in a very nice-looking car. Likewise, it’s also not a whole lot of extra work to detail the car to match the specific prototype.