Model railroad layout photography tips: Taking great shots of your layout has never been easier. Digital single lens reflex cameras or even the camera in your cell phone take a lot of the guesswork out of photography, if you know what you’re doing. This article will focus on the basics of photography, so that you get a better understanding of what you can do to improve your photographs.
Back in the day, model railroad photographers would probably use slide film and take a bunch of shots, send the film off to get processed, and then in a week or two, they’d see exactly what it was they shot. Meanwhile, the whole layout had to stay exactly the way it was, including the camera, in case they had to reshoot.
Now, it’s as easy as popping a memory card into a computer and immediately seeing what you shot. If changes and adjustments are needed, they can be made immediately – no more waiting for film to be developed.
A golfer isn’t going to improve his game if he’s only out on the links occasionally. A surfer isn’t going to get to be a good surfer if he’s only out on the waves every now and then. To get good at something, you’ve got to practice. The same holds true for model railroad photography. The more you shoot, the better your eye will become, and the more you’ll be able to train your head and your eye to see those great shots of your layout. You’ll teach yourself what’s good and what’s not so good, and gradually your instincts will become sharper.
I’m not saying you have to drag out the lights and the tripod and set everything up to take that million dollar shot. Just the opposite, in fact. Grab your camera, grab your cell phone, and take some experimental shots.
Take your camera to a friend’s layout or a club layout and shoot some things there. Do it informally just to get some practice, training your eye to look for good photos. Don’t just take snapshots. I’ll often just walk around my layout and take a shot here and there just to see if maybe there’s a good shot in there somewhere that I could revisit.
Here’s a good example. I took this informal shot of this scene on my former layout now. Is there a shot in there somewhere? Well, maybe.
What if I move the engine here? Is this a better shot?
When I looked at those shots, I thought they had some possibilities. When I had the time, I set up the lights and the tripod and fussed around with different locomotives and cars and camera angles. Eventually, I came up with this shot:
I must admit, it’s become a personal favorite. However, just as you saw, it wasn’t the shot that I started out with.
You need to do is to be critical of the shots you take and ask other people to be critical of those shots, too. The best way to learn is to see your shots through someone else’s eyes. It can be difficult to have somebody criticize a shot that you think is great, but ask them why they feel that way. Ask them what you can do to improve that shot. The best way to learn is to have them be honest with you and to be objective about what you’re shooting. Just like practicing photography, the more you ask for honest criticism, the easier it is to take. When you can say to yourself, maybe they’re right, you’ve climbed another rung on the ladder to becoming a better photographer.
When looking at your photographs, pay attention to three things. First, the front to back focus. Second, the lighting. And third, the composition.
This is a shot I really like. It has some strong shadows, everything’s in focus. Compositionally, though, I would have liked to get the train a little bit lower in the frame. As it is, it turned out pretty well.
There’s no question of what the hero of this shot is. The freight cars on the left and the caboose on the right provide a nice frame for the locomotive. The smoke was added later on in photo editing software. Even still, I think this is a fairly dramatic photograph. Andy Sperandio, editor of Great Model Railroads 2015, thought so too, and used this as a two page spread as the opening of my article.
Here’s another shot that ran in Model Railroader’s trackside photos. I love the lighting of the shot, but as I look at it again, I think the subject of the photo isn’t really defined enough. I mean, am I supposed to look at the building or the little blue car or, hey, there’s a locomotive back there.
Here’s the grain elevator shot again, strong lighting, no question what the subject is. It’s not too crowded. There are a couple of subtle things happening in this shot that I didn’t really plan out. Look at how the red color is in the grain elevator, the locomotive, the caboose, the depot, and even the billboard all complement one another. It’s a subtle, unifying theme.
This is an interesting shot. And notice how crisp the front to back focus is. In this shot, I fell prey to a common modeler foible: I’m trying to show too much. Well, the white tank building on the left is cool, so I need to show that. And the switch stand is neat, so I should have that in the photograph. And hey, the tree in the foreground sort of breaks the shot up.
This was a shot that I took for the cover of a magazine that contained an article about how I scratch built the barn. Even though the barn is the subject of the article, the locomotive is still the subject of the photograph, and the lighting is good, even on the dark side of the locomotive.
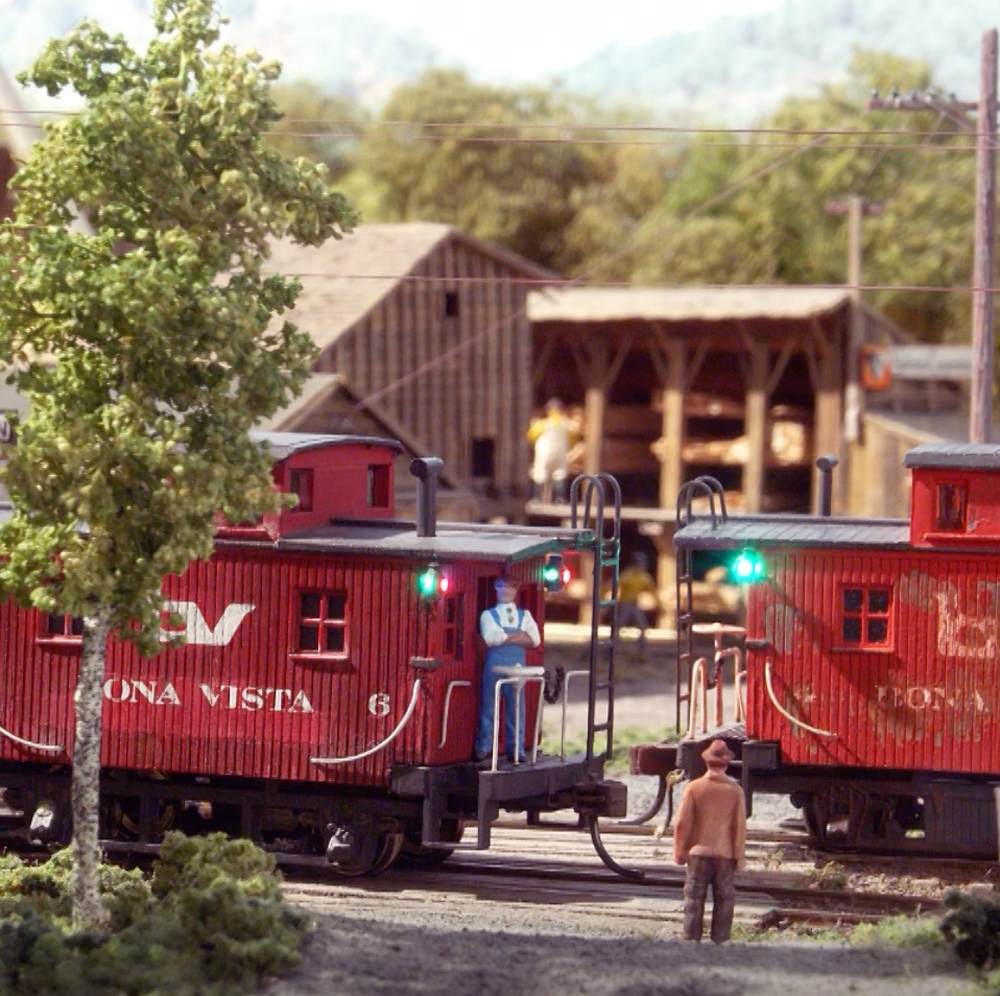
This is another magazine cover shot about building marker lights. It’s an interesting shot from the perspective of the little people. Maybe the train has stopped and they’re having a conversation, or maybe the train is slowly passing by and the man in the brown coat is waiting to cross. The tree on the left frames the shot and keeps your eye on the caboose.
Now, here’s a busy shot that was meant to be busy. This image made the cover of the March 2013 issue of Model Railroad. In this case, the clutter is a good thing. Again, good focus, and the shadows don’t obscure anything important.
O. Winston Link was a famous photographer who took black and white shots of the last days of the Norfolk and Western Railroad. I wondered if I could replicate his style on my layout to get this shot. I did what’s known as light paintings. I’m guessing the exposure on this shot was something like 3 minutes. In other words, the shutter was open that long.
I’m not a professional photographer, and almost everything I learned, I learned by trial and error. Get your camera out, get your cell phone out, and start taking some photographs on a model railroad. We’ll call that your homework for next time. Don’t just take snapshots: be conscious of the composition. What’s in the shot? Where would your eye go in that shot if you were looking at it for the first time? Always consider composition, and your abilities as a photographer will improve.
Adding smoke was great. how did you do it? Do you have smoke files from real engines? More detail , please.