Have you thought about how to upgrade your tower lights? An engine facility doesn’t look complete without small details around the buildings, tracks, and equipment. One detail that isn’t difficult to add to this scene is yard lights.
Most of these are “plug and play” details. Lionel’s option looks pretty much identical to how it always has. You can look at old manufacturers’ options; Marx, for instance, can still be found secondhand. Today, MTH still sells some stand-alone yard lights, but in my opinion, the best option is the old MTH RailKing tower lights.
I prefer these lights for a few reasons. First, they are scaled nicely—the tower itself isn’t too bulky. They are made of metal, which provides a nice weight and look. Lastly, the light units on top of the tower are able to be positioned, which provides a more realistic look.
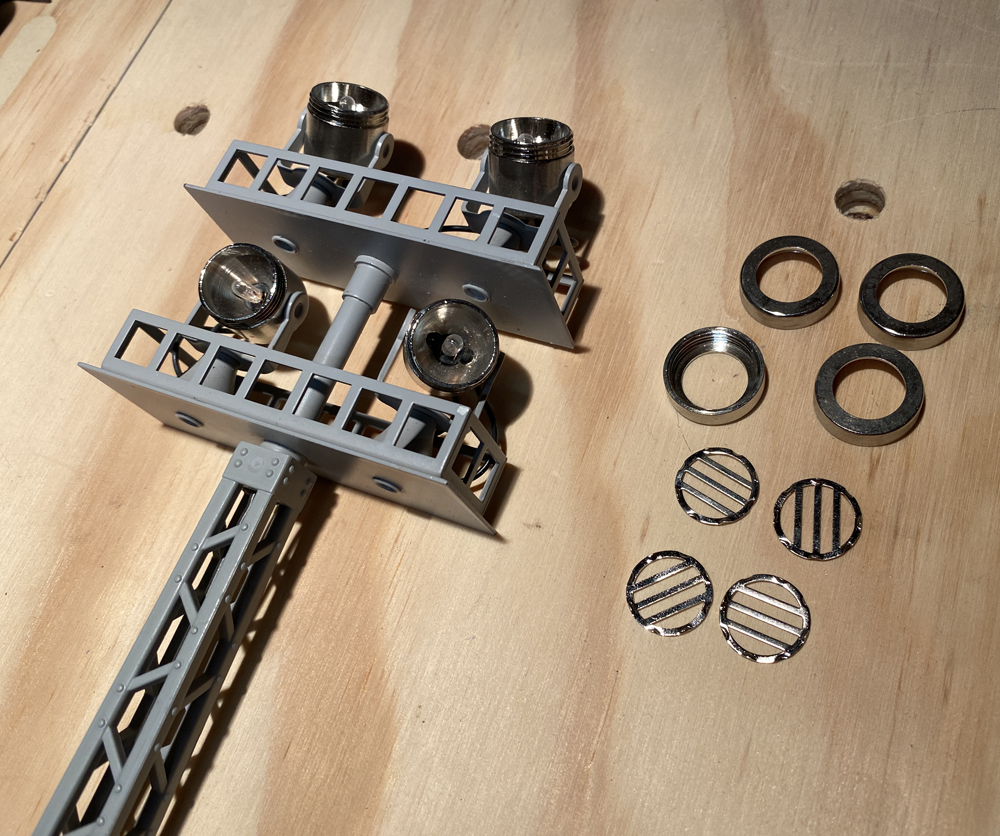
I was fortunate enough to grab a secondhand pack of RailKing tower lights a few months ago. The only issue that I have with these lights is that they are silver with chrome light caps and a bulky plastic base. Fortunately, I can fix these easily, and so can you.
The first thing that I did was remove the lens covers and guards from the tower lights. Mask the light bulbs with pieces of masking tape.
I painted the tower itself using flat black spray paint. Make sure you use flat paint, not gloss or semi-gloss. Two or three good coats should do it. Due to the structure of the tower, be sure to spray from multiple angles so you cover all the original color.
Next I painted the lens covers and guards using the same flat black spray paint. Once they were thoroughly dry, I reassembled the pieces.
For painting the base, I chose a camouflage khaki color, available at most hardware stores. Mask off the tower body first. Spray the plastic base with two to three coats. Once you’re happy with the coverage, let the paint dry and remove the tape.
Easy weathering
At this point, you’ll have a nice “just built” tower light. However, odds are a tower light sitting outside is going to show some wear in a fairly short period of time. To expedite this process, we will do some weathering.
I start by adding some subtle rust streaks to the metal uprights. To simulate rust, I use brown and red colored acrylic paint and a fine paint brush. Once a rust spot is painted and dried, I will come back over the same location with a brownish-red wash to simulate downward streaks of rust. Next I’ll add a black wash, using black paint diluted with water, to the tower light’s metal sections. I will mainly put the black wash near the base of the tower. The wash will run down and over the concrete painted base.
Time to finish up with some brown weathering powders. Powders can be liberally applied to the top of the towers and streaking down the metal uprights. Once satisfied with the powders, I use a flat clear coat to seal my work.
Learn more about weathering
Light it up
Your light is now ready to install and wire on your layout. You could now update your lights to LEDs if you’d prefer. Otherwise, just install them. Enjoy your upgraded tower lights!
Tips
- Attach the lens cover pieces to a piece of masking tape so they stay in place while spray painting. Let dry, turn the pieces over, re-attach them to the tape, and spray the other side.
- Try using Glad Press-n-Seal wrap instead of masking tape to cover the tower body.
Supply list
- Tower lights, your brand of choice
- Masking tape
- Flat black spray paint
- Khaki spray paint
- Clear coat spray paint
- Black acrylic paint
- Rust-colored acrylic paint
- Weathering powders
- Small paint brush