You might recognize my name as a restorer of Lionel trains, this having been my livelihood for more than 50 years. Some people may question my sanity in giving up “secret” painting tips that I have used for decades; I don’t mind at all. If I can make the hobby more enjoyable to my fellow enthusiasts, then more people will join our ranks, and that’s good for the hobby overall. Let’s dig out some of those old trains and fix ’em up!
What not to do
- Don’t use lacquer paint
If you are attempting a restoration for the first time, the first don’t concerns plastic. If you are painting any train that has a plastic body or plastic parts, never use lacquer paint! Lacquer will curl and eat away the plastic, ruining it.
Some enamel paints may also have the same effect if they are formulated with what is called a “penetrating” thinner. This thinner, or solvent, is designed for use on certain plastics and metals to “grab” them, thus ensuring both good adhesion and the fact that they will not be damaged by its penetrating effect. However, it’s not compatible with Lionel’s plastics.
Plastic-friendly paints have non-penetrating solvents and are specifically formulated to ensure good adhesion on styrene without damage. All of Lionel’s postwar plastics, with the exception of the motor brush plates and early Madison type pullmans, are styrene. Unfortunately, when your favorite brand of paint says “safe for use on plastics”, some are not. The only way to tell is to test the paint on a discarded piece of the same type of plastic you wish to restore, and examine it after 24 hours. If the plastic still looks good, you’re ready to go. Usually, “non-safe” paints will start to curl or “eat” the plastic almost immediately, but 24 hours is your best bet for a safe margin.
In my experience, Krylon and Rust-Oleum are NOT good for plastic, although they will give you an excellent finish on metal.
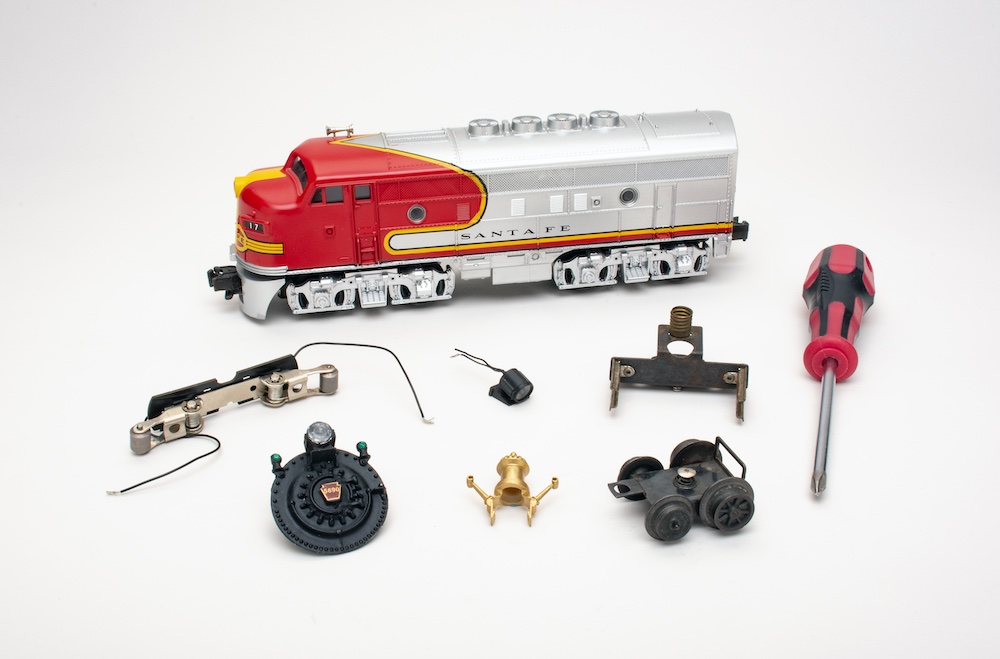
- Disassemble everything first
Don’t paint an engine, car, or accessory without first disassembling it as completely as you can. Lionel always painted parts first and assembled the finished (painted) parts last. You should do the same. If you are inexperienced with assembly and disassembly, either make yourself a diagram with notes to follow, take photos with your cell phone to document the process, consult a service manual, and/or attempt your project with a fellow enthusiast who has mechanical experience with electric trains.
- Don’t remove rivets
Don’t remove or drill out rivets unless you have access to a rivet press and rivets exactly the same size! Banging rivets on with a hammer is a sure way to scratch, chip, dent, or break that train you’ve spent hours restoring.
New rivets of just about any size and shape are readily available from parts dealers, and there are several rivet presses on the market, including some excellent hand-held riveters. Either invest in one of these, or just leave the rivets alone.
Starting the restoration
Most restoration projects are usually locomotives or motorized accessories, so that’s what we’ll concentrate on here. With locomotives, I’ve found it advantageous to do a complete mechanical overhaul while you’ve got it apart. Sometimes, the motors might need a good cleaning and lubrication, but it makes sense to do it now, not six months after you’ve got it back together.
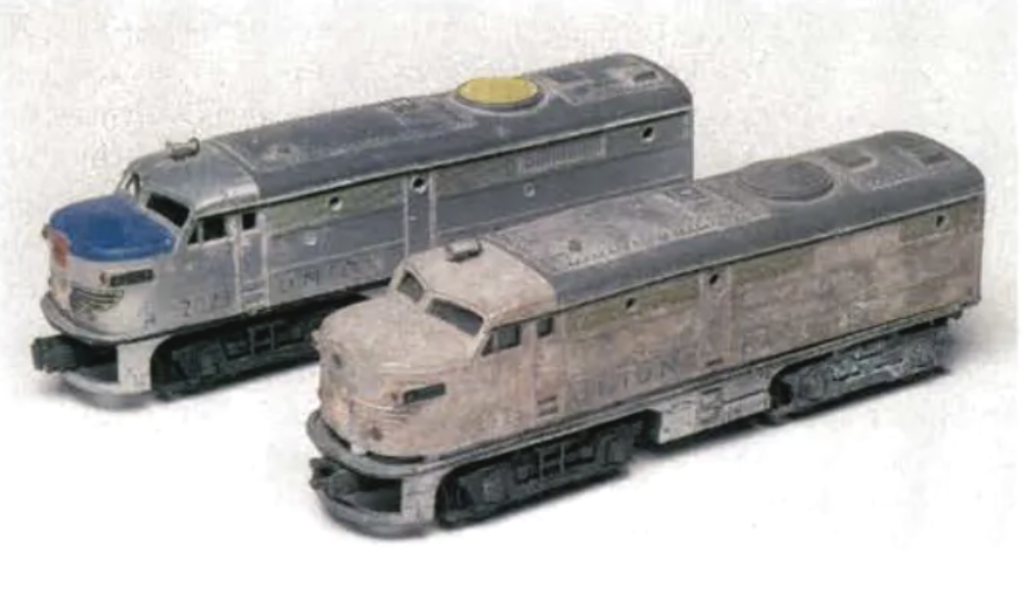
Paint removal
I strip off all old paint before starting any restoration. Some paints from the 1950s that Lionel used contained lead, but not all. In either case, I recommend using caution during paint removal, because lead paints, as well as many paint-removing solvents, are flammable, poisonous, and can give off noxious fumes. Work in a well-ventilated area and wear face and eye protection.
You can immerse plastic parts in commercial brake fluid. You must work outdoors, since brake fluid can be toxic and flammable. Use a protective face mask and rubber gloves and don’t leave your work unattended. A soft toothbrush removes stubborn paint from hard to reach areas. Rinse your work with dish soap and warm water when finished.
Sandblasting is a solventless process, but relatively expensive. The system consists of an enclosed cabinet, an air compressor with hose attachment, an air regulator, and a supply of plastic “beads” that are forced through a hand-held gun. The beads are ejected through the gun at such high force that it rips the paint right off your trains. The disadvantage of sandblasting is that it can’t be used on plastic. However, it works great on metal, has the added advantage of removing rust, and leaves a surface which helps with paint adhesion.
Painting process
Your piece might have scratches or dents. You’ll want to use sandpaper to remove imperfections. I recommend sanding grits of 360, 400, 600, up to 1200. For deeper dents you can use auto body putty, which must be allowed to fully dry and then sanded smooth. Your local hobby shop will likely sell hobby putties that will work equally well.
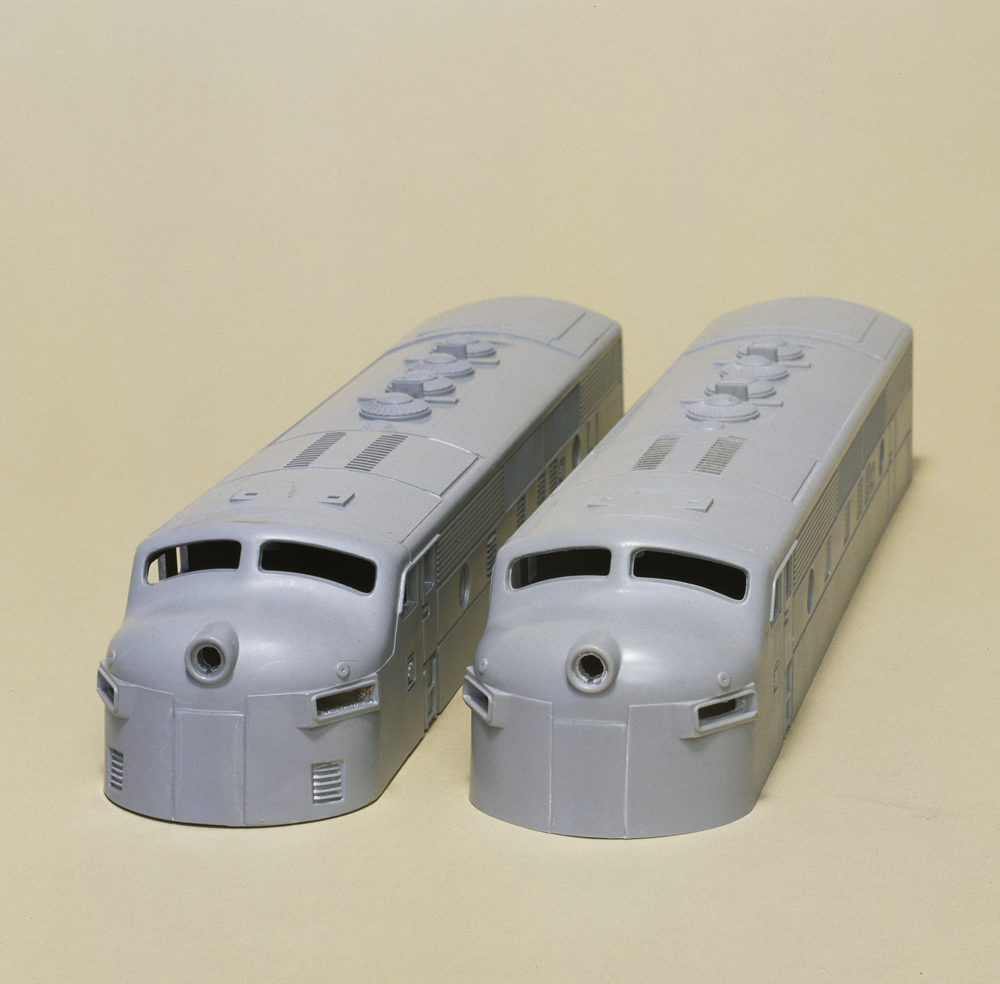
After paint removal and cleaning, I recommend a primer coat on everything you attempt to paint. Primer seals the metal (or plastic) and can usually be sanded to remove minor imperfections in the material. You must use different primers for metal and plastic. Testors makes an excellent primer for plastic. If you’re using an airbrush, Bryson Sleppy wrote an article about acrylic paints for airbrushes. For metal primers, I recommend PPG or DuPont, both of which can be found at an auto supply store.
Using two, three or even four coats of primer is fine, but here’s the key: apply light coats! Don’t try to cover everything in one coat.
How you apply your finish coat is now up to you. I use a Binks or DeVilbiss industrial model automotive spray gun and a 220V air compressor with 45-60 PSI, but I realize the average hobbyist obviously doesn’t have access to such facilities. However, you can achieve excellent results from either a spray can or a model airbrush if you follow a couple of general rules.
Best painting practices
If you’re using a spray can, test it first. If the paint doesn’t flow smoothly, save yourself a lot of trouble: buy a new can. If you’re using an airbrush, test it first. Make sure your spray nozzle is set to the pattern you wish, and that your air pressure is properly adjusted.
Make sure you like the color and finish. Lionel used high gloss on most tinplate and prewar items, as well as Santa Fe and Texas Special F3 diesels. The majority of their paints were semi gloss or matte, never dead flat. Some experimentation with the different sprays (on scraps) will help you achieve optimum results.
Make sure the paint is compatible with your work.
Use straight, even strokes, and again, don’t try to cover everything in one coat. You can usually go back to apply your second coat after an hour or so, but if you paint too much too soon, it will run. Spray past the edges of your work, both left and right, which will help the evenness of the finish.
Allow plenty of drying time. Paint that is not thoroughly dry is a disaster in the making no matter what you do to it later. If you try to tape over paint that is not completely dry for multi-color jobs, you are in for an unpleasant surprise when you peel that tape off. If you attempt to assemble anything that’s not completely dry, the paint may chip or peel, with your fingerprints all over everything. I recommend at least 24 hours before you touch freshly painted work (48 hours is better). Allow at least four days if you plan on taping over your new paint job to apply the second color.
Multi-color projects
Very few paint jobs were one plain color. We’ll use paint masking tape to mask off our piece. Your local hardware store can supply you with a variety of widths, and you can achieve professional results, if you just follow a few simple guidelines:
Wait until your first coat is dry! (Did I mention this before?)
Don’t try to apply too long a length of tape at one time. It will get unwieldy, will fold over on itself, and quickly become frustrating. Don’t peel off more than 5″ or 6″ at a time, or less if that’s all you can safely handle. If your work calls for a longer line, or striping, attempt it in two parts. Use fine tweezers to handle the tape for intricate shaping.
Don’t stretch the tape too much when trying to create curved shapes. It’s better to place a thick width of tape on a board and cut it to the prescribed shape with a sharp hobby knife, then pull it off the board and carefully position it onto the train. Don’t ever cut the tape to shape after you’ve applied it to the train! You could easily cut through the first coat of paint, which will create an opening for the remainder of the first coat to lift, ruining your paint job!
After you’re satisfied with your tape job, burnish the tape edges to create a tight seal. Otherwise, you’ll have a sloppy and uneven paint job. I have found a soft (No. 2) lead pencil ideal for burnishing, because it will push the tape down firmly without tearing it.
After the second coat is dry, peel the tape slowly. You can never peel tape too slowly. If you peel too fast, you run the risk of taking some of that first coat off with it. Also, your second coat (after taping) should be applied even more lightly than the first, because paint will build up around the tape edges. It’s up to you to minimize this as much as possible.
If you will be doing three- and four-color work, repeat the last few steps. Remember that as you add subsequent coats of paint, you must allow more time for each previous coat to dry. Even waiting 24 hours between coats may not be enough, because as you cover each previous coat, you are blocking the air supply that the base coats need in order to thoroughly dry.
An almost fool-proof method that I use to determine if you can safely tape over a new coat of paint: If you can smell the paint fumes when holding the work up to your nose, it’s too fresh to tape.
Lettering and decals
The most professional methods of lettering and decorating are screen printing, heat stamping, pad printing, and heat-applied dry transfers. Unfortunately, none of these methods are practical for the hobbyist.
Water-slide decals are available from many sources and are accurate and easy to apply. I recommend the use of Solvaset decal setting solution by Walthers (904-479) for all water-type decals. Follow the directions, use patience, and let it dry before adding a second coat.
Re-assembly
After your work is completely dry and you are satisfied with the results, it’s time to reassemble. Use caution when assembling freshly pointed parts. I would wait at least a week before touching any new work for assembly. Your fingernail can very easily scratch soft paint, even if it feels dry.
If you put a light scratch in your work, try this before panicking: Spray a little Endust Multi-Surface Dusting and Cleaning Spray on a soft cloth and gently rub out the scratch, then use Fantastik All-Purpose Cleaning Spray to remove the wax residue. Sometimes this will remove the light scratch without taking off too much paint. If not, you can touch it up with a small paintbrush.
Resources
Applying decals with Aaron Skinner
Cody’s Workshop: Stripping paint
L&L Model Train Restoration Co. (the author’s company)