In my 20-plus years with Model Railroader magazine, I’ve written several how-to articles on airbrushing. Some have focused on using the tool to re-create models you can’t find on the shelf, such as “How to paint multi-color locomotives” in the September 2013 issue. Others, including “How to weather coal hoppers” in December 2012, have demonstrated techniques for simulating faded paint, grime, and rust, among other effects, with an airbrush. After reading this beginner’s guide to airbrushing, hopefully you’ll be inspired to get out of the armchair and into the spray booth to do some painting.
Tools of the trade
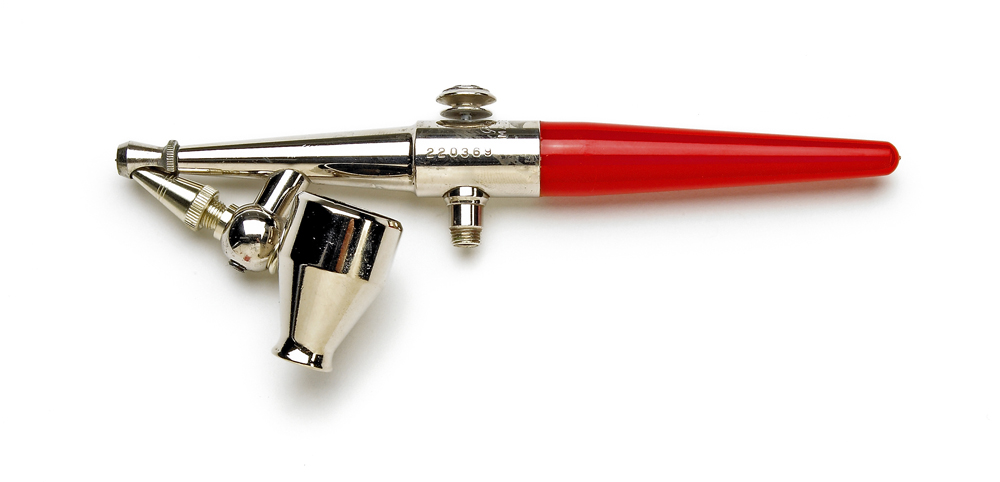
When you visit a brick-and-mortar or online retailer to shop for an airbrush, you’ll see they’re offered in different styles. Is there a right or wrong one? Not really. You’ll want to find an airbrush that’s comfortable to hold and has easy-to-reach controls. Paint sessions take time, and they can quickly become tedious if you have an airbrush that isn’t a good fit.
Another consideration is what type of painting you plan on doing. Some airbrushes are designed for specific tasks, such as large-area coverage or fine work. Others can be fitted with different needles and nozzles for different types of work.
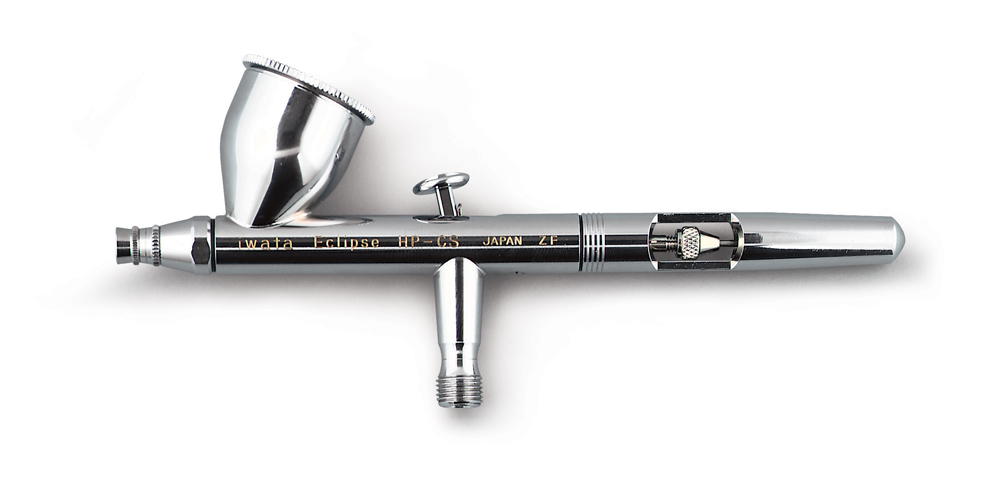
As you’re shopping for airbrushes, you’ll also see terms like single- and double-action and internal and external mix. What does all of this mean? A single-action airbrush lets you control the volume of air passing through the brush with the trigger. A double-action airbrush lets you regulate both the air and paint volumes with the trigger. The air on a double-action brush is controlled by pushing down on the spray button. The paint volume is adjusted by pulling back on the button. Double-action brushes are good for painting and weathering in tight areas where controlling paint volume is necessary.
In external-mix airbrushes, the air and paint are mixed outside the airbrush. With an internal-mix airbrush, the air is drawn into the rear of the brush, while the paint is drawn, either by gravity or suction feed, into the middle.
External-mix airbrushes, which are all single-action, are good general-use brushes and easy to clean. Internal-mix brushes are better at atomizing paint into smaller particles but are more work to clean.
Air supply
Sorry, folks, this section of the beginner’s guide to airbrushing isn’t about the soft-rock duo of the same name from the 1970s and ’80s. Successful airbrushing, in part, is dependent on a source of dry, clean compressed air. Similar to airbrushes, air sources vary in type, price, and complexity. The most basic (and affordable) is a propellant can. However, it’s difficult to regulate the air flow from a can, and the can may freeze during extended painting sessions.
If you plan to do a lot of airbrushing, an air compressor is a better long-term investment. Airbrush-specific compressors are priced between $100 and $400, depending on their features. Not all features are needed, but some, such as a pressure regulator, are useful. Small compressors are typically rated between 25 and 35 psi, ideal for most projects. However, for weathering, you don’t need that much pressure, and the regulator will let you adjust the psi.
A moisture trap is another helpful feature. Humidity in a compressor can cause water droplets to pass through the airbrush and onto the model, ruining the paint job. If you’re unable to find a compressor with a moisture trap, you can splice a trap directly into the air hose. Moisture traps should be drained after each painting session.
Types of paint
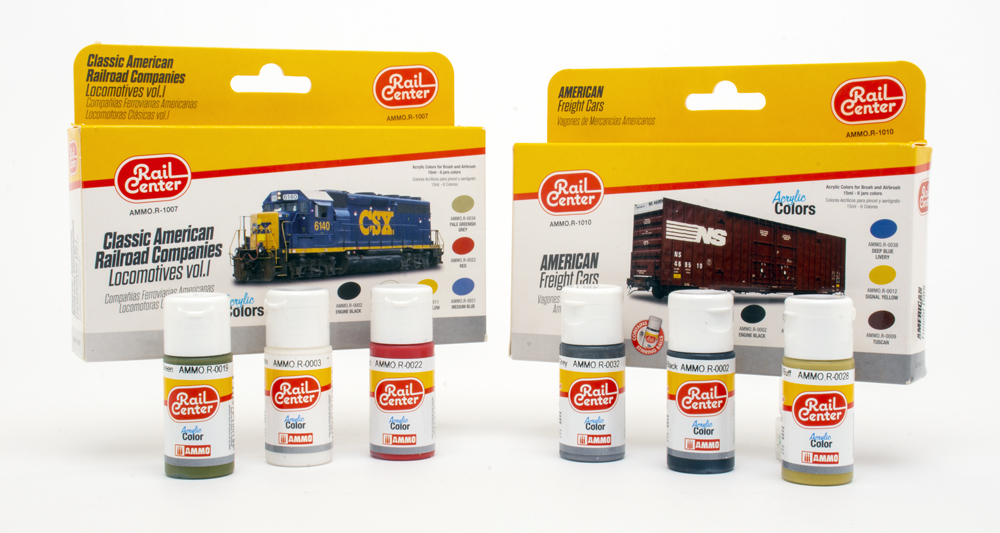
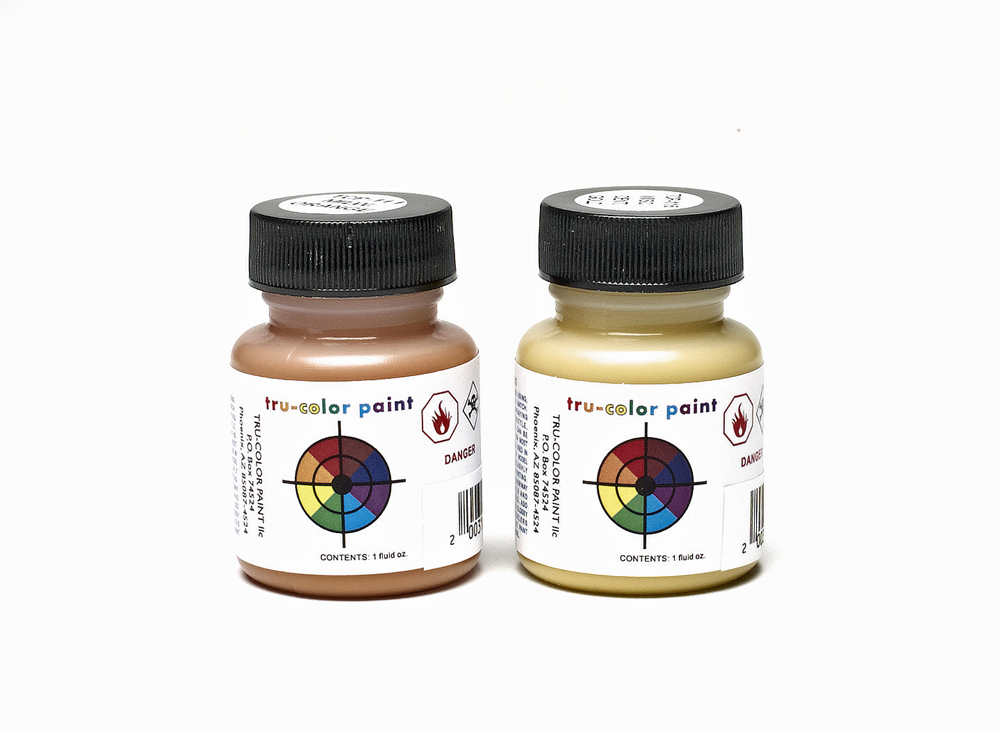
Once you have an airbrush and air source, the next thing you need is paint. In the past decade, there has been a lot of change in the hobby paint marketplace. Longtime brands with railroad-specific colors, such as Floquil and Polly Scale, have been discontinued. Some newer lines that feature railroad colors include MicroLux, Modelers Decals and Paint, Rail Center, and Tru-Color Paint.
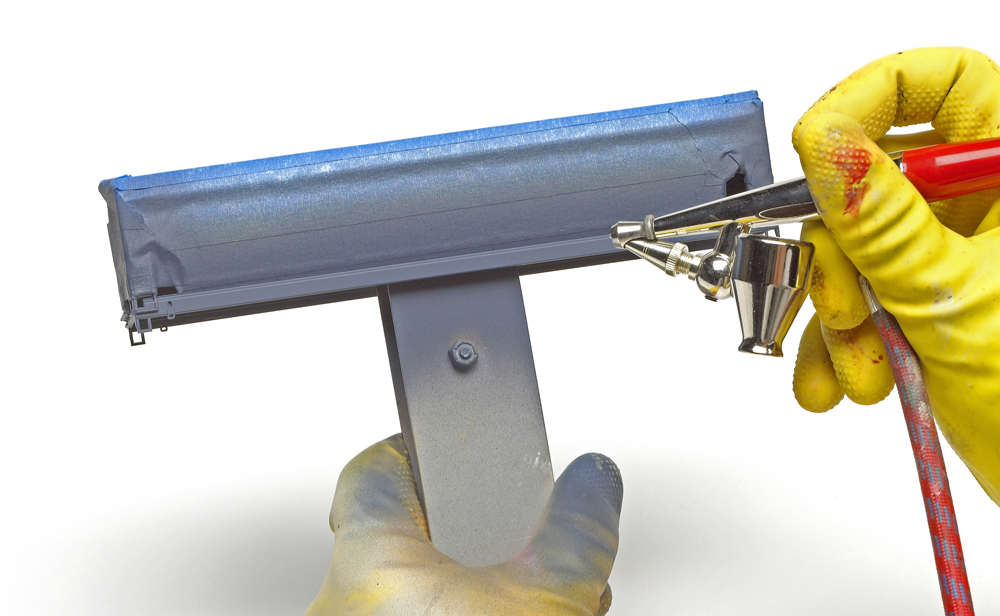
The two primary types of paints used by model railroaders are organic-solvent-based and acrylic. Organic-solvent-based paints have been used in the hobby for many years but must be handled with care. These paints may attack plastic, so you’ll want to prime your models or apply a manufacturer-recommended protective coating. Also, organic-solvent-based paints must be used in a well-ventilated area, and you should wear a respirator, safety glasses, and nitrile rubber gloves.
Plastic-safe, water-based acrylic paints are available in the same range of colors as organic-solvent paints. Even though they’re labeled as non-toxic, acrylics should still be used with caution (rubber gloves, respirator, and vented spray booth). Acrylics require a bit more air pressure (20-30 psi) than organic-solvent-based paints.
Acrylics and solvent-based paints are both sold ready for brush painting, which means you need to thin them for airbrushing. Start by stirring the paint thoroughly in the jar. It takes several minutes to remix a bottle of paint, particularly if it’s been sitting on the shelf for a while. Tans, grays, and browns take the longest time to mix because a large proportion of their pigment is clay. Keep stirring the paint until the pigment clumps are mixed completely with the liquid. Some brands of paint are sold airbrush ready and require little or no thinning.
To make sure your paint is clean (and stays that way), never shake the jar. When shaken, paint gets onto the lip of the jar and dries into clumps. These clumps can fall into the paint and clog your airbrush. Putting a screen filter on the siphon tube will help keep clumps out of the airbrush. Straining paint is an additional way to keep out foreign matter. Micro-Mark offers a strainer/funnel combination that’s useful for this task.
After the paint is remixed, find a thinner that’s clean (free of lint and dust) and compatible with the paint you’re using. Any impurities in the thinner will get in your paint and on your model. Acrylic and organic-solvent-based thinners can’t be used interchangeably. In a separate jar, thin the paint until it reaches the consistency of milk. After your airbrushing session, empty the thinned paint into a waste-paint container. Never dump it back into the original jar.
Most manufacturers print the recommended thinner-to-paint ratio on the side of each jar, but consider that a starting point. Different colors (and bottles of paint) react differently. Thin the paint, spray it, and adjust as necessary. Weathering mixes must be thinned more than regular airbrush mixes. Pigments settle fast in paint thinned for weathering, so stir it regularly or add a few drops of flow enhancer.
Painting with an airbrush
Before you start spraying a model, test the paint on a similar material. This way, if the paint mix is too thin or not thinned enough, you won’t ruin your model. Once you’re satisfied with the paint flow, start spraying.
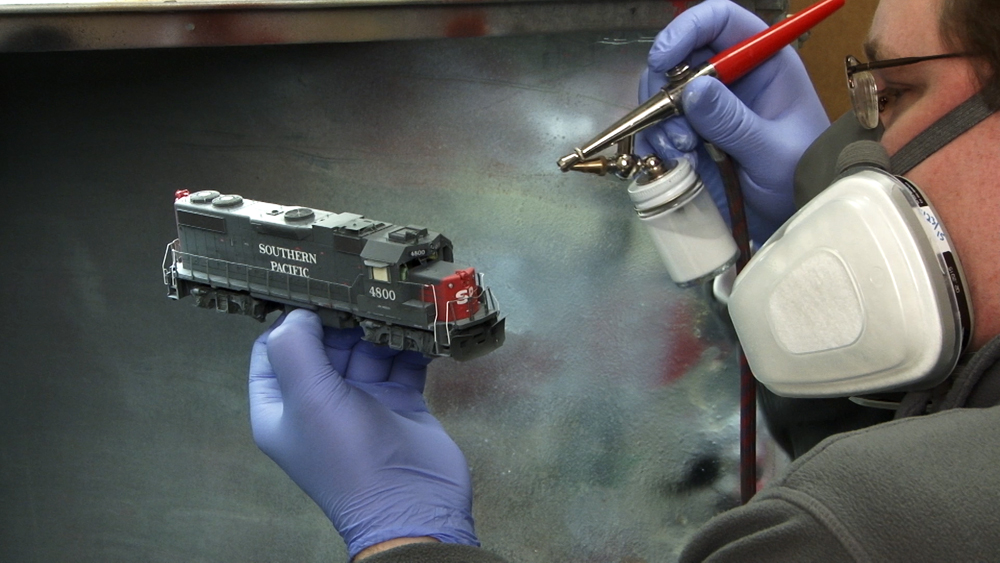
Hold the airbrush between 3″ and 4″ from the model and apply the paint with a smooth, even stroke. Start spraying beyond one end of the model, smoothly move the airbrush across the model, and stop spraying beyond the other end. Apply the paint in light coats, overlapping the edge of each stroke until the model is evenly covered. The paint should go on wet and shiny but dry quickly. If you apply the paint too heavily or don’t let it dry completely between coats, it’ll get thick and develop runs. If it goes on dry, you’ll have a rough finish.
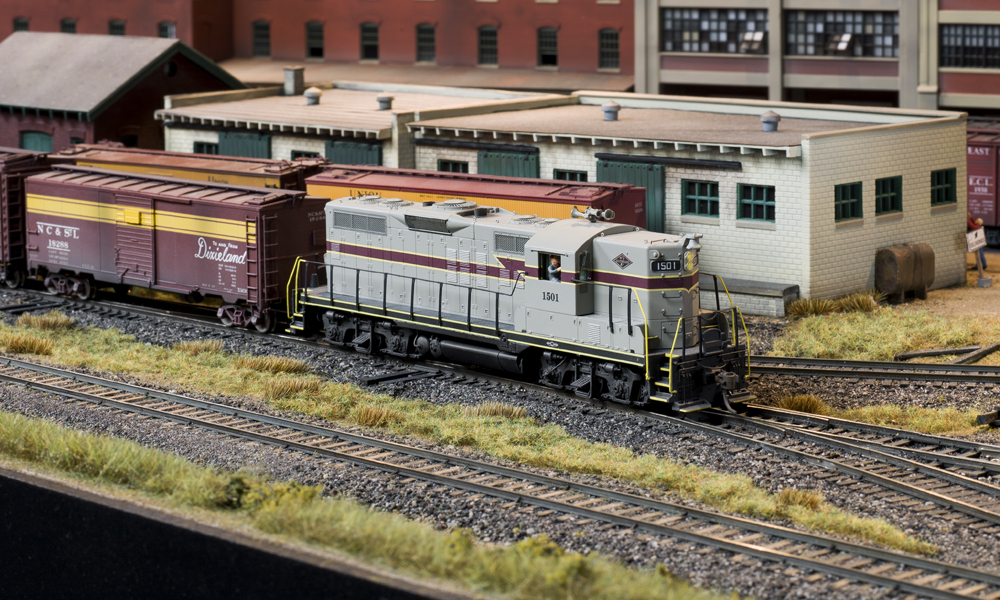
To gain experience with the airbrush, start with models that require only one color, such as a boxcar. When you feel more confident, try painting models with multiple colors.
Safety first
No matter if you’re using solvent-based paints or acrylics, paint fumes and particulates are harmful to your health. All painting should be done in a well-ventilated area, preferably a spray booth. Micro-Mark, Paasche, and Pace Enterprises, among others, produce spray booths. When you install a spray booth, keep it away from furnaces, water heaters, or other sources of ignition. Ideally, a spray booth should be vented to the outside air.
You can further protect yourself by wearing a respirator, eye protection, and nitrile (with organic-solvent paints) or latex gloves (with acrylic paints). The respirator and goggles will keep paint particles out of your lungs and eyes, respectively, and the gloves will keep paint off your hands.
The sky is the limit
After you’ve gained confidence painting models, you can weather them with an airbrush. It’s a given that you’ll have models that don’t turn out well, but don’t be discouraged. Learning how to airbrush well takes time, and the best way to learn is by practicing. Using the tips in this beginner’s guide to airbrushing, you’ll be painting models the way you want them to look in no time. Before long, you’ll find out how much fun airbrushing can be.