Model a “burning” building: I loved the idea of having a “burning” building on a large scale layout. Here was a feature that would be active and easy to set up. Plenty of 1:24 scale fire fighting equipment is readily available and reasonably priced. I bought Pola kit No. 33101 a number of years ago and it sat as other projects kept me sidetracked.
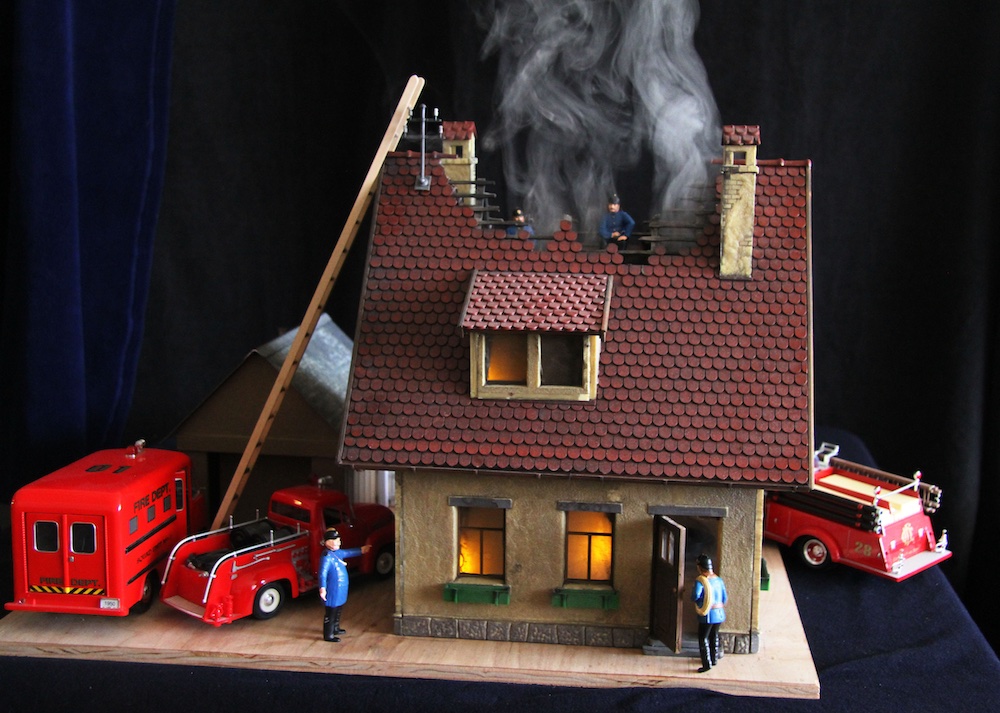
Finally, I took the time to finish the kit. I have to admit, it’s a great kit and not that hard to build, but they are expensive and hard to find today. Your house could be any brand of kit or even a scratchbuilt item. The real secret to having a spectacular display is in the details.
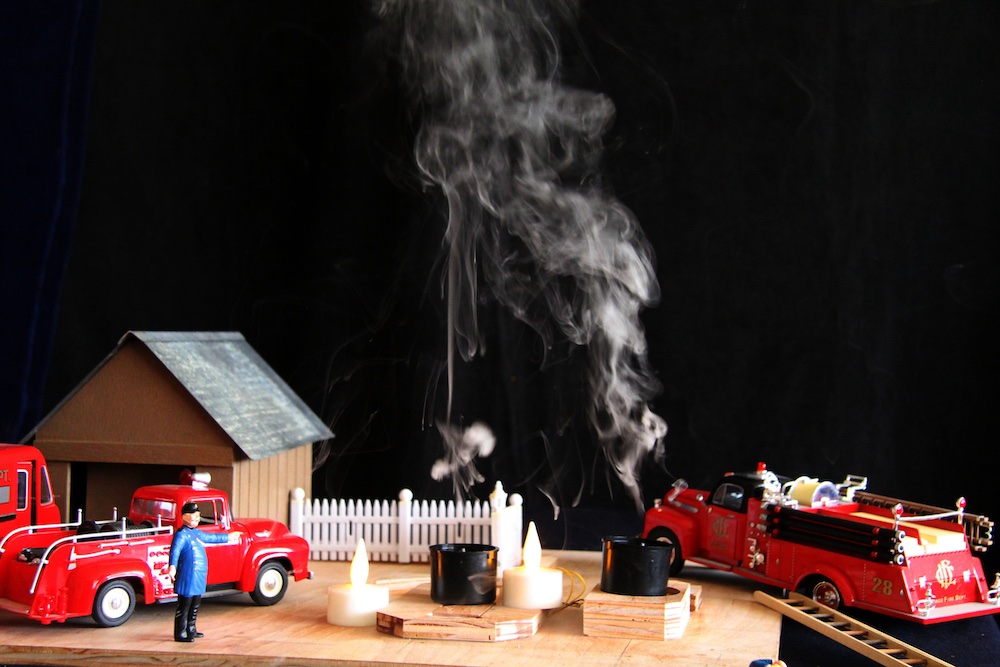
I wanted my building to be self contained and portable, since it would primarily be used on our club’s large portable layout. This meant that it had to be on its own base and electrically independent.
Most large scale transformers have 16 volt AC connectors that are used for accessories. This 16 volt current source is fine and works well, but I elected to use a sealed 12 volt DC battery that was small enough to be housed in a garage building that I added to the base.
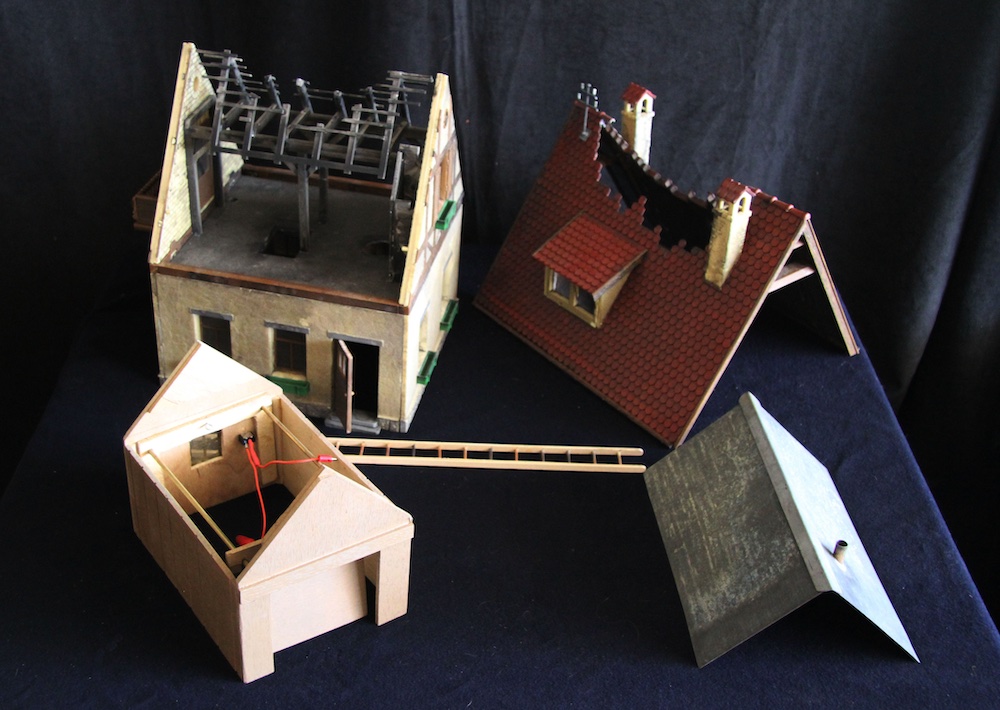
The roof of the garage comes off so I can remove the battery for charging. Wires from the smoke generators can be run under the base or directly to the garage and its on/off switch.
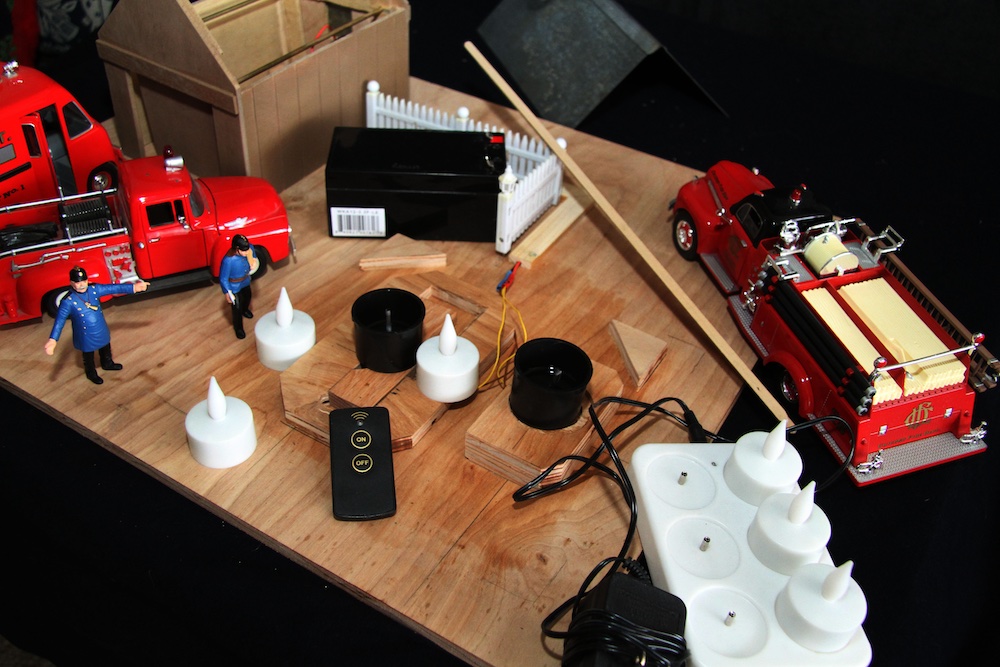
Whether you are using a kit designed to be a burning house or you’re creating your own structure, it is important to be able to easily remove the roof. You will need to fill your smoke generators with locomotive smoke fluid and be able to turn your “fire” lights on and off.
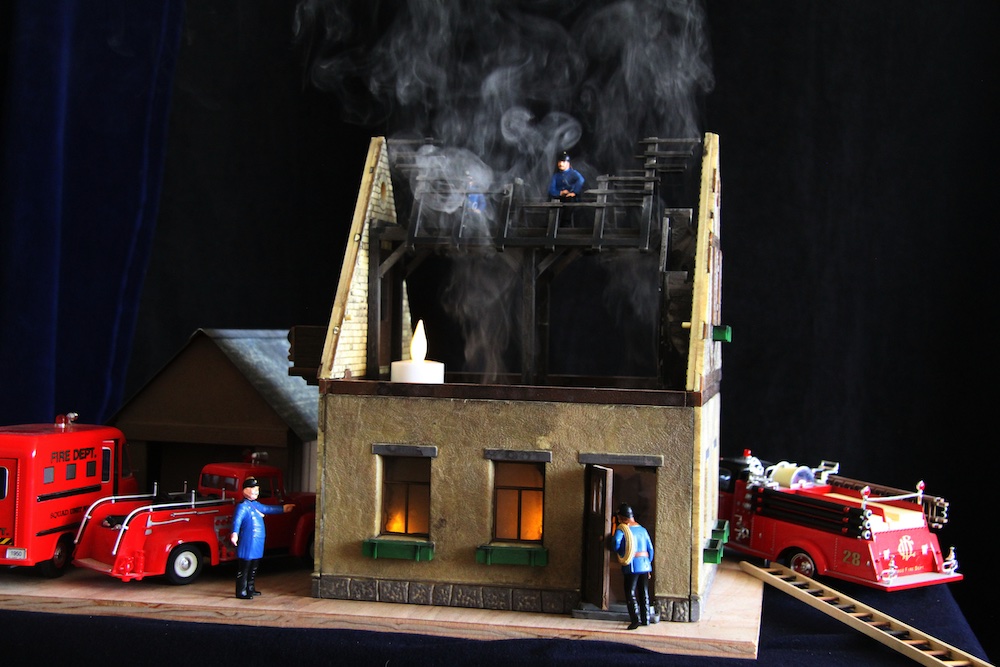
The lights that come with kits are inadequate to create the effect of a raging fire. I found that the small, battery powered “votive” flickering candles work the best. Even better was the set of six that came with a charging station and an on/off handheld remote control.
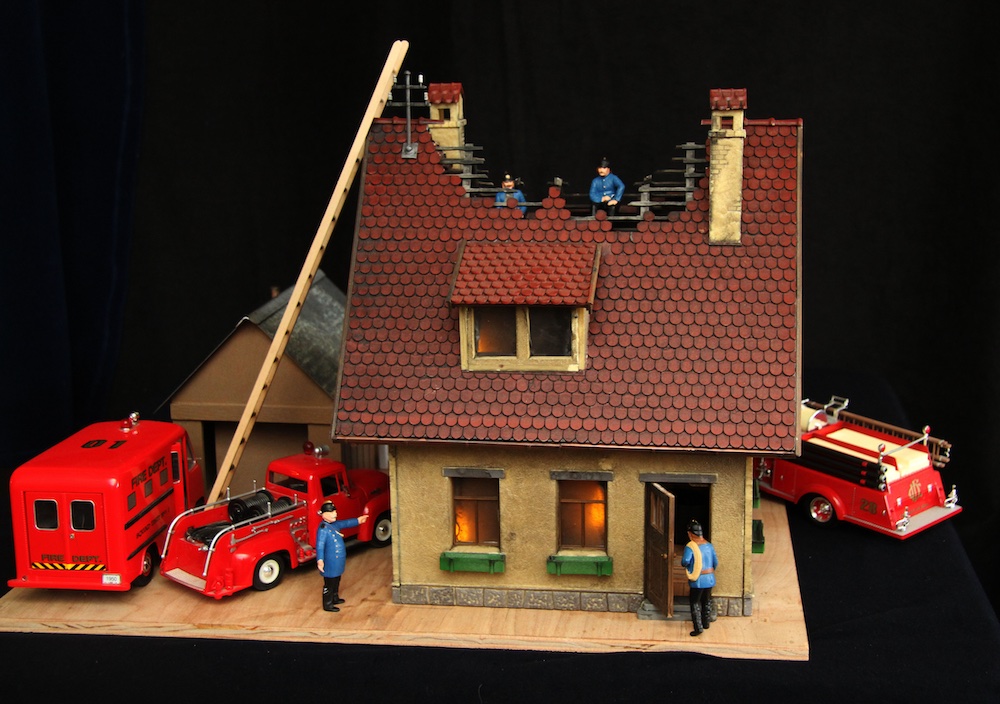
In the kits, there is a ceiling in the bottom part of the house that helps support the walls. To get the smoke up to the roof there is an opening in this floor for each smoke unit to let the smoke rise from its place on the base.
The smoke unit supplied with the kits is pitifully small and unable to create the clouds of smoke that I wanted. Instead, I bought two heavy duty Vollmer (stock number G 1282) units and cut two holes in the floor to pass the smoke up through the roof. [Vollmer no longer produces this model. A similar model is 41282. Walthers also sells other brands of smoke units.—Ed.] My windows are typical kit frames with a plastic window pane. They are smudged with paint on the inside to simulate smoke.
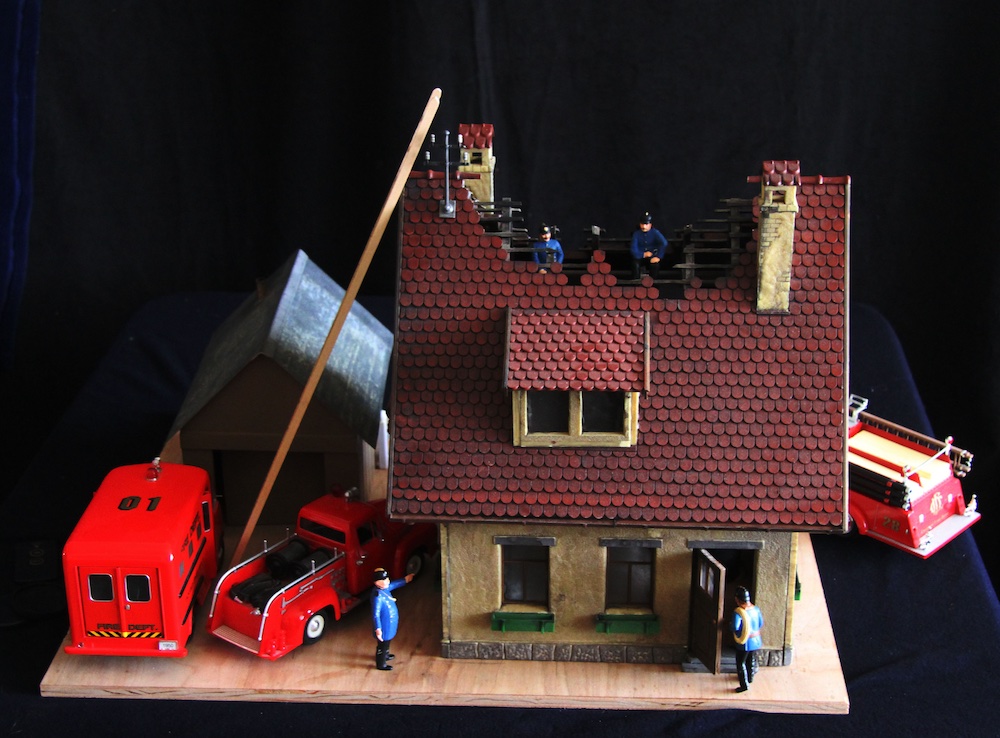
Even if you can’t find a burning house kit, any other house kit will work. In the case of the European kits, the materials are quite sturdy but I found that I needed to reinforce the roof. With the cut out in the center, the roof is only joined at the ends and not along the entire roof line. Reinforcing the joints at each end of the roof peak will be necessary. The roof needs to come off fairly often to refuel the smoke generators and service the battery operated lights. I reinforced the peak ends with scrap materials from the kit.
If you are scratchbuilding your own house, you may want to create the partial burnt wood framing that you can see in the pictures. It is a nice touch and not too hard to achieve.
To sum up, the most important things to remember are to make sure that you can take the roof on and off easily. It must be structurally sound! Don’t scrimp on the smoke generators. They are the key to making the fire look realistic. The flickering votive candles, either battery powered or even better, rechargeable and remote controlled, will complete the illusion of a real fire. Also very important is to be able to remove the house from its base. To help in relocating it on the base, I glued guide blocks on the base that ensure that the house is always returned to its original position.
Bonus construction tip
Here is a tip for building your ladders. It would appear to be pretty straightforward but a ladder can be a frustrating project.
My ladder was built as follows. There are four side pieces. The sides are 1/16” by 1/4” basswood available at most hobby stores. I used masking tape to hold two sides together. I glued a scrap piece of wood to the sacrificial wood cutting base and made pencil marks on it to use as a spacing guide.
Using the guide ensures that the holes are centered and even on both side pieces. I then drilled the 1/16” holes for the rungs. I cut the 1/16” inch dowel rungs individually using a pencil mark template to keep them all the correct length. Glue the rungs into one of the two side pieces. When dry, glue the rungs into the other side piece. Lock everything in place by now gluing the two remaining side pieces with no holes on each side of the ladder. Your ladder will be true and strong.


