


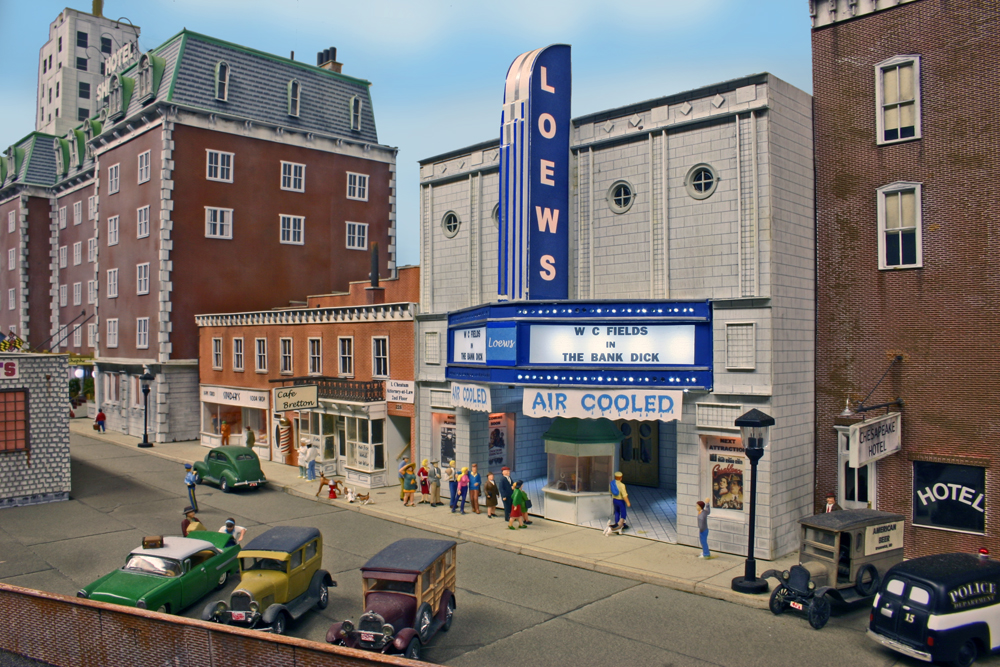
Contrary to popular belief, modeling an urban scene doesn’t require a bunch of space. Want proof? Check out the Winston-Salem Southbound, our 2018 project layout, shown in the photo above. The 2’-9” x 8’-2” HO scale shelf layout depicted the railroad’s Tar Branch in Winston-Salem, N.C. It featured more than a half-dozen rail-served industries, as well as a team track. A typical train consisted of an Electro-Motive Division GP9, five cars, and a caboose. Despite the layout’s compact size, it effectively captured the feel of an urban industrial district at mid-century.
In this article, well-known Model Railroader authors provide tips for great urban scenery. Some of the techniques covered are tried and true. Others may be new to you. If you plan on modeling a big-city scene, give these ideas to use.
For even more inspiration, check out Jeff Wilson’s book Modeling Cities & Towns and our special issue How to Build Realistic Layouts 4, both available at the Trains.com Store.
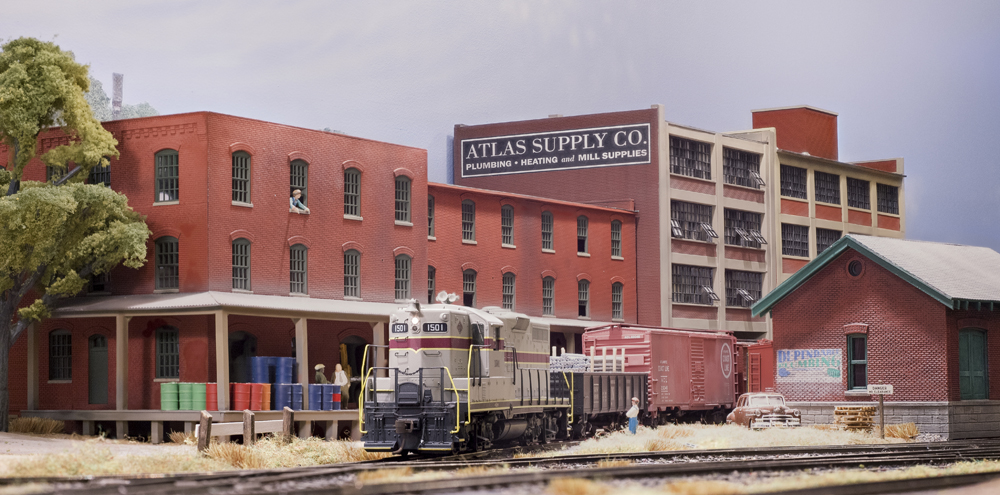
Photo-laminated buildings
With so many detailed plastic structures now available to model railroaders, you might wonder who would consider building a structure using paper these days. Maybe as a mock-up, but hardly as a permanent building, right? Well, don’t be so quick to relegate pulp products to the shredder.
Thanks to refinements in paper products and construction techniques, it’s never been easier to assemble paper buildings that include as much detail as commercial plastic structures. Today, using digital photography, photo-editing software, and inexpensive home printers, we can design and build realistic paper-based buildings that challenge even the most discerning eyes.
Although I initially intended to combine digital photos on a sheet of cardboard to make a background building flat with recessed windows, there was no reason why I couldn’t use the technique to make photo-veneer foreground buildings. Some may think of the photo-veneer building as a cop-out to modeling a dimensional structure, but photos introduce a look that’s virtually impossible to capture on traditional models. My technique captures window glass color and reflections, curtains and blinds, subtle coloring and weathering of masonry, and seldom modeled details like address numbers, mailboxes, and electrical conduits – all with minimal effort. — Paul Dolkos, from “Make realistic-looking buildings from photos and plastic” in the May 2012 Model Railroader
Forced perspective
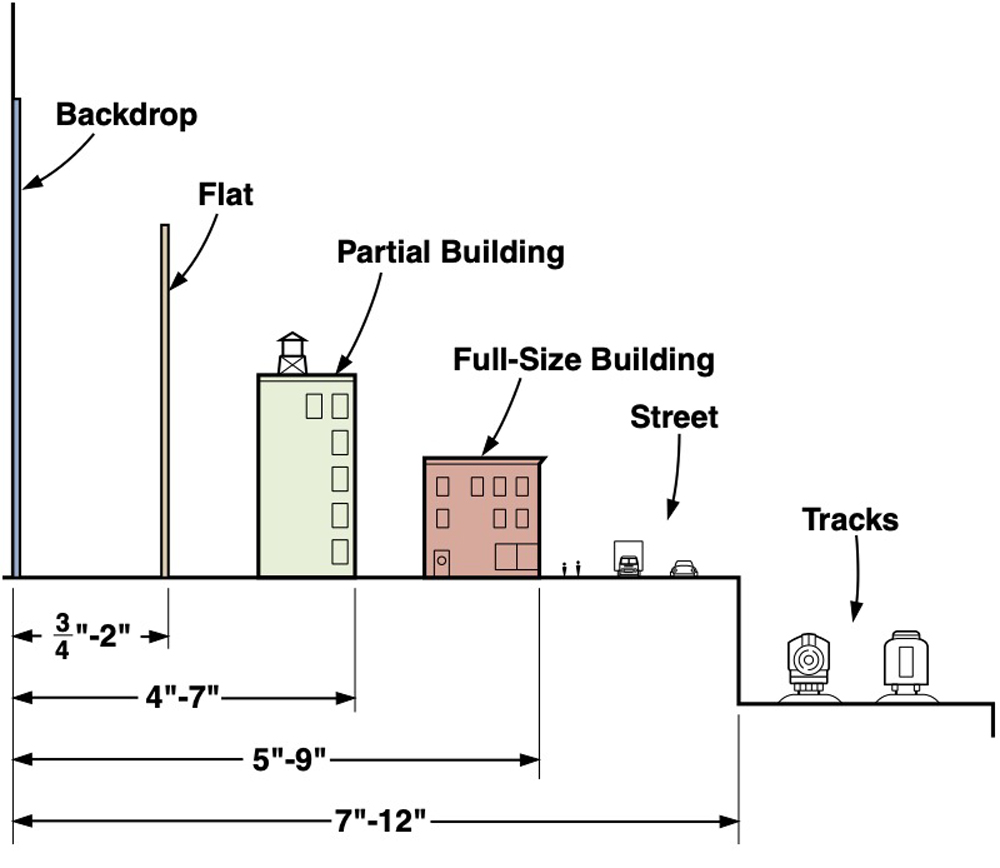
Within a city scape, the best way to achieve a sense of distance is to position the different elements of the city (full buildings, partial buildings, flats, and the backdrop), and then reduce the physical size of each element the farther it is from the viewer. Using an HO layout as an example, the trains in the foreground (the closest objects to the viewer) are HO scale, or 1/87 actual size.
In the cityscape, the complete buildings nearest the tracks are also HO scale. Ideally, partial buildings, if they are immediately behind the complete buildings, would be smaller by about 10% to make them appear farther away. However, since partial structures are made from standard kits or modular components, a 10% reduction in size is hard to achieve.
The next layer back consists of flats, about 4” to 7” behind the front line of buildings. I find that making flats 20 to 30% smaller than HO makes them look much farther away.
In the backdrop, usually 6” to 12” back, reducing the size of the closest structures to 50% of HO scale makes them appear even farther away than the flats. Other buildings in the backdrop should be even smaller, perhaps 60 to 70% of HO. Why? Because to the eye, small size equals distance; the smaller the building, the farther away it seems. — John Pryke, from Building City Scenery for Your Model Railroad (Kalmbach Books, 2000)
Light it up!
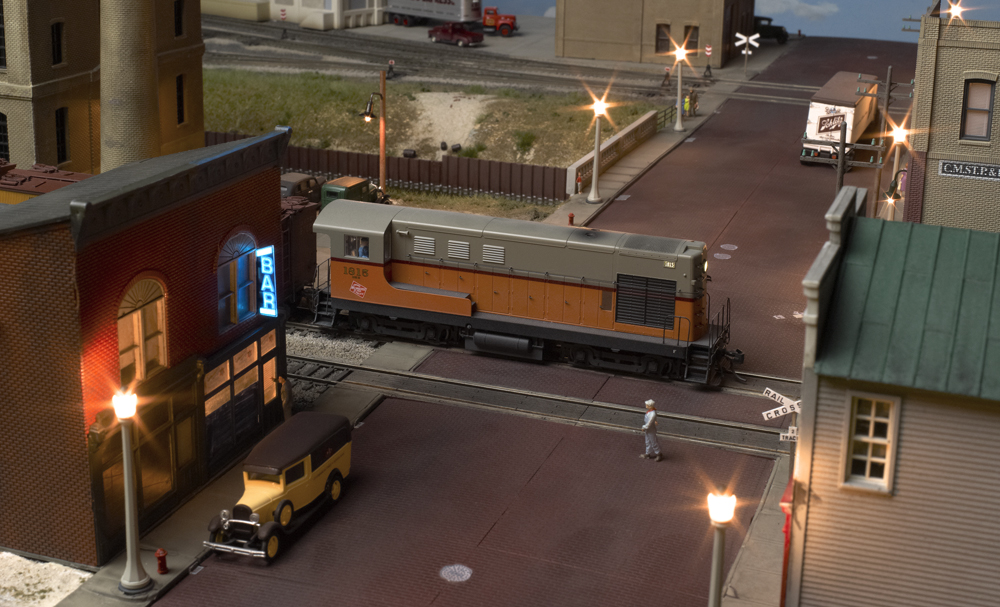
As if model railroads aren’t cool enough by themselves, adding miniature lights to the streets, buildings, and automobiles on your layout can make it so cool it glows – literally!
Recently, I added lights to a portion of Model Railroader’s HO scale Beer Line project layout, first featured in the January 2009 MR. With its detailed urban scenery, the Beer Line offered a lot of great options. And, when running an operating session on the layout, a lot of the action is supposed to take place at night, making the Beer Line a perfect candidate for lights.
When adding lighting to any layout, the best option, of course, is to prepare your models for lights as you build them. The miniature lamps, wiring, and interior details are easiest to install when the walls, roof, and floors haven’t been cemented together yet. However, with a little care, even structures that have been completed can be lighted. You may just need to rework them a bit.
This was the case on MR’s Beer Line layout. The MR staff had completed the layout in 2008 without any intention of adding lights. As a result, all of the structures needed to be removed from the railroad to gain access to their interiors. A few required some modifications, and one (the power plant) had to be completely disassembled and rebuilt.
The project took several weeks, putting in an hour here and there between my other tasks at MR, and the end result was more than worth the effort. The lights really bring the Beer Line to life, especially when switching the Freight House Job (shown above) during a nighttime operating session. — David Popp, from “11 easy urban lighting tips” in the October 2012 Model Railroader
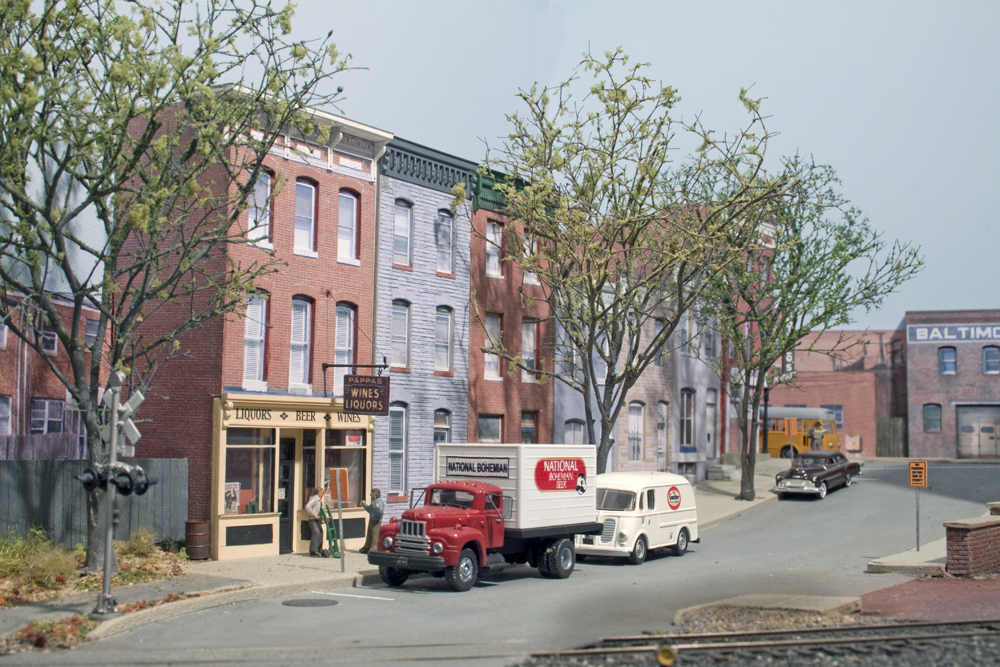
Figures and vehicles
Towns and cities are centers of activity, and even a small city or town scene can absorb hundreds of miniature figures. Painted figures have been available in a tremendous variety of poses from Bachmann, Busch, BTS, Herpa, Kibri, LaBelle, Merten, Noch, Preiser, Walthers, and Woodland Scenics.
When arranging figures, make sure they are in logical places, poses, and groupings: two or three people talking to each other on a sidewalk, several passengers waiting on a station platform, or a worker reaching for a crate on a factory loading dock.
Autos and trucks play a vital role in placing your layout in a specific era. Business names on trucks can identify a region or specific city; license plates can imply the state modeled. The number of vehicles help show how busy an area is, and the type of vehicles in industrial areas help tell the story of the products being made or handled. — Jeff Wilson, from Modeling Cities & Towns (Kalmbach Media, 2020)
Storefront details
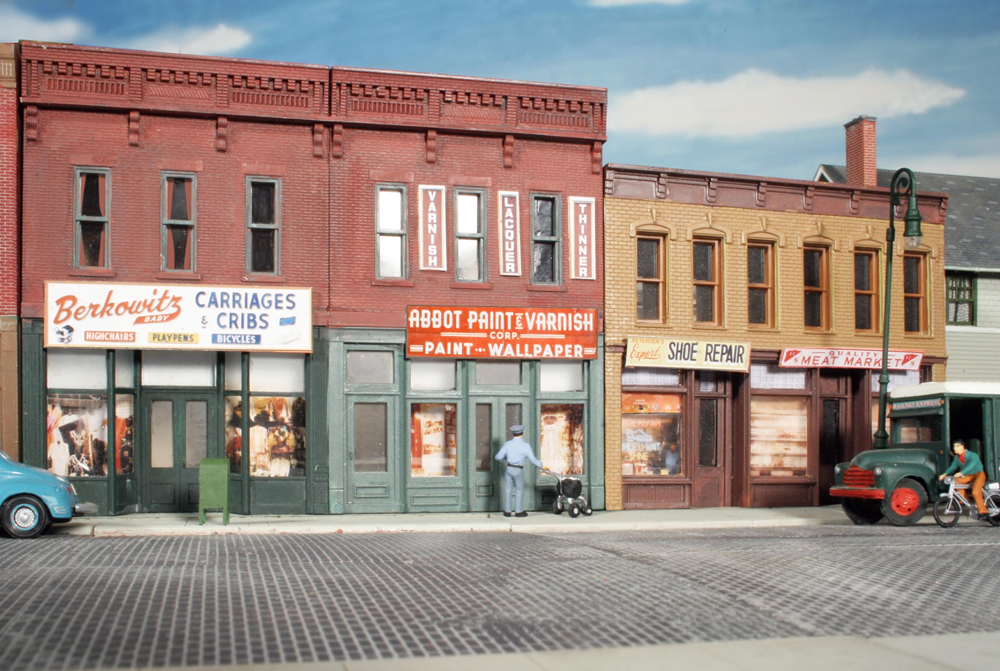
With more and more detailed urban structure kits coming on the market all the time, it’s unfortunate that I see so many of them placed on a layout incomplete. Modelers can be forgiven for thinking that once they’ve used up all the parts in the box, the model is finished. But there’s more to do if a storefront is to look realistic.
Manufacturers of urban structure kits rarely include interiors or any but the most generic details. That way, the modeler can decide if it’s to be a grocery, auto parts store, dry cleaner, or something else.
A number of good sign sets are available as aftermarket items, but not much has been made to fill in the gaping windows of the storefronts. This too often results in model buildings being placed on the layout with empty interiors.
For many modelers I’ve talked to, detailing storefronts is a task to be done some time in the future. I’ve found that I have a much better chance of actually finishing a building if I plan to do the detailing while it’s still on my workbench. As you can see above, doing so will make a world of difference in the appearance of your towns. — V. S. Roseman, from “Add storefront details” in the October 2011 Model Railroader


A very good article – unfortunately there are so many ads trying to pop op that it jumps up and down all the time.
Come on – Kalmbach, you can do better than that.
A frustrated paying customer.
Niels
Ads popping in and out make it very difficult to read the article.