In 2016, to separate the road and the track, I built a retaining wall and safety fence around one of the curves in my railway. I used pieces of treated wood to represent concrete blocks, and 3” wide strips from white plastic-coated wire baskets to serve as the fence (August 2016 Garden Railways).
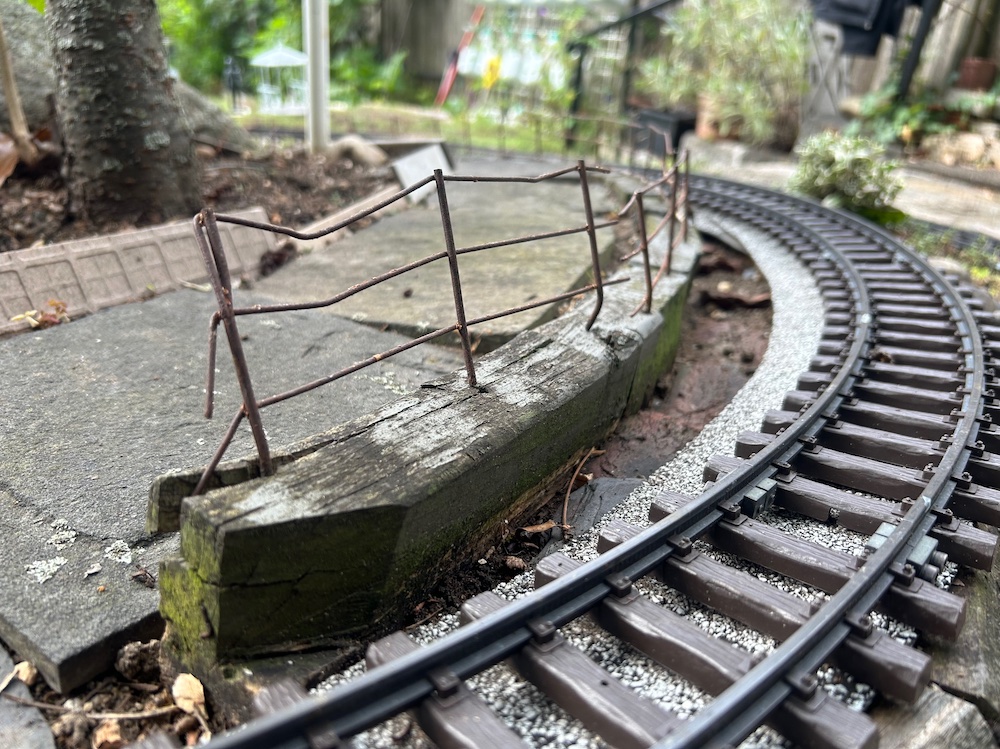
After eight years of exposure to the elements, both the metal fence and the blocks have decayed and need replacement.
To make it more durable, I’m using pieces of composite deck boards for the “concrete” blocks, 3/8″ brass pipe for posts, and 1/16” stainless-steel cable.
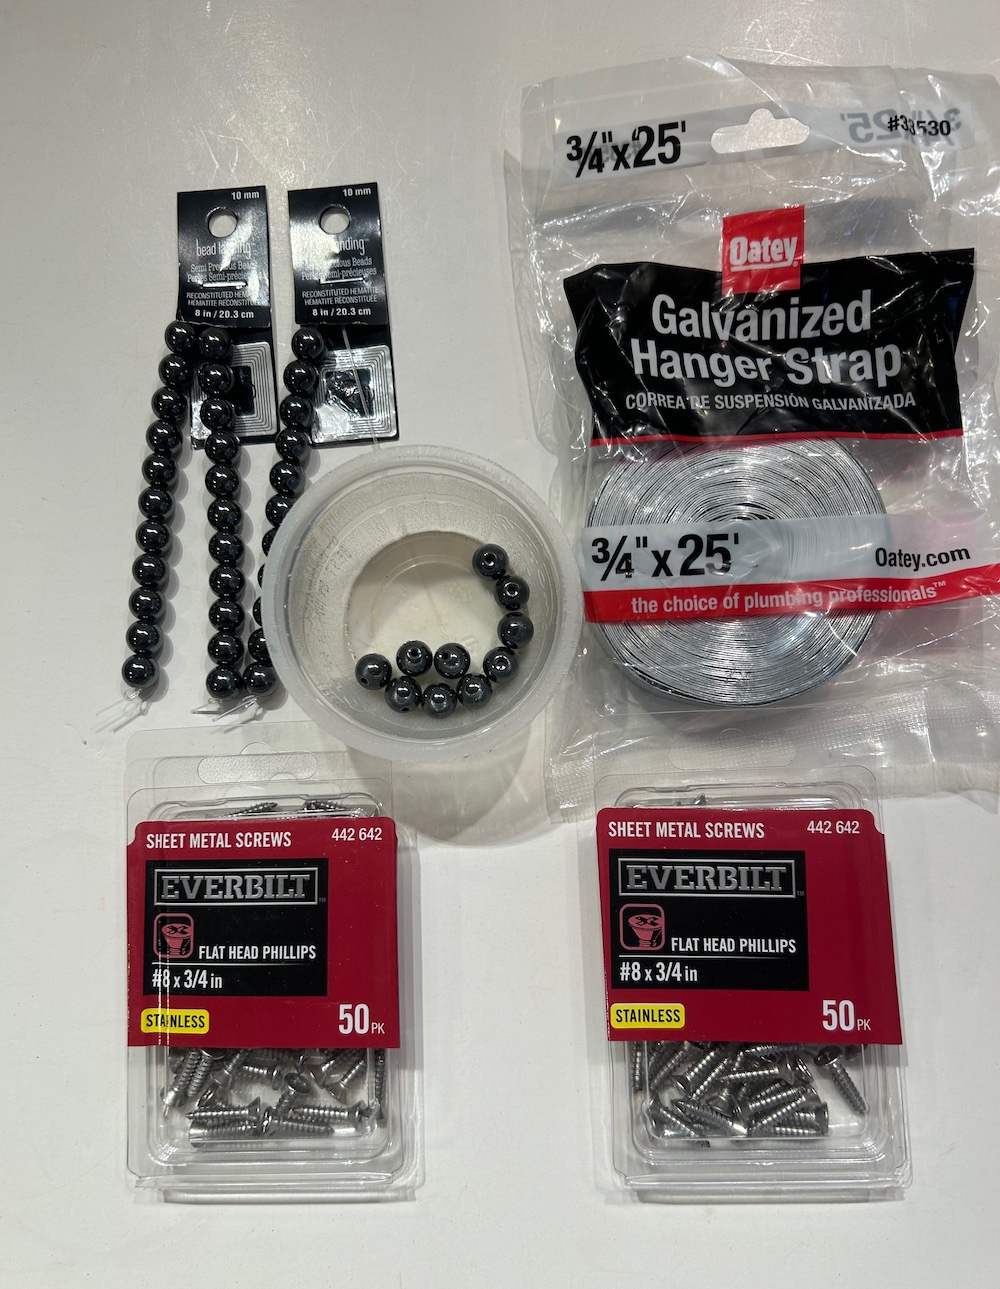
The composite boards are leftover scraps, the pipe is from a surplus store, and the cable is from a previous project.
Materials
- 10 feet of 6” w composite decking board (“concrete” blocks)
- 6 feet of 3/8″ brass pipe (posts)
- 30 feet of 1/16” stainless-steel cable
- 23 10mm beads (post finals)
- 20 feet of perforated metal hanger strap (to attach blocks together)
- 100, ¾” stainless-steel flathead Phillips screws (to secure blocks to strap)
- 2, 1½” L eye screws (to anchor cables)
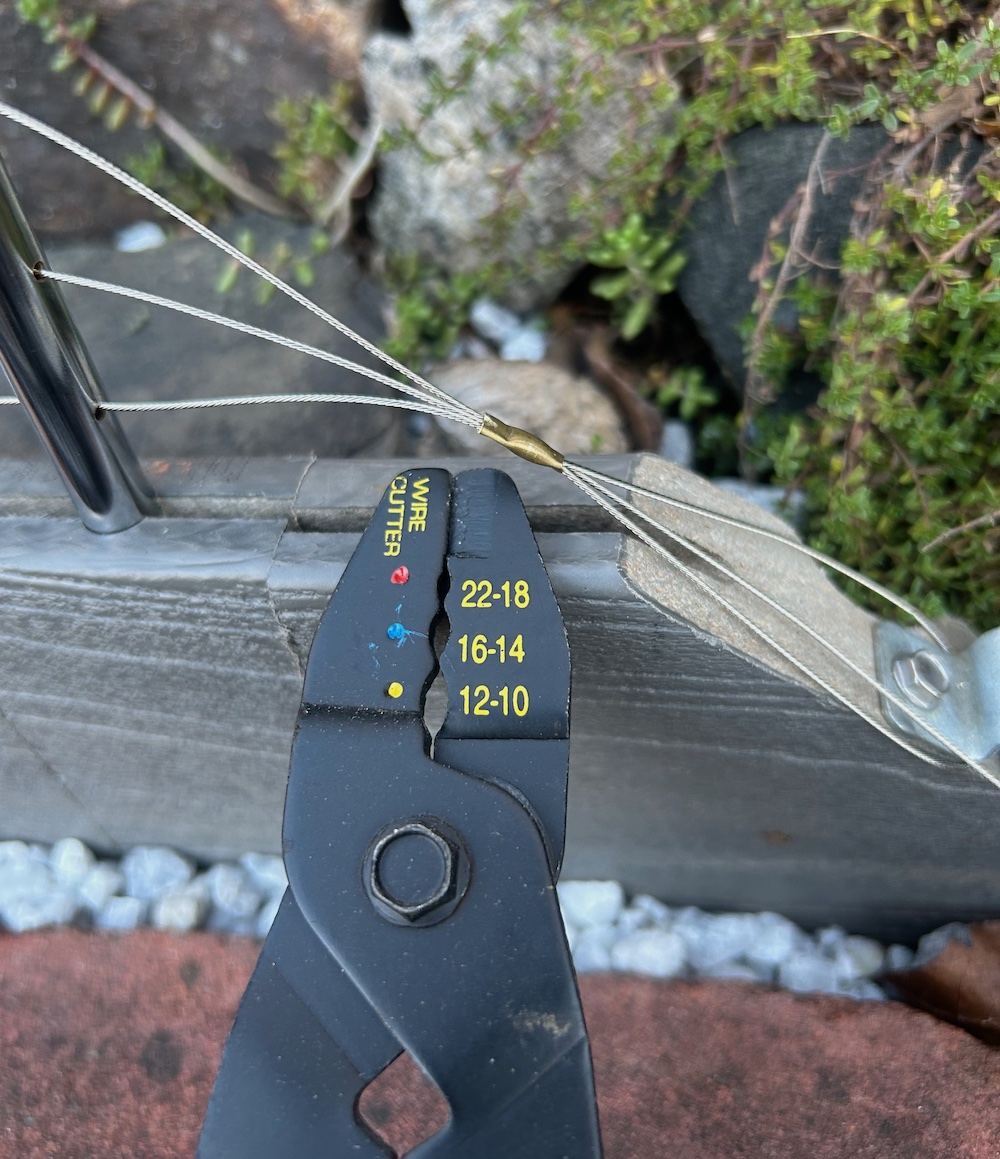
- 1 inch of 1/8” brass pipe (for crimping)
Process
Concrete blocks
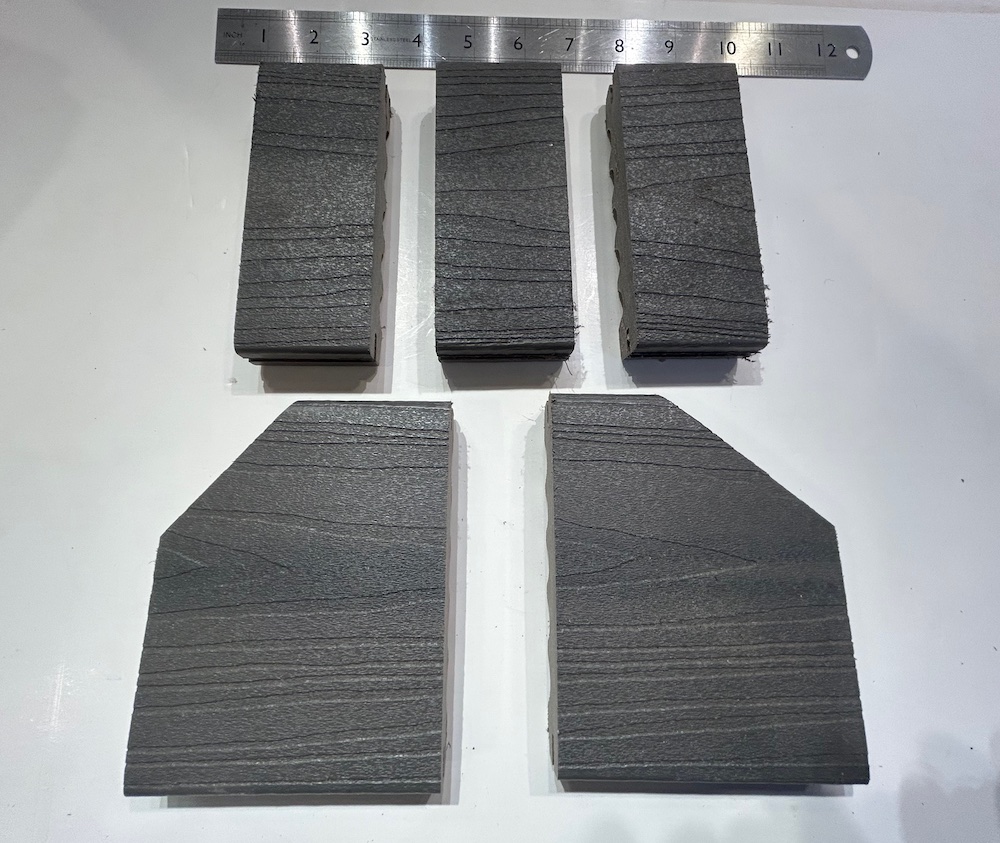
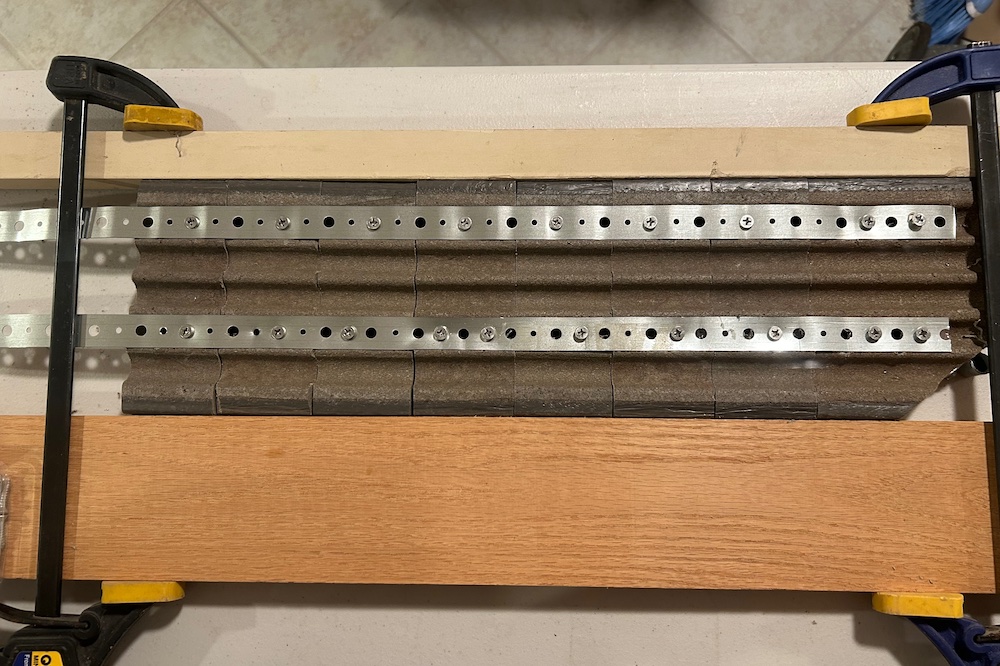
From the composite board, I cut 46, 2” pieces, plus 2, 4” pieces to build the wall (about 8.5 feet long). The 4” end pieces (a left and a right one) have a corner trimmed off to ramp-up and ramp-down the barrier, and to provide a stronger support for anchoring the cable.
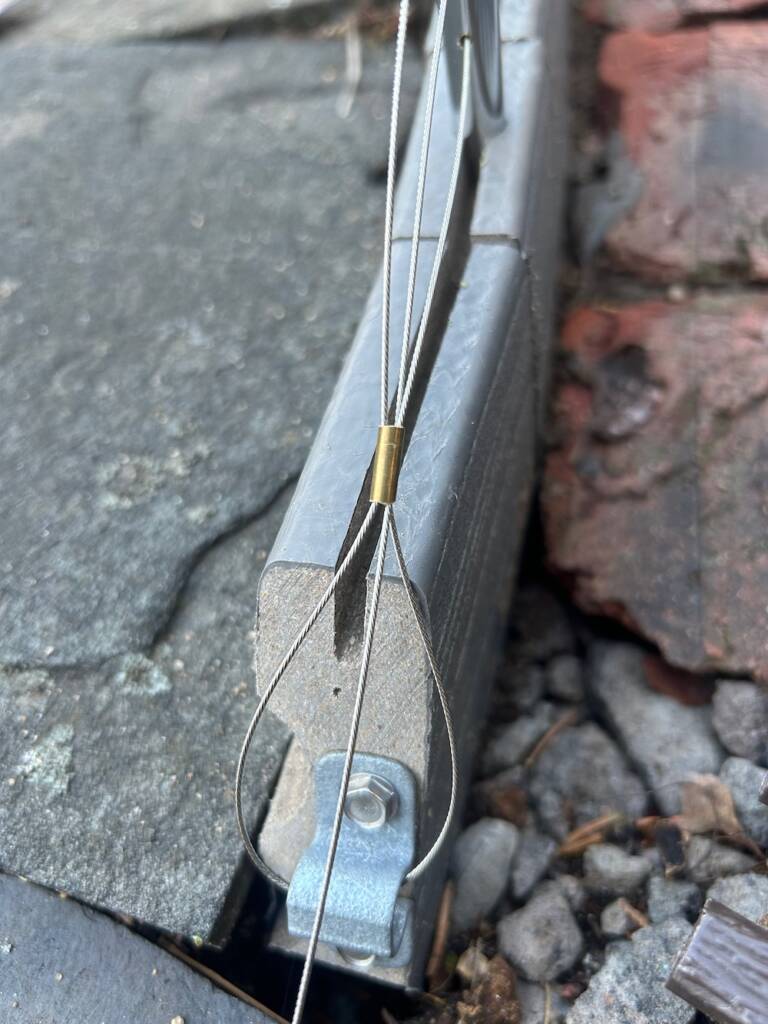
I used two metal brackets (found in my junk box) instead of the eye screws to anchor the cable on the ends.
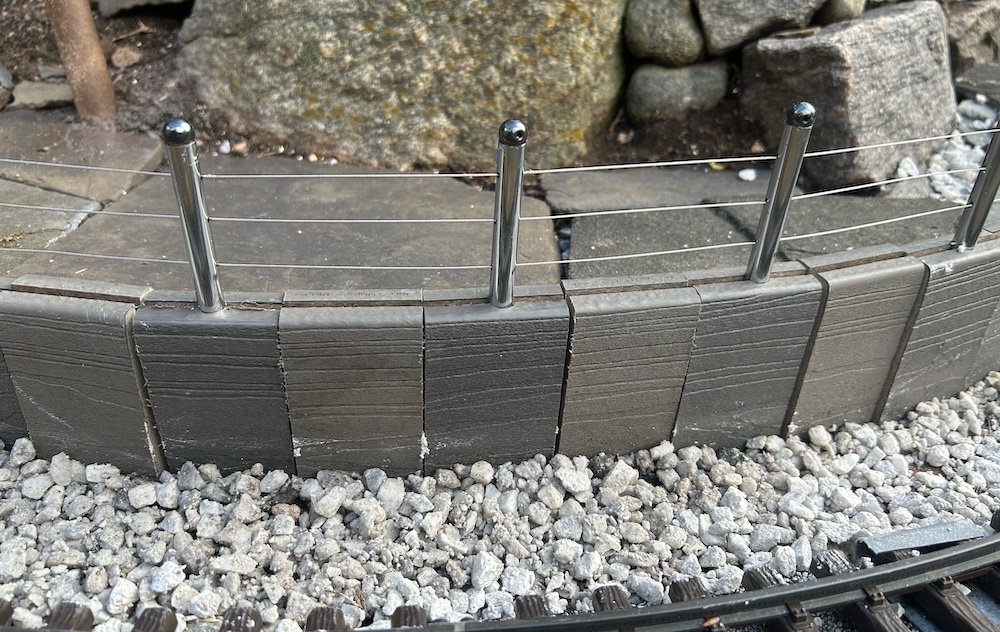
Each post is placed 4” apart on top of the wall.
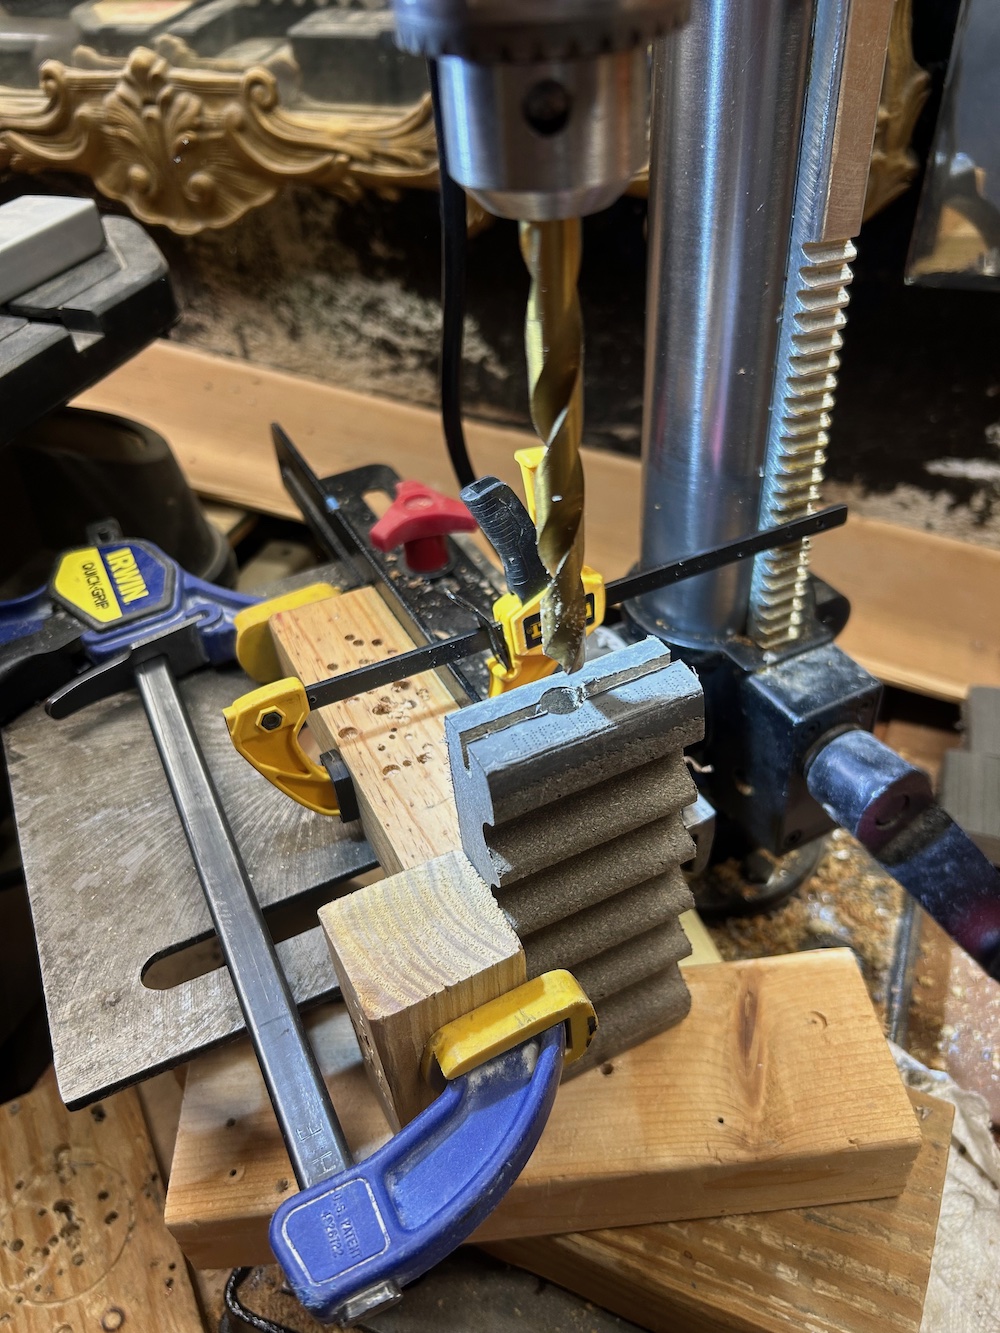
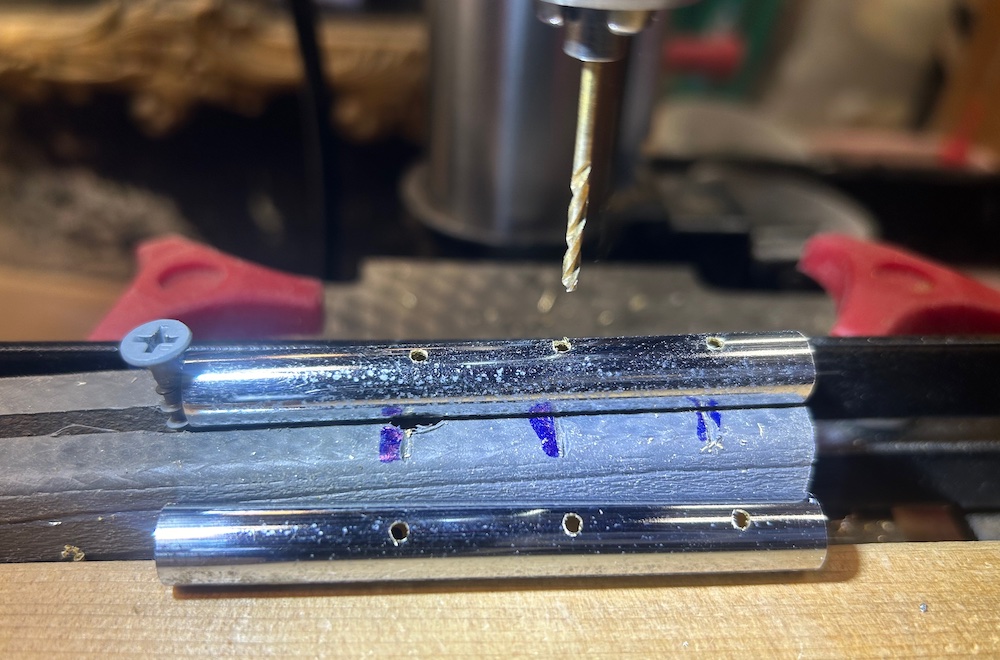
Using a 3/8” bit, and centered on top of each block, I drilled ½” deep holes on 23 blocks for the posts – I call these block/posts. The other 23 blocks don’t have a post.
Posts
Cut 3” long posts from the pipe, and drill 3, 1/16” holes through each post as follows:
- ¼” from the top
- 1” from the top
- 1 ¾” from the top
Retaining wall
The wall is one continuous chain made from 2” blocks, attached to each other with two rows of hanger strap and screws on the back side.
Starting with a 4” piece (remember, both a left and a right piece) of composite board, and followed by a block/post, secure them together with screws to the two rows of hanger strap. To maintain the required 4” distance between posts, alternate a plain block and a block/post. End with a block/post and the last 4” piece.
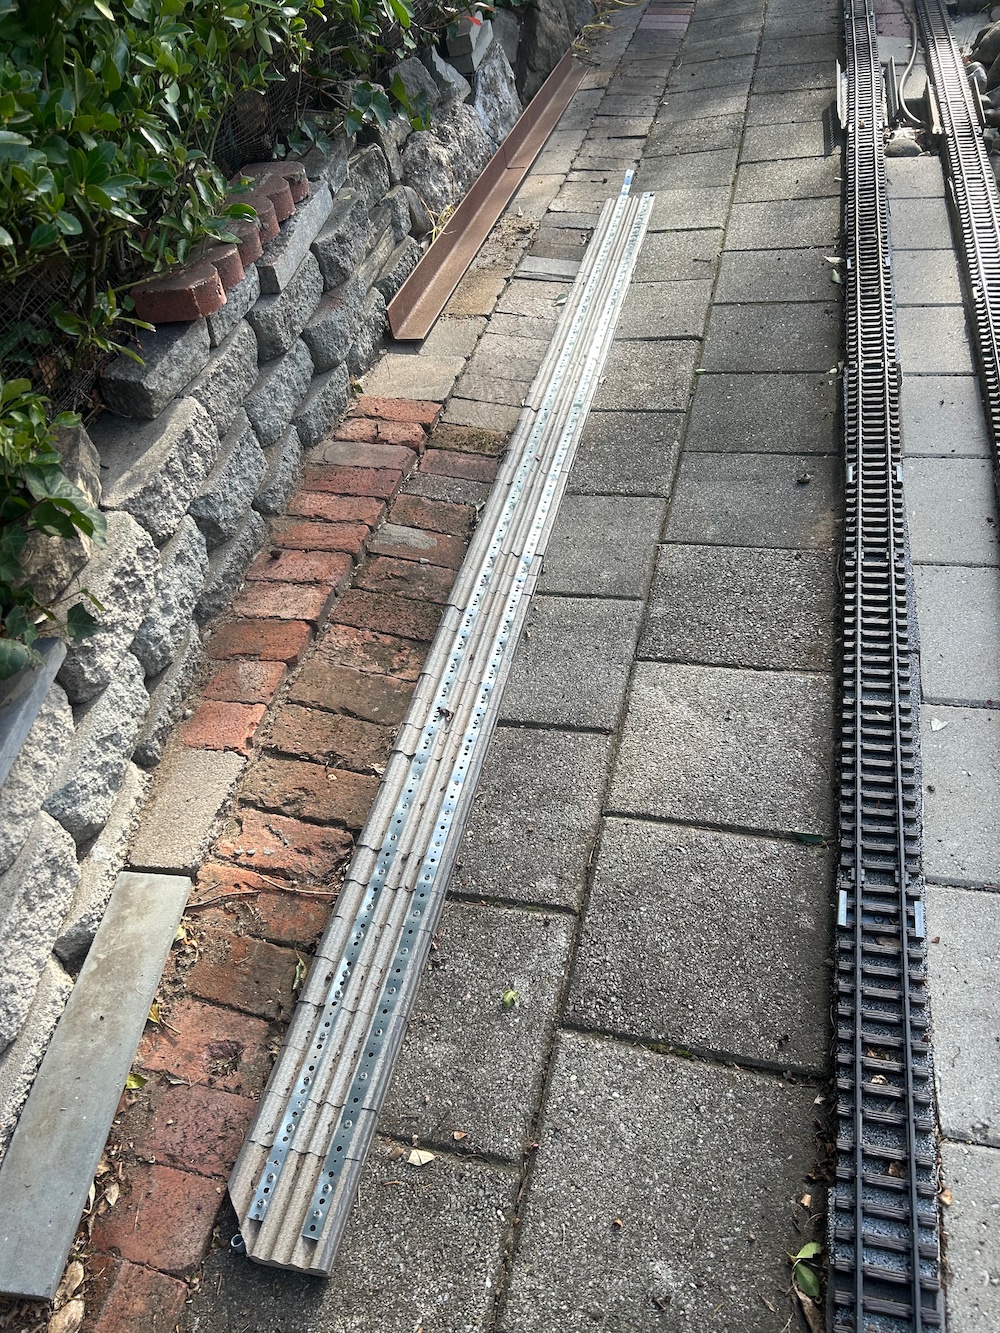
Installing new wall
I removed the old retaining wall and cleared out a 2” deep channel at the wall location.
I “planted” the new wall by backfilling with gravel and dirt on the side of the road, and pieces of brick and fine gravel on the side of the track. Then I replaced the “paving” flag stones on the road side.

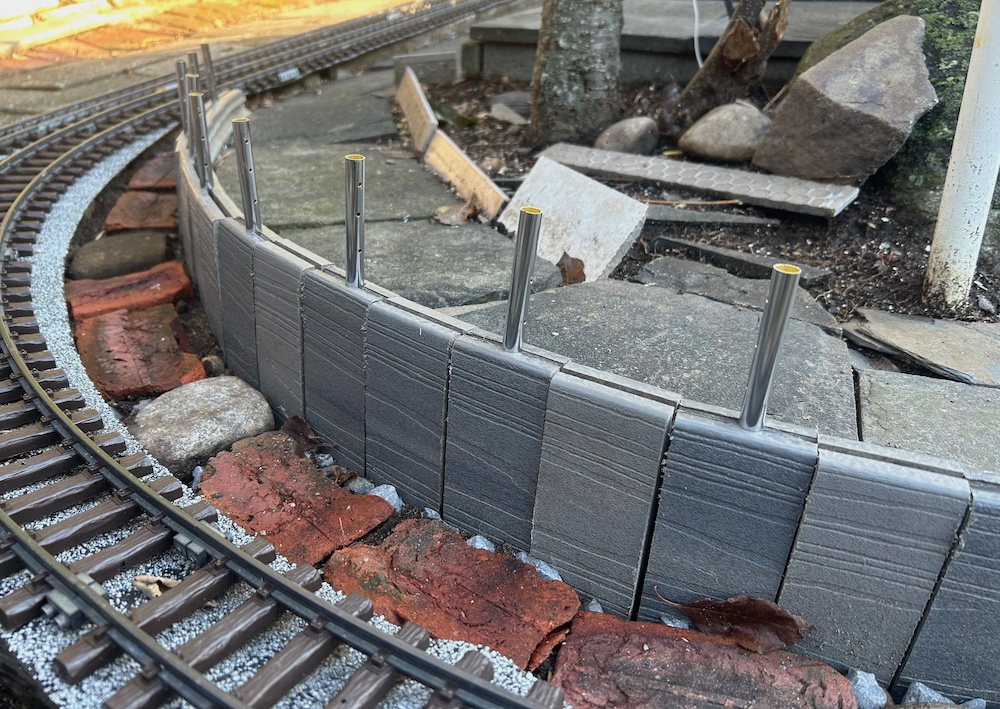
Cable barrier
With the holes of the posts aligned in the direction of the wall, I tapped the posts into the block/posts holes for a tight fit. Beginning with the bottom holes and following an S pattern, I threaded the steel cable through the posts, looping through the retaining bracket at the end of the wall, before threading the middle row, looping the retaining bracket at the other end of the wall, before threading the final top row.
Securing the cables
Cut the 1/8” brass pipe in two ½” pieces and use one piece to crimp each end of the cabling. Make sure all three rows of cable run through the crimping pipe.
I needed an extra pair of hands to help me hold onto one end of the cable while I removed any slack through the fence, and then, while maintaining adequate tension on the cables, I crimped the three cables on one side (using the 22-18 gauge in my crimping tool). I repeated the process on the other end.
Finally, I glued the beads on top of the posts with silicone caulking.
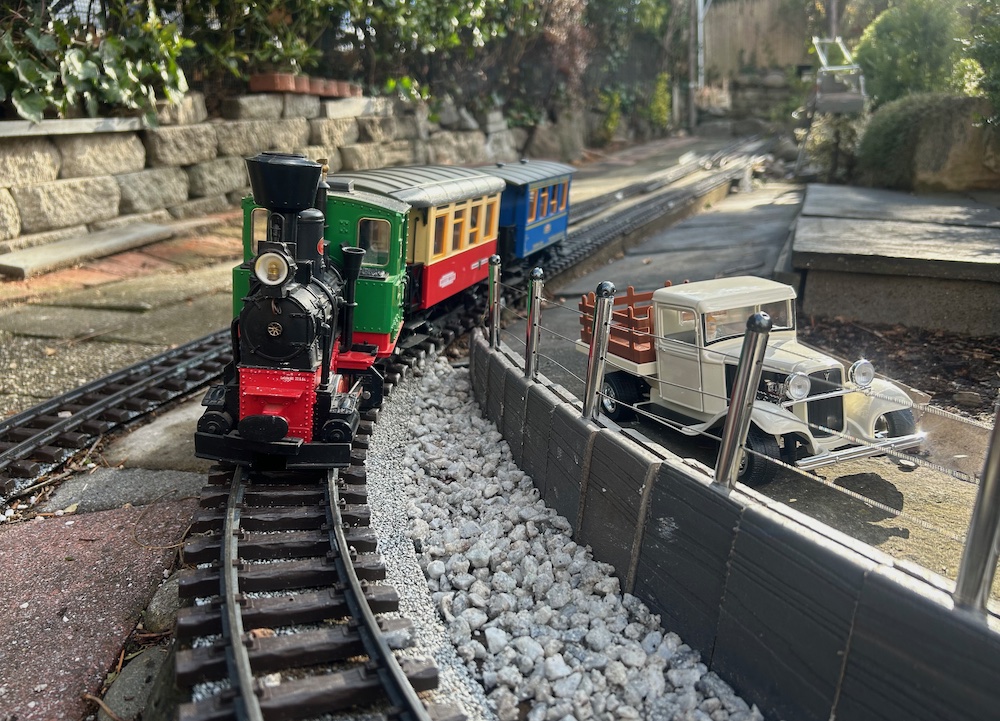
I took a few steps back to admire the completed project. I can see that my new cable barrier not only looks great, but it’s functional as well.
Learn more about using terraces in your garden railway.