


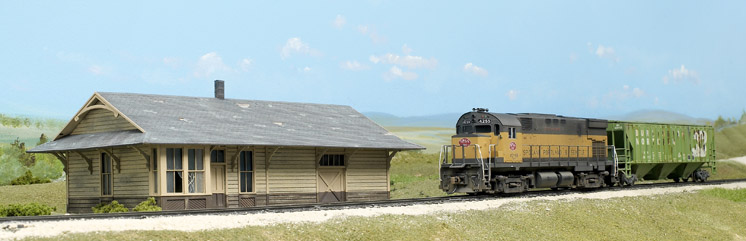
For this project, I used an American Model Builders HO scale Northern Pacific class C depot kit. Though I’ve built structures in plastic, brass, and plaster, I prefer wood for detailed weathering projects like this.
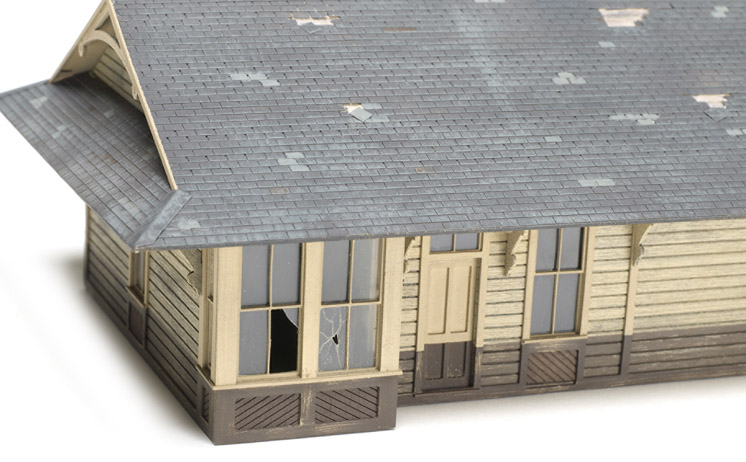
Structure weathering doesn’t have to be limited to just the walls. On many layouts, the roof is the most visible part of a building. Vents, air conditioners, and antennas, among other things, can make the roof visually interesting. Though I didn’t need those details here, I enhanced the depot roof by leaving shingles off this abandoned structure, exposing the bare subroof. I also painted individual shingles to look like patchwork repairs had been made over the years.
You’ll be surprised by how easy it is to turn an ordinary wood kit into one that will get the attention of visitors and members of your operating crew. Give these techniques a try. You’ll like the results.
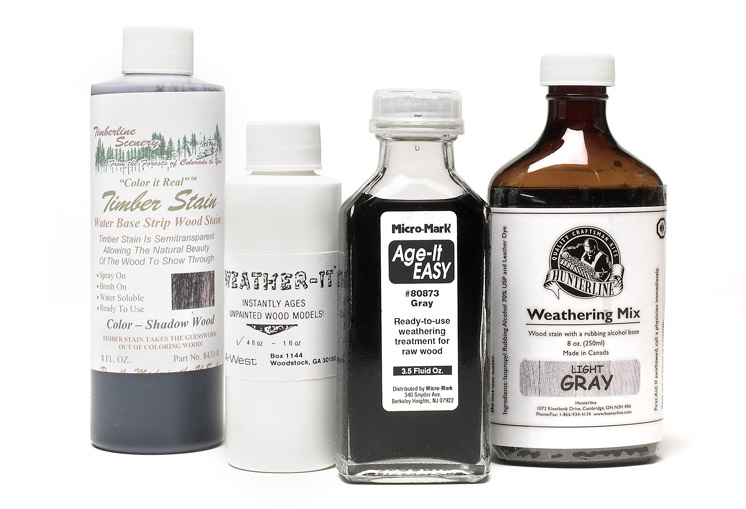
It’s easy to give wood that gray, aged look with stains. Timberline Scenery Co., A-Line, Micro-Mark, and Hunterline, among others, offer factory-mixed stains in a variety of colors. You can use the stains individually or in combination to create different effects.
Another option is to mix your own stains with India ink (available at most art supply and craft stores) or acrylic paint and 70 percent isopropyl alcohol. My favorite mix is two teaspoons of India ink to one pint of isopropyl alcohol. You can make the stain lighter or darker by adjusting the amount of ink. For a warm-tone stain, substitute sepia ink for India ink.
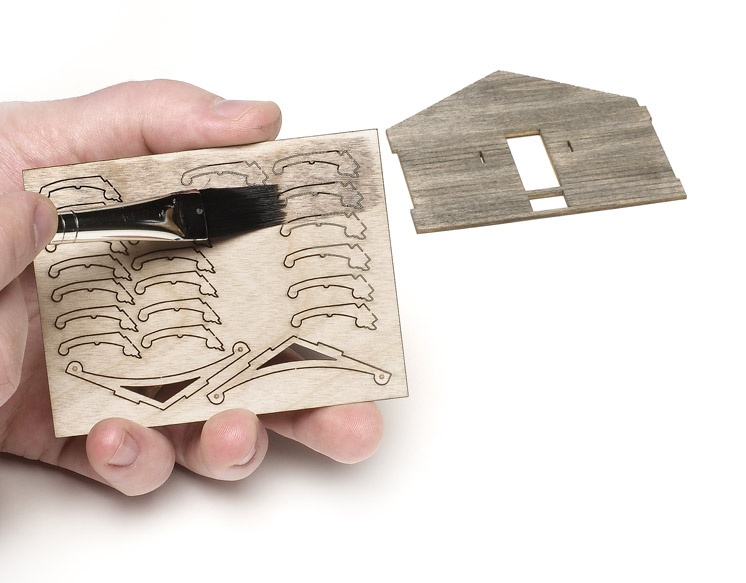
I stained the walls of the NP depot with the India ink wash described in step 1. I applied the wash with a ½” paintbrush, brushing with the wood grain. I used all of the stain on the brush before reloading it. As you can see on the basswood wall section in the background, this technique yields a variety of light, medium, and dark gray planks.
The photo also illustrates how different types of wood take stain. The basswood wall in the background required only one application of stain. I had to apply two coats of stain to the microplywood roof brackets to achieve the same look.
Since 70 percent isopropyl alcohol contains 30 percent water, the India ink wash may warp the wood parts. To prevent this, I laid the wet parts on a flat surface, covered them with paper towels, and laid heavy books on top of them. I let the stain dry for 48 hours.

The depot walls have a milled siding pattern that’s flexible across the grain. To prevent the walls from warping or sagging over time, I braced them from the inside using assorted pieces of stripwood.
Then I masked the exterior walls and sprayed the interior with Rust-Oleum Gray Automobile Primer. Once the primer dried, I painted the interior walls with Model Master Pale Green.
Next, I masked the interior and sprayed the exterior with Polly Scale Sand and NP Dark Brown (three parts Roof Brown, one part Boxcar Red).
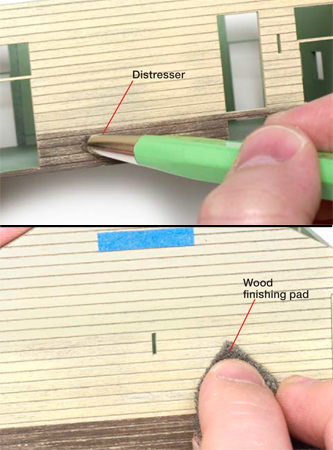
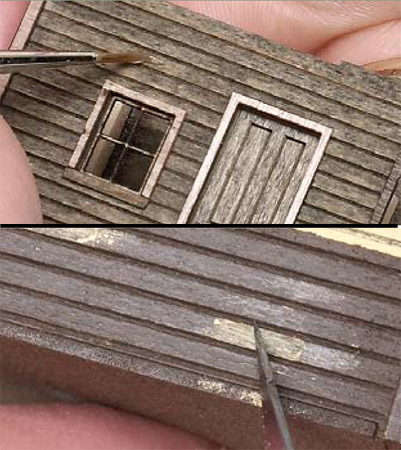
I let the paint dry for 24 hours and then used Micro-Mark’s Distresser weathering brush to scrape off the paint and expose the stained wood. In the top photo, you can see the bristles are exposed about 3⁄16″, which is ideal for heavy weathering. If you prefer a lighter touch, expose more of the bristles.
I used a 3M wood finishing pad (no. 07415) to remove fuzz created by the Distresser brush. In the process,
I discovered that the pad works well for weathering, too. I used it to lightly remove the sand and brown paint, as shown in the bottom photo. I also used the pad to weather the delicate peel-and-stick cardstock trim. Before weathering the building, I applied blue painter’s tape where the station sign would have been.
After I finished using the Distresser brush and wood finishing pad, I applied a final wash of India ink. This stained any bare wood exposed by the Distresser brush and further muted the paint. Once the wash dried, I attached the trim. Don’t apply an alcohol-based wash after the peel-and-stick trim has been attached to the model, as this may cause the adhesive to come off.

I weathered the roof fairly heavily to further reinforce that the depot is abandoned. I started by applying the peel-and-stick three-tab shingles, omitting random patches to reveal the bare sub-roof.
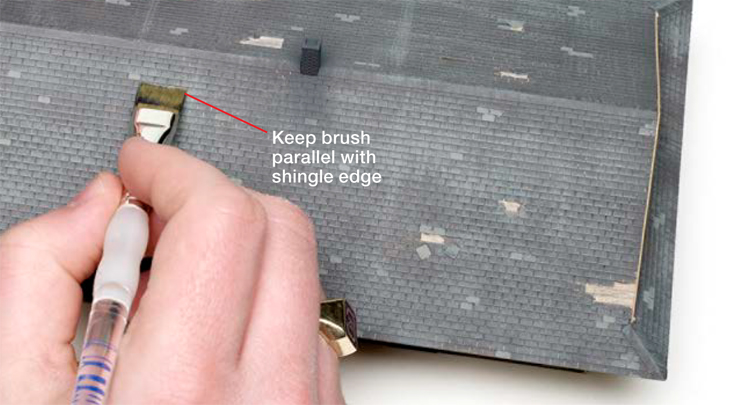
Next, I brush-painted the shingles Polly Scale Union Pacific Dark Gray. I highlighted individual shingles by painting them with the same firm’s Roof Brown and Louisville & Nashville Gray.
I then used a Microbrush to apply Hunterline Light Gray wood stain to the subroof. I applied the alcohol-based stained sparingly so it wouldn’t attack the shingles’ adhesive backing.
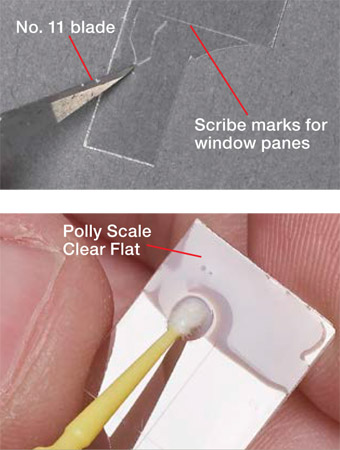
I modeled the broken glass in the operator’s bay using the kit’s clear styrene. First, I marked the locations of the four panes. Next, I cut all but a corner out of the lower right pane. I simulated the shatter marks with a no. 11 blade.
To suggest the windows are dirty, I used a Microbrush to apply Polly Scale Clear Flat on the opposite side of the styrene from the scribe marks. I prefer the Clear Flat over aerosol Testor’s Dullcote as the latter gives the clear glazing a frosted look. My goal was to simulate dirt and grime while keeping the windows somewhat transparent.
It’s easy to simulate peeling paint on buildings with rubber cement masks, as shown on this motor car shed kit from the Northern Pacific Ry. Historical Association (www.nprha.org). Using a no. 0 brush, I applied the rubber cement randomly with the wood grain, as shown in the top photo. I mask individual boards instead of large areas.
Rubber cement masks can be hard to see once the building is painted. It’s a good idea to mark where you applied the masks on the kit’s instructions or on a sketch of the building.
I painted the shed with the same colors I used on the depot. Once the paint dried, I used a no. 11 blade to remove the masks, as seen in the bottom photo.
You can also remove the rubber cement masks with tape or an Art Gum eraser. If you use the latter method, you can rub the eraser over the entire wall and not have to remember where the rubber cement is. Avoid pink pencil erasers, as these may leave stains on the model.


I’ve switched to canopy glue for most of my windows since I love the opaque, wavy “glass” it creates. It reminds me of really old window glass.
This article should be in the paper edition of the magazine. Wood structures have a character all their own. Good job!
thanks for this article on weathering the depot kit. if it were not for you and the guys at MR I probably wouldn't know the little bit that I do know. keep up the great work!