
In each phrase of this project, at least one aspect gave me indigestion through anticipation. I tend to worry about the “how” until I’ve actually done it. With benchwork it was how the legs would fold; with wiring it was how to keep from inadvertently crossing the wires; on the Caliente, Nev., side of the layout, it was how to make the backdrop. I puzzled and agonized over this for weeks. I had no issues like this on the other side of the layout, where the mountains and rock cliffs climbed up the backdrop. But no such luck on the Caliente side. I needed a realistic backdrop for this side of the layout.
Background problem solved
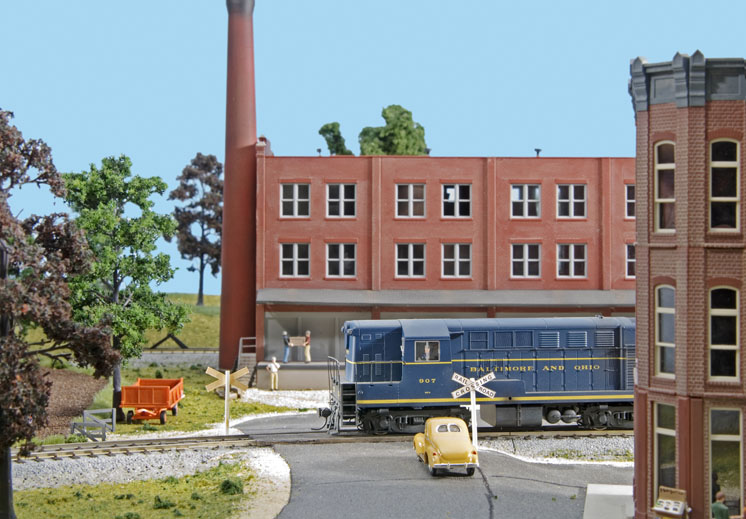
Several options came to mind for the backdrop. I searched through catalogs; I considered asking a friend, who is a high school art teacher, to paint the scene for me; and I ordered a sample of wallpaper border (a pretty interesting idea, but not quite the right scenery). Finally I called Model Railroader associated editor Cody Grivno to ask for input. He recommended I check out BackDrop Warehouse’s Web site (backdropwarehouse.com). Bingo! After some surfing, I found a photographic background I thought would work.
When the heavy-paper backdrop arrived, I rolled it out and held it against the tempered hardboard. Not enough sky and too much hill; the horizon would be above my eye level. I’d hoped to be able to just roll out the backdrop and attach it to the painted tempered hardboard, but no such luck.
So, I got out the scissors and cut a couple inches off the bottom of the roll to lower the horizon. That fixed the horizon problem, but now there wasn’t enough printed sky to reach the top of the tempered hardboard. The only solution was to cut away the printed sky, including the light, wispy clouds I’d have liked to keep. But that’s why I painted the hardboard sky blue.
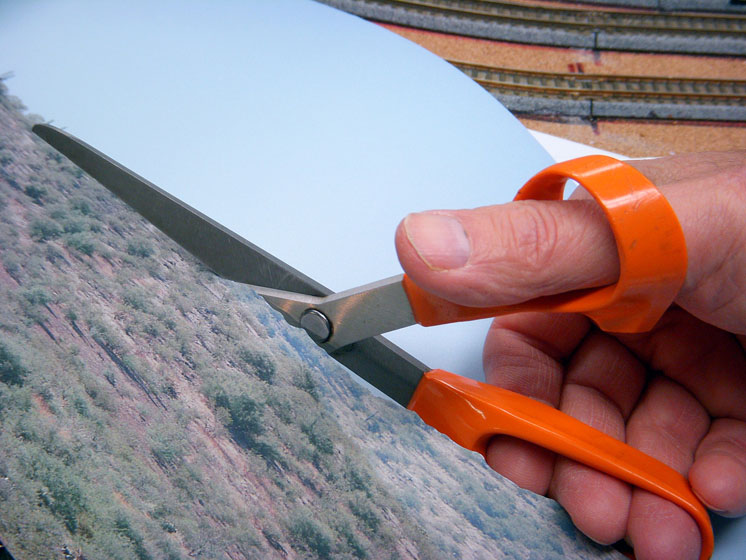
Using sharp scissors, I cut very carefully along the tops of the hills. I zig-zagged where pieces of brush were large enough to save, as shown in fig. 1.
I attached the photo backdrop with spray adhesive applied to the reverse (non-printed) side. I place the backdrop against the hardboard and smoothed it out with a paint roller, applying firm and even pressure.
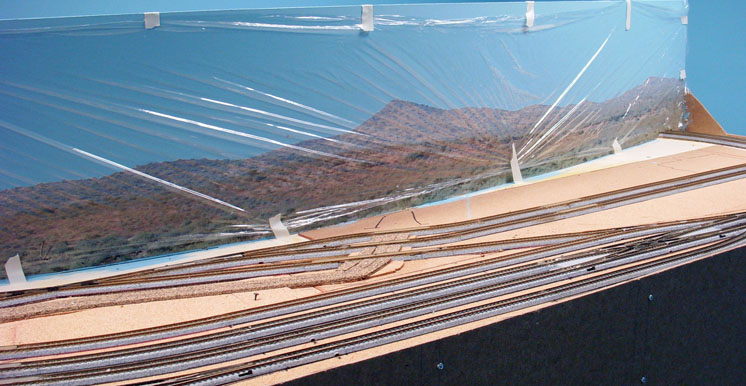
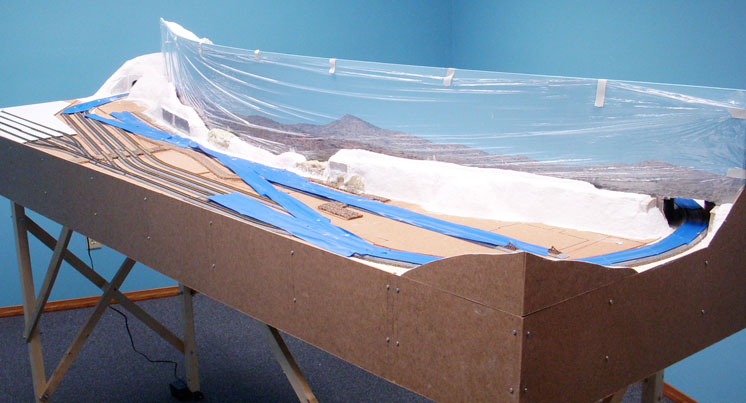
To protect the photo background during scenery construction, I covered the backdrop with plastic wrap held in place with masking tape, as shown in fig. 2.
Roll out the cork
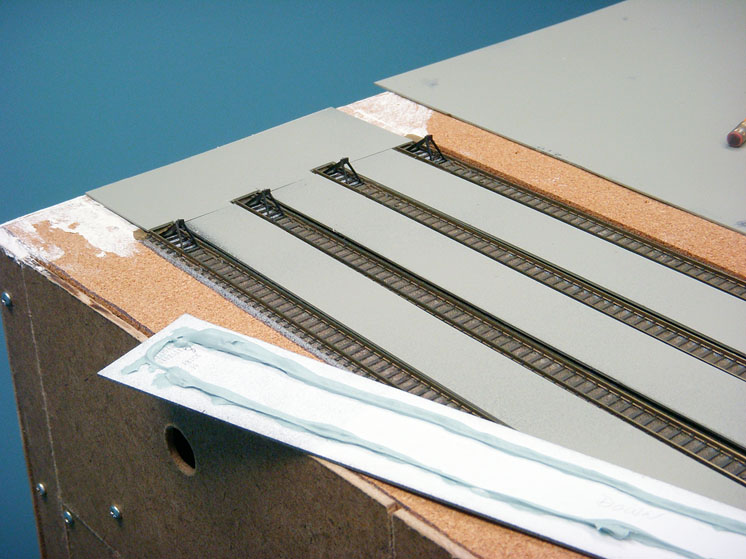
Having cemented cork roadbed under the double-track sections on the Meadow Valley Wash side, I was obligated to raise the main line onto cork at Caliente. However, I should have covered the entire side with cork. I added extra cork between the passing siding and diamond to get the yard office up to track level. I also added cork underneath what would be the enginehouse (using the kit’s floor as a template) and between the tracks in the intermodal yard so I could lay the styrene lot at railhead level. I used cork roadbed with beveled edges for the base of the roads as well.
Hills, abutments, and rocks
As good as the backdrop looks, the point where it meets three-dimensional scenery needed to be concealed. That meant I had to get out the extruded-foam insulation board and carving knife again. I cut long strips of foam to match the curve of the backdrop, spliced in chucks of Noch foam rocks, and glued on a cast-plaster retaining wall where the enginehouse tracks were too close to the hill.
As with the Meadow Valley wash side, I layered pink foam and made a tunnel at the left end (ballasting the track before adding the top layers of foam.) At the other end, I’d planned for a highway bridge to disguise the opening, so I positioned bridge abutments on either side of the track.
Near the middle of the layout, I positioned another bridge abutment to support one end of the highway bridge that would cross over the yard. I covered the foam with a thin coat of Sculptamold, as seen in fig. 3, and used a thicker mix to fill holes and to blend in the rocks, retaining walls, abutments, tunnel portal, and wing walls.
I painted the rock gray, and like I’d done of the other side, I applied black and orange-brown washes. I then added highlights by drybrushing white over the surface. The bridge abutments are gray with a black wash and white highlights.
The rest of the basic scenery on the Caliente side is no different from that of the Meadow Valley Wash side featured in last month’s MR (the May 2010 issue). Here and there I sprinkled on a little fine green foam — especially between the main line and passing sidings and between sidings leading into the intermodal yard — and plunked down a few more pieces of brush.
Highway and bridges
My friend Stener Harildstad envisioned a highway running the entire length of the layout. I liked the idea, but when push came to shove, I didn’t really want to build a 9-foot-long bridge. I opted for the short bridge over the main line at the right end of the layout, a highway from there toward the middle, and a bridge across the yard. The left side of the layout would just be hill, rocks, and retaining wall.
The highway along the top of the hill is .030″ styrene cut to fit the narrow space available. I painted the styrene Model Master Light Sea Gray. Then I used yellow and white medium-point paint pens for the highway markings.
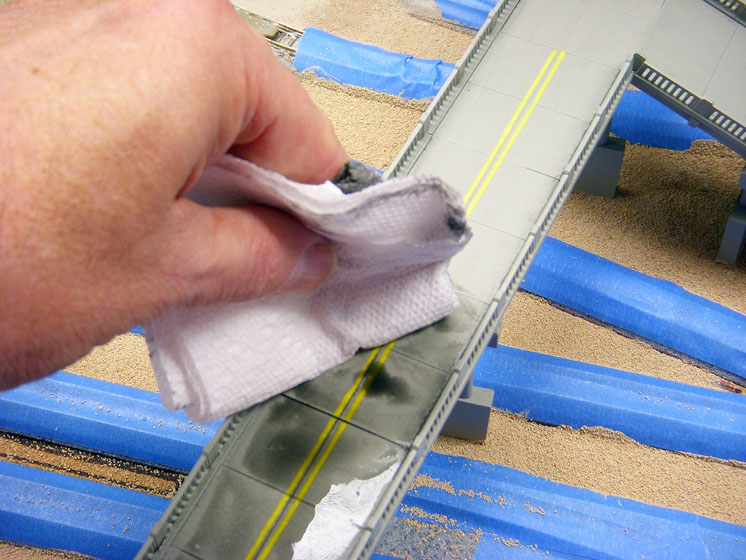
I painted both bridges gray to match the highway and added appropriate road markings. Then I applied a wash of Woodland Scenics Black liquid pigment with a paintbrush. The mixing ratio isn’t critical, maybe 1 part pigment to 10 or 20 parts water. After I applied the wash, I blotted it with an absorbent paper towel, as shown in fig. 4.
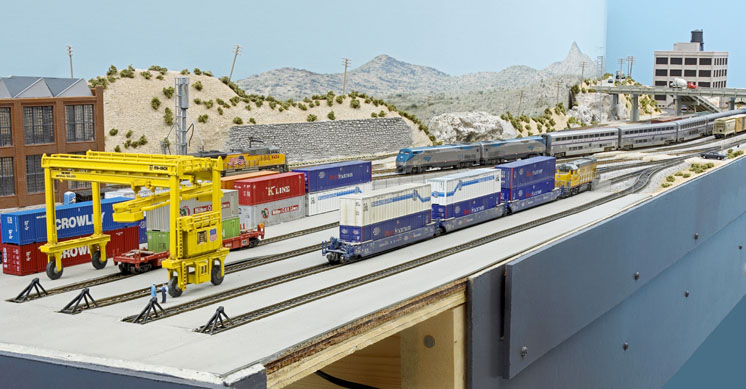
Intermodal yard
The intermodal yard is at the left end of the layout. I used carpenter’s glue to affix strips of cork at the end of the yard and between the tracks. Then I cut corresponding pieces of .030″ styrene sheet to create a concrete surface for the end of the yard and between the tracks.
I primed the styrene and sprayed it Light Sea Gray. When the paint dried, I used PL300 construction adhesive to cement the styrene to the cork, shown in fig. 5. As with the bridge and highway, I applied a wash of black liquid pigment to the intermodal yard lot, wiping it with a paper towel and applying it again until it had the grimy, weathered look I wanted.
Next, I positioned the office at the corner of the yard. My grandson, Elliott, assembled the kit during a visit, and I painted the details (handrails, doors, ventilators, and roof) and weathered it. I also sprayed the structure with Testor’s Dullcote to remove the plastic shine.
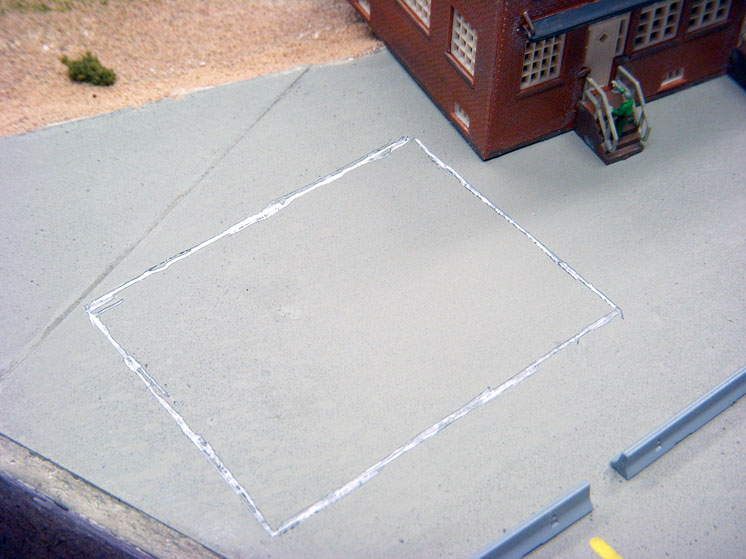
Since I’d already painted the “concrete” part of the yard, I needed to scrape away some of the paint before I could use plastic cement to attach the office, as seen in fig. 6. I also scraped away paint beneath the concrete barriers used to direct trucks in and out of the yard, likewise under the wheels of the trucks and containers sitting in the yard.
I used paint pens to add stop lines for trucks entering and leaving the yard. Though the road markings looked realistic, I was bothered by the shiny paint. Instead of spraying the entire lot with Dullcote from a can, I used the Testor’s flat finish from a bottle. I dipped a paintbrush into the liquid and then touched it to the shiny paint. Voila! When the Dullcote dried, the stripes had a flat finish.
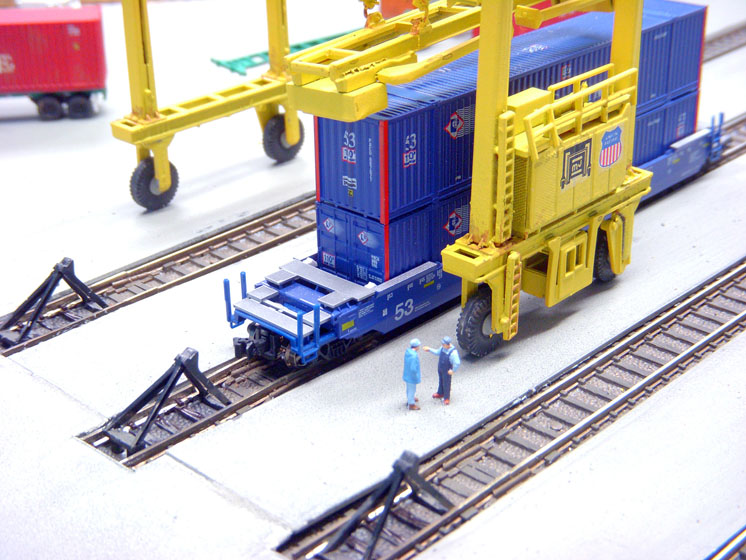
What would an intermodal yard be without an intermodal crane? I assembled an N scale Walthers crane (molded in orange plastic), painted it Model Master Bright Yellow, decaled it, weathered it, and glued it to the layout. I added a couple of yard workers as well, shown in fig. 7.
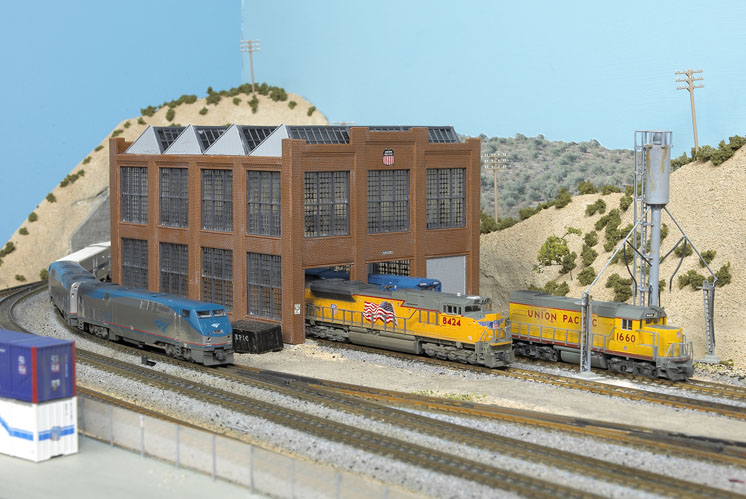
Engine servicing
Though it’s sold as a car shop, I used the Walthers kit shown in fig. 8 as an enginehouse. Prior to assembly, I marked the structure’s footprint and siding locations. I then used cyanoacrylate adhesive (CA) to attach the track rails to the notches in the floor.
The kit has three doors and bays, but adding a third siding would have meant installing another turnout. To add a little interest to the scene, I modeled it as an abandoned siding, by removing the rails and leaving just the ties.
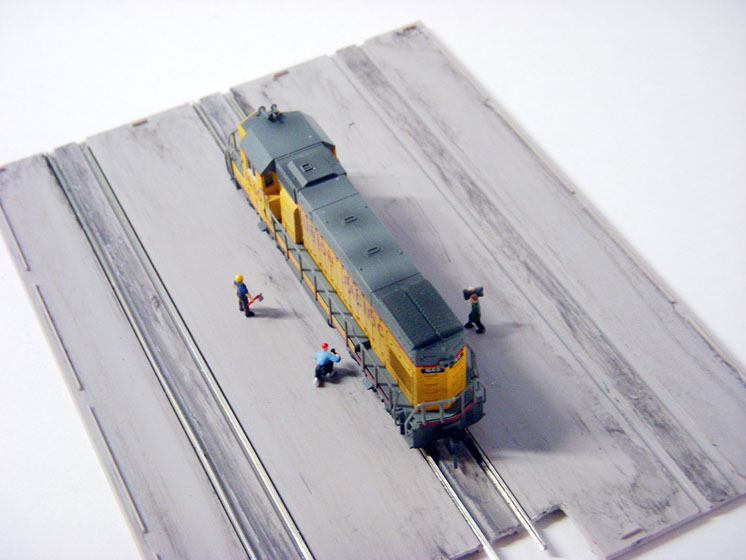
After that, I assembled the kit per the instructions, gluing a couple of workers to the floor before attaching the walls and roof. I wiped on Polly Scale Grimy Black paint here and there and some of it more thickly between the rails to suggest grease and oil, as seen in fig. 9.
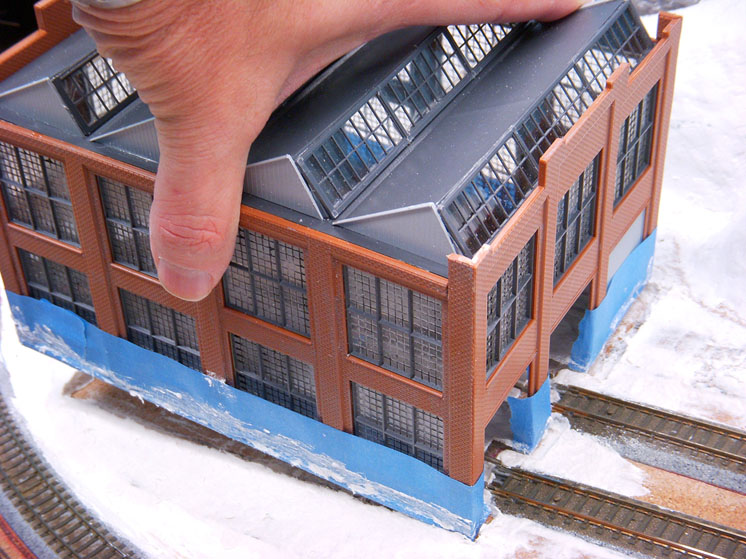
Next, I positioned the structure (note the masking tape around the base) where it should ultimately be. I spread Sculptamold right up to the masking-tape-protected walls, making it a little thicker here and there to suggest ground contour. Then I gently lifted the building, leaving an impression in the Sculptamold, shown in fig. 10, opposite. I set the building aside to let the Sculp-tamold harden before cementing the enginehouse in place with Liquid Nails.
To finish the scene, I added a Walthers sanding tower (complete with white sand from a Florida beach) and an outmoded water column, rusted rails, freight car wheels, and piles of ties. I also added a pile of rusted culverts, some junk piles, and a worker. On the hill behind the enginehouse is a water tank, left over from the steam era, when it supplied the water column.
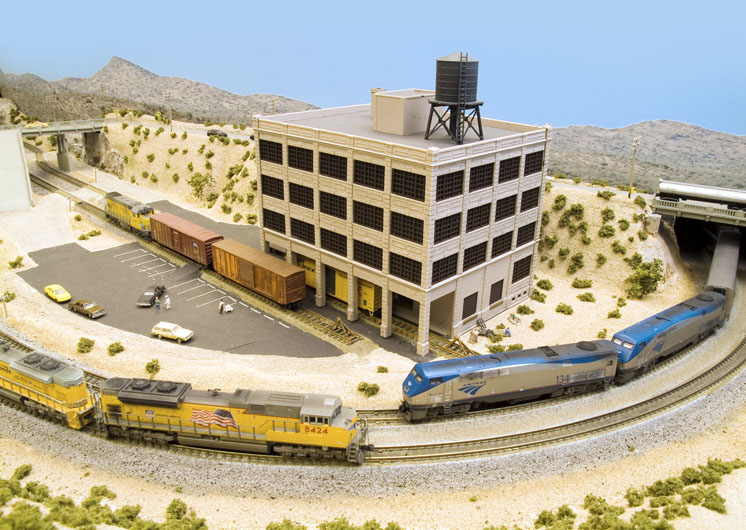
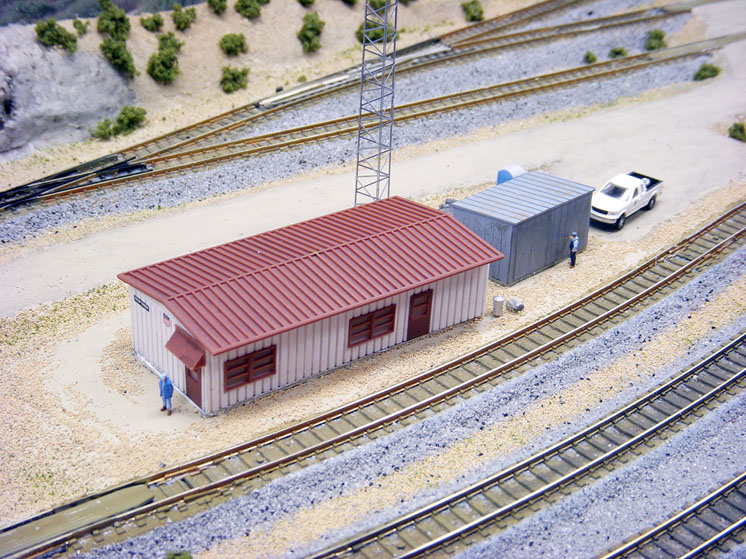
Caliente Yard
The yard scene consists of the office, equipment shed, and radio tower, all BLMA products. See fig. 11. The office and shed are factory assembled, but they’re difficult to attach to the layout. To solve this problem, I cut styrene rectangles (think floors or slabs) that I could cement to the bottom of the building.
One of the neatest structures on the layout, though, is the radio tower behind the yard office. It’s an easy-to-assemble etched metal kit. The tower itself is one piece that needs to be folded twice and cemented together along its length with CA. I attached an antenna on top and several optional small antennae to the sides of the tower. Then I sprayed it with Dullcote to make it look like it’s been outdoors awhile.
Furniture factory
As Stener and I visualized the right-hand end of this side of the layout, we planned for a factory toward the backdrop to provide freight traffic, and a fuel depot toward the front for some tank car movements. As the time came to start working on the scene, though, I realized that the furniture factory is a big building that would need a lot of employees. Where would they park if the fuel business was there? So much for the fuel depot. Instead, I put up a parking lot.
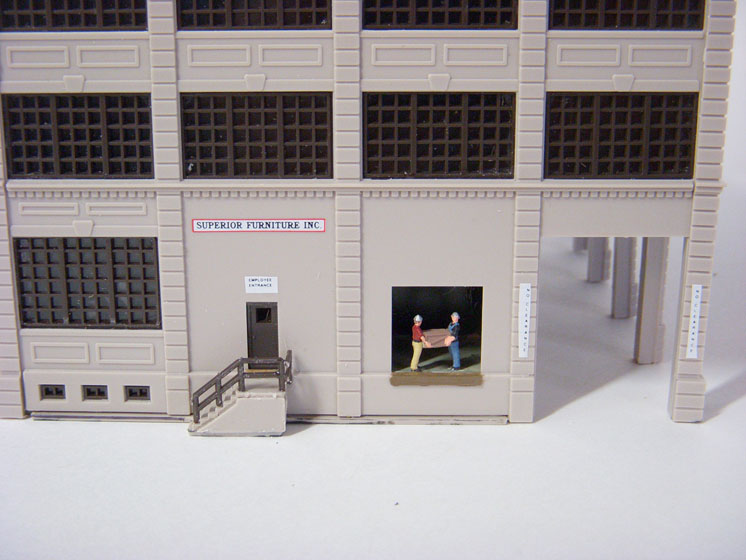
Should you build your own version of this layout, you may find it difficult to locate a furniture factory kit, as Walthers has discontinued it. Nevertheless, I chose it because I liked the fact that the siding and loading docks are covered.
Just before I assembled this structure, I read Andy Sperandeo’s piece in the April 2009 issue of MR on building shadow boxes for loading platforms. They’re simple to build. Just four pieces of styrene with the floor painted a concrete color and the walls black. I added a couple of Woodland Scenics factory workers and some crates and then glued the shadow boxes in place behind the loading dock doors.
With the building nearly finished, I shifted my attention to the parking lot. I used .030″ styrene sheet for the parking lot, pedestrian crossings, and across the sidings to the factory. I painted the lot with Woodland Scenics Asphalt.
With the scene nearly ready for the factory, I finished up the kit. I painted the stair railings and wooden loading dock bumpers, and added decals at various spots on the walls, shown in fig. 12.
Wrapping things up
Nine months after I started the N scale Union Pacific Salt Lake Route, and two weeks after I finished it, MR editor Neil Besougloff and senior editor Jim Hediger arrived from Milwaukee with a van to pick up the layout. Neil and Jim lifted the layout, which isn’t excessively heavy, as I folded the legs up. Then we tipped the layout on its side and carried it through the sliding door of my walk-out basement and into the van.
Since then, people have asked if, having done all that work (maybe 400 or 500 hours), I miss the layout. My response is no. Maybe that’s because it’s only 250 miles away, and I get back to Milwaukee three or four times a year and have “visitation rights.”
Besides, I now have an empty, finished room that I’ll soon begin filling with my own model railroad.