Lionel Trains’ 21″ passenger cars have been a staple in the manufacturer’s lineup of O-scale, 3-rail products for some time. A common censure though has been the lack of previously installed passengers upon purchase, leaving empty seats that need to be filled. From disassembly to reassembly, this project is easier to accomplish than I initially thought. You, too, can find this project easy when installing figures in Lionel’s 21″ passenger cars.
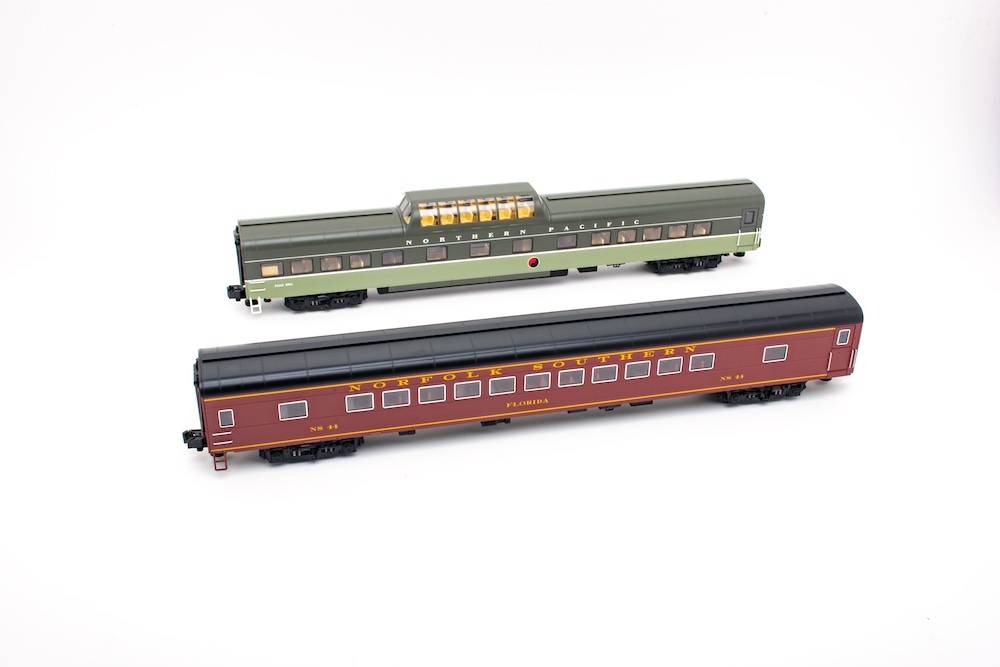
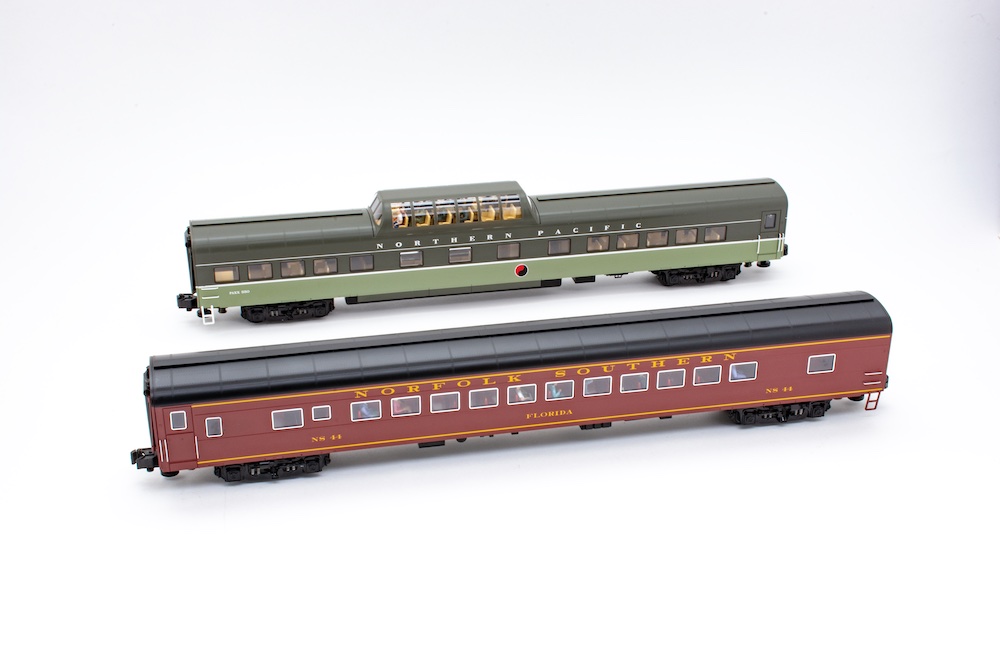
I’m using one of the coaches from the Norfolk Southern Excursion Coach 4-Pack (SKU: 1927200) and a dome car from the NS Excursion Private Car 2-Pack B (SKU: 1927220). These cars were offered in Lionel’s 2019, Volume 1 catalog. While an older set, the basic setup in the body and frame’s assembly has not changed since first introduced.
Disassembly
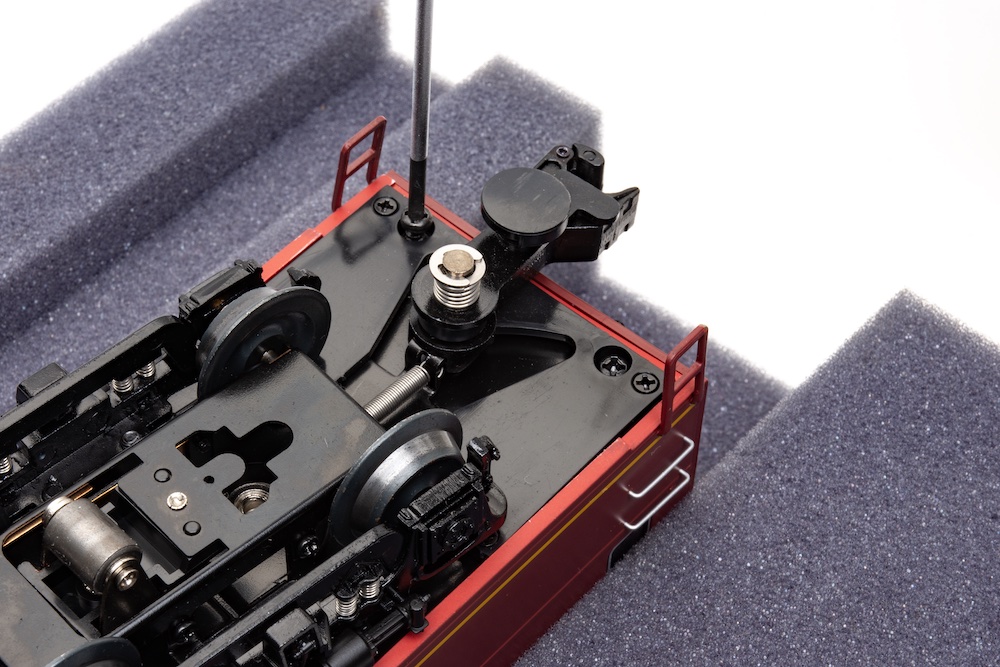
You’ll find two 3×1/2″ Phillips round-headed “body” screws at each end of every coach, diner, and dome car near the centerline, for a total of four screws under each car. (Round-ended observation cars have only three screws, with one being a longer tie bolt at the tail end.) It’s easy to access the screw heads on these cars since there’s little underbody detail in the area. Just flip the car over on a cradle and use a Phillips head screwdriver. A smaller flathead can also be used for a better grip without stripping the heads.
You will also see four smaller Phillips flat-headed screws at each end. These are for the Kinematic coupler system and don’t need to be unscrewed unless you plan to replace the couplers.
Likely, you’ll notice some leftover adhesive between the car body and frame. You’ll need to lightly pry the body’s underside – while taking care not to damage the underbody detail – and gently lift each end of the frame by way of the truck assembly. From what I’ve learned, this process may involve multiple attempts until you can feel the frame lifting off from the body. Take your time.

Once you feel the adhesive loosen, slowly lift the frame from the body. Be aware of the electrical wire found at one end of the car – normally in the vestibule area – spanning from the floor to the ceiling. This is the connection for the LED lighting system from the truck’s pickup rollers. While there is some slack in the wire to simply set the body off to the side and next to the frame, I recommend unplugging it for a full separation. You can then move the body completely out of the way as the frame is now the primary focus, while preventing any damage to the wire. The wire can be unplugged with either a pair of pliers or simply by hand.
Installing figures

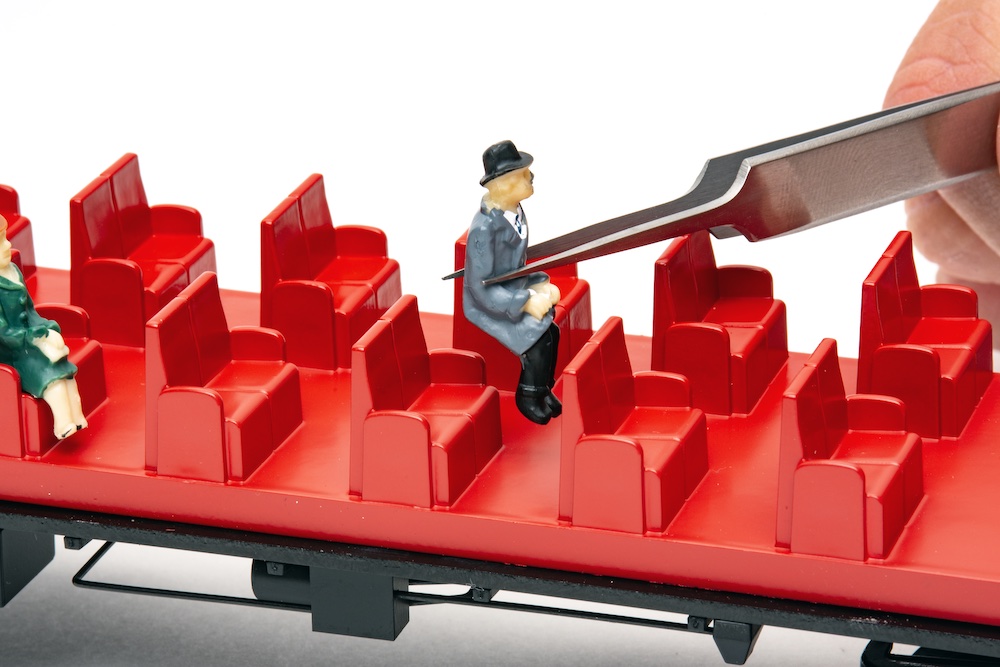
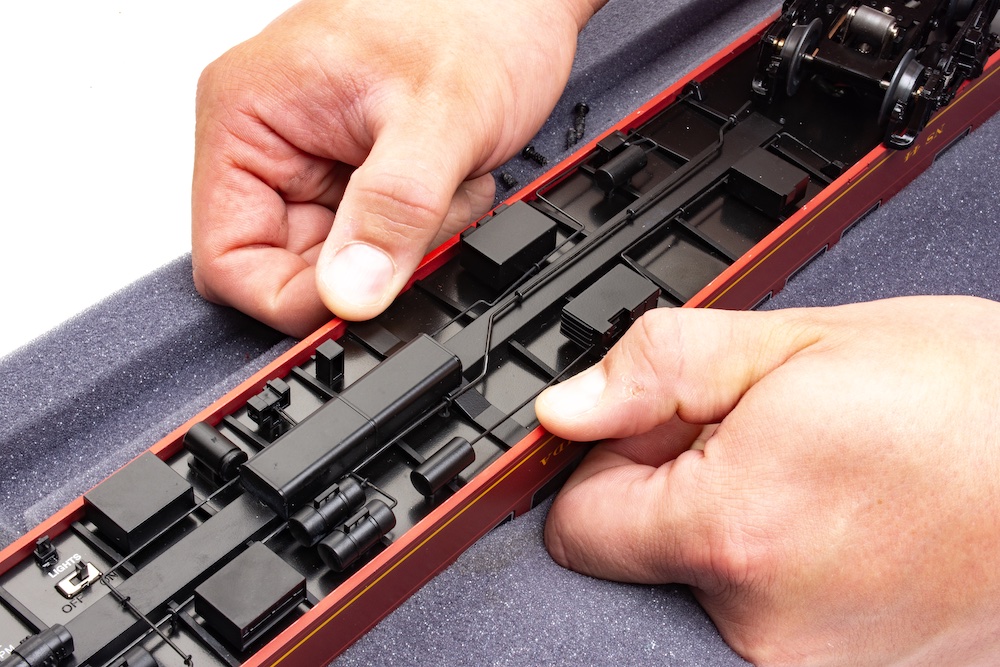
Placing the frame right-side up again, you’ll see the molded seats are ready to be filled with passengers. Multiple manufacturers offer seated figures, including Lionel, Atlas, Golden Gate Depot, and Evemodel. Check out this list of O-scale seated figures being offered:
- Lionel 21″ Passenger Scale Figures Pack
- Atlas O Premier Madison Heavyweight Passenger Figure Sets
- Golden Gate Depot Little People 1930-1950s 36 Detailed Painted Seated
- Preiser O-Scale Seated Passengers Sets Nos. 1 and 2
- Evemodel 50pcs O Scale 1:43 All Seated Painted Figures
- Bachmann Waist-Up Seated Platform Passengers – O Scale
- RTM BEEpeople 48 Seated Figures
- Woodland Scenics Passengers – O Scale
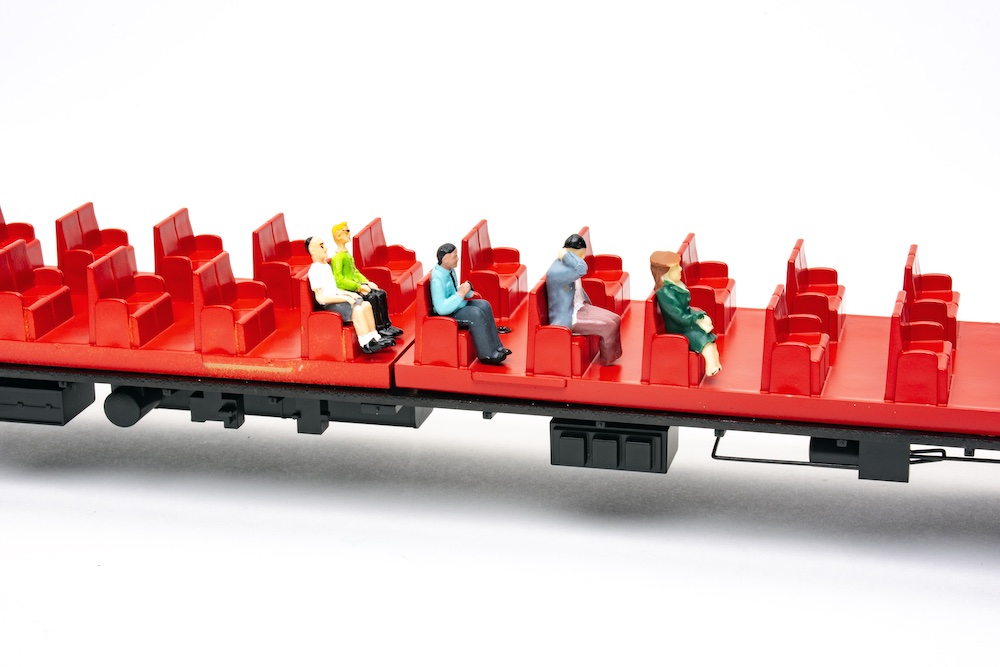
While certain figures will fit like a glove, others may require minor modifications due to their size. This will usually involve cutting the feet and sections of the legs. I’ve used an X-acto knife in addition to a sanding file to smooth out the cuts. Regardless of which figures you purchase and where you place them in a car, keep in mind their size and the possible modifications mentioned when test fitting prior to gluing.
Reassembly
Once you have your passengers seated and secured in place from the dried superglue, it’s time to reassemble the car. First, replug the wire for the LED lights. When beginning to put the body and frame back together, I offer these quick tips:
- Have the body and frame right-side up to lower the former onto the latter.
- Be mindful of the LED wire during the lowering process to prevent possible pinching.
- Take your time.
Once you feel the body lined up and snapped back into place on the frame, flip the car over so it rests in the cradle. The four body screws can then be reinstalled, thus completing the reassembling and overall project.
Domes
Half- and full-length dome cars are also part of Lionel’s 21″ car lineup. While adding passengers in the lower sections involves the previously mentioned disassembly, adding them to the dome section is a different, yet easy project.
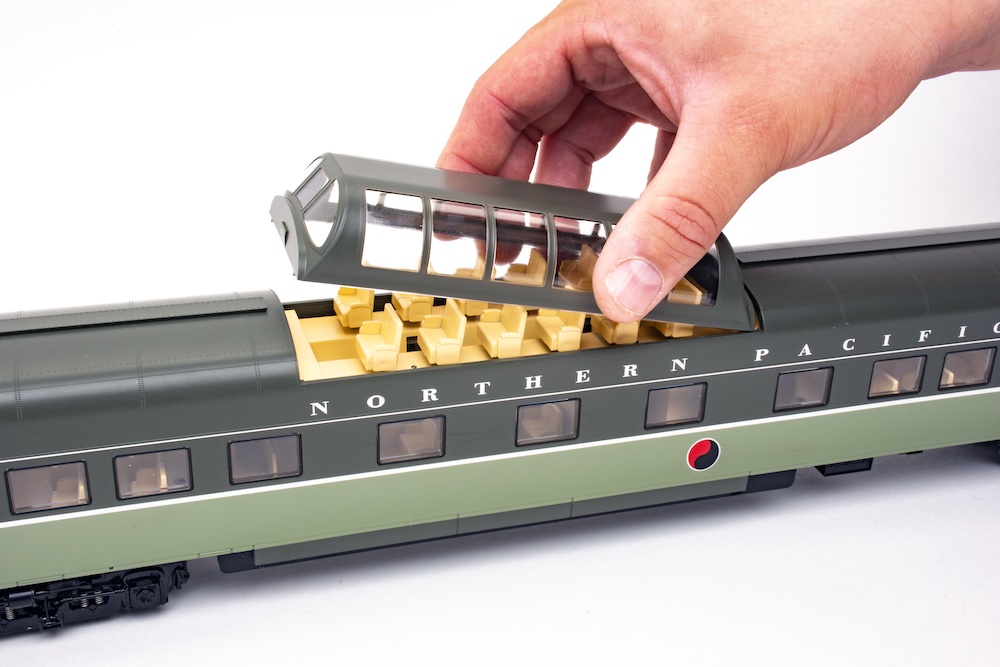
With small tabs molded at each end, simply lift at one end until the dome pops right off the roof of the car body. The seats are then clearly accessible to add your figures. The dome can then be popped right into place.
Breathing life into the interiors
Using just a few tools, you too can add figures to your Lionel 21″ passenger cars. Enjoy your train now filled with passengers that breathe new life into what were empty rows of seats.