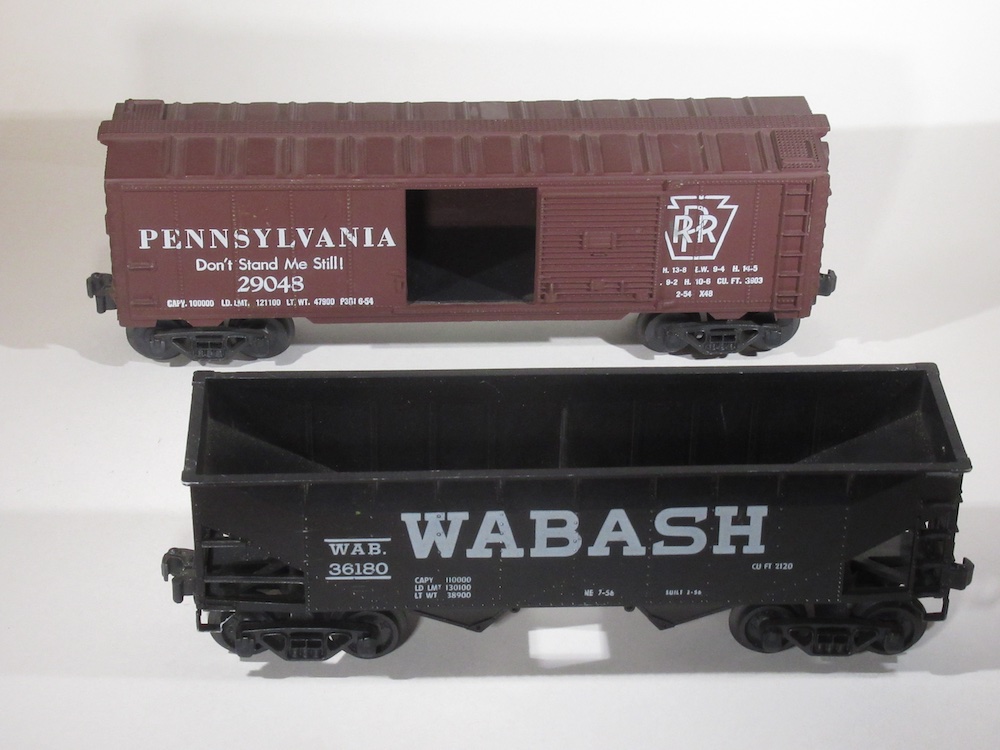
I bought a set of Williams tinplate cars that duplicated scarce Lionel products from the 1930s in an online auction (photo above). I planned to run them on my period layout and was pleased to find the cars to be in like-new condition when they arrived. However, when I placed them behind my Lionel No. 257 locomotive on Atlas 21st Century track, the little engine strained to go forward, spinning its wheels. The cars could be pushed by hand, but only with some difficulty.
I set the cars on a length of Lionel tubular O gauge track, and the cars moved freely. Thinking that the wheel flanges could be rubbing on the ties, I examined them for clearance, and found no interference with the roadbed. However, the wheelsets did not seem to sit evenly on the track.
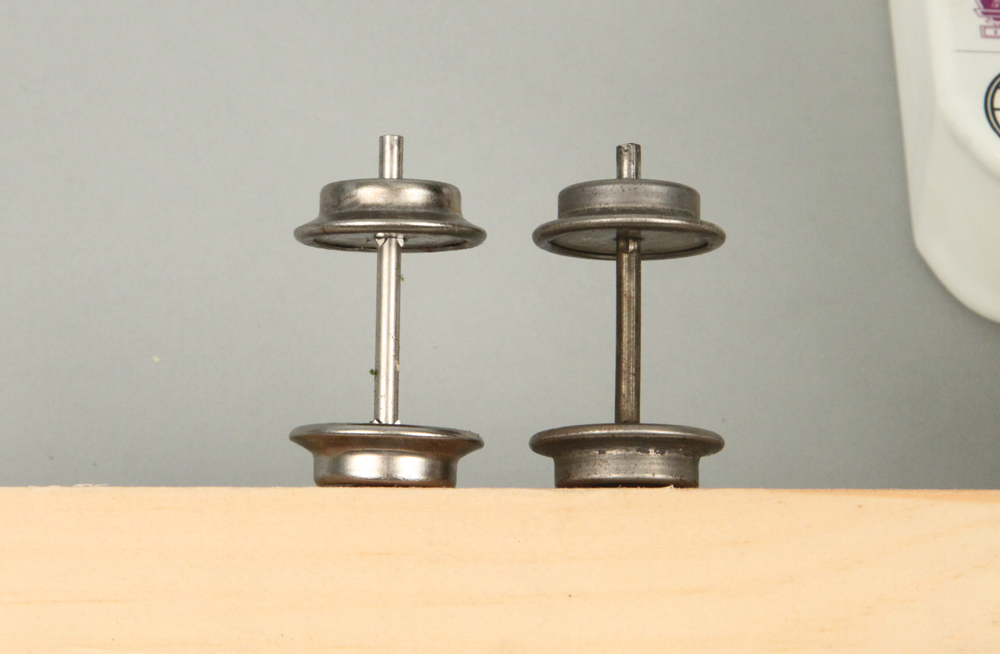
I removed one of the wheelsets by gently spreading the sideframes of one of the trucks. I compared the wheelset with a Lionel product from the 1930s, and the problem was immediately apparent. The wheel stops on the Williams axle (left) were more widely spaced than on the Lionel axle, forcing the wheels too far apart. In addition, the wider curvature of the flanges where they meet the tread of the Williams wheels further compounded the problem, causing the wheels to bind when running on modern T-shaped track rails.
“Gauge” is the distance between the two outside rails of the track, and it must measure very close to 1-1/4” for O gauge trains. The Williams wheelsets were spaced at slightly more than 1-3/8”. The tubular profile of the Lionel track was more forgiving of this discrepancy, as the center of the rounded tops of the rails measured about the same as the Williams gauge. However, the Atlas track kept the wheels from turning easily.
I have encountered a similar problem with other Williams tinplate products, and even with some reproduction axles available from restoration parts suppliers, but rarely to this extent. The difference in gauge on these cars, amounting to more than 1/8” per wheelset, was unusually large, making it almost impossible for a period locomotive to move the cars.
Fix wheel gauge problems
To lessen the gauge measurement (the distance between the wheel treads), I reduced the wheel stops on the axles by approximately one-half, using a cut-off disk in a motorized rotary tool. I angled the cuts to slope away from the holes in the wheels. The axle at left in the photo is uncut. The wheel stops at the left end of the other axle have already been shaped, and the cut-off disk is shown at the correct angle to reduce the size of one of the wheel stops at the opposite end.
Sparks will fly from the cut-off wheel during this operation. These sparks are actually microscopic particles of red-hot metal, so you must wear protective goggles to shield your eyes. Work slowly to prevent removal of too much of the round part of the axle. (In the absence of a rotary tool, you can cut away half of each wheel stop with a small file, but it’s a labor-intensive job that will take a long time.)
Test the wheels on each modified axle before reinstalling them on the cars. If they bind, even slightly, use a file to remove extra material that the tool may have missed. All wheels must rotate freely. Apply a small drop of oil to each wheel where it turns on the axle.
The photo below shows a modified Williams wheelset (left) side by side with an original Lionel wheelset. The distance between the wheels is now identical. Don’t worry if there is a slight variation, because clearances on these old models are not critical, and a small inconsistency in the wheel gauge won’t cause any problems.
If you love the look of vintage trains but are reluctant to risk wear and tear on original examples, consider acquiring reproductions from such manufacturers as Williams and MTH. Even if they should require some modification to work well, a little effort will yield substantial rewards in operating fun.
Learn more about scale and gauge: https://www.trains.com/mrr/beginners/model-train-scales-explained/