Lionel prewar locomotive parts are readily available these days, allowing you to return your vintage motive power to the job.
One of the great things about old Lionel engines – even really old ones – is they generally will run, even after decades of disuse. This prewar 252 electric, made in the early 1930s, is a prime example. It came to us as part of a collection a co-worker had inherited.
I could tell this engine had been run a lot. The paint was chipped in spots and some parts were missing. The biggest issue with it, though, was the pot-metal wheels had cracked and split, totally locking the mechanism. This “zinc pest” is common with trains and other items of the era.
My goal wasn’t to restore this engine, but merely to get it in running shape. The techniques I use here aren’t unique to the 252. They are applicable to many Lionel steam and electric profile O and Standard gauge engines of the period as there were similar and shared mechanicals underneath the bodies.
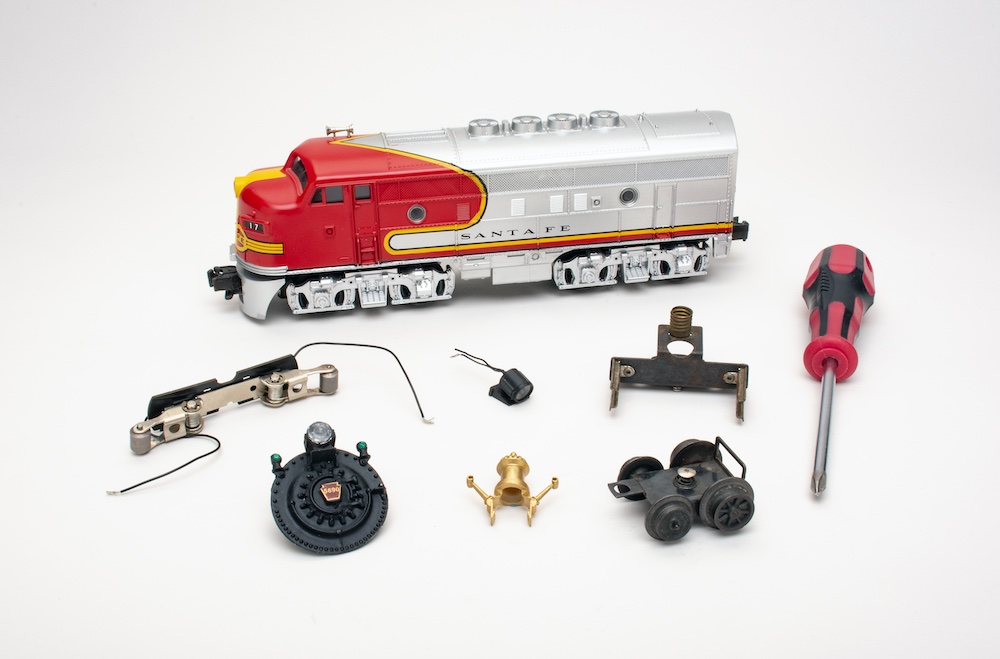
With new parts, a few hours work, and basic tools, you can return one of these engines to the rails in operating condition.
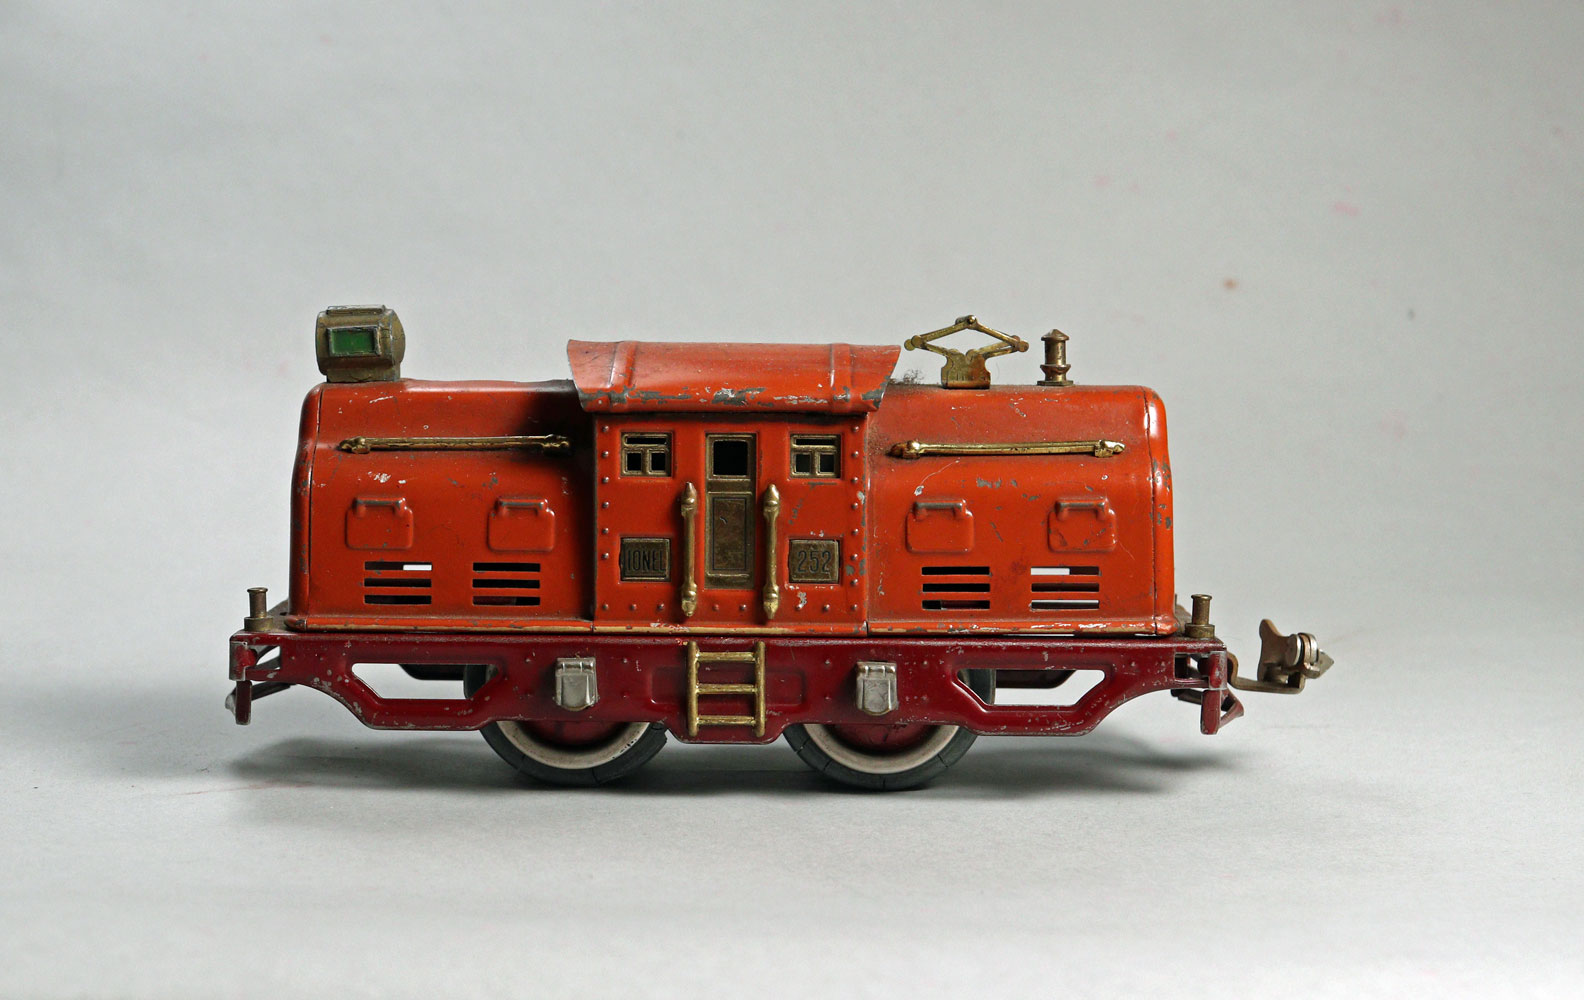
As we received it, the 252 had chipped paint and a few pieces missing, including the front coupler. I didn’t worry about it as I only need the rear one. The condition tells a story of its own and shows how much it was played with.
The bigger problem with the engine is the wheels. They suffer from zinc pest and their cores have swollen and split. As a result, the mechanism is locked up.
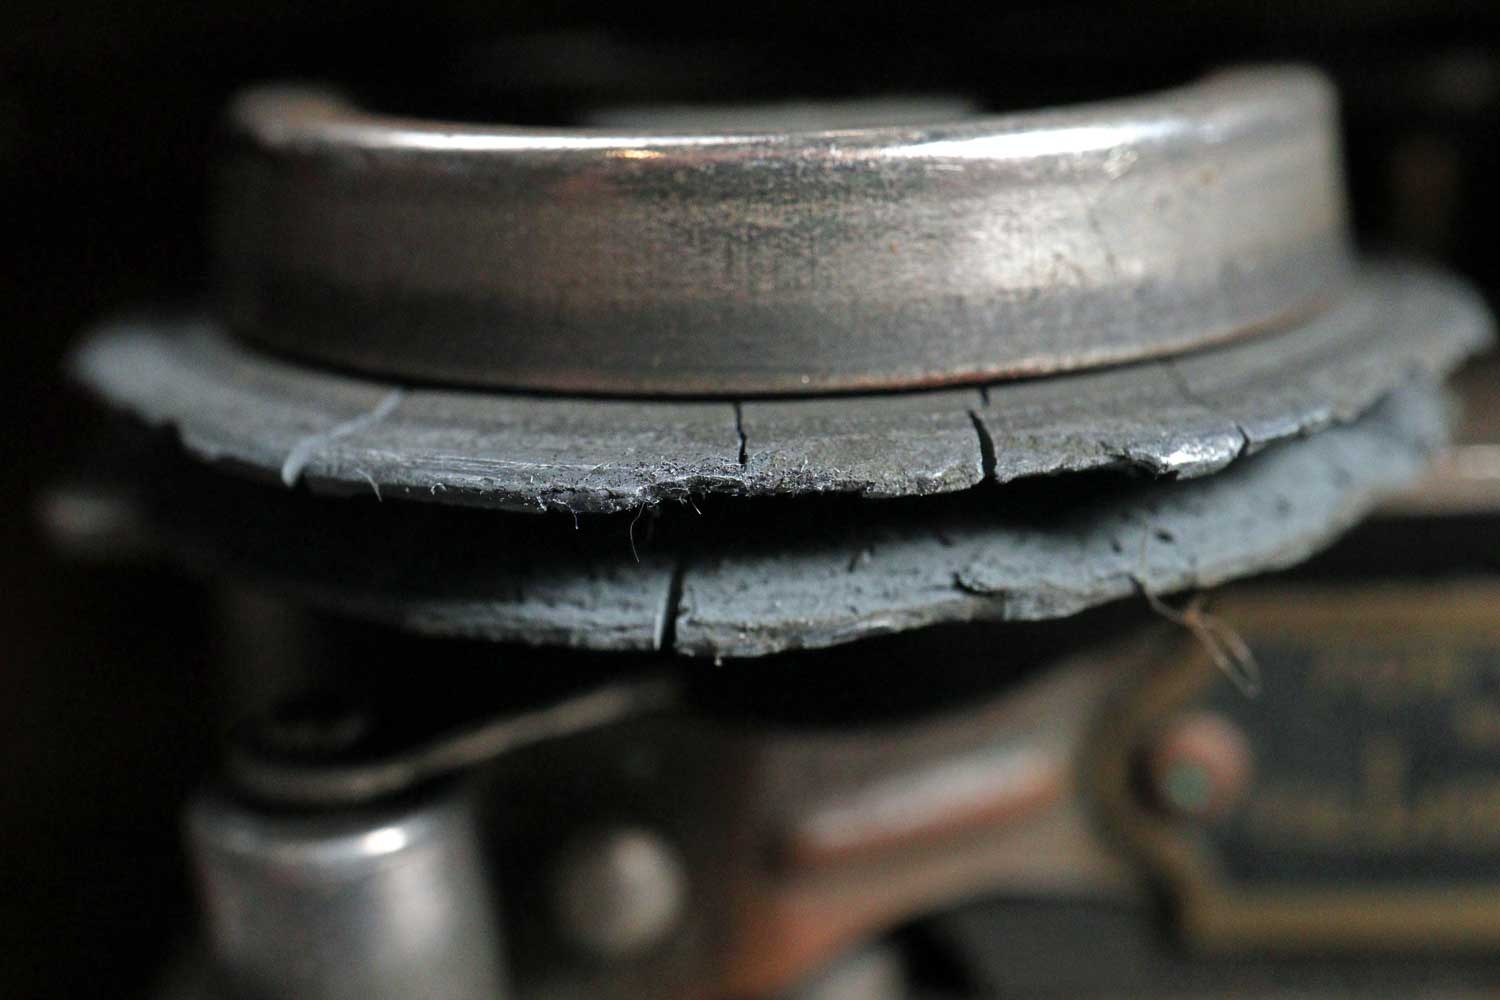
A closer look at the wheels reveals the core made of pot metal way beyond its expiration date. The flanges crumbled as I handled it. A ferrous metal cap on top makes it electrically conductive.
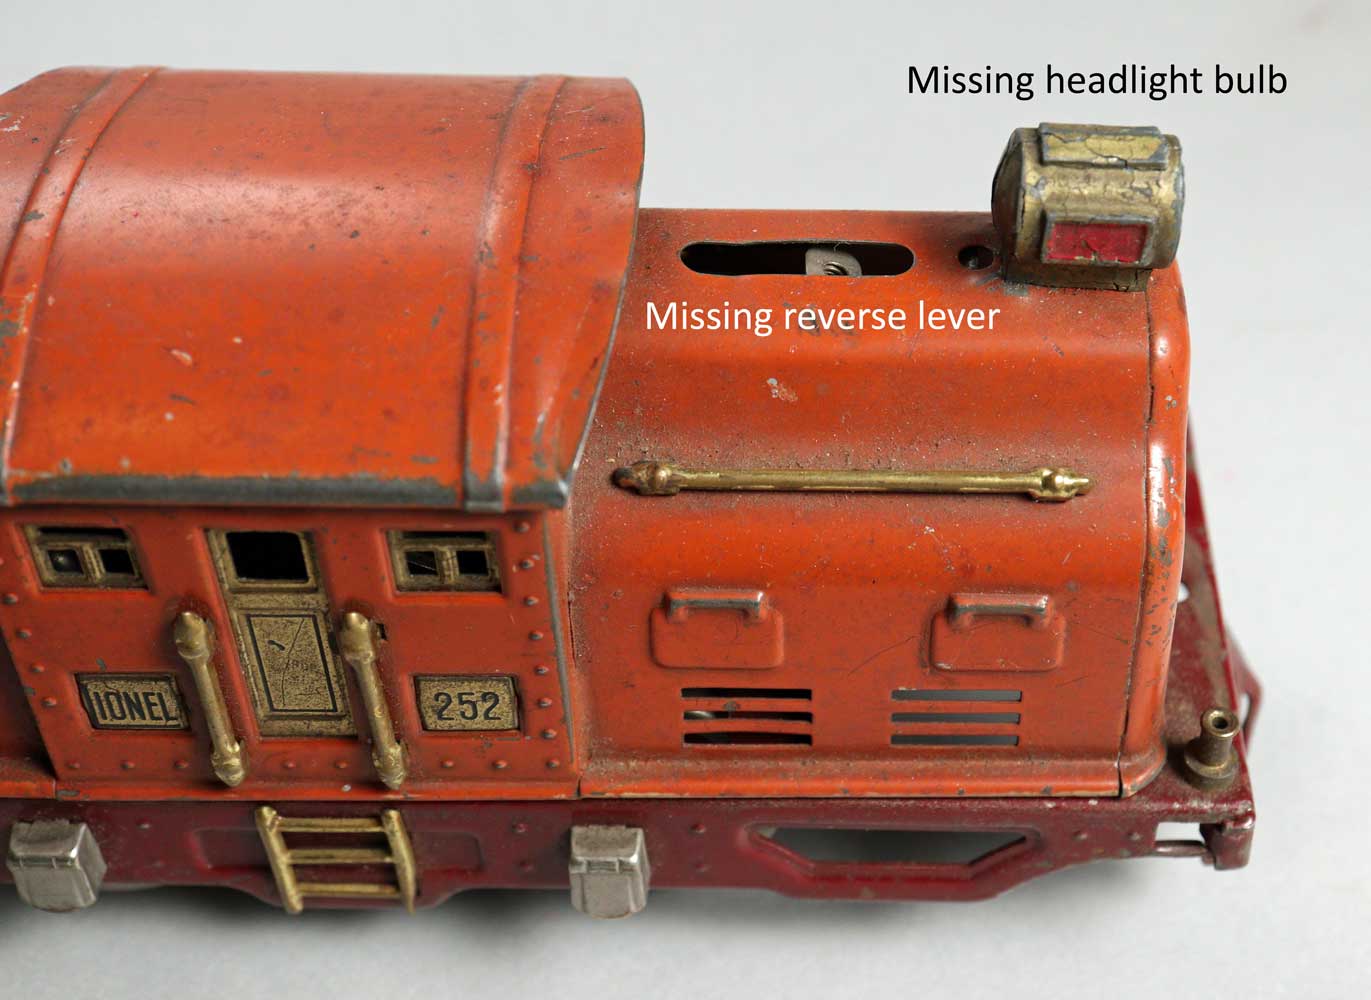
Important missing parts included the 18-volt headlight bulb and the lever for forward and reverse. These engines had a manual “controller” rather than an E-unit for changing direction.
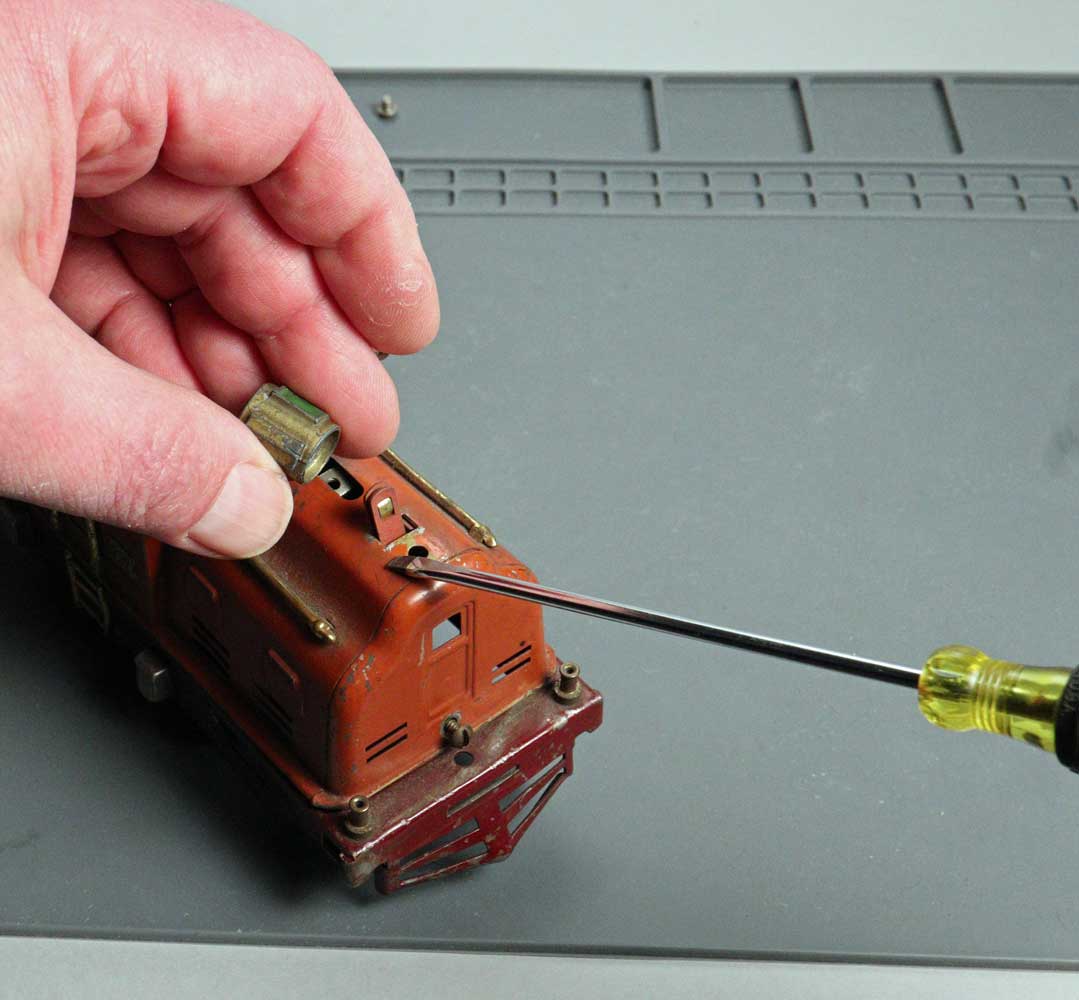
The first step is taking the engine apart. To start, remove the headlight housing screw underneath the hood and slip the bulb holder off. Put all small parts aside in a safe place.
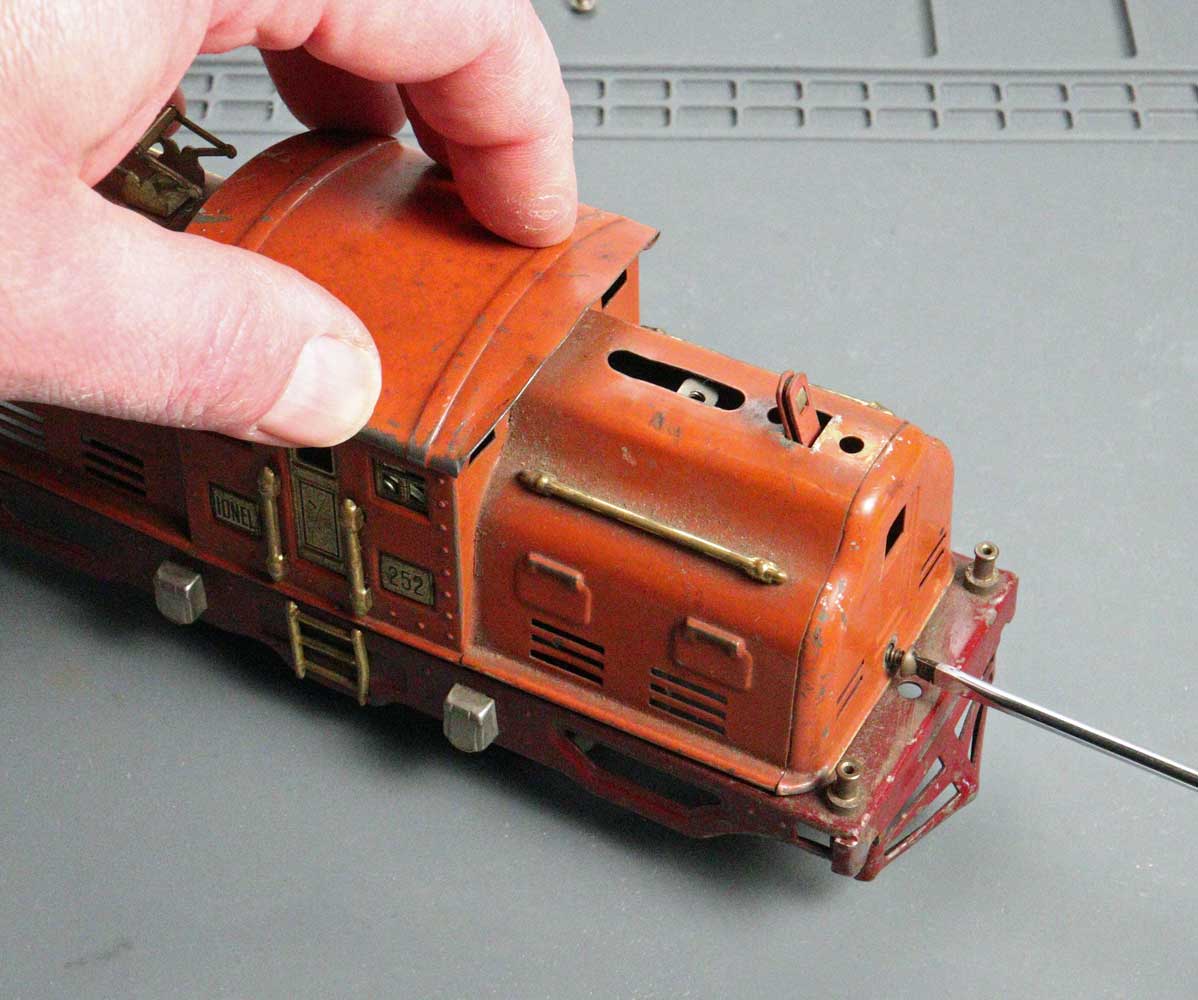
A small screw at each end holds the body to the frame. Use a flat-bladed screwdriver to remove them.
After slipping the body off, it’s time to remove the frame from the motor. Four screws attach them; remove and slide the pieces apart.
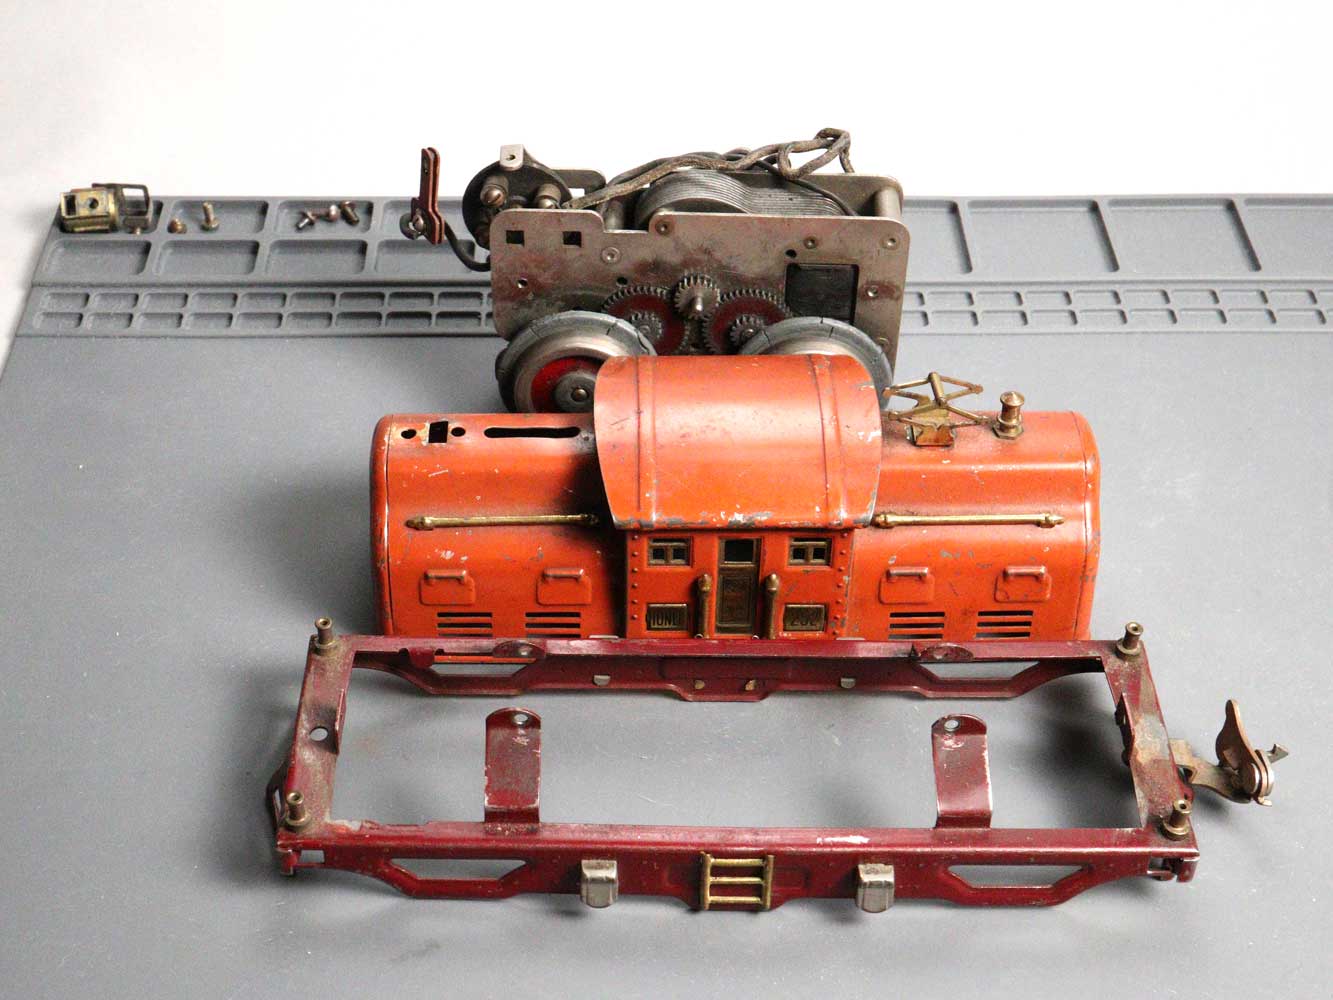
At this point you should have three major components. Set the body and frame aside for now.

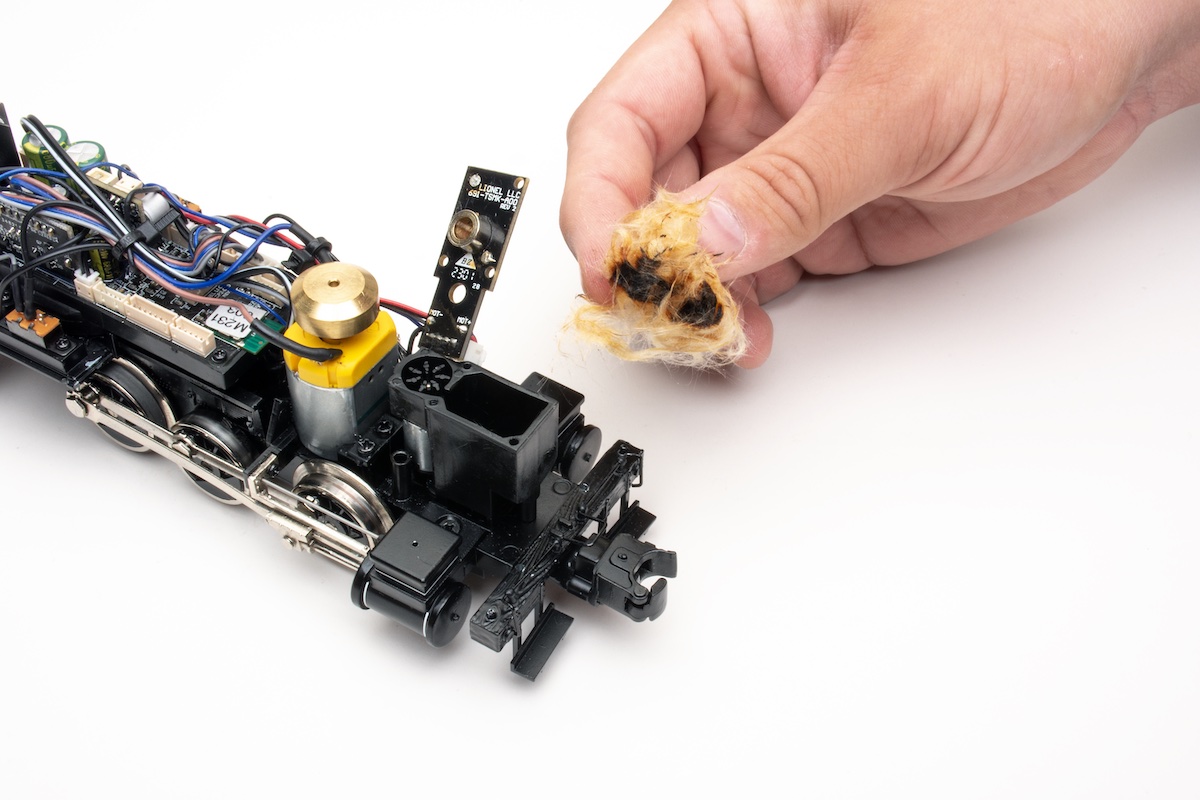
You can remove the wheels from the motor a few ways. I recommend using a tool like the Large-Gauge Wheel Puller (LWP-STD-COMB) from PE Design & Manufacturing. This combo kit works on S, O, and Standard gauge. The company recommends giving the top of the screw (where my index finger is) two or three sharp raps with a small hammer before pulling the wheel. This will break any rust that has formed and make the job easier.
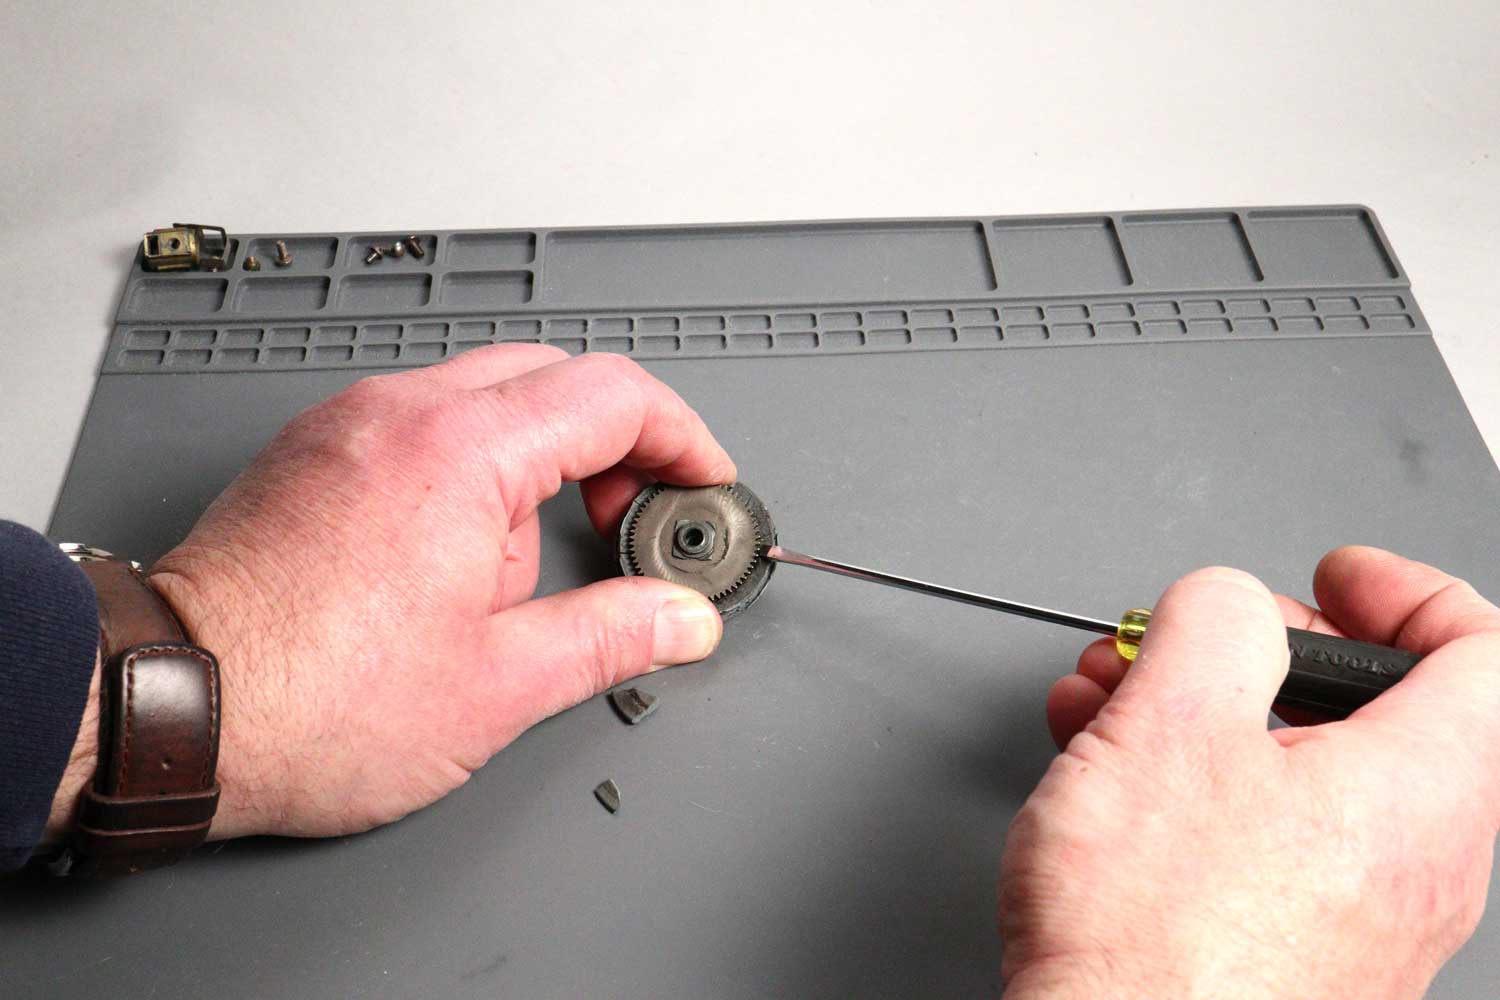
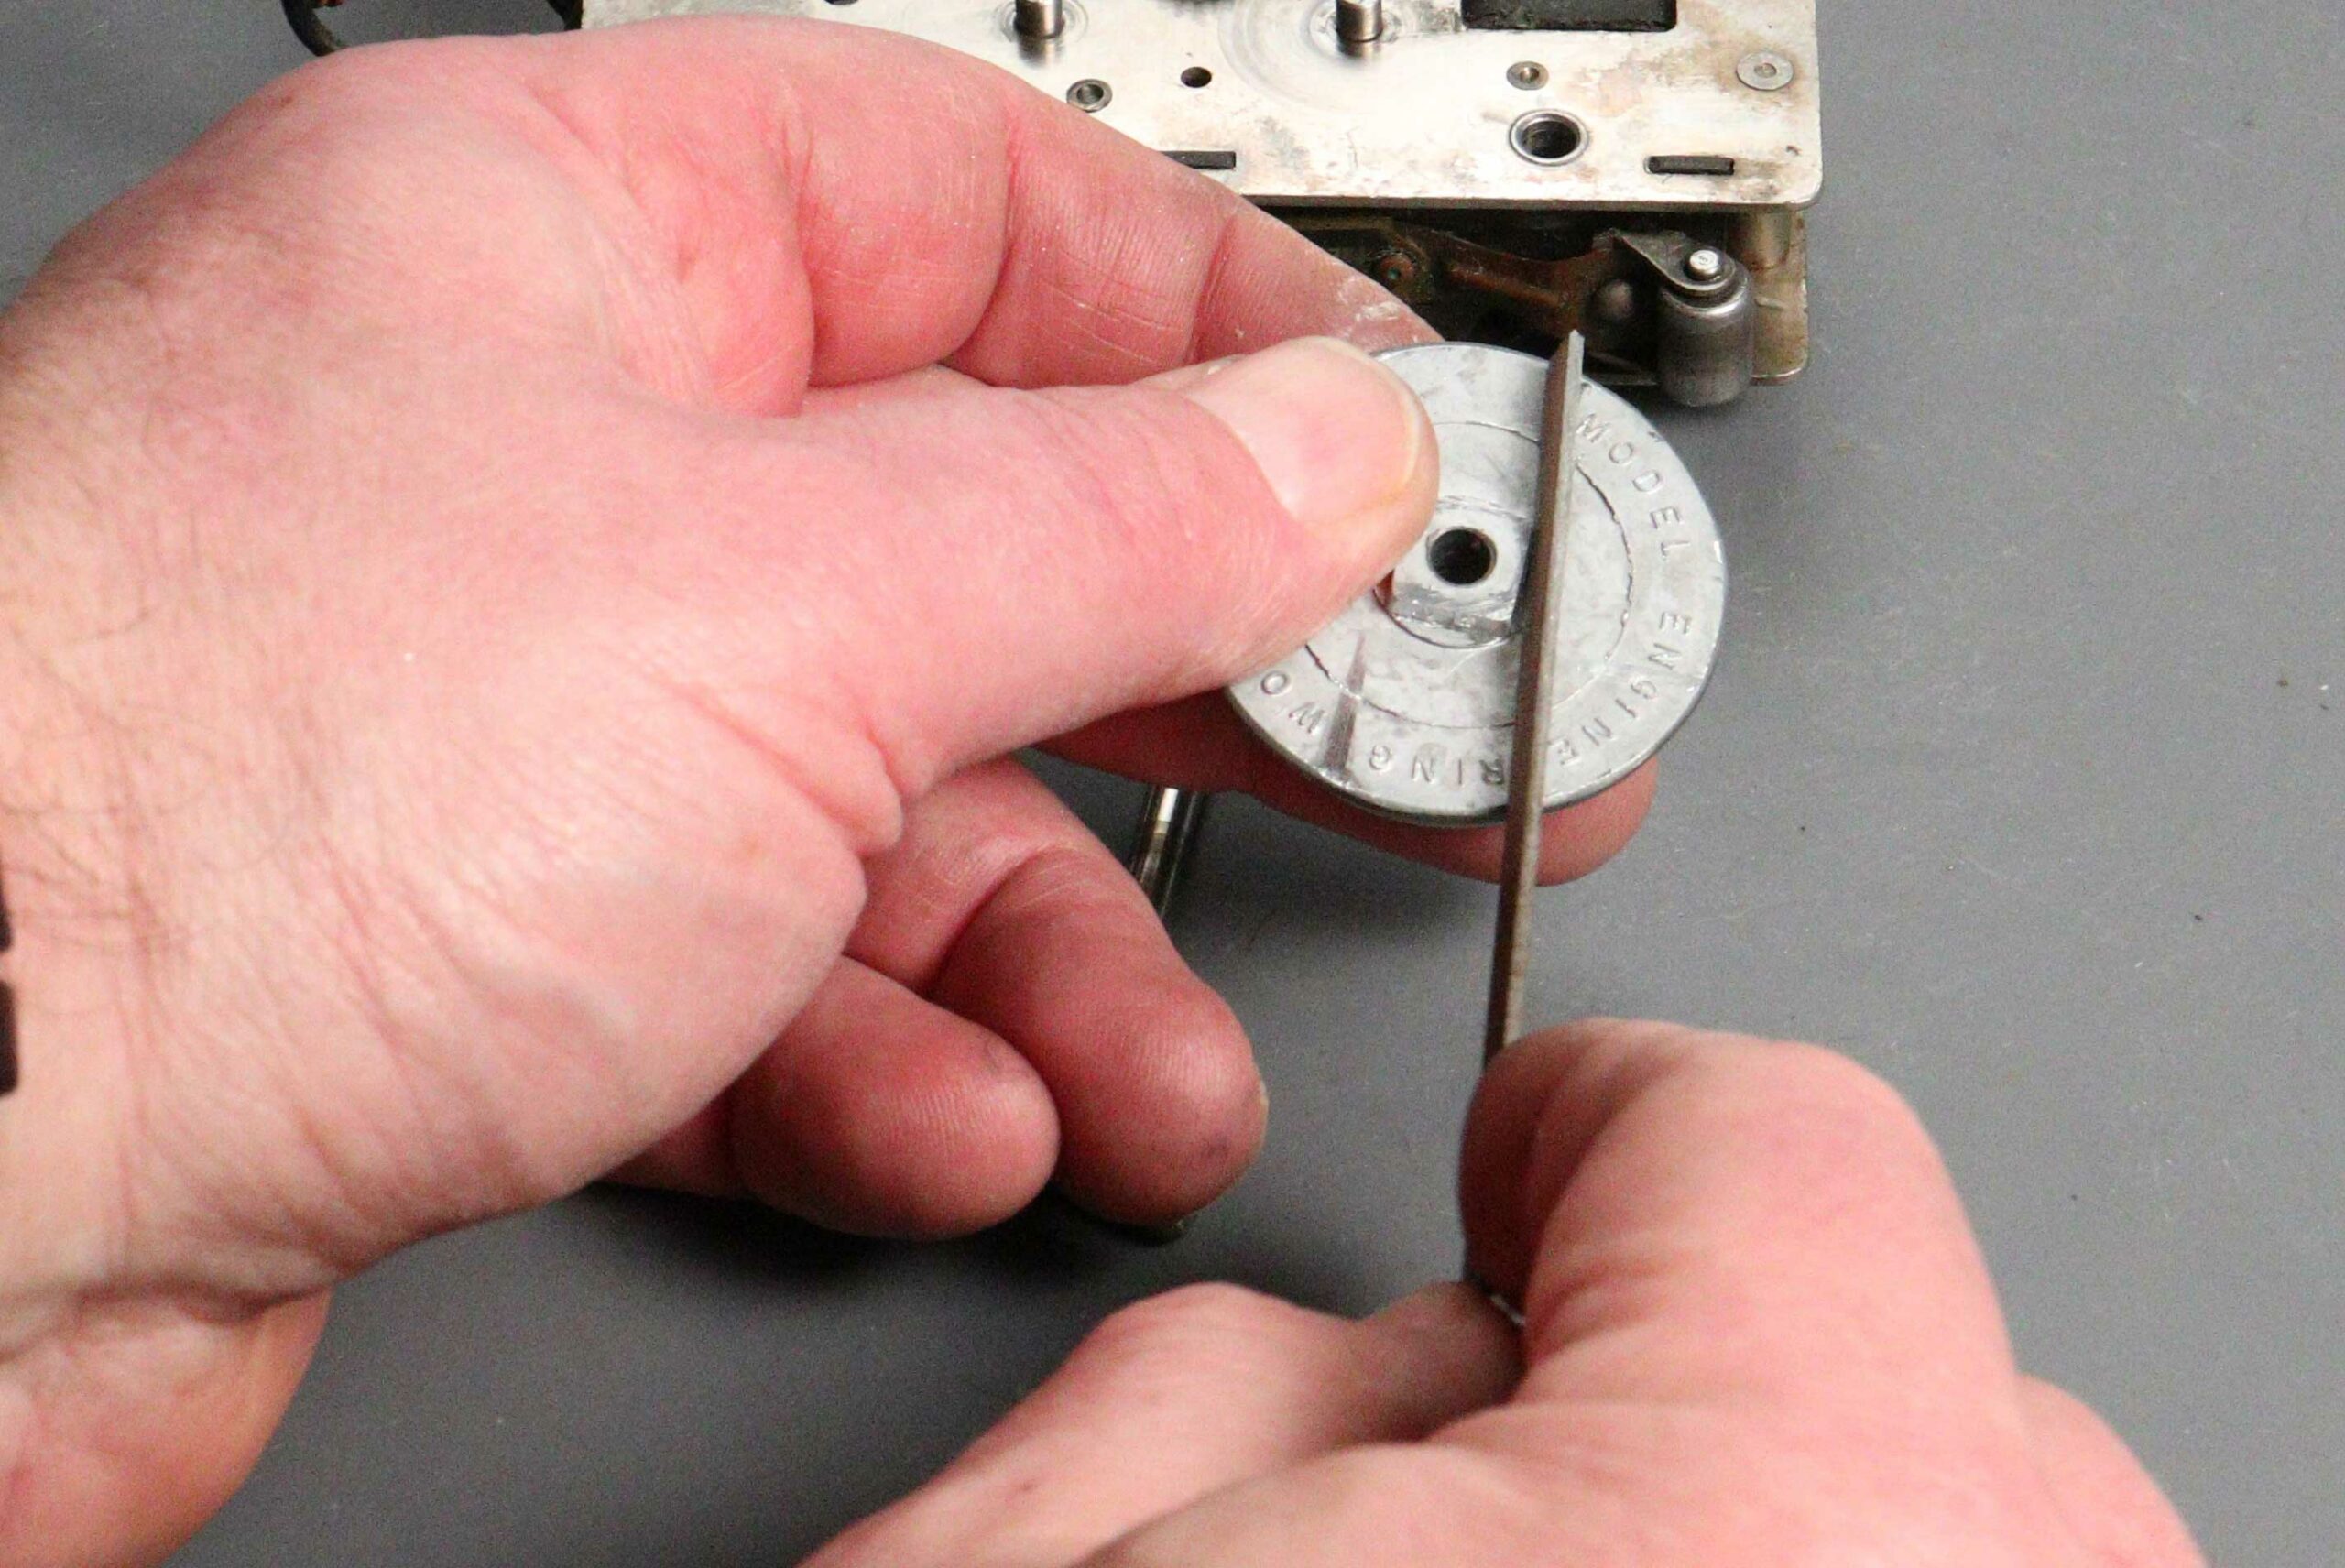
Once the wheels are off, remove the two drive gears from them. I worked the tip of a flat-blade screwdriver underneath to separate them. Don’t worry about breaking the old wheels, their next stop is the trash.
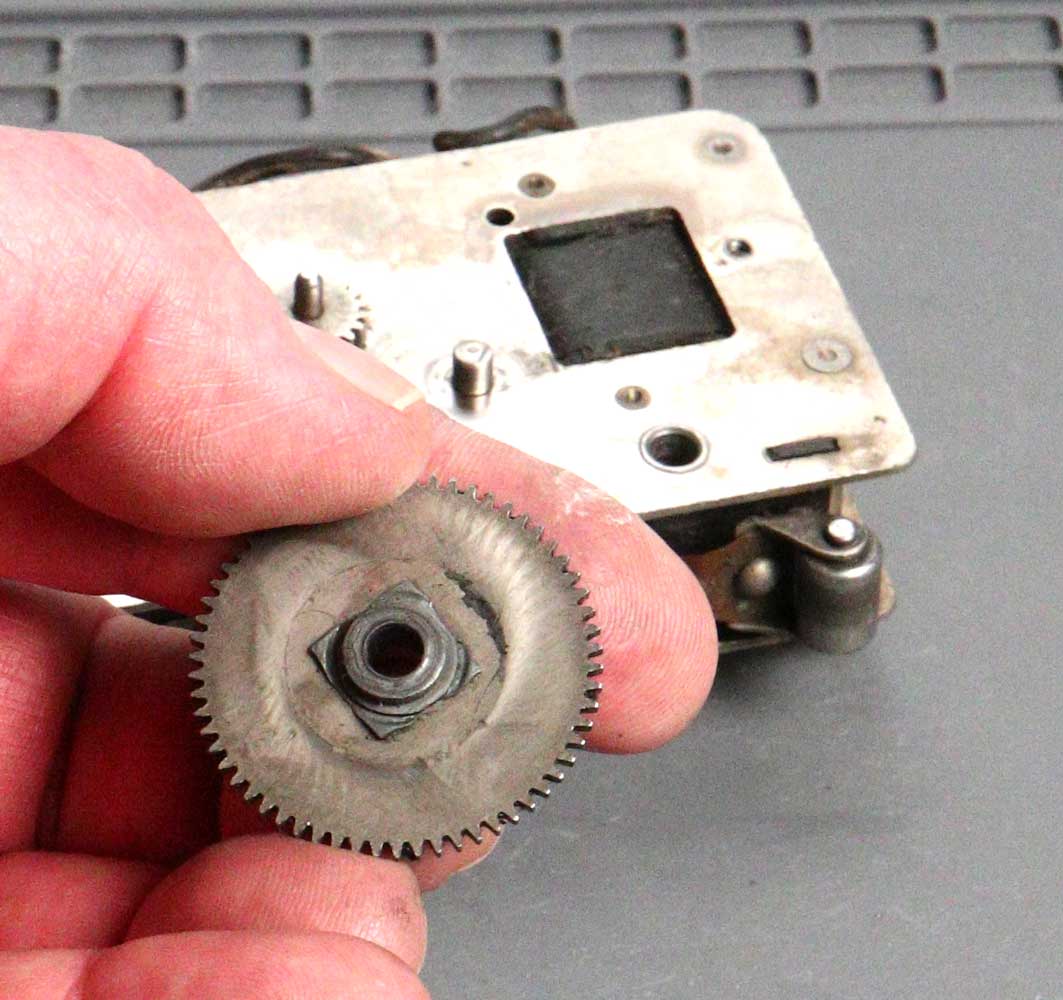
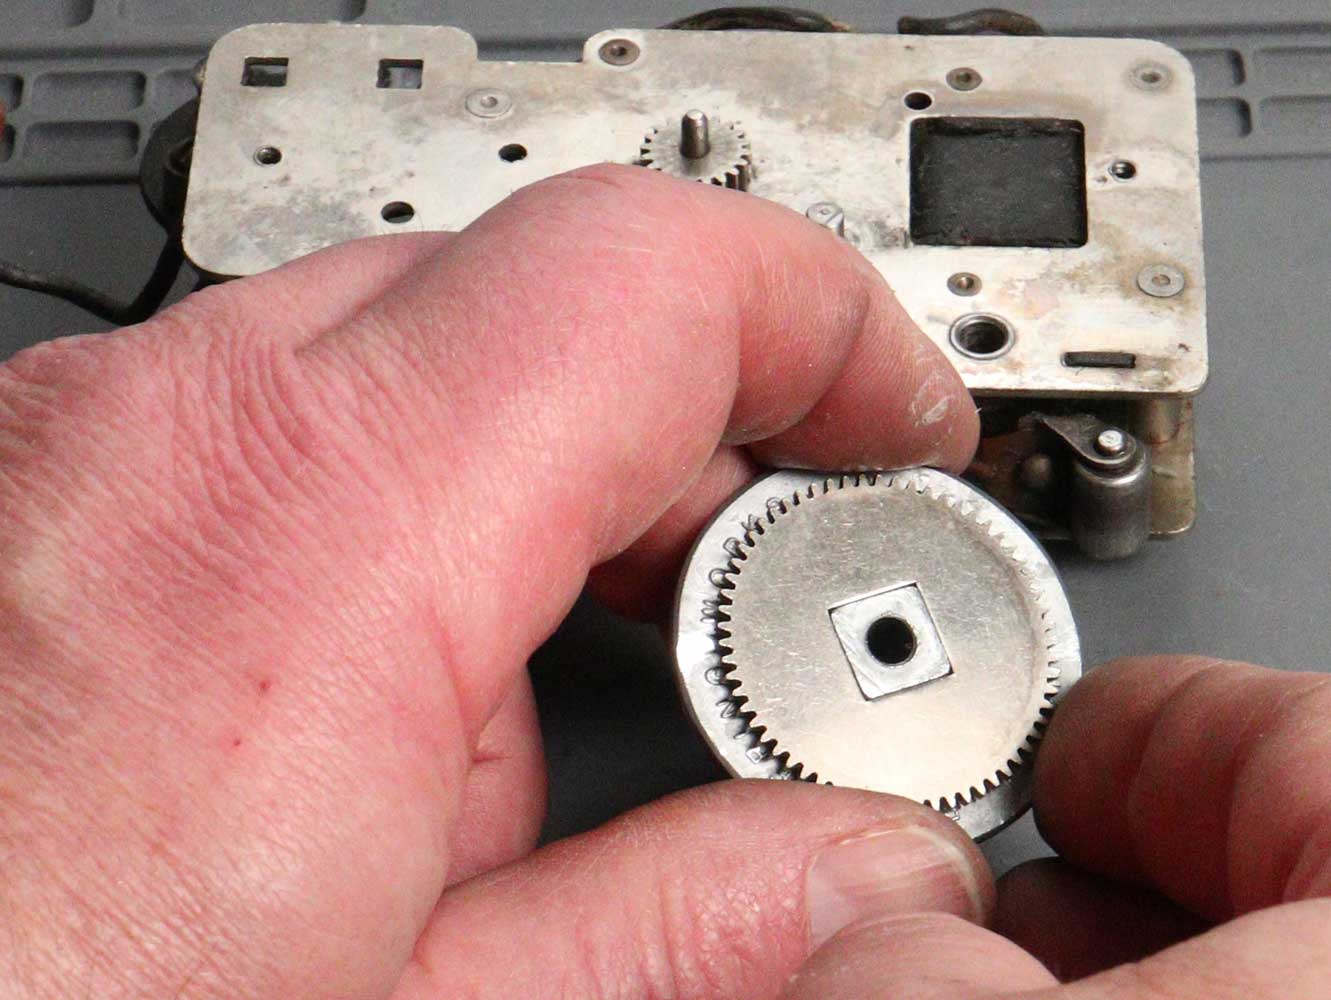
The square “key” might break off in the old gear; it’s no cause for alarm. Just put the gear on a hard surface and bang the middle with a small hammer. Just do it hard enough to break the pot metal free from the gear without bending the gear. It’s OK if the “hub” shatters in the process, it’s going in the garbage.
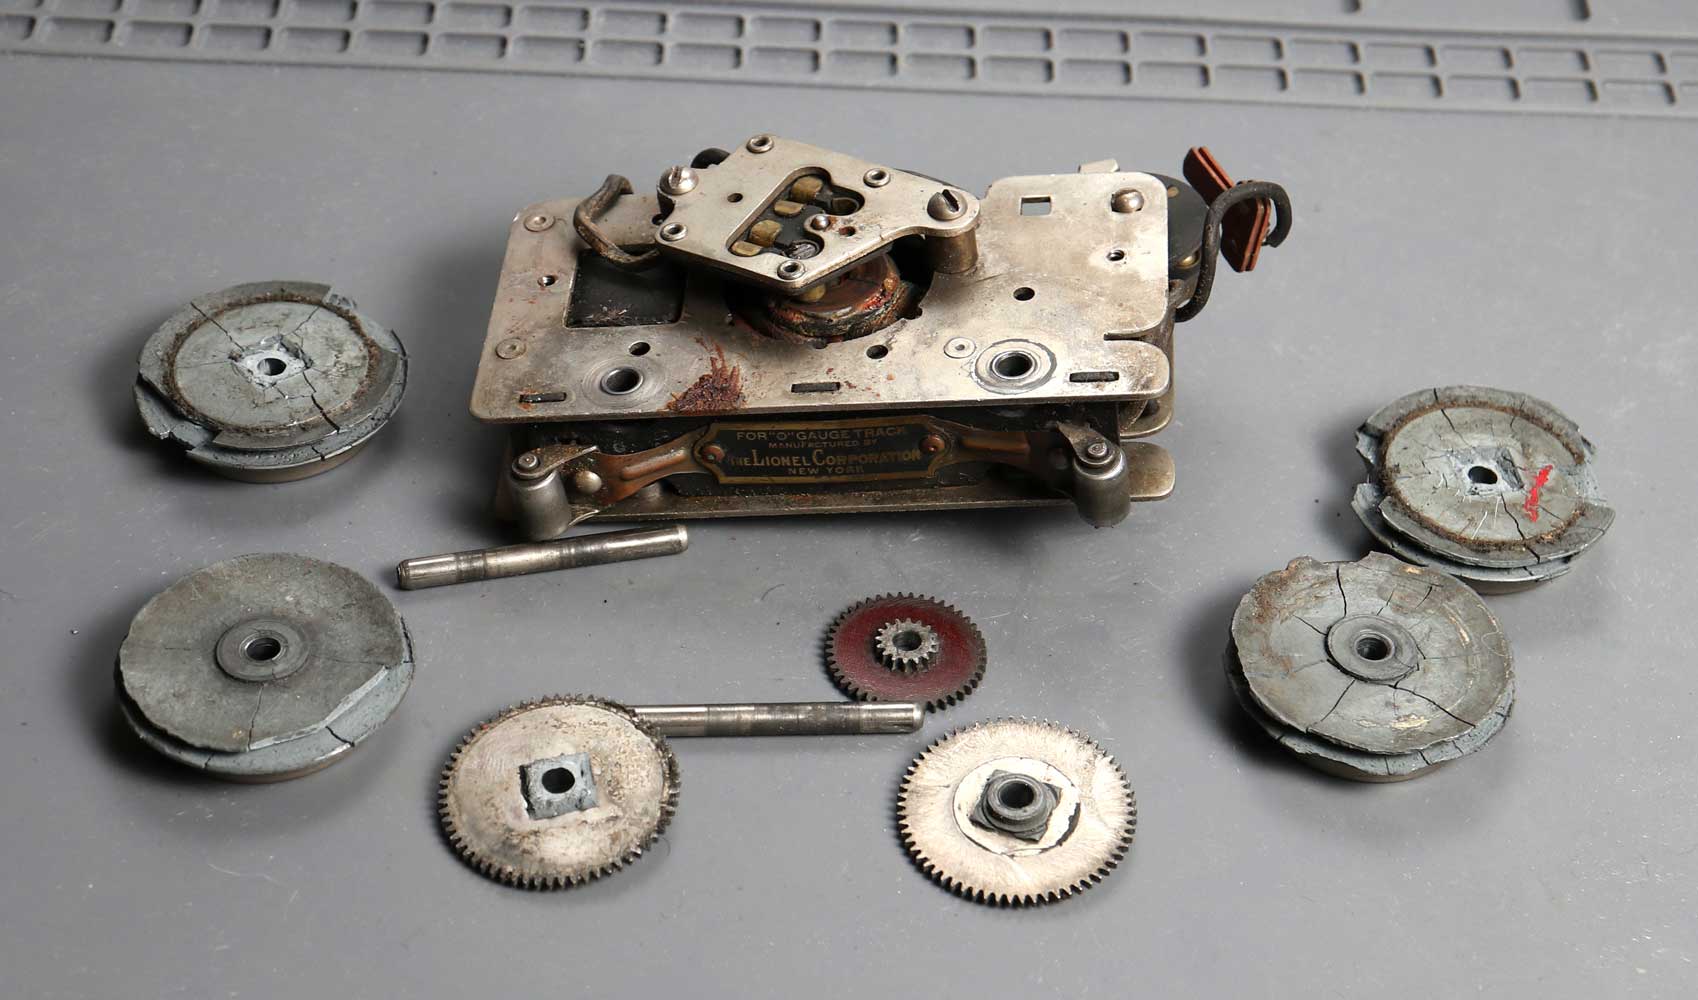
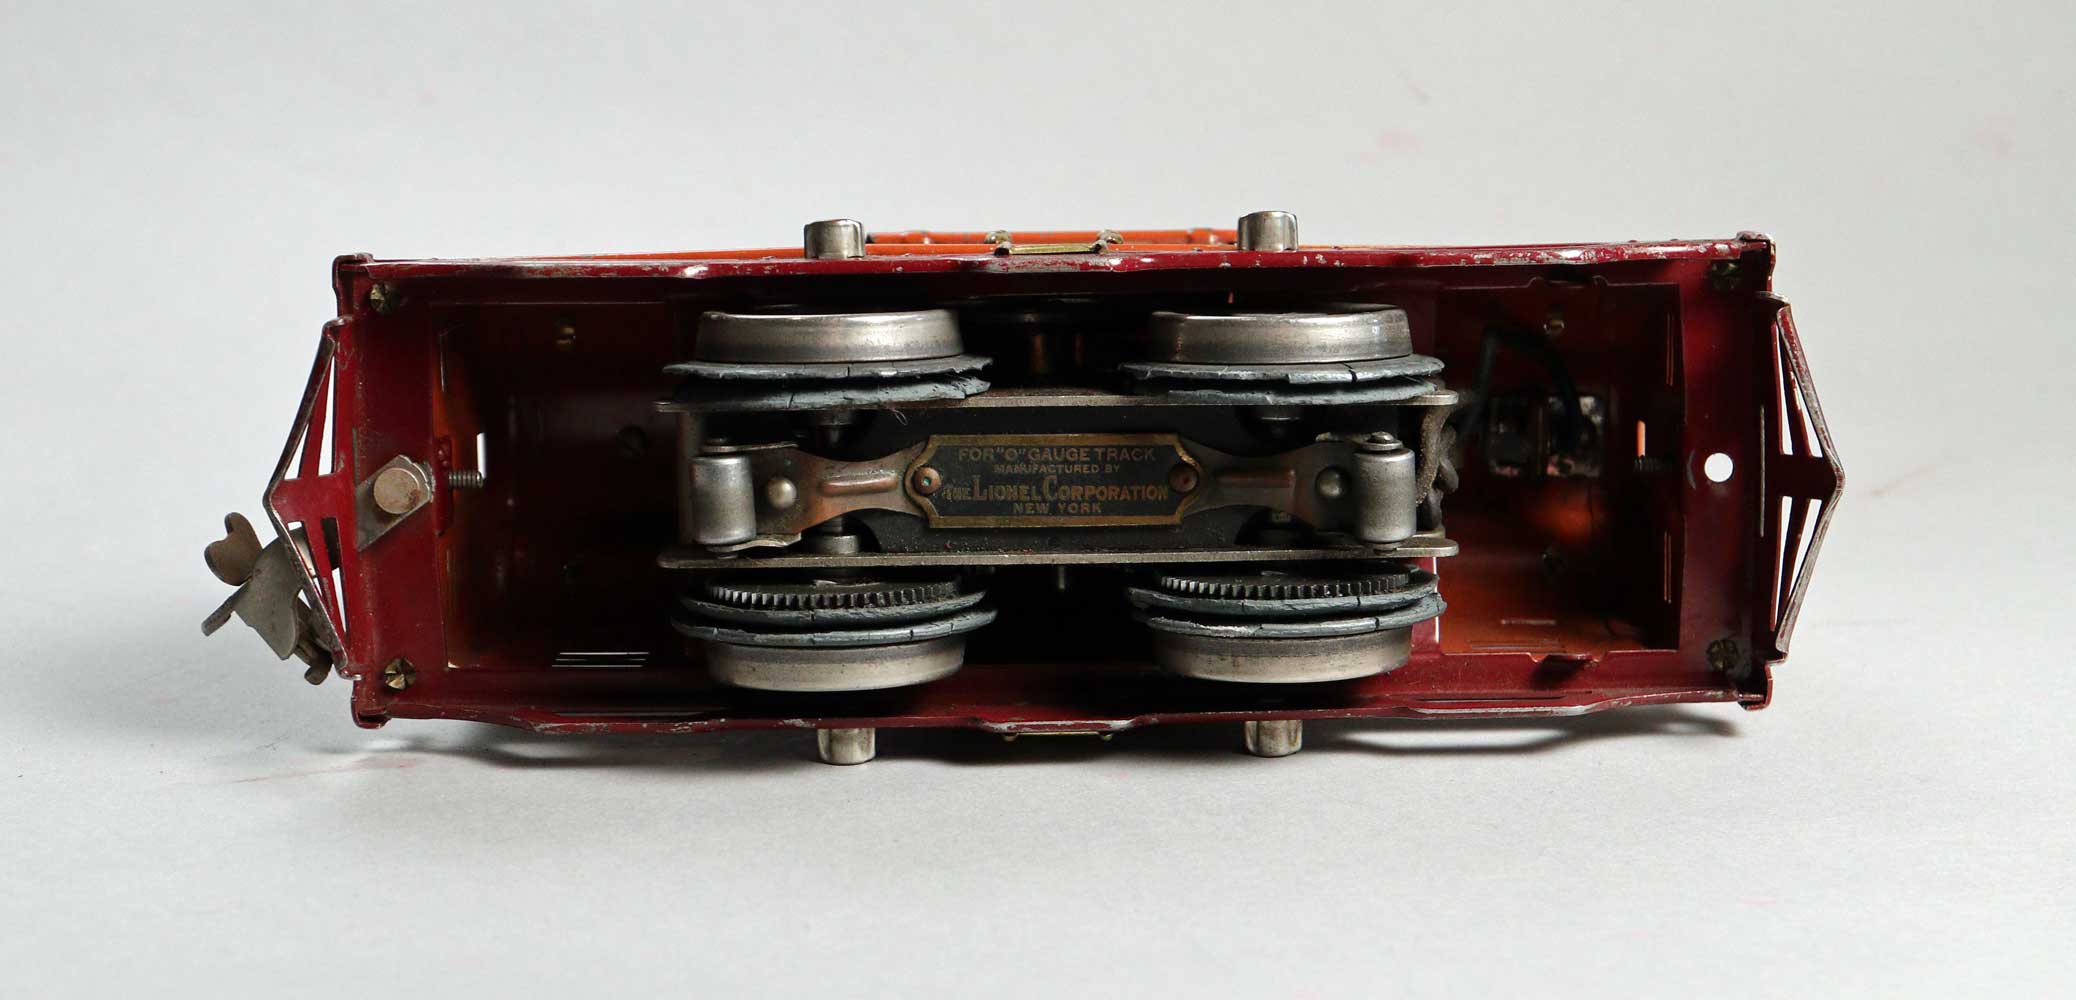
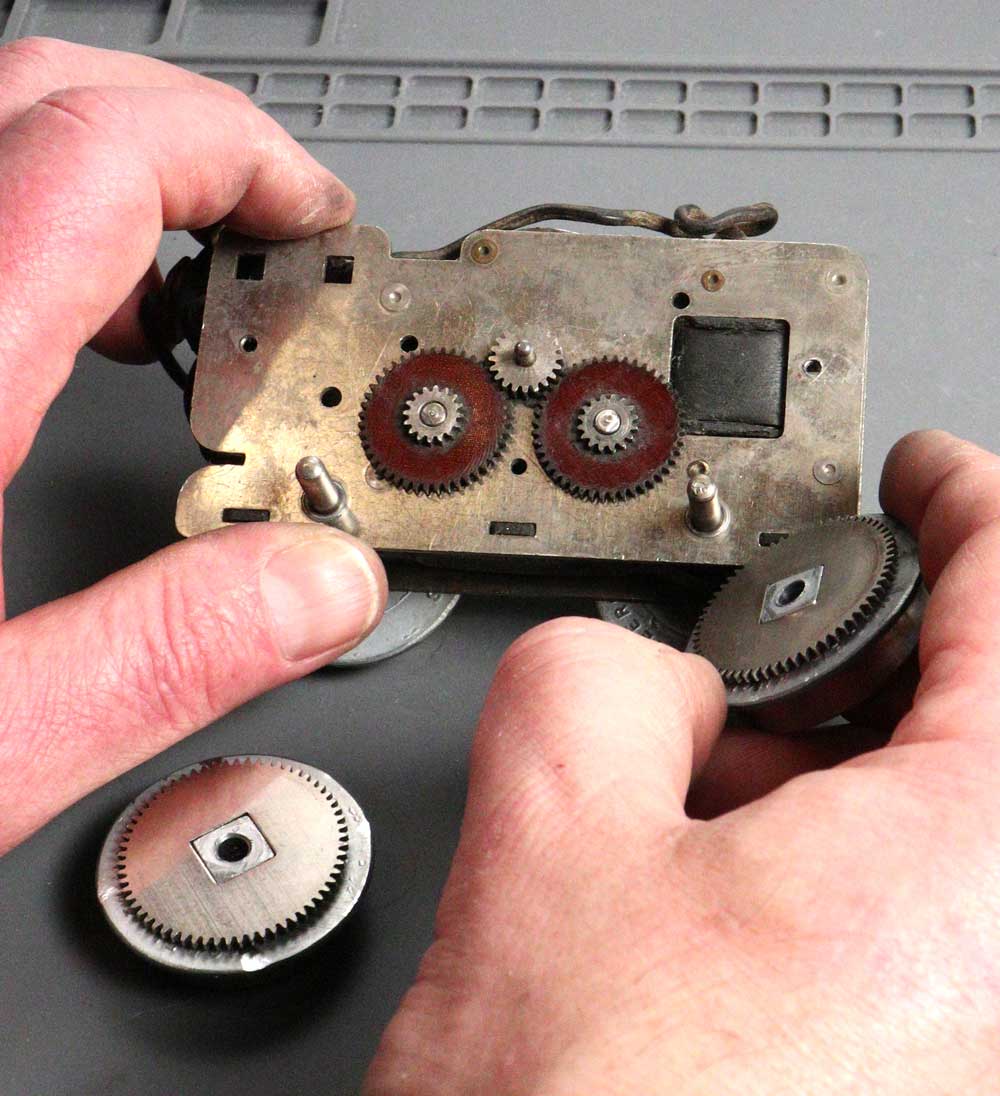
When disassembled, here are the parts of the motor. The secondary drive gears are made of Bakelite and fortunately all teeth were intact. Metal replacements are available if needed.
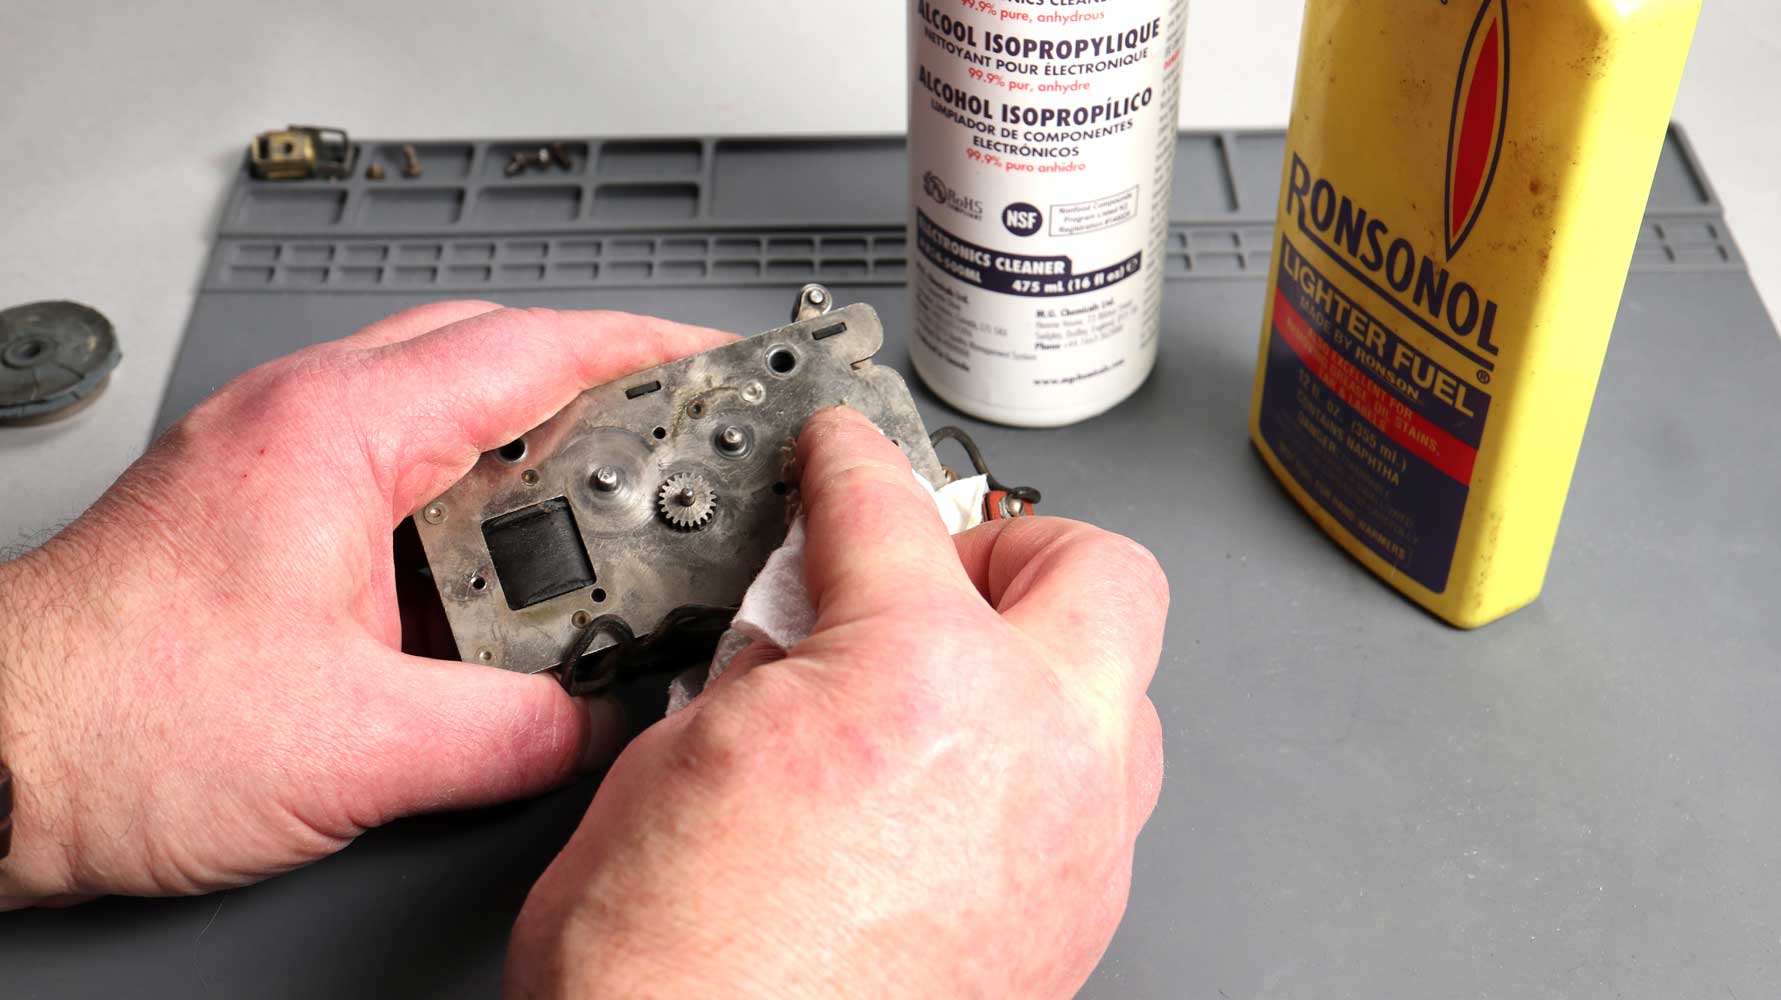
Clean the frame using an old t-shirt or lint-free cloth with isopropyl alcohol (this is 99 percent) or lighter fluid that contains naphtha in a well-ventilated space or outside. I should have been wearing nitrile gloves for this step. If wiring needs to be repaired, this is the time to open the frame and do it. Fortunately, it was in good shape on this motor.
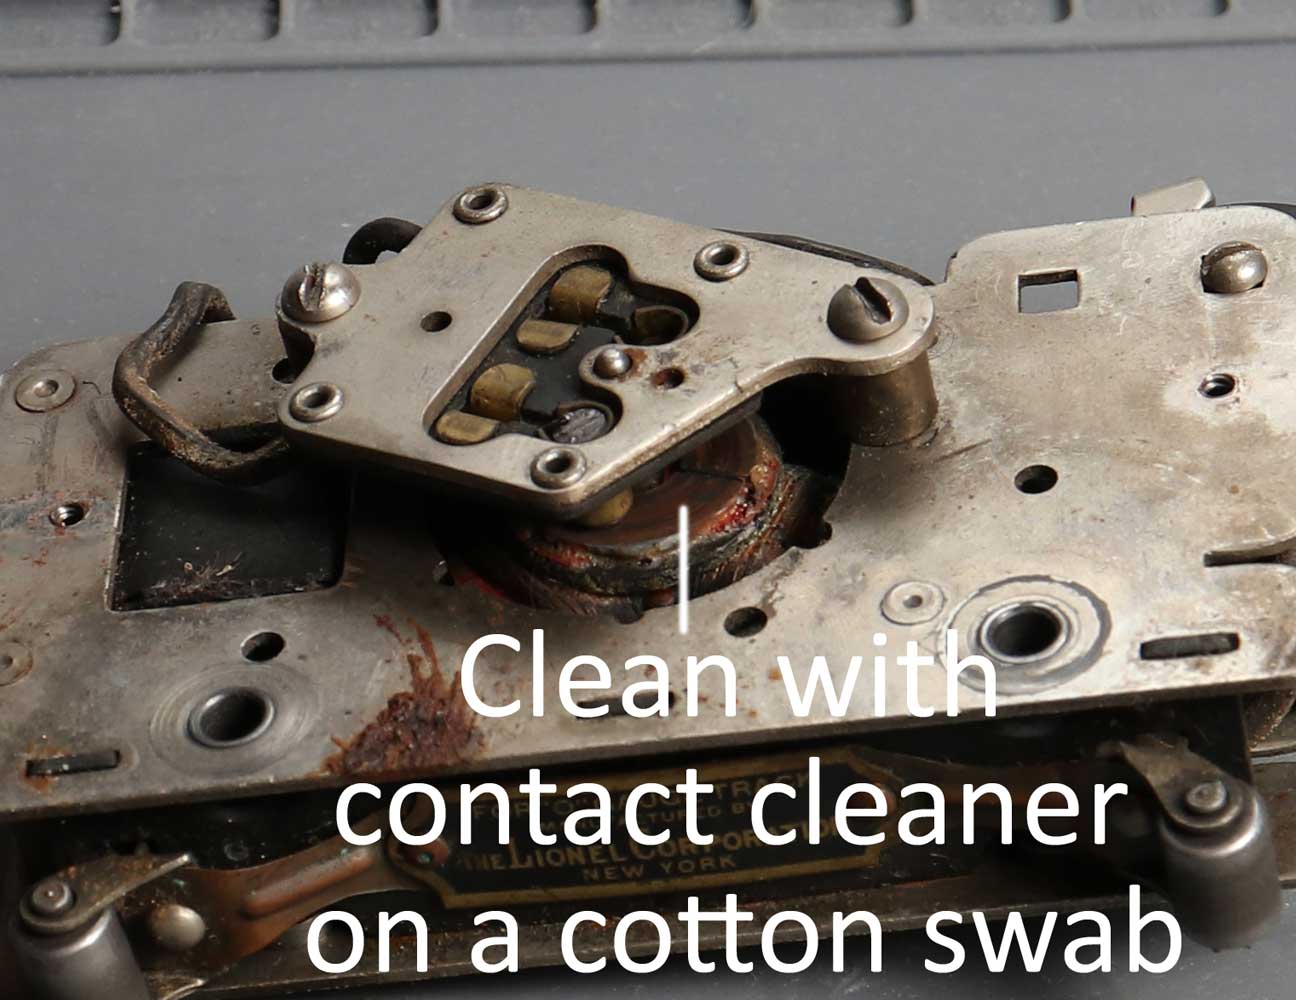
I didn’t do a full teardown of the motor, but I did clean the rotor with electrical contact spray. I recommend decanting some into a container, dipping a cotton swab in it, and then cleaning the copper area where the carbon brushes ride.
With the motor cleaned, it’s time for reassembly. I ordered a new set of wheels from Henning’s Trains (part SLS-35). The square keys on two of them are slightly larger than the corresponding holes on the gears. File the sides a little at a time until the two pieces fit snugly. Do not file so much there is play between the key and the square gear opening. Take it slow and remove a little at a time.
When the two pieces fit, the gear must be pressed down on the key. Use an old socket with an opening slightly larger than the square. Put it over the square and tap it with a hammer a few times (a drill press will also work) until the wheel key is just slightly proud of the surface of the gear. Then tap the corners of the key until the metal deforms slightly and holds the gear to the wheel. Make sure the gear is parallel to the back surface of the wheel.
I actually used the wheel puller in reverse to put the two non-geared wheels on the axles. It just so happens the axle fits in the screw part if you remove the pin. Then I slipped the axles through the bearings and pressed on the geared wheels just enough to stay on the axles. I used a bench vice to press the wheels the rest of the way on. Make sure the gears mesh and that there’s a millimeter or so of play. At the maximum amount you still want the wheel gear engaged with the small secondary gear.
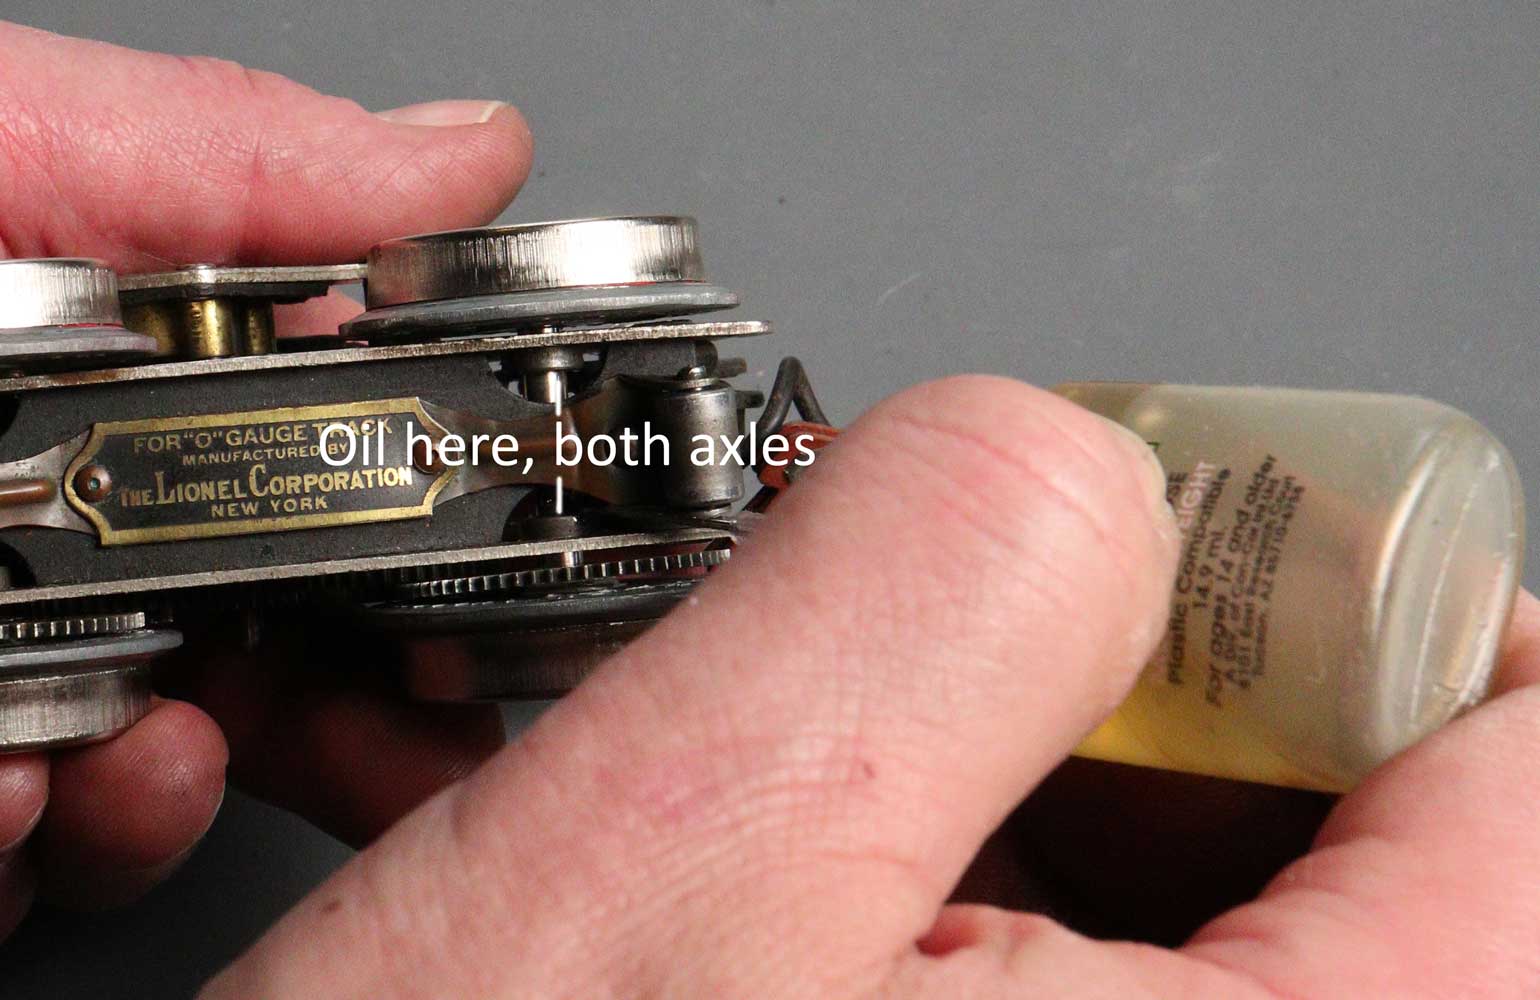
Once the wheels are pressed on, lubricate the axles with a drop of oil. I used Labelle No. 107. Clean the pickup rollers; I used an abrasive track-cleaning eraser. Then test-run the motor on a track. If it runs smoothly it’s ready to go.
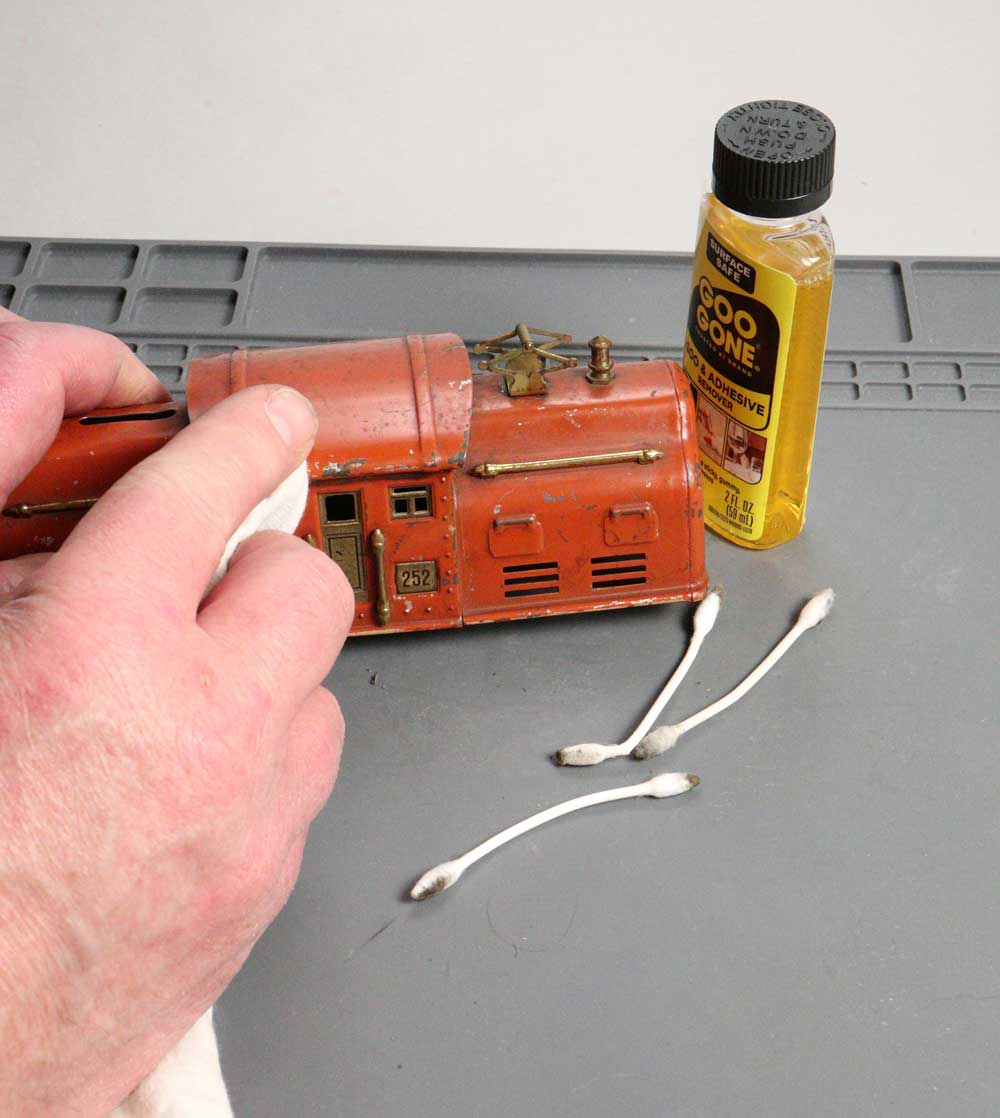
I cleaned the body shell with Goo Gone and an old T-shirt. Use cotton swabs to get into the nooks and crannies. Also check to make sure the handrails are tight by adjusting the attachment tabs from the inside with a flat-bladed screwdriver.
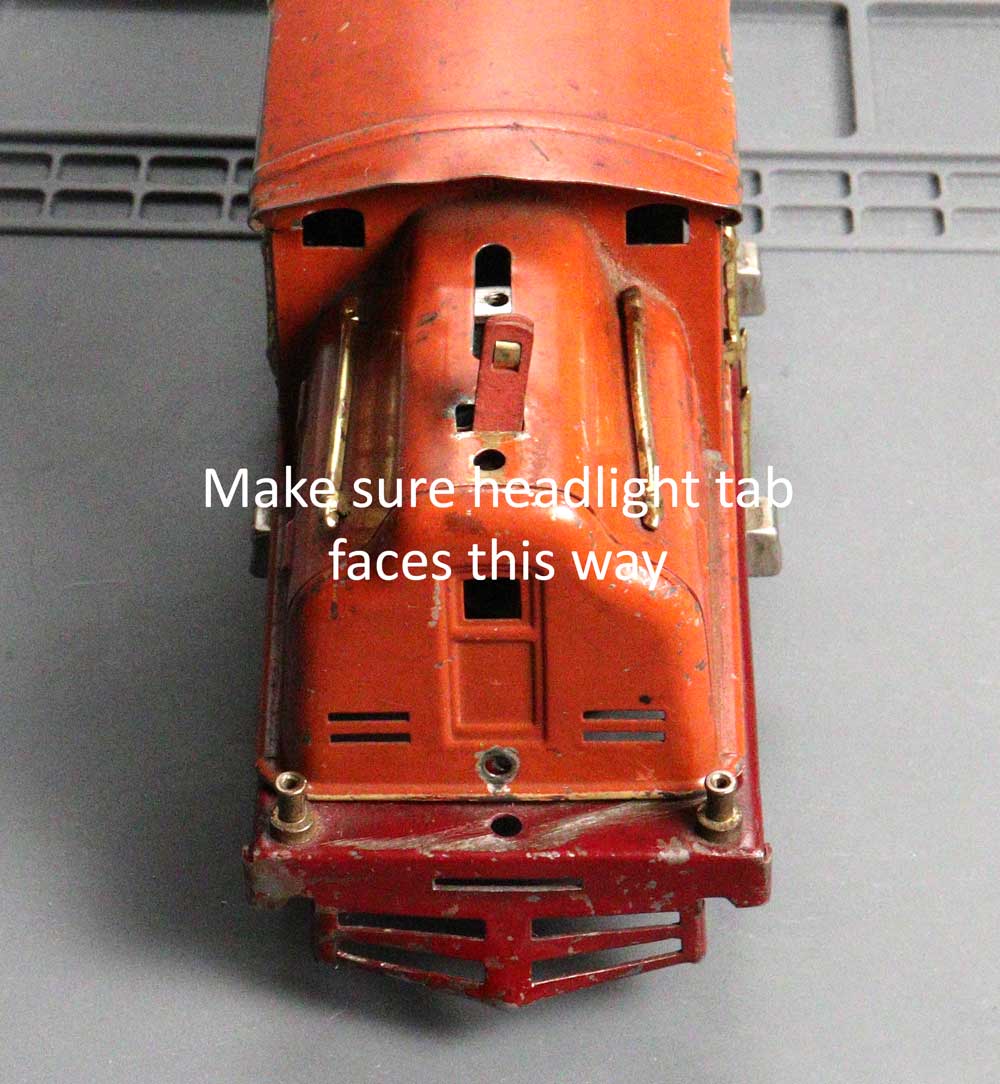
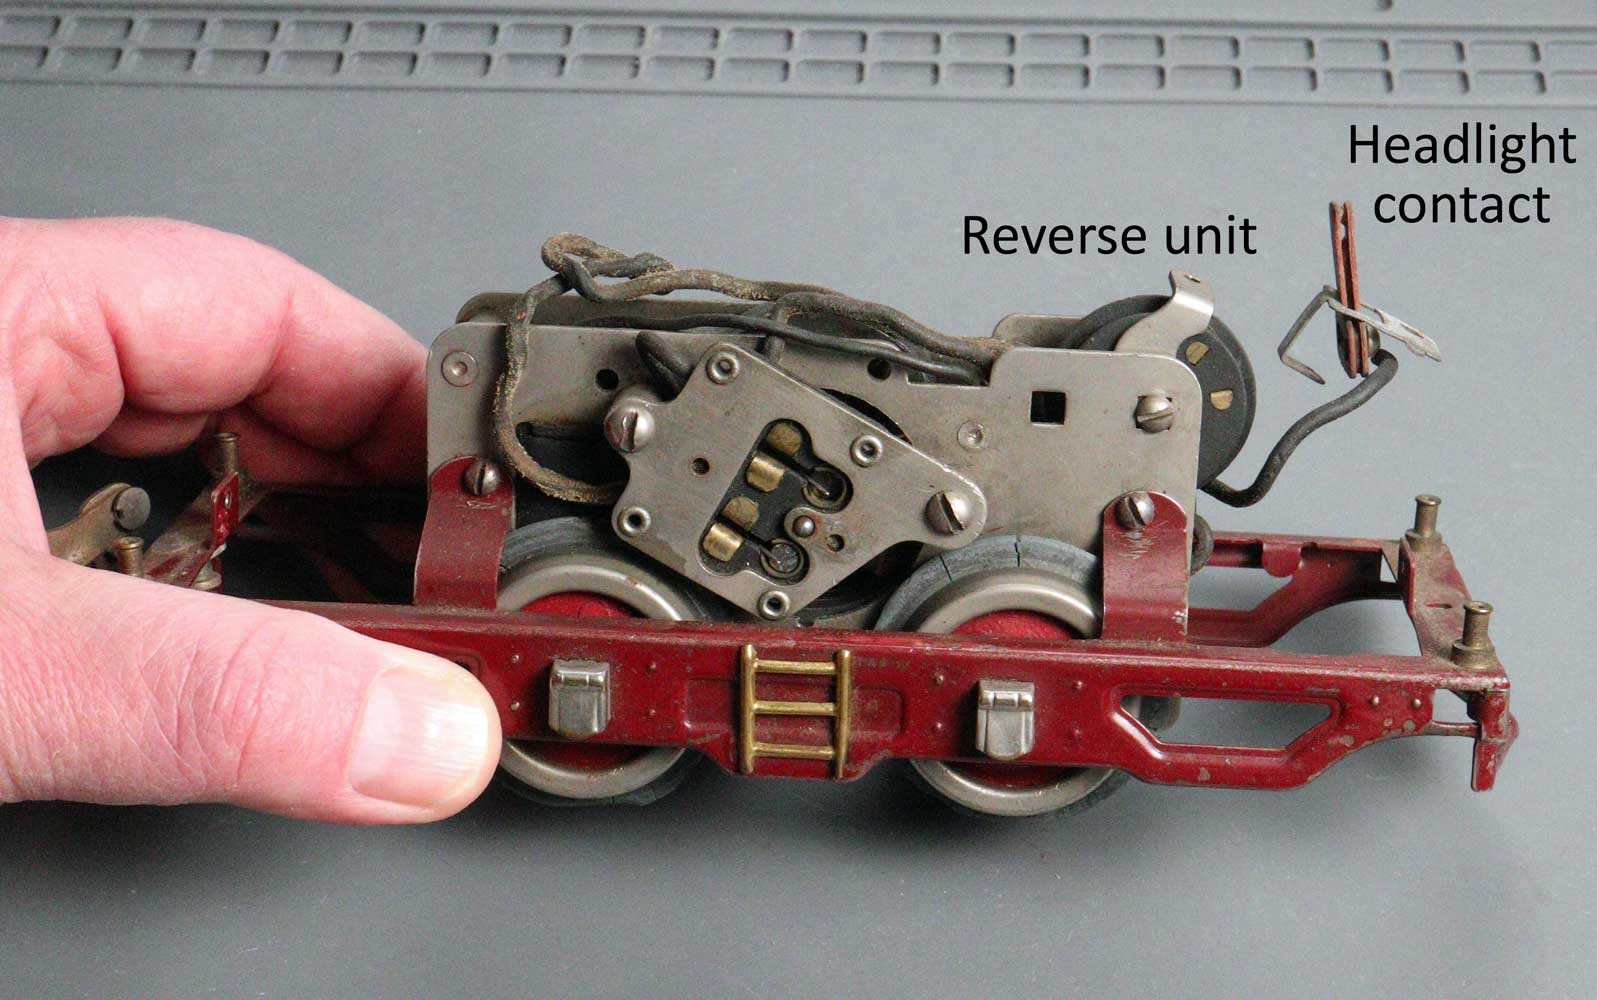
When you reassemble the engine, make sure the headlight contact faces forward. If it doesn’t your headlight won’t illuminate. The silver bracket should hold up the contact from inside.
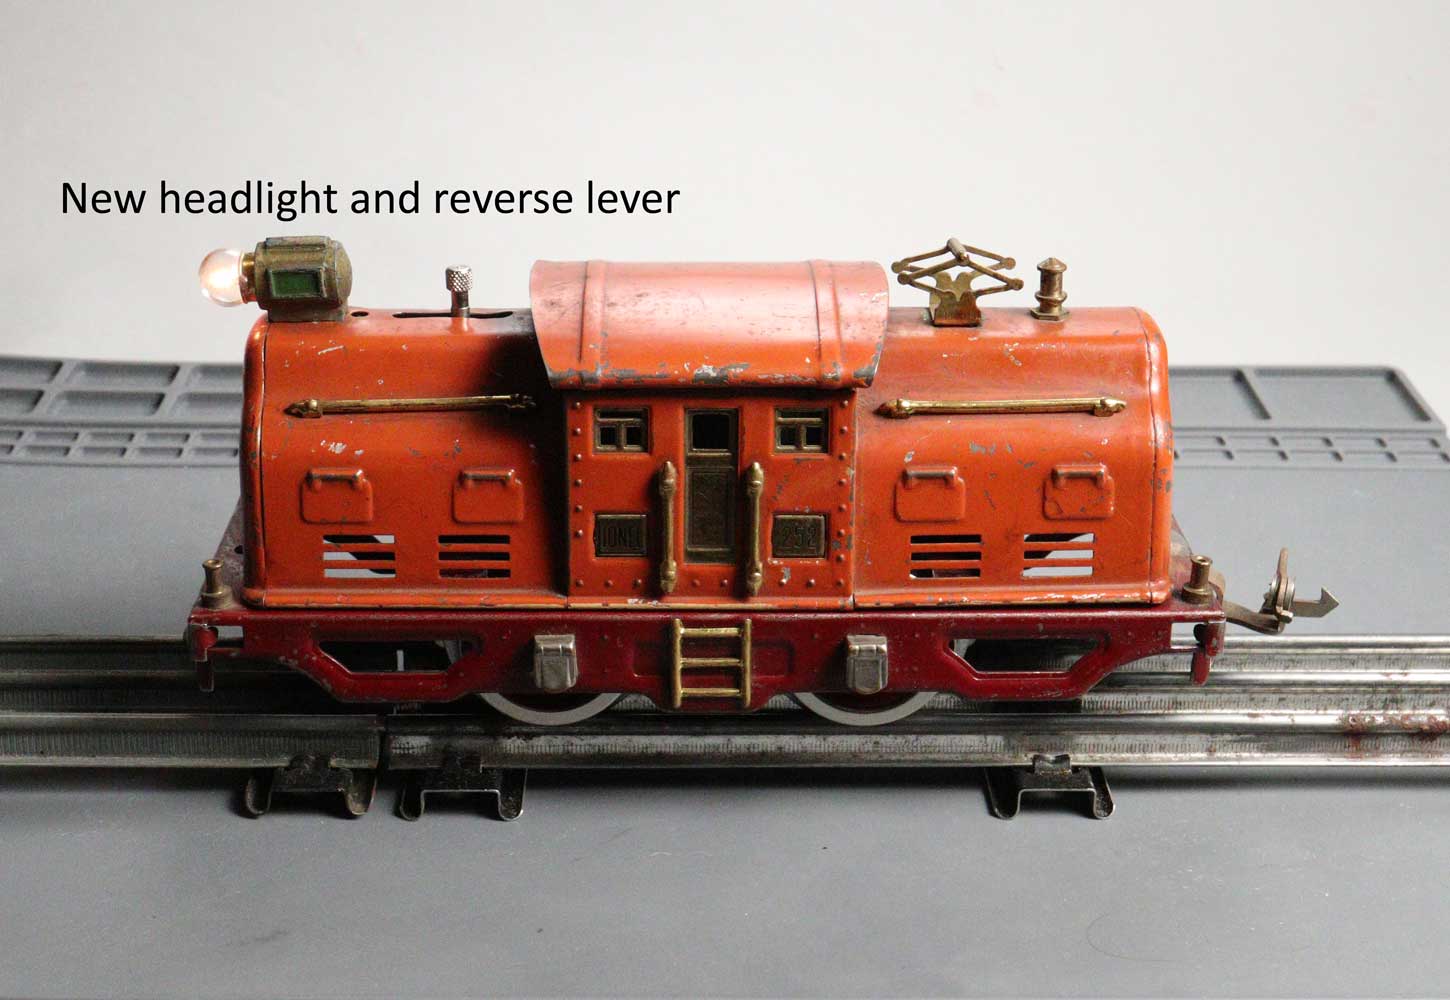
With a new headlight, also from Henning’s (1447C Small Head Clear Screw-in Bulb), and a No. 8-22 Brass Prewar Controller Handle sourced from Trainz, the No. 252 returned to the rails. Now all it needs is a matching terra-cotta set of 529 Pullmans and a 530 Observation car to go with it.
Share this article