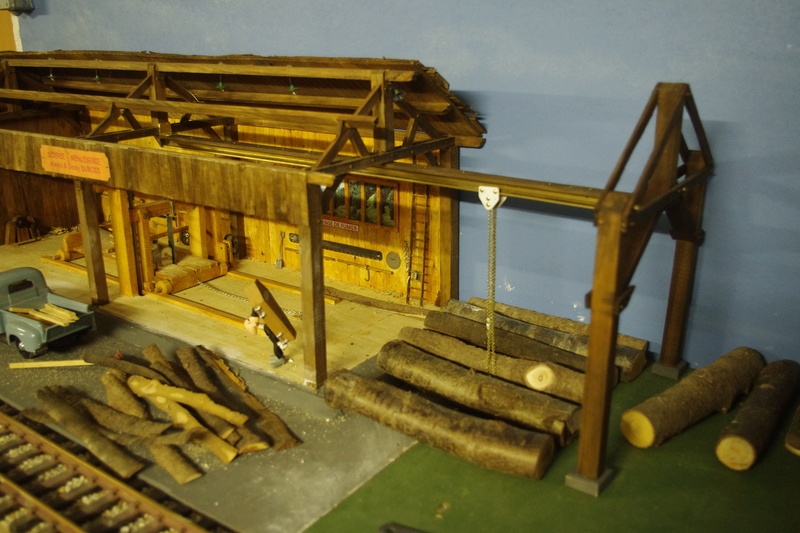
I model the Western Maryland Ry. (WM) from the 1920s to before the start of World War II. Appropriate commercial models of coal hoppers for my modeling era are limited in large scale. I was using LGB two-bay and Bachmann three-bay hoppers as stand-ins, but I wanted accurate, period-specific coal hoppers for my rolling stock fleet.
I turned to 3-D printing to create models that aren’t available commercially. Over the last few months I created files, printed, and built different versions of the Vanderbilt, GLa, U-channel, and fish-belly hoppers that were operated by the WM and its predecessors during the era I model.
This series will take a look at the different cars I built. If you have access to a 3-D printer, the files are available on Cults3D.
Read about the 3-D printed Vanderbilt hopper car I made.
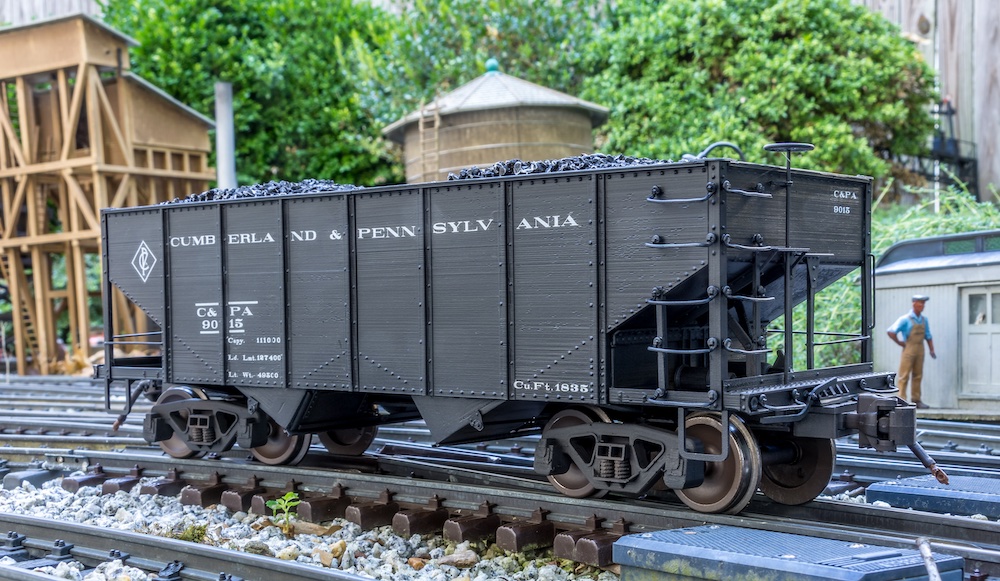
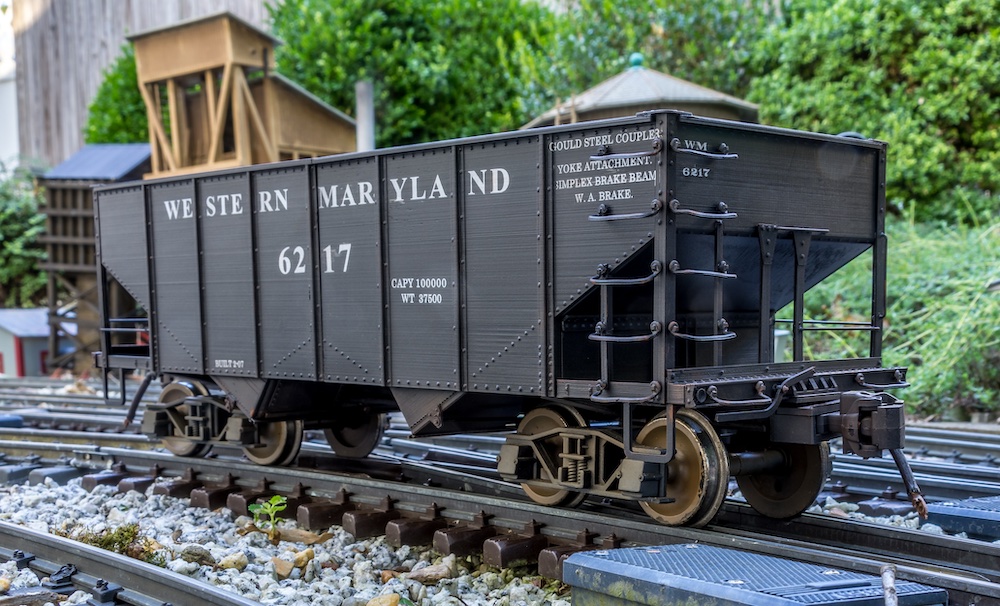
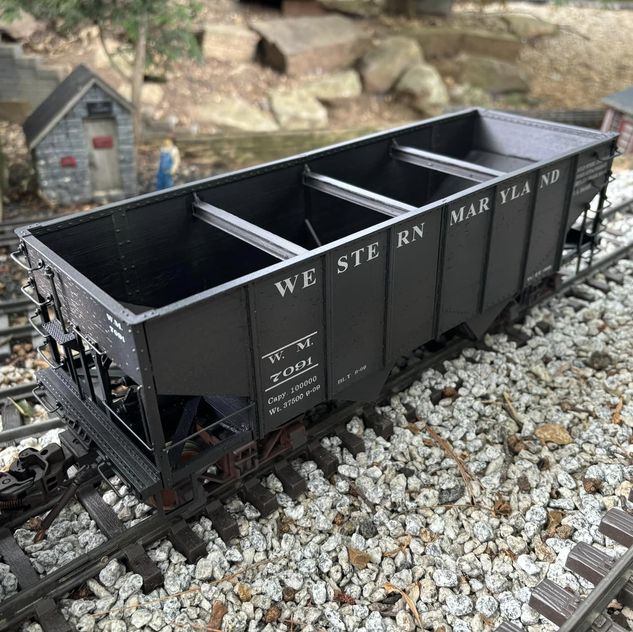
The class GLa 50-ton, all-steel hopper was a turn-of-the-century design widely used by the Pennsylvania RR (PRR). The car became an early “standard” design widely used by many railroads with various owner-specific modifications. Western Maryland adopted the design and utilized it as the railroad migrated away from wood hoppers. Early cars lacked the corner grab irons, but these were added after the Safety Appliance Act of 1893.

When designing the 3-D printed model, I make the sides, slope sheets, and underframe each as two pieces to fit the limits of a standard filament printer. I use Tinkercad to create my files, and typically use a scale of 1mm = 1” to make it easier to design things. This works out to 1:25.4 scale, so I re-scale my files in the slicer depending on what I am making. I built these cars in 1:29 scale, which worked out to a slicer rescale of 86%.
After printing the six basic components, I did a test assembly to check the fit. Then I began building the car. I glued the two sides together and used 1/8” styrene rod to join the two halves of the frame.
After the frame was set, I added the slope sheets. I designed alignment pin holes in the frame and slope sheet pieces that required a short piece of 1/8” styrene rod to ensure the slope sheets are properly aligned on the frame. Then I attached the frame/slope sheet assembly to the car sides and glued everything. Finally, I added the end frame/slope sheet pedestal components to both ends.
This finished the basic car assembly. From there I started adding detail parts, including the corner posts and interior braces. The first car I built was a version with a power brace brake lever. I added the K-type air brake components found on the full-size cars and detailed the brake beam with Ozark Miniatures ½” bolt castings. Then I ran a piece of brass rod from the bottom of the brake beam to the frame. I also installed the grab iron supports and Ozark Miniatures grab irons.
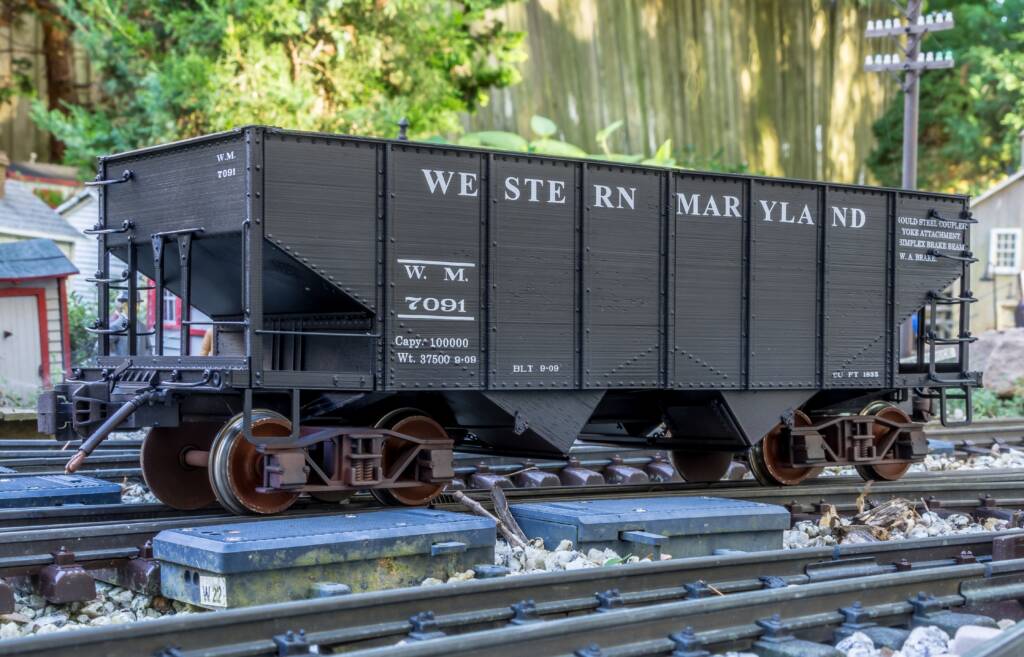
These cars had Carmer uncoupling levers. I added those as separate details with Ozark Miniatures ½” bolt castings. The hoppers also had distinctive triangular brackets at the top of the two center end support braces and a heavy, box-like end sill. I added the brake staff and installed a short piece of chain from the shaft to the brake beam.
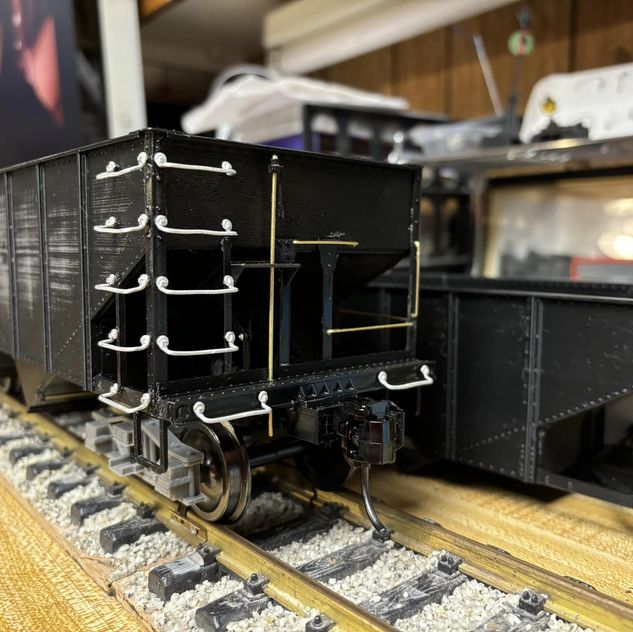
The prototype cars used a ratcheted shaft system to open the hopper doors. I used brass rod and chain to re-create this detail. I also added Ozark Miniatures air brake hoses and valve castings to the hopper. I installed Kadee center-set couplers using mounting cavities I designed into the ends of the frame.
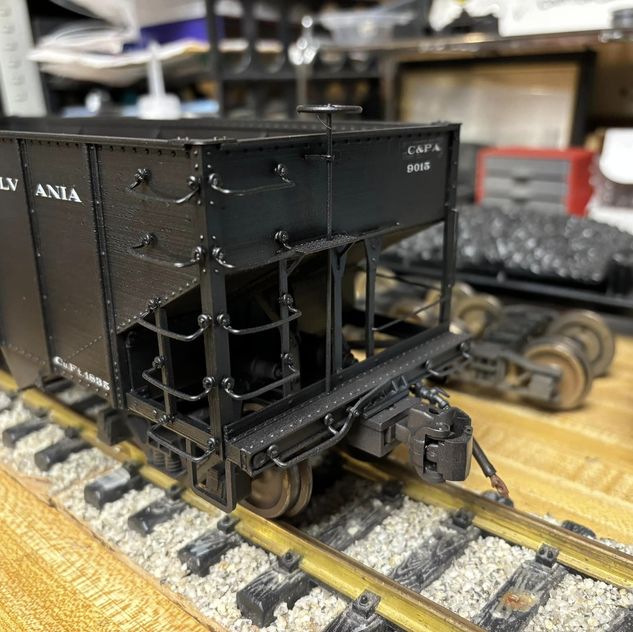
I again turned to 3-D printing for the archbar and solid-bearing trucks. The trucks are fitted with metal wheelsets.
Once assembly was complete, I gave the car a coat of semi-gloss black to prepare it for decals. I used prototype photos as a guide when designing the decals. The artwork includes two variations of Western Maryland lettering, as well as data for WM predecessor Cumberland & Pennsylvania (the railroad used solid-bearing trucks on its hoppers). I designed the artwork in Microsoft Publisher and created a .pdf that I sent to Shawmut Car Shops, my custom-decal printer.
After making the first car, I then printed two more with wheel-type hand brakes for a total of three models. I also made a 3-D printed load form that fits on the top of the car and glued on aquarium charcoal to represent a coal load.