Remember the fable of the three little pigs who built different homes? The youngest pig quickly made his from straw, the next from sticks, and the eldest of brick. The way you build retaining walls for your “planter-box” railroad will have similar results. Moral: prevent the big bad weather from blowing it down. Straw will soon sag into compost; wood will decompose a bit later; stone or brick walls will stay put long after us. Ancient fieldstone walls, built by farmers along property lines, still tell that enduring tale.
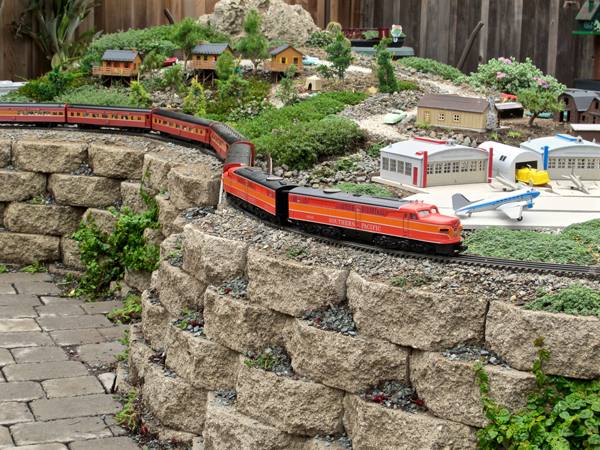
In photo 1, Jacques Verdier and Nancy Lagomarsino’s Verdi Railroad, an 0-scale Lionel line, is raised about two feet on 4″ easy-stacking keystone blocks, which allow curves of 63-81″ diameter. To soften and tie the wall into the garden, Nancy planted four groundcovers, from spreading sedums to trailing thymes and climbing ficus. Few of our miniature plants need a two-foot depth of soil for healthy roots. After installing drains and conduit for electrical and plumbing under it all, Jacques compacted the fill under the 6-12″ layer of planting mix. Many a raised railway will sag as fluffy soil flattens out and trains have to porpoise up and down grades around the line. To circumvent this problem, Jacques used a sub-roadbed of boards directly under his track. To prevent his mountain from sinking, he built up concrete blocks underneath a heavy chunk of old concrete that once held posts in the ground—the postholes now model square mine openings on the backside.
Prioritize
Before we get into the nuts and bolts of raised railways, I’d like to report that many a garden railroader became just that by using available materials, throwing together an outdoor platform for track, then running trains for quite some time. See Jim Maley’s straw story in “Regional reports.” Maybe sticks won’t work but logs certainly will, as seen on Jane and Noel Wilson’s railway in photo 2. Timbers (especially pressure treated) will last 20 years or more, giving one time to make plans for something else.
I’ve been building railways for 20 years and now it’s time for a permanent raised solution for someone growing older and less nimble—me. I also wanted the garden to be saleable in case we needed to move out. As a landscaper and homeowner, I chose to plan my raised beds for access, beauty, and functionality, more or less in that order of priority.
Paths
It usually happens that leaves fall on rails or a bird leaves a business card seconds before the train gets there. Access for maintenance is the key to having fun on the day of your railroad party. Build in paths to reach the entire track. The building code for walkway width outside the raised bed (to allow two people to comfortably pass) is four feet. After all, it may be you pushing that walker some day.
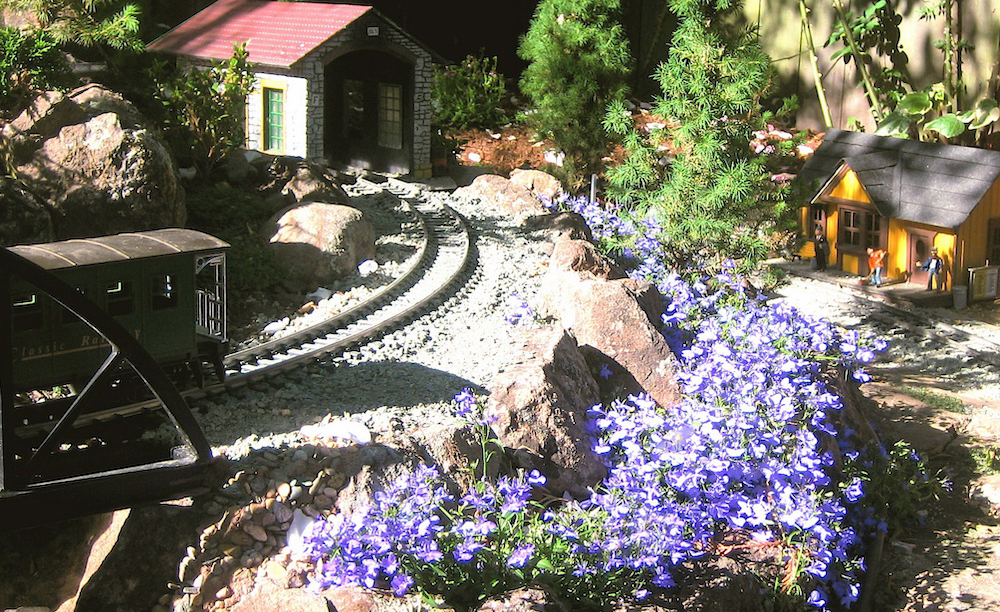
Space some stepping stones within the railroad to access the far reaches, or build in stepable groundcovers, a dry creek, and/or gravel car roads. If you build the rear wall against a fence, leave an airflow space at least 18″ wide for scooting in between the walls (unless you are more than 18″ wide). Please don’t ignore safe steps up and into the raised area. You can hide some steps in the rear or build steps or a gorge into the front. Using the wall material, steps can become part of the scenery, as they did for Bob and Irene Brown in photo 3. Leave plenty of patio room for viewing and working on the railroad.
Retaining walls for elevation
Of course the walls are necessary for the raised box planter but, if you’re creative, you can make them look like scenery, as in last issue’s “Miniscaping” on rock gardens. Check GR’s website for rock-garden techniques, where planting among natural stone can simulate cliffs, bluffs, and mountains. Crimson and Chris Star actually deconstructed their old retaining wall to make an irregular rock-garden railway (photo 4). Peggy and David Riggles constructed one wall to look like the mountain above (photo 5).
Compacted, gravel-filled footings prevent your wall from sinking and allow drainage. Lean your wall 5-10% (batter) into the soil to prevent the wall from being pulled over onto a clumsy kid trying to climb up. Walls over three-feet high, by code, should be built by professionals who understand the mechanics of weight and materials.
Rear concrete blocks
You can quickly build a vertical wall of two-hole concrete blocks, reinforced every other hole with rebar that extends into the ground. Fill the holes with dirt for plants or gravel for track. The blocks aren’t pretty, so disguise them. In photo 6, parallel tracks on Mike and Holly Crane’s upper dog-bone loop run on double-wide, double-high, 8 x 8 x 16″, two-hole blocks hidden by ballast on top and stone in front.
Festive and functional
This page has a border, pictures have frames, and a garden needs edging to set it off and prevent weeds. Like an edge, Jerry and Alison Ogden’s lighted wall guides traffic and also serves as seating and a table for work or snacking (photo 7). The Cranes’ sloped-stone edging (photo 6) retains the ballast and tells kids running on the lawn when to stop.
The Verdi Railroad (photo 1) would display a large expanse of cold, dry man-made blocks were it not for the plants. Green and red leaves, sometimes blooming, festively decorate and emotionally warm up the wall while keeping soil temperature cooler when the sun gets hot. Plants extend the garden into the wall and tie it into the railway above. I’ve just finished one end of my elevated-dogbone by retaining it with hypertufa; it’s a lot more work than natural stonework but does afford some interesting building techniques (photo 8). It’s like molten stone that solidifies as abutments.
• Study masonry books on building techniques for safe and beautiful walls: www.geoproducts.org/editoruploads/documents/Retaining%20Walls%200811s.pdf
• Get tips on proper masonry building tools: www.masonryforlife.com/HowToBasics.htm
• Here’s a video on building with timber: www.thisoldhouse.com/toh/video/0,,20349553,00.html
• Martha shows different styles of planting boxes: www.naturalyards.com/raisedbeds/?utm_source=bing&utm_medium=cpc&utm_campaign=CT%20-%20Raised%20Beds&utm_term=raised%20vegetable%20garden
• Build benchwork between the boxes
• GR subscribers, see “Greening your railway: Blend benchwork into your backyard,” Feb. 2012 GR
Regional gardening reports
Zones are USDA Hardiness Zones
How have you raised your railroad above your walkways?
Dick Friedman
Sacramento, California, Zone 9
Stucco-covered blocks
Our and several other families helped another Sacramento Valley Garden Railway Society family, Jim and Sue Garcia, build extensive dual-use walls. Most of the walls are merely concrete blocks filled with gravel and placed on a shallow (2″) bed of mortar. Then we filled them with concrete and smoothed the top surface. Jim later did all the stucco work on the face of the blocks to make them more realistic, like rocks. This is much like the “Make-a-Wish” project. That entire railway was built in about half a day. We had 14 people working very hard: two crews mixing concrete, others laying out the blocks and filling them, some bending and laying the track, and some adding a ballast/mortar mix to keep it in place. Preliminary work and stockpiling of materials let us begin early so we were running trains after lunch!
Dave Stoneham
Alberta, Canada, Zone 3
Stacked ties
Of course, I think raised is the way to go on our Wolf Creek Railroad. It’s easy on the body in general but the extra work and cost of construction is the trade off. I used pressure treated, mini landscape ties. They have two flat sides so are stackable. I stack them five high, drill every joint with a 1/2″ bit, then put a piece of 12mm [about 1/2″] rebar, 30″ long, through them and into the ground. Each corner needs three pieces. To stop a wall from pushing out when being backfilled it must be tied into something, whether it’s another wall or a post concreted into the ground (the post will get buried anyway). I use 2 x 6″, pressure-tracktreated lumber for my roadbed. It’s definitely a lot more work than laying track on the ground but I think it is worth it.
Jim Maley
San Jose, California, Zone 9
Straw wattle
Our first attempt at an outdoor 0-gauge railroad was at Prusch Farm Park in San Jose, California, on a straw wattle, believe it or not, as shown on this brief video of our Chile Pepper Express: www.youtube.com/watch?v=xAQgsNVAPgE
This was a “never again” approach that had lots of stability problems that we eventually worked out, but we decided to use a different idea for the next follow-up garden (work in progress) using large, wooden raised beds of stacked timbers [similar to Dave Stoneham’s].