How to build a pondless waterfall: In considering the infrastructure of garden railways, waterways come high on the list of those items that are best built early in the process. It’s hard to beat the sight and sound of moving water or the mirrored allure of a pond. However, I won’t deal with ponds in this article because I want to introduce you to the concept of pondless waterfalls.
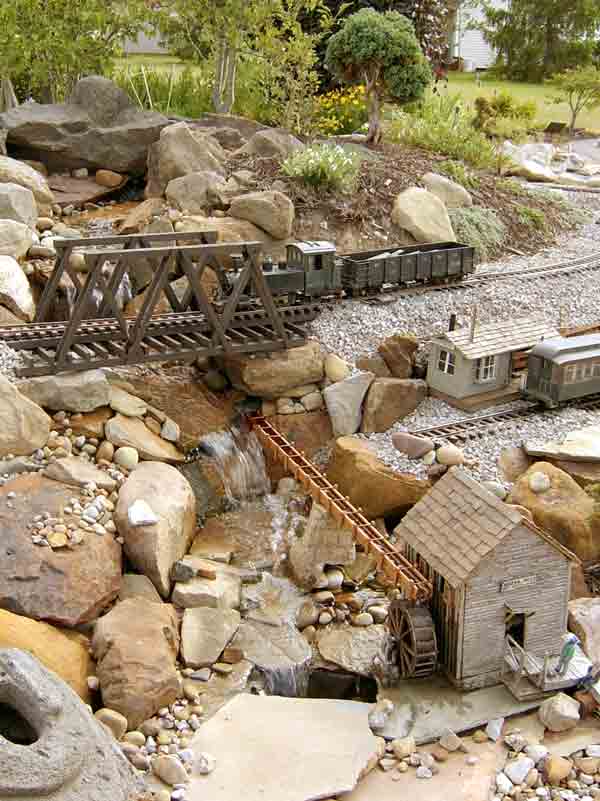
Recirculating streams and waterfalls do not have to end in ponds or visible pools. Instead, a pondless water feature utilizes a hidden (typically underground) reservoir that contains the recirculating pump and holds all the water needed to fill the waterway. The buried reservoir is disguised with a covering of rocks, and the water simply disappears from view among the stones.
Building a pondless waterfall
The technique I’ll describe here is typical for waterways made with readily obtainable liner materials. Polyethylene liner is least expensive-as little as 32¢ per square foot for 20-mil thickness. PVC plastic liner in 20-, 30-, and 40-mil thickness costs as little as 37¢ per square foot. The drawback to PVC of any thickness is its vulnerability to ultraviolet-light degradation. The best liner is made of EPDM rubber (ethylene propylene diene monomer), 40 mil in thickness, and costing as little as 43¢ per square foot. EPDM rubber is resistant to ozone and UV light, and comes with a 20-year warranty but may last 30 or more years outdoors.
A waterfall should have enough drop to develop a good cascade for visual and auditory appeal (2″ minimum; 6″ is better). Unless there is already an established drop across the area you have chosen for your tumbling stream, you will need to elevate the head of the waterfall with fill dirt and rocks. Mark the shape of the waterfall with spray paint or short stakes. A zigzag course, where the water changes direction below each fall, is the most interesting.
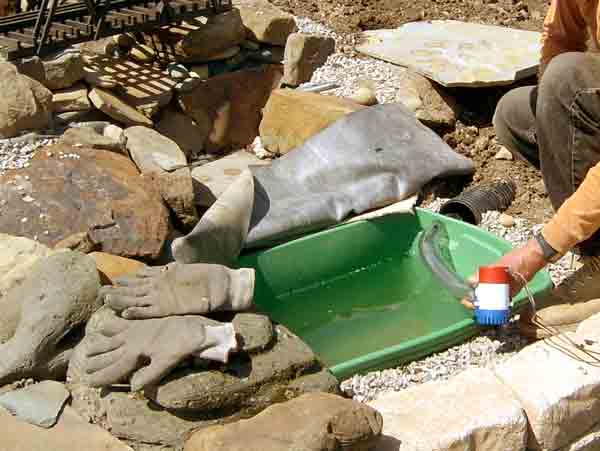
Dig the pit for the reservoir first. I used a plastic utility tub as a simpler and less expensive container (photo 1). The tub size will depend on the width and length of your stream. (Example: if your stream averages 6″ wide and 3″ deep, each linear foot of flowing water will contain about a gallon [6 x 3 x 12 = 216 cubic inches; one US gallon = 231 cubic inches]). The top of the reservoir should be a little below ground level and will determine the level of the pool below the lowest waterfall. The area you dig for the pool and watercourse should be a foot or more wider than the eventual stream width (to allow for edge rocks that line the course), but not wider than the tub.
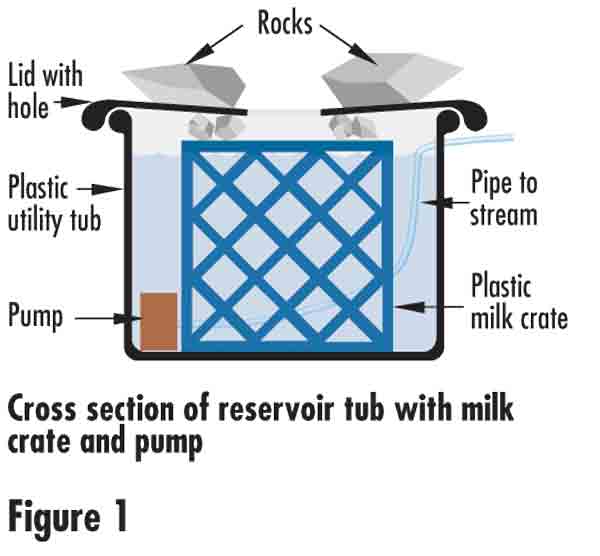
An alternative to the tub is a steep-sided basin, lined with underlayment and rubber liner, and holding a lidded container for the pump. Holes drilled in the side of the container allow entrance of water from the surrounding reservoir, which is full of golf-ball-to-tennis-ball-size rocks. This arrangement is necessary to support the larger rocks on the surface that disguise the reservoir. In my case, I put a heavy plastic milk-bottle crate in the tub to support the tub lid and surface rocks (figure 1). Note: if you live in a freezing climate, make sure the pump is easy to disconnect and remove for winter.
Building the waterfall
Next, make the vertical cut into the hillside the height of the waterfall you want, counting the thickness of the spill rock over which the water will run for your total height. Continue digging the stream bed uphill above the fall, allowing about a 2″ drop per linear foot for good water movement and sound. Follow the same process for each waterfall upstream if you plan for more than one.
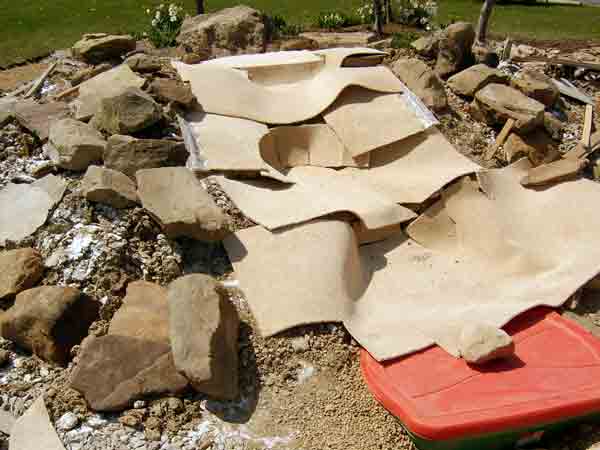
Remove any sharp objects in the bottom of your dug course. Then put in a fabric underlayment that will protect the liner from puncture when large rocks are placed on it. Commercial underlayment is not cheap and so I chose an alternative material: discarded carpet. The carpet should be of synthetic material to last a long time in contact with the soil. Cut the carpet to fit the horizontal and vertical spaces (photo 2). Then lay the liner over the entire course of the waterway. It should extend a foot beyond all edges and drape into the tub or reservoir basin. To calculate how much liner you will need, add all horizontal and vertical dimensions plus two feet for the surface extensions in both directions. Large anchor rocks will hide this surface extension and help to hold the liner in place (photo 3).
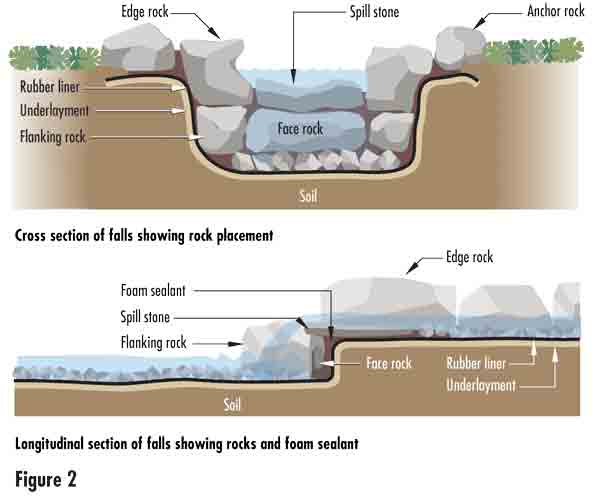
Leave some slack at the base of each waterfall so that heavier rocks won’t stretch and weaken the liner. Place larger, preferably vertical, stones at the sides of each waterfall with an extra piece of rubber liner underneath to cushion the weight. Position a flat, vertical face stone between the two flanking rocks, tall enough to support the spill stone over which the water will pour (figure 2). Continue placing edge rocks along the course of the waterway, bringing the liner up behind the stones and packing dirt against the liner so that it rises a few inches above the expected water level.
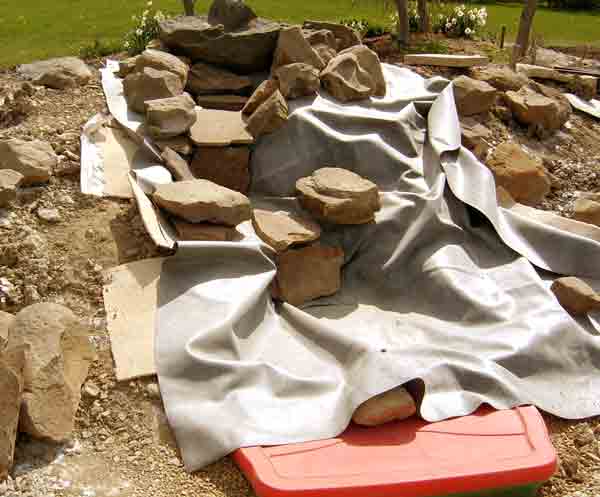
Next, place your spill stones so that the water will fall into the pool below. The spill stones should be flat and not very thick. Irregular rocks at the edge or bottom of the falls will create more sound and water movement.
Using black, expanding foam
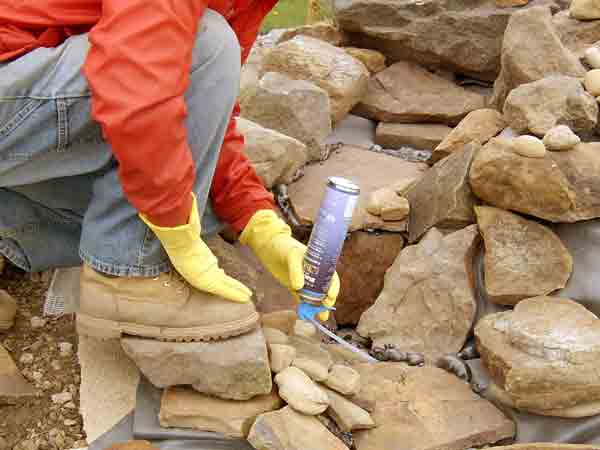
To make sure all the water goes over the spill stones and doesn’t sneak around the edges, use black, expanding foam sealant made for ponds and waterfalls. Apply foam sealant to the edges and underside of the spill stone to adhere it to the rubber liner (photo 4). Now fill all the gaps with smaller rocks to force the water to go over the spill stone, and apply foam sealant around any stone where the water might go astray. Black, expanding foam sealant is available in most stores that sell outdoor pond-building supplies, or may be purchased online.
Try to have all the rocks lined up or in place before you start foaming. The sealant hardens in about 30 minutes and can be cut and shaped easily with a utility knife. It also becomes quite stiff in the delivery tube after only a few minutes of not being used. The plastic tube can be cut shorter and foam will then come out again, but after 30-45 minutes it’s almost impossible to get anymore out of the can. I used parts of two cans to do my waterfall.
Finishing the waterfall
After all the rocks are placed and the foam sealant has hardened, run water down your stream (from a hose or using your pump). Look for water that may be leaking around rocks away from your spill stones and fill any remaining gaps with more sealant. Place a variety of round river rocks in the course of the stream (from egg size to pea size) for a natural look and to give the water something to tumble over. Bring soil up around the anchor rocks that rest on the liner extensions, making sure that drainage through the soil will flow away from the stream so as not to make the stream water muddy. Now all you need are plantings and groundcover to make your stream and waterfall look like an integral part of your landscape.
Choosing a pump
Submersible pumps are measured in gallons per hour (gph) at a specific discharge height (or head). You will want approximately 150 gph for each inch of width of your widest waterfall for the best effect. To figure the head effect on your pump, calculate the distance your water pipe travels from the pump to the top of your stream, measuring vertical and horizontal (10′ of horizontal distance = 1′ of vertical rise). I chose a 12V DC pump for safety reasons and because everything else in my railroad runs on 12V. Bilge pumps for boats running on 12V DC are available with capacities of up to 3,700 gph. I chose a 1,100 gph pump (800 gph at a head of 3′); my largest waterfall measures 6″ wide. The Rule brand pump has a three-year warranty and I bought it from Amazon.com for $31.


