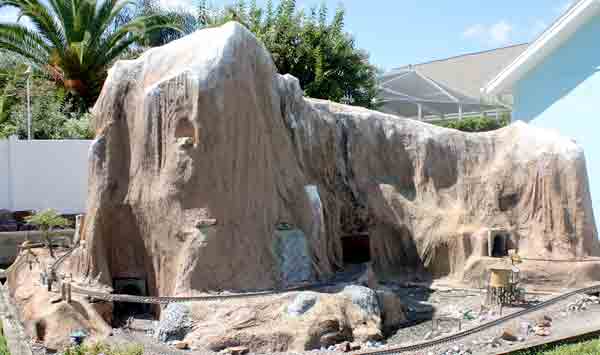
Before you build is the time to plan. How big a mountain? Style? Will the train run through the mountain and/or on the outside of the mountain? Even if you are not an artist, scribble some sort of general outline of your mountain on a piece of paper. Keep it simple. Don’t over-think the task.
Supplies: 2 x 4s, long deck screws, paper-backed wire lath (diamond-mesh lath), lath screws, washers, old bed sheets (unfitted), and type-S mortar mix.
The simplest way to look at this project is by thinking it out in four steps: framing, lath, covering, and finishing.
1. Framing. The framework is made up of a number of wooden A-frames, depending on how large the mountain will be. Make an A-frame by laying two 2 x 4s together, making a “V.” Use deck screws to fasten the two boards together. The length of the two 2 x 4s is determined by the height of your mountain. Do not measure! This should be a random sort of length. Each A-frame is just a random length, similar to the others. If you want a high peak in one spot, make a taller A-frame or two for that place.
When you have a few A-frames assembled, you can start to join one A-frame to the next. Stand an A-frame up and attach a 2 x 4 flat to the outside of it, about halfway up the height of the A-frame. Then attach the other end of the 2 x 4 to the next A-frame. Let the 2 x 4 overlap the upright of each A-frame by 4 or 5″. The first two A-frames will now stand on their own. You should have two, horizontal, connecting 2 x 4s between the two A-frames. Proceed with as many A-frames, as needed.
2) Wire lath (tin snips needed). This is a fun part. Anything goes. You could use chicken wire but I like wire lath as a base because it is a lot stronger. Wear a cheap pair of work gloves. Lay a piece of lath on the ground and walk all over it. Bash it up good with your feet. Remember, there is no such thing as a perfect mountain.
Once you have a sheet of lath nicely bashed and misshapen, it’s time to set it up on one of the A-frames. If you are going to do a tunnel section, start at the tunnel opening. If no tunnel, start wherever you want. There are special screws for attaching lath. Just ask at your local hardware store for wire-lath screws. They have a nice, oversized head-washer, which makes it easy to grip the mesh. After the first sheet, another sheet of lath goes on, overlapping the edge of the first sheet 4-5″. If you are doing a large, high mountain, put a section of lath over the peak and work your way down.
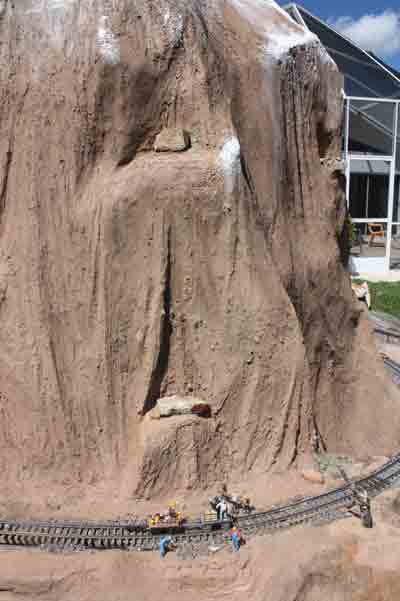
3) Covering (mortar mix and old bed sheets). It’s time to cover the mountain. Cut up old bed sheets into approximately 2′ x 4′ pieces, which are easier to work with. Mix the mortar mix to a thin consistency, fairly watery. Thoroughly soak a piece of the bed sheet in the mortar mix and place it on the mountain frame. Repeat the process for the rest of the sheets until the mountain is covered. Important tip: To hold wet sheets to each other on a steep section of the mountain, use either wire-lath screws or drive in a few decking screws. This will hold the sheets in place while the mortar sets up. Once the first coat of sheets and mortar mix has dried, it’s time to smear on one or two more coats of mortar mix using a cheap pair of cloth work gloves. You will need several pairs of the gloves.
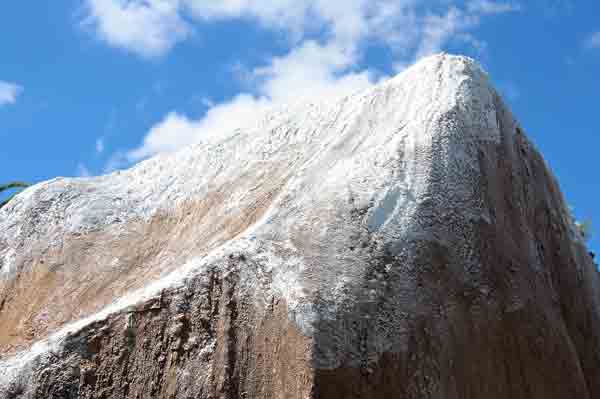
4) Finishing (paint). Decide on a color or multiple colors. Remember, anything goes here. I added a white section across the top of my mountain for snow. If you like the snow idea, I learned a little trick to make it sparkle. You can get crushed glass at the paint store. While the paint is still wet, sprinkle on the crushed glass. This will catch the sun and really bring it to life. Enjoy, and remember, anything goes.