Before we could start building, we needed a track plan. But before we could design our plan, we needed to know what sort of railway we wanted and what was possible. This was an important part of the process and not one to be glossed over. Rod and I sat down and discussed our potential railroad, based both on our wants and on the physical restraints imposed by our site.
We decided that we wanted a general-purpose railroad that offered both freight and passenger service. The era that we chose was early 20th century, say from 1900 to 1930. This gave us quite a bit of flexibility in the type of structures and rolling stock.
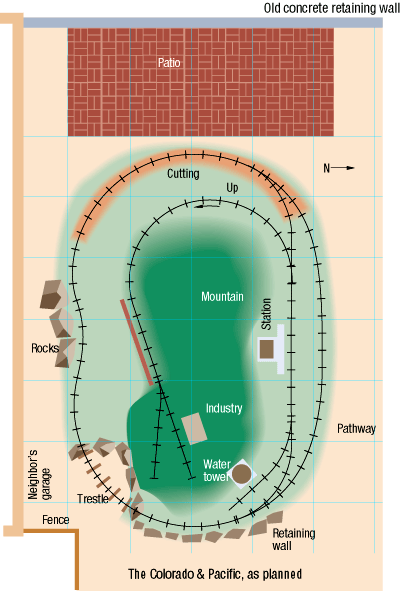
Through our discussions, we also decided we wanted a certain amount of operating capability combined with a simple, basic-loop trackplan. Live-steam operation, in addition to track-powered electric, was attractive to us, so a level mainline was desirable. A station with a passing track would give us the potential for two-train operation. We already had a water tower, from Grover Devine’s old South Pacific Coast line that we wanted to use, so some sort of engine-servicing facility was in order. A spur line, possibly elevated for interest, serving an industry or two would round out the package.
Our site was on a slope, but we wanted a level mainline, so we knew that we’d have to do some cutting and filling. A flat site, even if sloped, wasn’t too interesting, so we decided to build a mountain in the middle, one that would perhaps provide a home for our industry. If the mountain was big enough to obscure the view of the other side of the railway, so much the better. This would add interest and increase the illusion of distance.
Our site was pretty small, so track length and radius would be restricted. The rule of thumb is to use the largest-radius track your site will support. Trains, even little ones, don’t look natural going around right-angle curves. Even with our small site, we could still have a main loop with 6-foot radius curves, with a spur line down to, say, 4-foot radius.
Also, because of the limited size of our railroad, large, full-length mainline equipment was out. We opted to go with the smallest equipment we could find to keep the scale of the rolling stock in line with the scale of the railroad itself.
We also discussed mode of power. While we wanted to keep the live steam option, we felt that for instant availability, track power or radio-controlled battery power would be better for day-to-day use. We also wanted to be able to host visiting locomotives, so track power was almost a must.
On the other hand, we didn’t want to get into a wiring morass. With a simple-loop plan, we felt we could probably get away with a single set of leads to power the entire line, especially if the rail joints were soldered or if jumper wires were soldered across them. The main power supply would have to be kept in the house, with a line run out to the controller at the railroad, at the far end of the yard.
Drawing the Plan
Once we had finally settled on what we wanted for the railway, we sat down to develop and refine the plan. We made lots of rough sketches on tracing-paper over our site map. When finally satisfied, we made an accurate drawing of our proposed line to see if what we wanted would really fit and to check curves and clearances. While we made this drawing as accurately as we could, we kept in mind the fact that things could change somewhat when we finally got down to the site and started construction.
Our final plan showed a kidney-shaped mainline with a cutting at the high end and a retaining wall at the low end. A trestle at the very lowest point would provide drainage for the line. A station with a passing track would be built into the north side. Off the east end of the passing track would would be a short spur to serve as the engine facility, and at the west end a longer spur would ascend the mountain to an industry or two. Large rocks on the south side would provide an obstacle for the train to negotiate, adding a little interest, and the hillside would be planted with suitable, scale-appropriate plants and miniature trees.
Now we had a plan, something concrete that we could work from, something that felt good to us, and that satisfied the requirements that we’d set out. Now it was time to get out the shovels.





I want to design a main line S.P. Gauge One line. I already have several articulated locomotives, and several eight and twenty car passenger trains While I like the conversion to radio control, I want to start with track power. I would appreciate an article on track power problems, and their solutions, with track two hundred feet long.
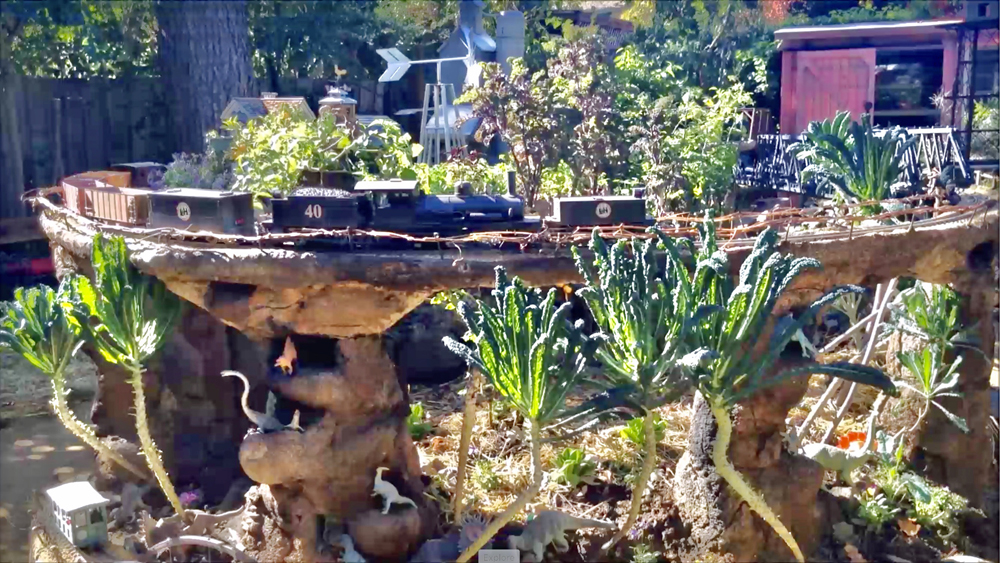
This shows a trackplan doesn’t have to be complicated or expensive to be a viable garden railroad. I am currently down sizing from an around the yard layout to a raised garden railroad similar to the one shown in the article. I have found that my operational interests have changed from a point-to-point layout to a plan that allows me to run multiple trains at the same time. Similat to the old Lionel plans built on a 4×8 sheet of plywoodi Less maintence, more running.
Thanks for the article. It gives me a couple of worthy topics and suggestions to consider, and a direction toward developing my first garden railroad theme and track plan. I enjoy the planning of any project, as well as the subsequent steps. It is as my father taught me, “enjoying the journey” and each step as well as the desired destination.