Perhaps one reason for this lack is the difficulty of building realistic, durable roads for outdoor railroads. I have come up with a simple, quick method of building simulated asphalt or dirt roads that are totally weatherproof and can be walked on. My roads recently survived a storm that dumped 31/2″ of rain on them with absolutely no deterioration. In addition, I use them as walking paths to give me access to the middle of my railway.
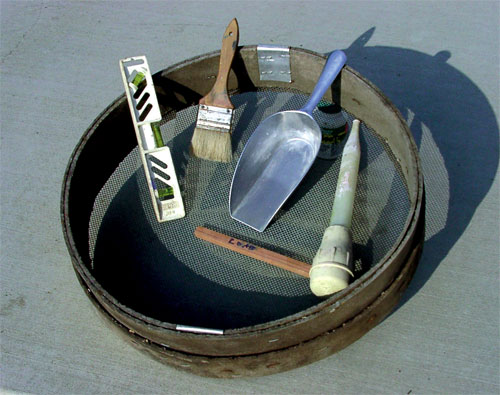
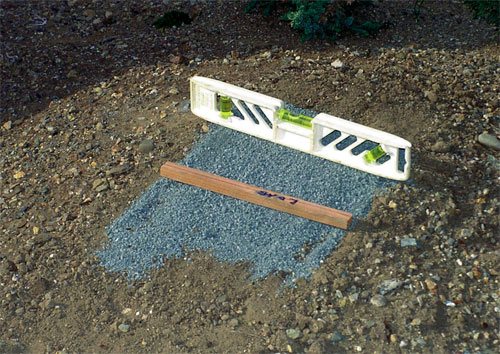

The only tools needed are a kitchen scoop with a flat bottom, a paint brush, a small torpedo level, a turkey baster or spray bottle, and a sifter with 1/8″ mesh or a two-foot-square piece of 1/8″ hardware cloth. It also helps to make a gauge to measure the width of the road to keep it fairly constant. I made my gauge from a 3/4″ square piece of wood cut to the same length as the desired road width.
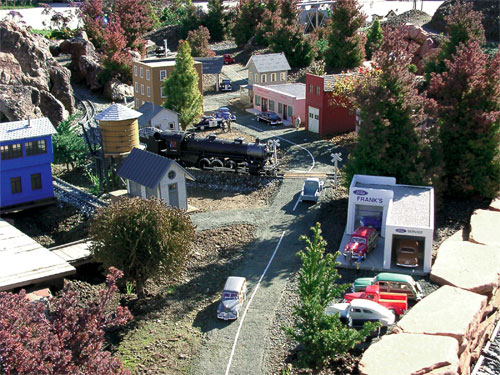
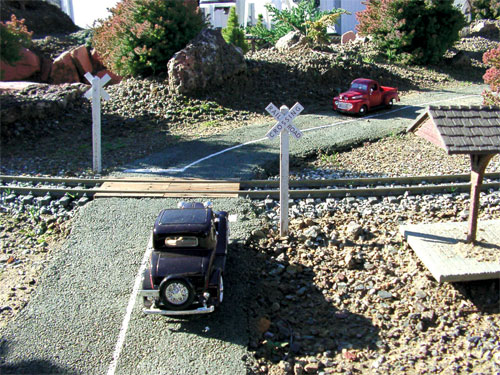
When I made my first roads, I built them with prototypical 10′ wide lanes (20′ total width), using 1:24 as my scale. I soon discovered that these actual 10′-wide roads sort of overwhelmed the rest of the scenery. Since I have a lot of 1:24-scale die-cast cars, I decided to make the lanes just wide enough to accommodate these cars, with a little extra width so they looked comfortable on the road. I finally settled on 4″ lanes and a total road width of 8″ for a two-lane road.
The actual construction of the road is simple and fast. Determine where you want the road to go and begin by grading a roadbed just us you would to lay track. My roads are laid directly on the dirt. Do not make the roadbed level. Grade it with one side slightly lower than the other so the road will drain. These roads can be crowned for drainage, but that is not as easy as it sounds and generally doesn’t work all that well.
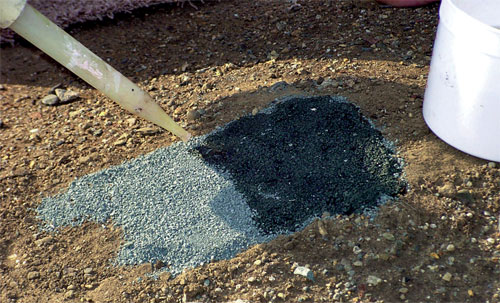
Screen the fines through the sieve or hardware cloth into a bucket. This takes all the lumps out and will give you a smoother surface. Dilute the concrete bonder with four parts water to one part bonder. Stay as close to these proportions as possible. If the glue content is too high, it tends to put a white coating on the road surface. You may want to add a couple drops of dishwashing detergent to act as a wetting agent.
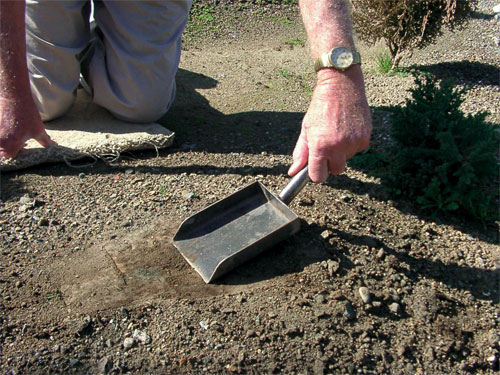
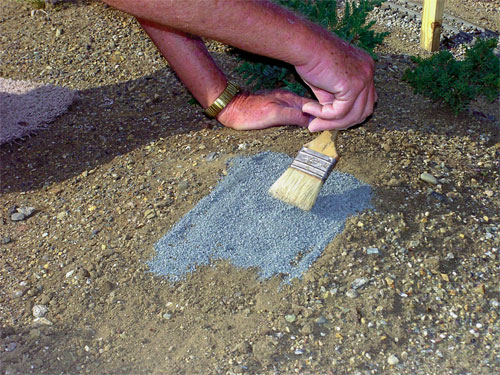
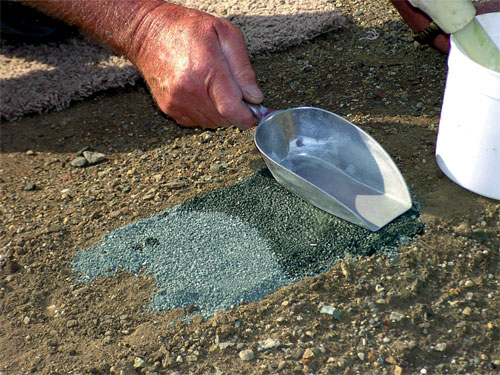
Using the scoop, distribute the screened fines over the roadbed approximately where the road will be. Make them about 3/4″ thick. With the paint brush, shape the fines to their final form and smooth out the surface, using the wooden gauge and level to ensure proper width and run-off angle. Using the flat bottom of the scoop, gently pat the fines to pack them down slightly.
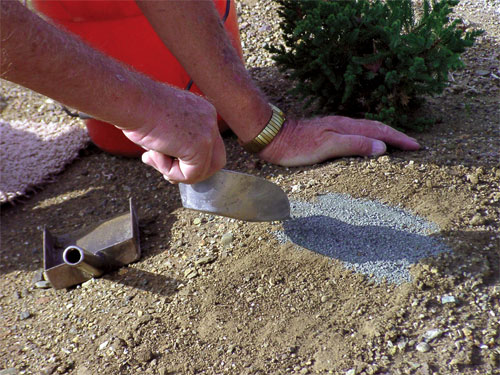
Apply the diluted concrete bonder very gently with either the baster or the spray bottle. Saturate the fines thoroughly but gently, so they are not washed away. Be sure to apply enough bonder to soak all the way through the fines and bond the “pavement” to the surface below. If applying the bonder disturbs the fines, dip the scoop in water and use the flat bottom to smooth them out. Be sure to rinse the scoop again or the bonder will dry on the scoop, ruining it for further use. Keep a container of clean water at hand for this purpose. Also, be sure to thoroughly rinse out the baster or sprayer before you put it away.
That’s it! Depending on the weather, the road usually sets up in a couple of hours. I prefer to leave it overnight before allowing it to get wet or walking on it.
The concrete bonder does not dry to a brittle hardness. It retains a little flexibility. This is what makes these roads so durable. Walking on them will not cause damage as long as they are on a solid base, like packed dirt. If they are somehow damaged, a virtually invisible repair can be made with the fines and bonder.
Dirt roads can be made using gold fines instead of gray fines. Remember that most dirt roads do not have smooth surfaces, so be sure to include some ruts and potholes.
Since my railroad era is pre-1950, I embellished the roads by painting solid white lines down the center. This was done with masking tape, a stipple brush, and white, exterior-grade latex house paint. Be sure the masking tape edges are pressed firmly onto the road surface. Dab the paint on with the stipple brush fairly dry. If the brush is too wet, it will force the paint under the tape. Keep dabbing the brush until the line color looks appropriately solid. If you are modeling a later era, you may want to use broken yellow or white lines.
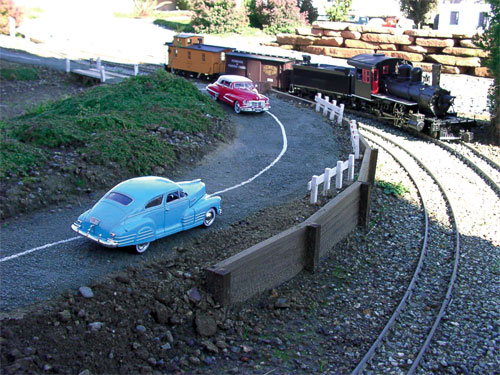
My roads are now two years old and have stood up pretty well, especially in view of our having record rainfall here this winter. There is some deterioration, mostly cracks and some chipping. The roads are still strong enough to be used as footpaths through the railway.
I now think that there are a couple of things that can be done to make them almost bulletproof. First, I think that they should be made a little thicker. In my article I said to lay the screened fines about 1/4″ (a misprint said 3/4″) thick. It now appears that 3/8″ would be better. The extra thickness would probably eliminate the cracking. Second, the ratio of water to concrete bonder needs to be lowered. In the article I said to use four parts water to one part concrete bonder. Using three (or even two) parts water to one part bonder would most likely stop the chipping.
I feel that the combination of these two changes would greatly increase the strength and durability of these roads, even to the point where they should be nearly maintenance free.