“Don’t sweat the small stuff!” That’s easy to say when you are running small equipment on your rails. Your diminutive LGB Stainz and two-axle freight/passenger coaches with hook-and-loop couplers can track over pretty much whatever you throw at them.
But what of us who like to run the big stuff? Heavyweights, streamliners, and extended freight cars are especially susceptible to bad track-work, and who wants to spend the afternoon re-railing their coaches due to settling roadbed?
What if there was an easy, unobtrusive way to keep the critical areas under control? Even better. What if you could do this using discarded materials, such as office chair mats?
Over time, plastic, carpet-covering floor mats tend to crack and deteriorate under the weight of rolling chair wheels. But for garden railway applications, these mats, even when cracked from their intended use, will still provide a sturdy subbase to keep trackwork together and in proper alignment. Let me show you how!
Ideally, you can use a saber saw fitted with a fine blade to cut the plastic material. Do not use a motorized hand tool, as the high-speed cutting disk melts the plastic as it cuts. If a saber saw is not available, a hand saw will work just fine. When possible, avoid cutting across the carpet spikes that you’ll use to secure the material into the ground. A electric drill also comes in handy for making small holes used to route wires through the mat.
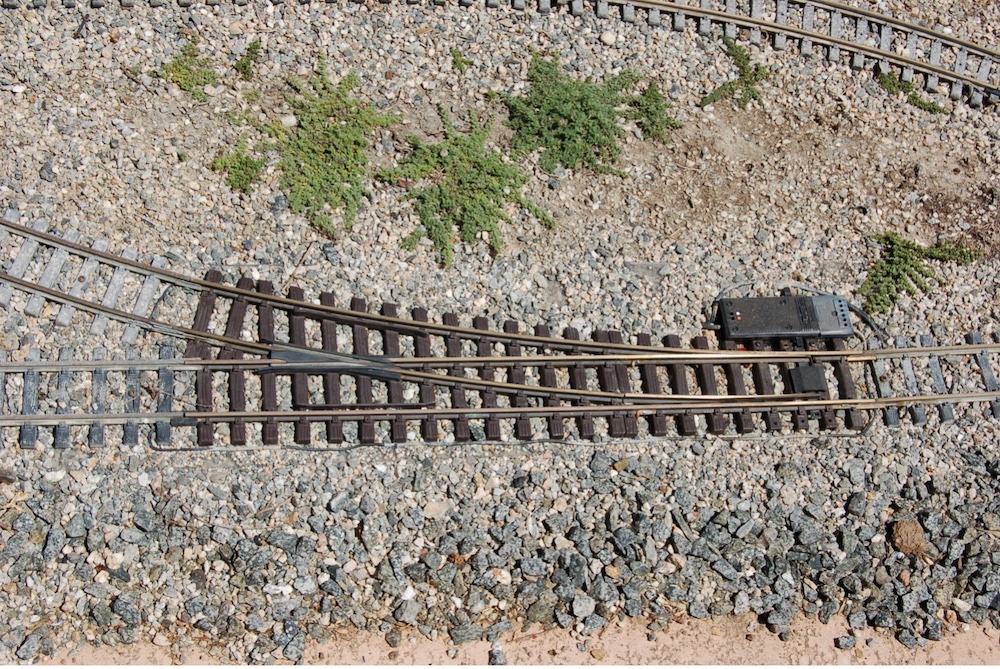
Assuming that we are starting with a used, damaged, chair mat, your cuts will be determined not just by what you want/need, but can actually make. In the case of turnouts, I like to cut the plastic long enough to include the complete turnout as well as about 4 inches of the lead in/out tracks. This allows me to screw the adjoining tracks, as well as the turnout, to the base and keep everything both together and in alignment.
Any differential settlement now affects the entire “assembly” that stays together as a whole, so that the track stays better in both horizontal and vertical alignment. You can still get some twisting in the trackwork, but it is spread over a much broader area is less severe at any one place along the rails. Additionally, by keeping the vertical alignment linear, rather than “stepped,” which can occur if the lead in/out tracks settle differently than the turnout, Kadee couplers stay together much better. I previously had a problem with my freight cars uncoupling when entering a turnout on a slight incline that had “stepped,” but no more.
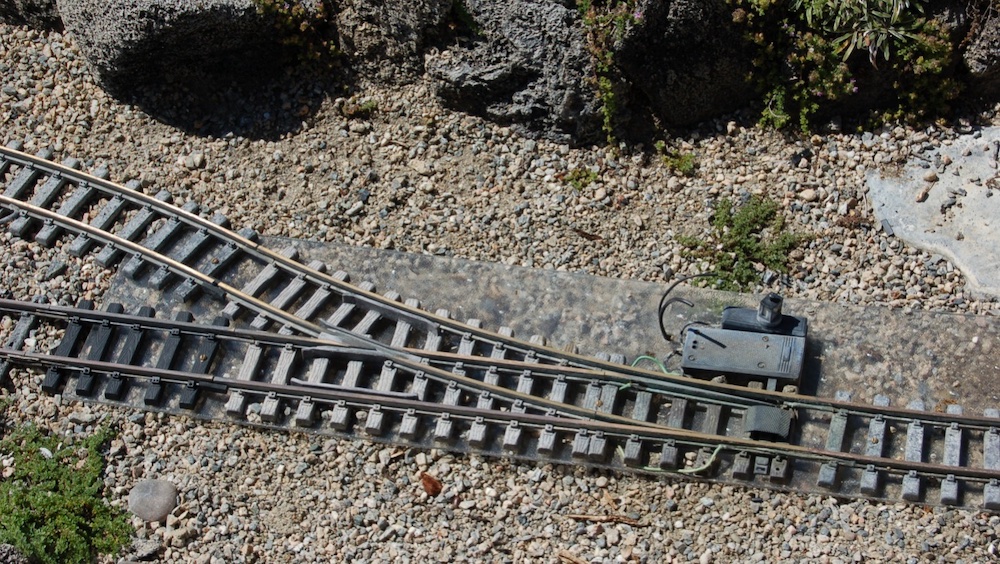
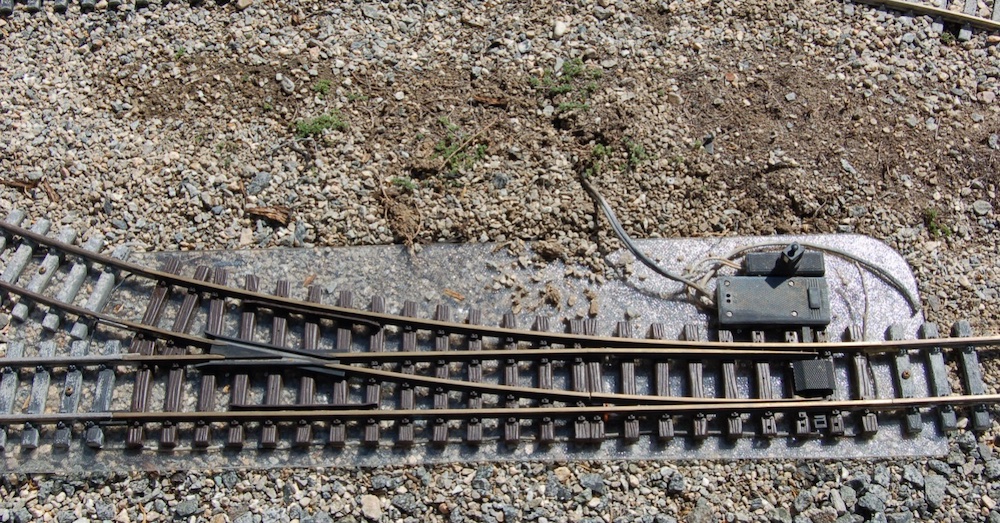
Photo 2. Todd Brody photo
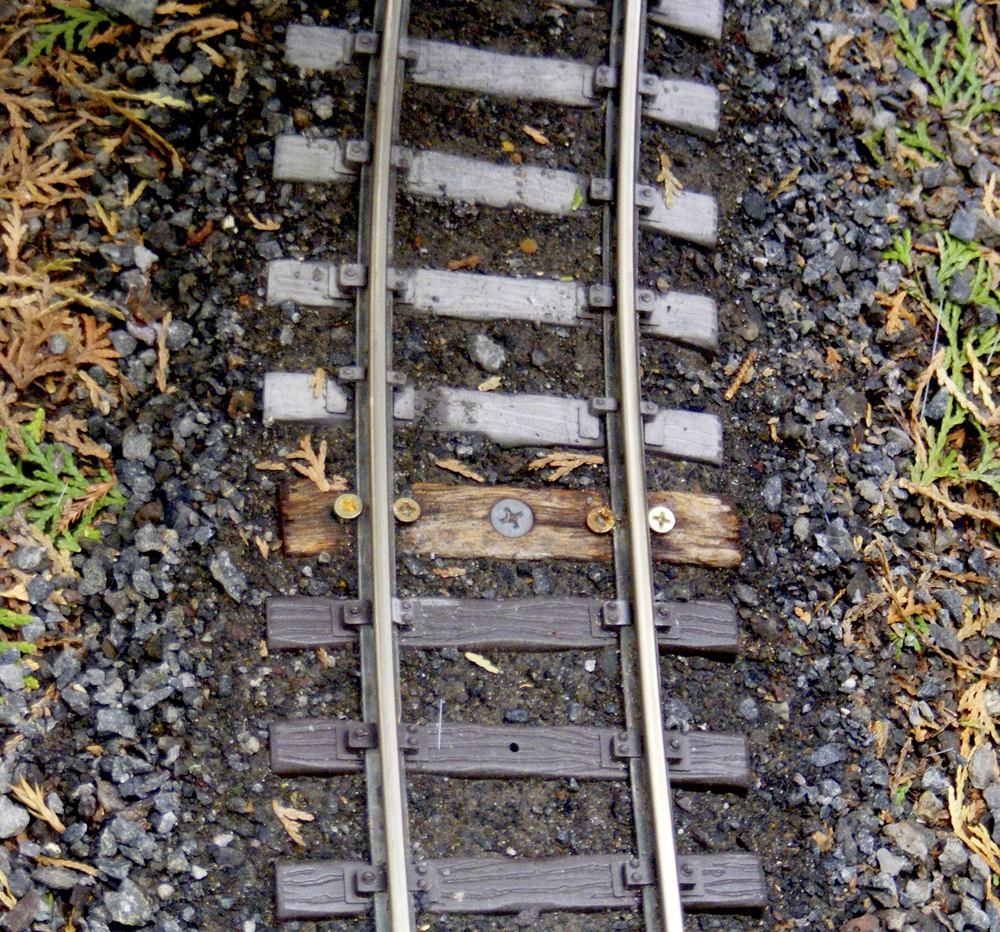
Photos 1 and 2 show cut pieces of the plastic mat under both LGB 1600 and 1800-series turn-outs installed and ready for re-ballasting. Originally, these turnouts were underlain with 2” x 8” wooden boards that had been treated with roofing tar and covered with roofing paper. But 27 years of watering the garden takes its toll on buried wood, even if treated.
Our track “floats” in the ballast and it was merely a case of lifting the track a bit, clearing out and leveling some of the old ballast, sliding the mat into place, and drilling the mat to accept the screws that will secure everything together. A 5/64” drill bit provides a nice tight fit into the plastic mat. I prefer stainless steel, #4 x 5/8” sheet metal screws, but brass will also work (Photo 3). If you use Aristo-Craft track, the bit and screws will just fit within the existing tie holes. Do not overtighten the screws, or you’ll crack the ties.
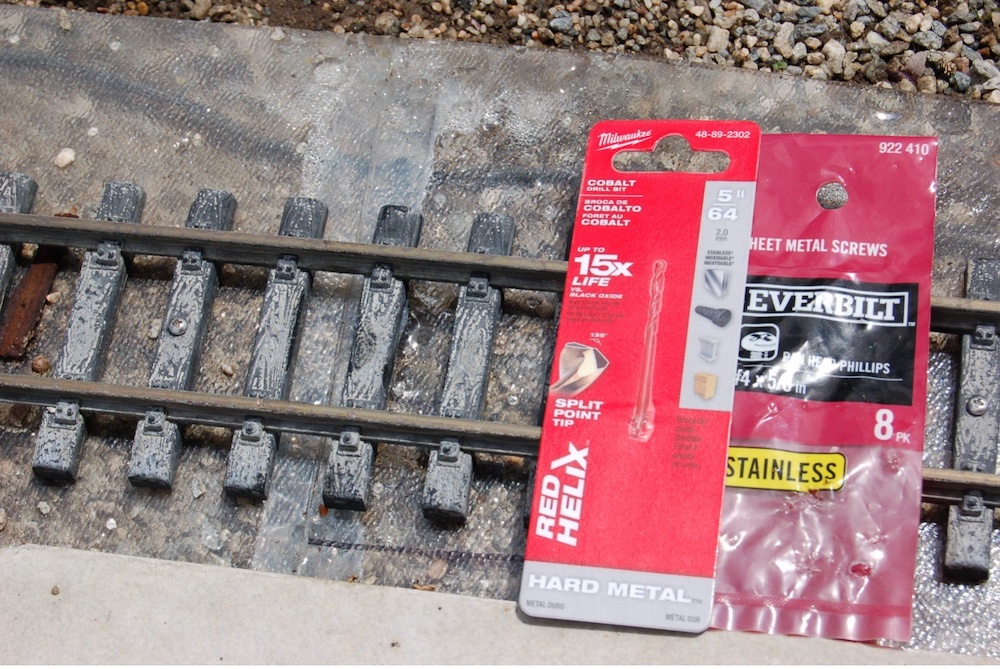
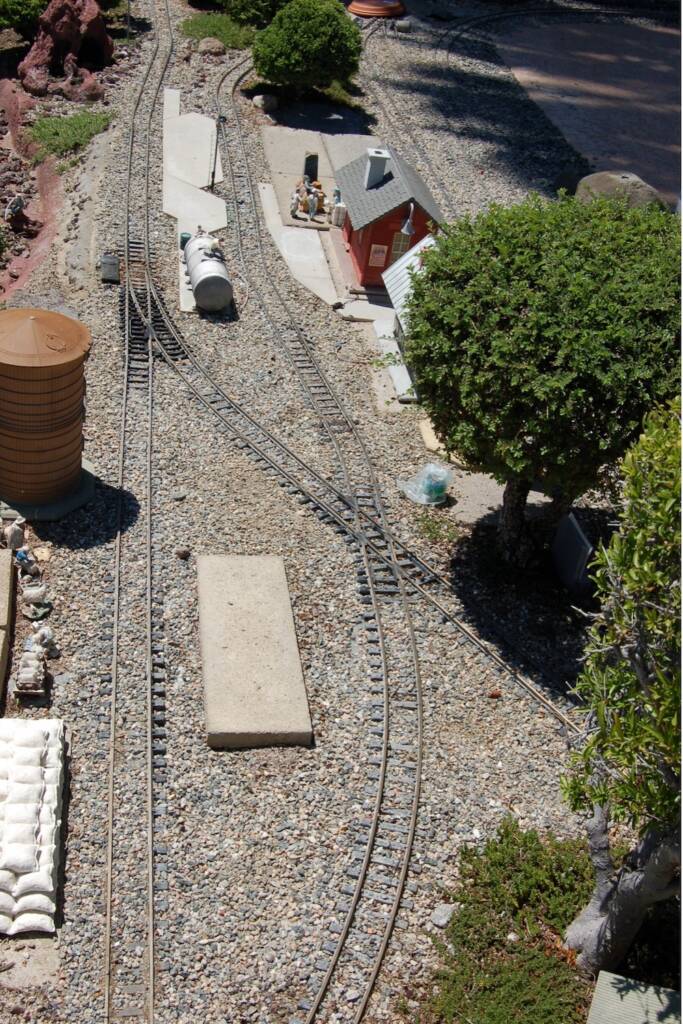
Photo 3 also illustrates how the plastic mat can be “seamed” together to make longer runs. Cut the two pieces midway between the carpet spikes and a separate “bonding strip” that is thin enough to fill this area. Apply the adhesive to the top of the bonding strip and bring the two pieces together with the strip as an underlayment. E6000 adhesive works well for bonding this material together. Once the track is mounted, the area can be lightly re-ballasted and the mat, being clear, becomes nearly invisible (Photos 4 and 5).
In addition to reinforcing turnouts, the mat works well to stabilize “complex” areas, such as S-curves, that are especially prone to differential side-to-side settlement.
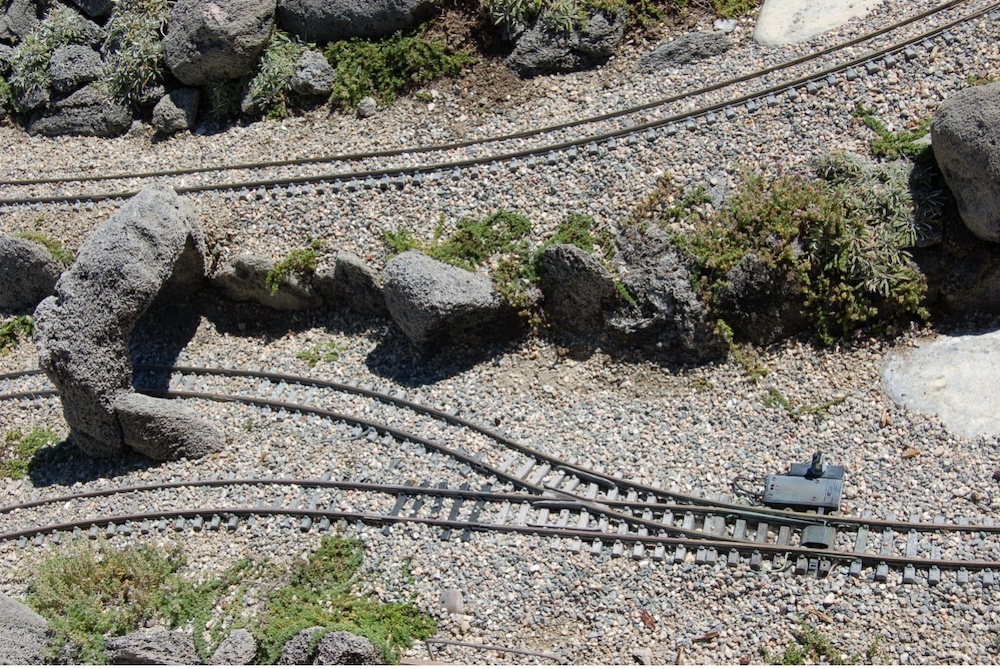
In one area on the T&LBRR we have a loop where a GP-9 pulls three streamliners through a 60 degree S-crossing that is shared with the local freight. Differential settlement through the sweeping “S”, that includes the diverging path of a turnout, always made this a difficult passage with lots of uncoupling and derailments. And with 27 years of settlement, time only made it worse. Because this crossing is shared with the local freight, and all operations are automatic running unattended off of track power, the crossing is not the place that you want to leave your nice stainless streamliners when the 2:05 p.m. freight approaches!
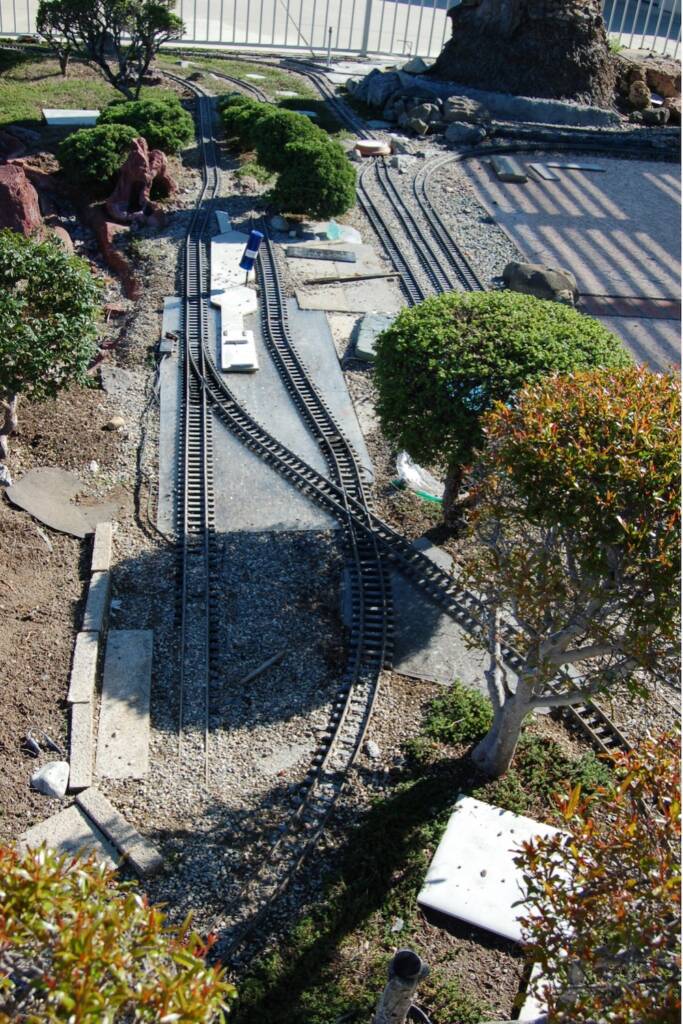
In this case the entire area was underlain with the chair mat (Photo 6). However, because of the protrusion of the wires directly under the crossing, this was done as two pieces. Again, the mat all but disappears when the ballast is applied (Photo 7).
The results at both the turnouts and crossing are all that I had hoped for. Soon after installation we hosted a layout tour for the National Model Railroad Association Convention in Long Beach, Calif. I’m pleased to report that there were no uncouplings at the turnout that previously had a “step” leading into it, and no derailments through the crossing area. Maybe this is just the thing to keep you on track.
Learn how author Neptali Martinez used composite board for his roadbed.
Share this article