3-D print problem
I stopped using my 3-D printers for a couple of months, then recently printed a part and noticed that the layers were not adhering as I expected. Under a microscope I could see tiny particles that prevented proper adhering of the material. I found that everything else had dust on it. I wanted to prevent this from happening again. This is what I learned along with design tips on how to build my own 3D printer enclosure.
Why use a printer enclosure?
• First, you must have a fume extraction system. In the latest studies of 3-D printed fumes, even PLA was deemed harmful because of the nano particles detected in the air while printing. All filaments create harmful particles when the filament is heated in the printing process.
• An enclosure keeps out dust and dirt that is attracted to the filaments because of a small static electric charge that builds up between the filaments and the machine extruder. Once it gets into the printed part, failure of the part will occur sooner or later. This is especially true if the part is under stress when used.• 3-D printers are not quiet. With an enclosure, the sound made while printing is much quieter.
• This is important to those of you with small children, it keeps hands and other body parts away from the hot end which can burn skin quickly.
Types of enclosures
There are many types of enclosures available on the commercial marketplace. I have not tried any of these and none of my 3-D printing friends have tried them either. (They all have made their own.)
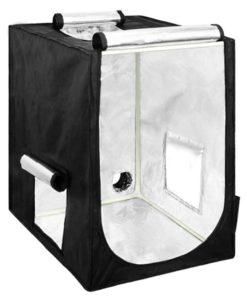
This one is a fabric/canvas outer flexible shell with a “fire-retardant” inner shell. I didn’t care for the design because there is not a convenient place to put a fan. You must mount the filament reel on the outside, which means the reel is exposed to the elements. The price is $40 which is not bad, but it isn’t my preference.
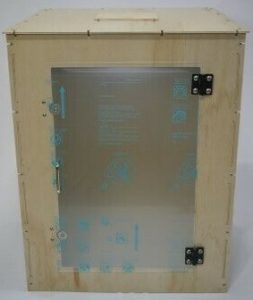
I found a wooden enclosure for $149 from Korea. Again, the spool goes on the outside but at least I could cut some holes in the wood for a fan. The wood does not appear to be finished. Wood dust can still contaminate the print and the print surface, so I did not choose this enclosure.
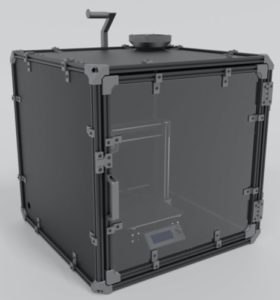
This metal enclosure from China is only $50. This also has the filament reel on the outside and it looks like some metal working would be required to add the fan and cable entrances. I can’t tell how tight the seal is on the door. Can dust and particulate matter get in when not in use?
Building my own enclosure
I’ll be using clear 10mm twin-wall poly-carbonate sheets. I am using polycarbonate because it is UV resistant and self supporting. A minor problem with polycarbonate is that it can be a challenge to glue.
My enclosure will have a wooden frame. I chose Sapele (Entandrophragma cylindricum). It’s more expensive than pine or poplar, but I wanted something that would look nice in my office. You can use any wood you prefer.
A 120mm, 12-volt fan should move about 71 cubic feet per minute of air. To power the fan and other accessories, I need a 12V power supply (such as an old computer monitor power hub).
One of the first accessories will be LED lights. Four LED landscaping floodlights should do the trick. They are not too bright and if necessary I can lower the light output. (The additional lighting will be used for a future Wi-Fi based camera.)
There needs to be access for changing the filament, removing parts, and maintenance. I also want the base of the printer to be at least six inches off the desk top, for cleaning and storing hand tools.
Here is my design.
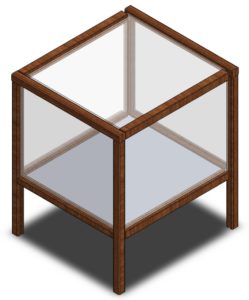
I’ll add triangles in all corners to improve the stability, and bracing underneath the metal bottom to prevent “beer canning” or flexure. I’m sure there will be other changes as the build progresses. The top of the enclosure is removable to allow access to the four sides so they can be removed.
I will be posting my final design on my website: www.rallecrailroad.com. Posting of the progress will be on my Facebook page too; search for Rallec Railroad.


