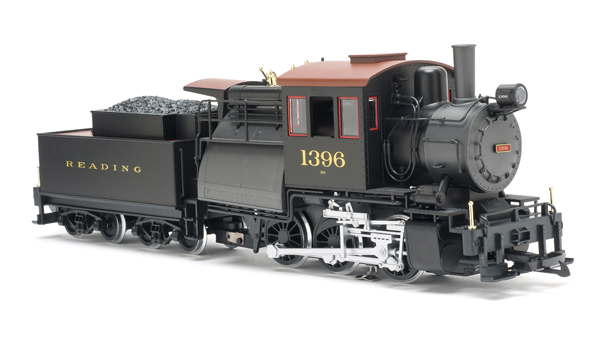
1:20.3 scale, gauge 1, live-steam East Broad Top Mikado
Accucraft Trains
33268 Central Ave.
Union City CA 94587
Price: $3,499 (live steam); $2,999 (electric)
Website: www.accucraft.com
All metal, live steam, 1:20.3-scale model of East Broad Top Nº 12; minimum radius, 4’; butane fired; sight glass; water pump in tender; fully sprung drivers; working Walschaerts valve gear (also available as an electric model with 24V motor). Dimensions: Length, 35″ (over couplers); width, 51/8″ (over cab); height 73/16″ (at smokestack). In 1:20.3 scale, this works out to 58′ x 8’6″ x 12’1″, respectively
Pros: Overall faithful representation of the prototype; smooth running, even at slow speeds; large boiler and fuel tank allows for long run times (upward of 1 hour)
Cons: Instruction manual lacks detail; some minor details not fully accurate to the prototype; valve gear “reversed” compared to the prototype
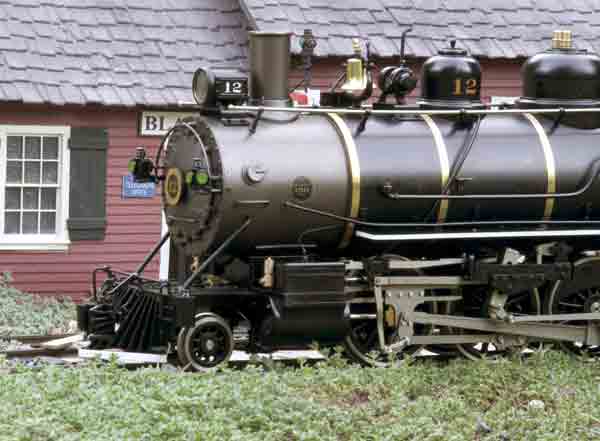
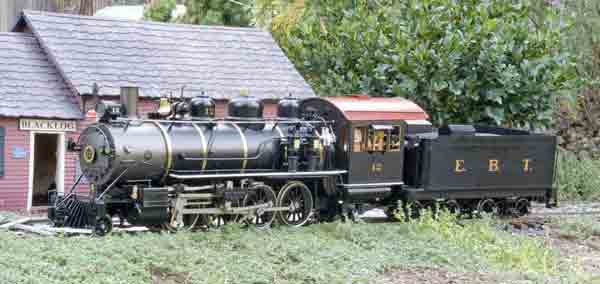
EBT Nº 12 was built in December, 1911. It could pull 15 loaded hoppers (70 tons each) from Robertsdale to Mt. Union. Nº 12 was so well received that the EBT would ultimately order five more over the next nine years—the first two just a little larger than the first, and the last three even larger still. Nº 12 was still in service when the railroad ceased regular operations in 1956, and was the first locomotive called back into service in 1960 when the line opened as a tourist railroad. It ran for an additional 40 years until mechanical issues finally sidelined it in 2000.
I’ve been waiting for a long time for this model to arrive. After un-cocooning the locomotive from its shipping container (a task requiring a screwdriver, pliers, and a sharp knife), my eyes were rewarded with a massive, well-proportioned locomotive that looked very much like the prototype. There were a few things that had me saying “huh?” but they are minor, and I’ll get to them later.
I took delivery of my locomotive at the live-steam track at the Colorado Railroad Museum, so naturally my first task was to boil some water and see how it ran. I opened the instruction manual and began reading, comparing what I read to what I saw on the locomotive. I’m left with the distinct impression that whoever wrote the instructions didn’t have the locomotive in front of them. Neither the photos nor the written instructions mention either the lubricator drain plug or the blowdown valve that protrude beneath the floor of the cab. These are both advantageous things and it would have been nice if the instructions explained their use (i.e., the instructions tell you to use a syringe to suck the water out of the lubricator, whereas, with the drain plug, you simply open it, loosen the cap on top, and let gravity do the work).
The instructions also tell you to fill the boiler full, then suck out 30ml of water to make room for the steam. This is far too little to make room for steam. Instead, use the sight glass to gauge water, then stop when it’s around three-quarters full.
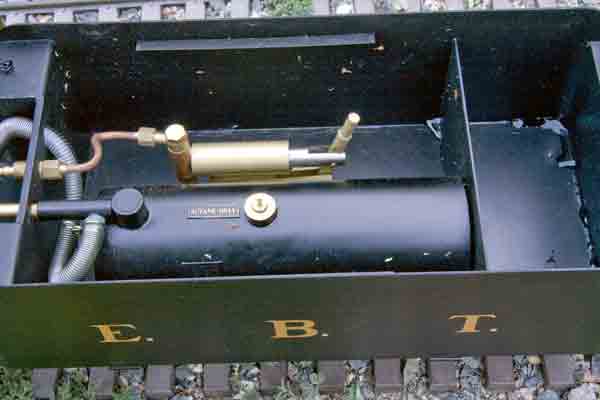
With the boiler filled, I topped off the lubricator with steam oil, then filled the cavernous gas tank in the tender. Don’t be surprised if you empty half your butane can on one filling. The good news is that it will last an hour or so before you need to refill it, even with two burners. With everything filled, I connected the water line from the locomotive to the tender, inserted the gas jets into the flues, and was ready to light the fire.
I pulled open the smokebox door, stuck in my lighter, and opened the gas valve. The gas lit, and quickly pulled back into both flues. The burner is surprisingly quiet at low to moderate levels, but roars heartily when turned up high.
Within 10–15 minutes I had around 40 psi on the gauge, so I set off to see what the engine could do. It eased forward, clearing the condensate from the cylinders with only a little gentle prodding at first. Once the cylinders were clear, the locomotive sprang to life and took off at a fair pace. I backed the throttle down and the engine settled into a sedate pace (around 20 scale MPH). After a few laps around the track, I coupled it onto a short train (six cars) and watched as it pulled it without difficulty. It later pulled a nine-car train and I have little doubt this locomotive would pull a prototypical 15-car train without breaking a sweat.
The engine is quiet, with the chuffs just barely audible unless just starting out. I wouldn’t mind a bit more of a bark to the chuff but there are aftermarket products that will provide that enhancement.
One curiosity is that the valve gear is “backward” compared to the prototype. You pull the radius rod up to set the locomotive to go forward and push it down to set it to reverse. I’m told you can make the appropriate adjustments yourself to correct this but locomotive valve timing is something of a black art, and I’m of the “if it ain’t broke, don’t fix it” mindset here. When it’s running, you don’t notice it.
I ran the locomotive for nearly two hours, stopping to periodically pump water into the boiler from the tender and once to refill the gas tank. The sight glass developed air bubbles that affected its accuracy, so I found myself having to guess a bit. (Hint: Place a very thin brass or stainless-steel wire inside the sight glass. This breaks the surface tension of the water and allows a more accurate reading. I did that on a subsequent run with better results.) After the run, I opened the blowdown valve (the one not mentioned in the instructions) and let things cool. Operationally, it was an excellent run—I could ask for no better.
When I got home that evening, it was time to see how the locomotive passed the “rivet-counter review.” When I compared the engine to published drawings, most of the dimensions were within one scale inch of the drawings. Overall, the locomotive gets high marks for accuracy.
There were a few things that jumped out as being a bit off, however. Let me preface this by saying that the entire time I was running the locomotive, I couldn’t see much that looked glaringly out of place; it was only when I closely compared the locomotive to photos that these things became evident. The most noticeable discrepancy is the presence of window shades over the center window on the cab. The prototype never had them. It had a small U-shaped rain gutter but no shades. That’s easily fixed with some wire cutters.
The running boards along the boiler simulate metal, whereas the prototype’s are wood. They’re also a bit narrow; they should be even with the width of the cab, where these are inset by around 18″. Ironically, the front pilot deck has simulated wood grain, where the prototype is all metal. There are minor discrepancies in the plumbing around the injectors—pipes with bends where they should be straight. I was also hoping for better on the cab roof. With the exception of one row of rivets right along the front edge, there’s no attempt to replicate the rivet pattern on the prototype’s roof, nor does the roof turn down at the edges quite as sharply as does the prototype.
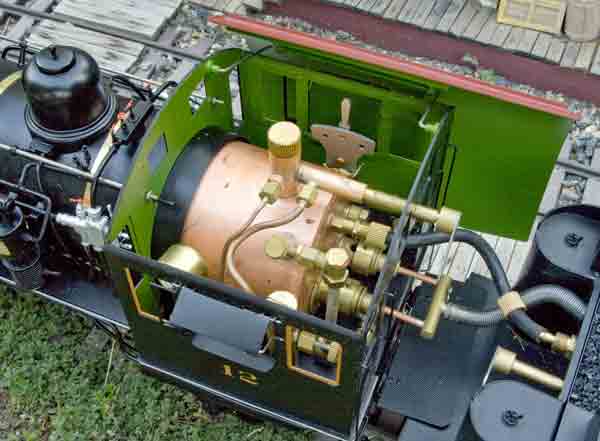
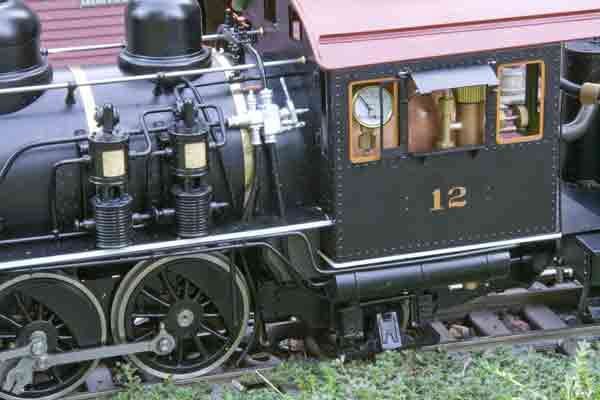
On the tender, I was a little disappointed in the lack of wood grain on the parts that are supposed to be wood—tool boxes, end beams, and decking. The inclusion of the poling pole is a nice touch, and something that’s often missed. The top of the tender is easily removable so you can get to the gas tank and water pump inside.
The locomotive comes painted in the “tourist” paint scheme of the EBT, which includes brass boiler bands, red roof, and white trim. (For the utmost accuracy in this scheme, Nº 12 should have the name “Millie” under the number on the cab.) The graphite smokebox should also be black. (Only Nº 14 ever had a graphite smokebox, and that was only in recent years.) In regular service, Nº 12 would have worn basic black from head to toe. The lettering is crisp, but isn’t quite as vibrant as the orange used on the prototype. Rather, it looks like the lettering on the locomotives as seen in photos, where it’s been weathered with layers of coal dust. The color on the window trim is a little too orange, too. It should be closer to the color of the roof.
In terms of mechanics, the locomotive tracks well. All the drivers are sprung and the locomotive adapts to rough track easily. The two center drivers are blind, as per the prototype. While the specs state the locomotive can run around a 4′-radius curve, I’d recommend larger curves for a engine of this size, if only for aesthetic reasons (though mine really slowed down on my 5′-radius curves). The wheels all fall within G1MRA and NMRA tolerances. Couplers are Accucraft’s standard 1:20.3 coupler, in order to couple with the rest of their equipment, though the prototype used a three-quarter-size coupler, better represented by Accucraft’s 1:32-scale coupler. Alas, fitting those couplers would require some surgery.
The literature on the company’s website lists this locomotive as being “R/C ready.” I’m not sure what that means; the written instructions are vague. In fact, they state the locomotive was designed to be manually controlled. There is a compartment in the rear of the tender that is more than ample for batteries and an R/C receiver. There’s a small tube that runs from this compartment to the front of the tender, presumably for servo wires, though there’s a sharp bend at the end of the tube that would prevent the plugs from making it through. You’d have to snip and resolder the plugs once you run the wires forward. Inside the cab, you’re on your own when figuring out how to mount the control servos. There’s ample room, to be sure, but no brackets or anything like that.
Overall, I’m impressed with this locomotive. Accucraft has done a great job of capturing the look and feel of the smallest of the EBT Mikes, and the engine looks stellar sitting out on my railroad with a string of hopper cars behind it. Of course, I wish they had gotten everything right on the engine but, even for purists like myself, “close enough” works. I’ll change what I can and live with the rest. As I’ve been running the locomotive, others who have known how long I’ve been waiting for it have asked: “Was it worth the wait?” The answer is unequivocally “yes.”