Brandbright Ltd.
Unit 3, Holland Business Park
Holland Way
Blandford Forum, Dorset DT11 7TA
United Kingdom
Price £27.50 ea; £97.50/four (less wheels and couplers)
Website: www.brandbright.co.uk
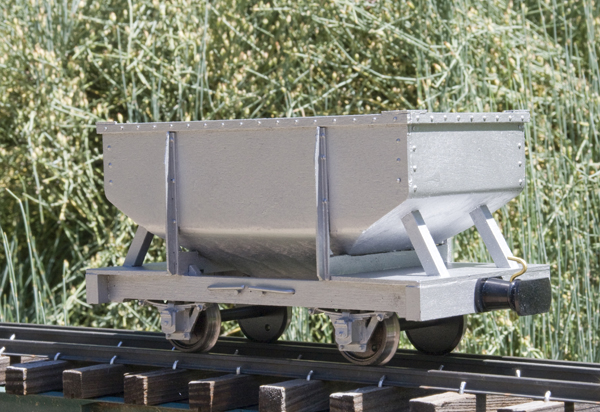
Laser-cut wooden kit (#GS19) for a British narrow gauge, four-wheel hopper car (wagon); white-metal and other hardware supplied; instruction sheets; can be built for ga. 0 or ga. 1 track; wheels and couplers available separately; requires painting
Pros: Complete kit; relatively straightforward construction; crisp, cleanly cut wooden parts; opening hopper doors; nice-looking finished product
Cons: Some minor cleanup required where the laser didn’t quite make it all the way through; instructions could have been more complete/clearer; wheels wouldn’t rotate without modification
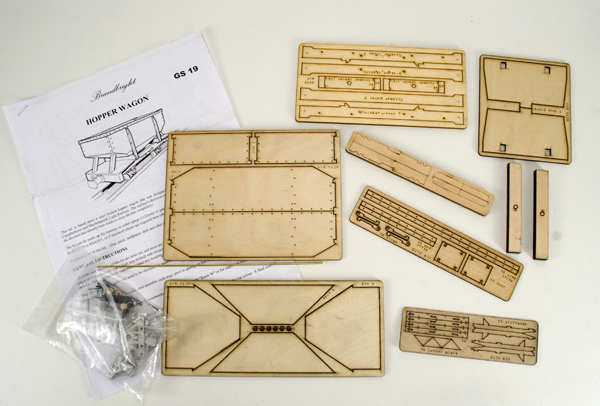
The kit contains several sheets of laser-cut wooden parts, both in plywood and what appears to be basswood. A hardware package is also included, which contains white-metal axle guards, brass bearings, various pins for detail, and a brass rod. Wheels and couplers are not included in the standard kit but are available separately from Brandbright. The builder will have to supply glue (PVA and epoxy), tools, and sandpaper.
Six pages of instructions are supplied. These contain both text and excellent drawings. Instructions begin with general comments concerning the kit and what the builder must supply and watch out for during construction. This is followed by a labeled, exploded drawing of the car with a parts list. Following that are the assembly instructions. I found these to be well written, generally logical, and easy to understand. This is not an easy kit, however, and I’d not recommend it to those with no model-building experience. However, if you’ve assembled laser-cut wooden kits before, this one should hold no particular terror.
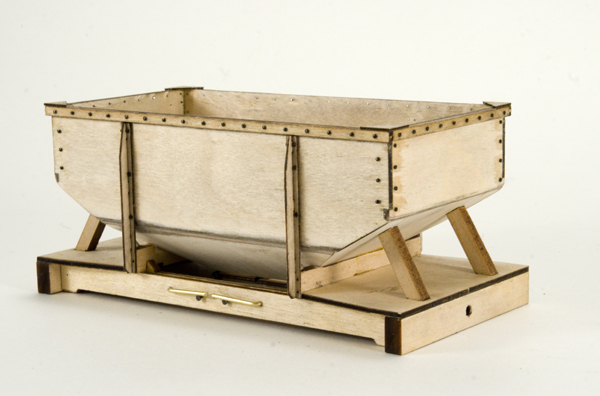
Most of the difficulties with this kit have to do with the odd angles formed by the hopper panels as they join the square sides. The instructions offer several excellent suggestions on how to achieve smooth joints, which are essential to the looks of the car, as you’re modeling a metal piece of rolling stock in wood.
The parts on the laser-cut sheets are held in surrounding wooden frames, or frets, by tiny tabs and will need to be cut out of them. This can be easily done with an X-acto knife. The remains of the tabs will then need to be smoothed with a file or sandpaper. I found, in a few instances, that the laser cutter didn’t quite penetrate the entire depth of the wooden sheet. In those instances, the edges had to be cleaned up a little—no big deal. Part names and numbers are etched into each part or the nearby fret—nice!
Assembly begins with filing or sanding angles onto the edges of a number of pieces. Guides are etched in to the parts to aid in this. Once this was done, actual assembly could begin. I immediately ran aground in this. It is important that the angled pieces be assembled properly, with the angle facing the correct way. Nothing in the instructions actually says this and it’s not immediately clear in the drawings. Consequently, I assembled the parts intuitively, which turned out to be wrong, necessitating the disassembly and cleaning of all the parts I’d assembled before they could be reglued.
The components usually fit together well, but a fair amount of trimming and sanding was required in various parts of the kit. This was generally covered in the instructions. Since you are replicating a metal vehicle, I found it almost impossible to do this convincingly without resorting to a filler material to cover and/or disguise joints, as well as sanding the surfaces to eliminate the wood grain.
Rivets are represented by tiny, blackened straight pins. These must be trimmed to length, then inserted individually into laser-drilled holes in the wooden parts. This is not particularly difficult but it is tedious. Also, the pins have a tendency to get away from you. This is mentioned in the instructions and precautionary measures are offered. Despite this, I still ended up losing a few and didn’t have enough to complete the project as intended. It would have been nice to have had a few more spares.
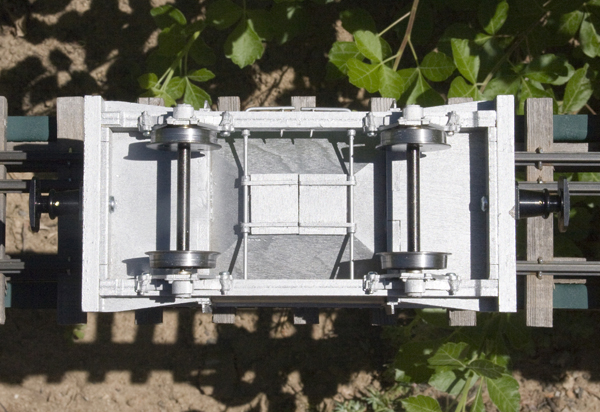
The white-metal axle guard castings were quite clean and sharp, requiring only minor cleanup with an X-acto knife. However, the holes had to be drilled out to accept the supplied axle bearings. As mentioned above, wheels and couplers are not supplied with this kit. However, the company kindly supplied both wheels (#RSA139/1, uninsulated steel wheels) and center-buffer couplers (#RSA45, blackened aluminum, unsprung) so that I could finish the kit. When installing the wheels, I found that the axle guards (axle boxes) were too close together and the wheels wouldn’t rotate. In assembling the kit, the solebars (beams to which the axle guards are affixed) are spaced according to a jig provided in the kit, so that spacing is predetermined. To get everything to work properly, I had to remove .015″ from the face of each of the wheel bearings to provide clearance.
Having completed this kit, I’d have to say that the instructions could have benefitted by more assembly illustrations and text that better covered each step. The difficult parts were pretty well covered but some areas were glossed over a bit, making assembly somewhat less straightforward.
This is a difficult kit and one that I would not recommend to those with no experience in building kits of this type. However, for those who have experience and the willingness to carefully read and understand the instructions and put in the time required, the end result is an interesting, unusual, well detailed, and accurate piece of narrow-gauge rolling stock.


