Gauge 1, 7/8″ scale, Welsh slate-wagon kit
The Train Department
26 Coral Dr.
Hazlet NJ 07730
Price: $75
Website: www.thetraindepartment.com
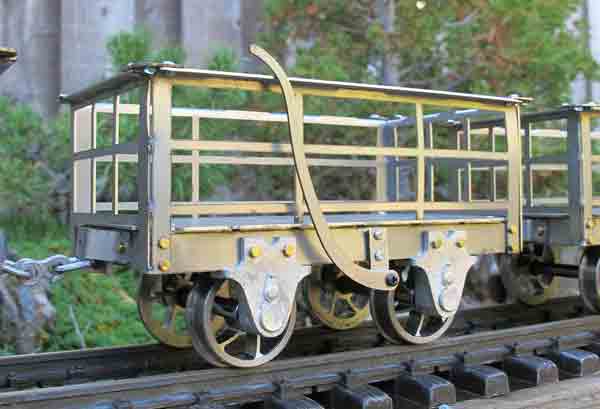
Welsh slate-wagon kit in 7⁄8″ scale (#TD5105); major parts, laser-cut steel; white-metal detail castings; curly-spoke wheels from Sierra Valley; instructions supplied
Pros: Good instructions; helpful drawings; industrial strength, all-metal construction; plenty of detail
Cons: Coupling this car to a different type of coupler may require creativity
When I bought my 7/8″-scale Accucraft live-steam locomotive, Emma, I had been looking for a larger-scale train to run around my vegetable garden. Maybe I’d haul some cherry tomatoes and kumquats to the kitchen, but in what cars? Finding 7/8″-scale rolling stock took a bit of searching. What I found is a selection of industrial rolling-stock kits online at www.thetraindepartment.com. Kits are more affordable, so I ordered three Welsh slate cars, which arrived in due time.
Here in this review, I’ll share how I put one together in the same time that my grandson built two of them.
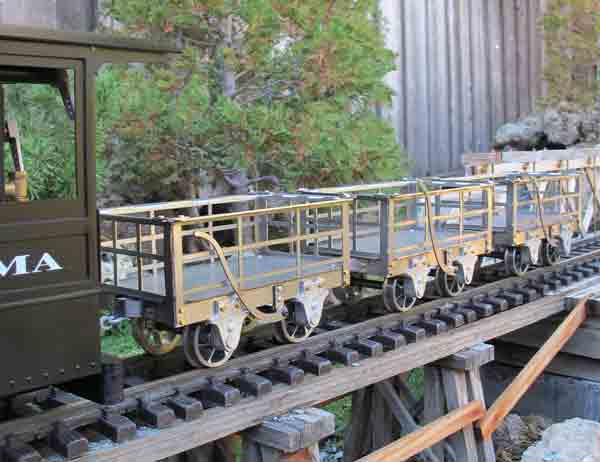
While grandson, Lake, bulldozed through his first kit in the garage, I found pertinent websites and ancient photos of quarries with many styles of slate wagons in Wales, some with wooden floors and sides, some of steel construction, and others a combination. These little wagons were solidly filled to capacity with rows of cut slate. To endure the weight, the prototypes were built compact and low—quite small, as rolling stock goes. Because Emma is a model of a short and stocky industrial engine, these wagons would look good linked behind it.
The skill level is advertised as “easy.” I read through the three pages of instructions, which were written by the maker of the kit, Stephen D. King. Steve’s a pioneer in 7/8″ scale (1:13.7), modeling two-foot-narrow-gauge railways on gauge-one track (August 1997 GR). Stephen, on page 2 of the instructions, suggests that we contact him if we have any questions or problems, giving his telephone number, e-mail, and address.
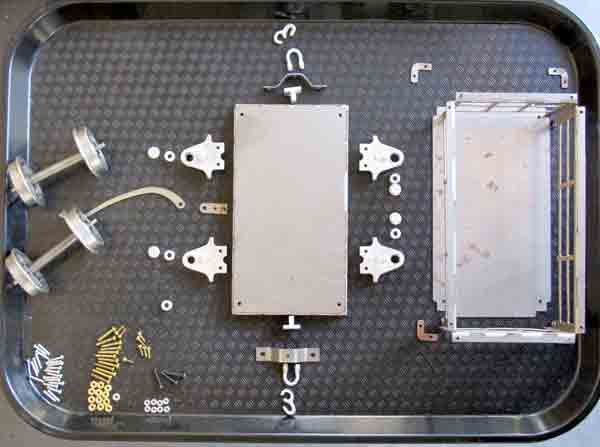
The parts list of 17 types of items (98 pieces in all) told me I needed to get organized. I spread all the parts out in a sort of exploded view on a cafeteria tray, guided by the drawings on page 3. I wouldn’t lose any parts this way. Luckily, I had one extra rivet, which replaced one lost on the floor. I saw I needed a 2-56 tap but didn’t find one among my store of taps. I began anyway.
The steel parts are laser cut. I used a file to clean up the burrs from the preformed wagon sides, the pre-bent frame, and the wagon floor. The axle box and caps, as well as the shackle-and-hook coupling sets (which were made of white metal) also needed a tiny bit of filing to remove flash. Most of the pre-drilled holes for the tiny 2-56 screws required reaming with a 1/16″ or 3/32″ drill bit. I didn’t drill through all the holes at once because the instructions warn against enlarging all of them. Smaller, brass, 1-72 hex-head screws and nuts hold the lower corners of the sides to the frame.
Rivets fasten the top corners of the sides together with boomerang-shaped plates, called corner irons. I’d never used this type of rivet, being more familiar with the rivet-gun type. These 1/16″-diameter aluminum rivets, about 1/2″ long, are pushed through the pre-drilled holes. This often required reaming to remove the burrs left over from the laser. Once through, on the unseen back side, I cut off all but 1/8″ of the tail of the rivet, then mashed it down. I used a nail set and small hammer to flatten the rear of the rivet, while holding the front side against a hard metal surface (the anvil of my vise), as the instructions suggested. My grandson Lake used needle-nose pliers (without ridges) to squash the soft rivets.
I glued the four nylon bushings into each axle box and glued each axle cover on the outside with CA cement. The supplied 18″ curly-spoke wheels (by Sierra Valley) look great and show off nice details on the axle boxes.
When mounting the brake handle, I used a fifth nylon bushing to hold the handle’s base about 1/4″ away from the wagon side to clear the bent edge at the top of the side. For his bushing, Lake chose to use a stack of three tiny washers we had on hand in order to preserve the all-metal look.
While just about every detail of these rugged-yet-refined wagons follows the prototypes I saw in pictures of Welsh quarries, the most interesting thing is the use of prototypical couplers. The coupler set starts with a part mounted to the wagon frame through which a curved shackle is screwed. The shackle is supposed to be tapped for a 2-56 screw, but since I didn’t have a 2-56 tap, I reamed the holes somewhat and self-tapped the screw into the soft metal; this tight fit seems okay. A hook then fastens to the shackle. Finally, a preformed buffer surrounds all three parts and protects the couplers when adjacent cars bump into each other.
There is at least a 1/2″ discrepancy in height between the Emma’s lower bumper and the slate wagon’s buffer, which makes coupling awkward. However, an Accucraft link, pinned to the Emma, will receive the wagon’s hook just fine. When I have more time, I intend to paint these cars as I’ve seen them online—rusty, due to wear and use. Others who have built these quarry wagons have left them steel-colored so far.


