Q: I’m excited to lay track on my HO scale shelf layout. I have a few track laying questions. I’m using the Walthers turnouts with the little tab on the side for the frog power. I remember one of your videos where you talked about these turnouts and connecting the power to the frog. Unfortunately, I cannot locate it again. Can you point me in the right direction?
Also, I will need to trim a couple of the turnouts to fit the plan. I have seen places where you’ve soldered together a series of turnouts before adding them to the layout. I’m thinking it would be easier to do all that at the workbench. Any advice would be welcomed.
Finally, I would like to wire and weather the track in the garage before putting the shelves back on the wall in my office. What are the latest paint brands and colors recommended? I know there have been a lot of changes in paint over the last few years. Second, any recommendations for laying and then cutting track at a layout section joint? – Philip Bailey
A: I’ll be happy to answer your track laying questions.
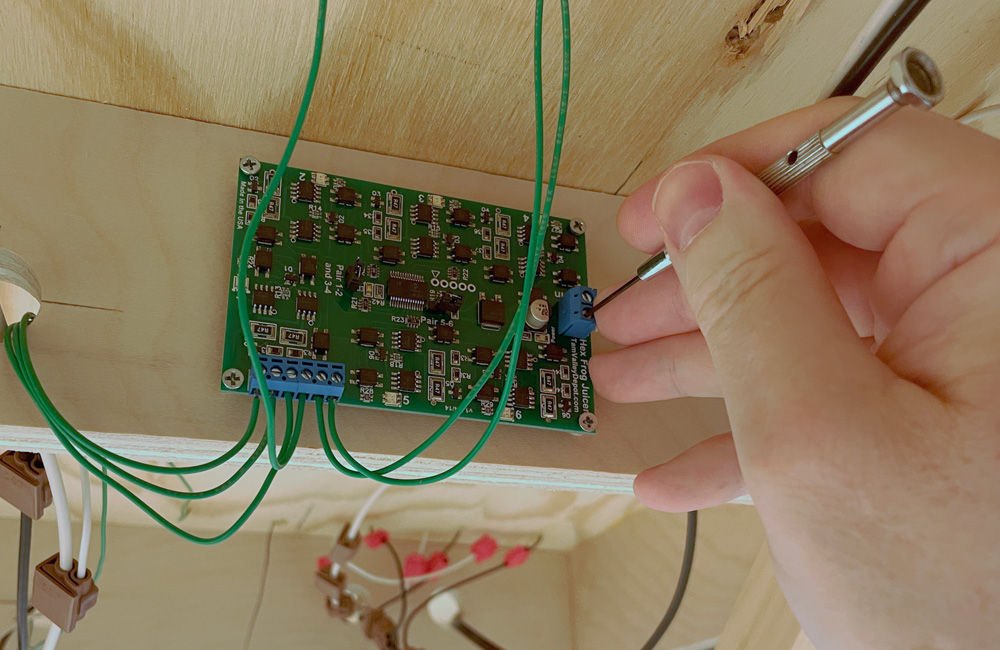
We don’t have a video specifically about powering the frogs on a new Walthers turnouts, because they’ve only been out a couple years and we hadn’t used them on a project layout yet. You might have seen a video about the older Walthers turnouts. However, we used them recently on our 2024 project layout, Freemont Mills, and powered the frogs with Tam Valley Depot Frog Juicers. We’ll be explaining how we did that in our February 2024 issue; keep an eye out for it. But if you can’t wait for that issue, we have another video you can watch from our Thin Branch series. Those aren’t Walthers turnouts, but the principles are the same; the only difference is you attach the frog feeder to the tab instead of directly to the frog.
Complicated arrangements of turnouts and crossings can be easier to assemble at the workbench, then place on the layout as a unit. Just be aware that different kinds of turnouts have different wiring requirements. Generally, turnouts with insulated frogs, like the new Walthers turnouts, can be soldered together in almost any arrangement without issue. Other turnouts, though, must have their heel rails insulated so power is fed to them only through the stock rails. Flip your turnout over and see which rails might be jumpered to which before you decide which can be soldered together and which must be joined with insulated rail joiners.
There are still a lot of hobby paints out there, including Vallejo, Humbrol, Tamiya, and Tru-Color. If they don’t have a color specifically called Rail Brown, they might have something similar under a name like Roof Brown, Dark Earth, Dark Leather, or Dark Skin Tone. Most hobby paint makers’ websites let you sort their wares by basic color; just filter for brown.
If I were to assemble a layout like yours with separatable sections, I would secure the track to the layout surface as a single piece; remove a couple ties on either side of the section joint; solder the rails on each side of the gap to two slivers of printed circuit board (PCB) that will take the place of those ties; cut a gap in the copper on top of the PCB so it doesn’t create a short circuit between the rails; secure the PCB to the benchwork with screws so the ends of the rail won’t move; and only then carefully cut the rails at the section gap, using a razor saw. This will minimize the movement of the rail ends so they will align properly whenever you rejoin the sections.
I hope that answered all your track laying questions. If not, look in the Kalmbach Hobby Store for Jeff Wilson’s book “Basic Trackwork for Model Railroaders.”
Send us your questions
Have a question about modeling, operation, or prototype railroads? Send it to us at AskTrains@Trains.com. Be sure to put “Ask MR” in the subject.


