


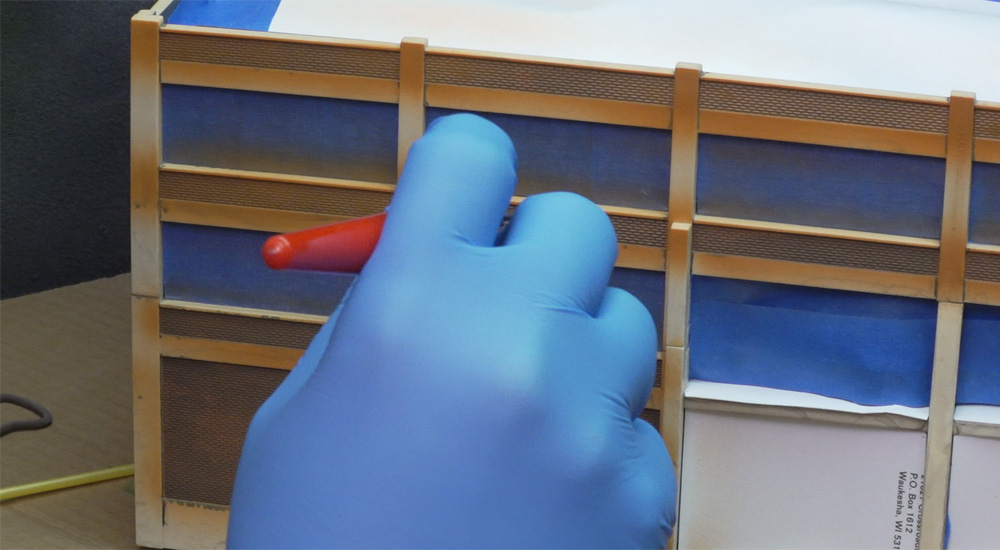
Q: I wonder if you could offer some ideas as to what might have caused a rough finish on an airbrushed structure. The prototype’s facade has white enameled panels, which I made by scribing lines in white styrene. The rest of the exterior is gray with a concrete block pattern, which I also modeled in styrene. After covering the whole model with gray primer, I airbrushed the facade with flat white acrylic paint, but I had a hard time totally covering the primer. The white paint came out speckled, the surface is a bit rough, and it took many coats to cover the gray, so it’s hard to see the scribed lines. What could cause this? Was it a mistake to prime the whole thing? I’ve never experienced this when airbrushing other structures, but this was my first time scribing styrene and painting white over gray. — Chris Taylor
A: I can think of a few reasons why your paint finish might have come out like that. One cause of a rough finish on an airbrushed structure might be bad paint. If you’re like me, you still have a stash of your favorite brand of hobby paints that were discontinued by the manufacturer years ago. However, even if those jars have never been opened, paint has a shelf life. Pigments will settle and clump if left too long, and once paint separates into clear and pigmented layers, it can never be completely mixed again. You might be able to mix it up well enough for brush painting, but airbrushes are much less tolerant of lumpy pigments. And once the factory seal has been broken, the clock starts ticking. No jar lid is truly airtight, and the smallest amount of air in the bottle will start the curing process. After opening, the longest you can expect hobby paint to be good is 3 to 5 years if it’s stored properly and opened only occasionally. If you want to use the paint in an airbrush, the usable life is closer to one-half or one-third of that.
The wrong thinner could be another problem. Water-based acrylic paints can be thinned with distilled water or the manufacturer’s recommended thinner. Don’t use tap water; it can have impurities that can cause the pigments to clump. Again, this might be unnoticeable if you’re brush painting, but airbrushes are much more sensitive. Some acrylics can be thinned with isopropyl alcohol, but not all paint formulations are compatible with it; some brands will “curdle” if mixed with alcohol. Test-spray a small amount on a piece of scrap material before thinning a large amount for spraying. For solvent-based paints, use only the manufacturer’s recommended thinner.
Although you used acrylic as your top coat, incompatible paint can cause similar problems. Spraying an enamel- or lacquer-based paint over an acrylic paint can cause bubbling and wrinkling, as the solvents in the top coat will attack and dissolve the layer underneath. Some enamel paints will work with acrylics, but a lacquer-based paint can only go over another lacquer. And once an enamel or lacquer base coat has fully cured, acrylic can be safely sprayed over it.
Next, check your equipment. Make sure your airbrush is scrupulously clean, especially if it’s the internal-mix type. Disassemble it after every use and let the parts soak in blue window cleaner for acrylic paints or an appropriate paint thinner for solvent-based paints, then gently scrub them clean with a Microbrush.
Finally, check your technique. Paint starts drying as soon as it leaves your airbrush nozzle and hits the air. This is especially true if you’re airbrushing in a hot, dry atmosphere, have over-thinned your paint, or have thinned it with alcohol. So if you hold your airbrush too far from the model, the partially dried paint will take on a pebbly texture on your model. Hold your airbrush 3 to 4 inches from the model, move it quickly, and don’t try to cover it all in one coat. Spray several light coats instead.
And on a side note, if you want to simulate enameled panels, consider a gloss finish paint rather than a flat.
Send us your questions
Have a question about modeling, operation, or prototype railroads? Send it to Senior Associate Editor Steven Otte at Steven.Otte@Firecrown.com. Be sure to put “Ask MR” in the subject.


This question actually helps me with one of my projects. I want to put a textured finish on a grain elevator. I thought the smooth plastic wouldn’t really represent the silos’ rough concrete surface. Now that I know what can cause a rough finish, maybe I can do it “wrong” to get the right results.
Thanks for all the advice, Steven. I made notes of this and will refer back to them when I try that project again. Thanks also for the suggestion of glossy paint for the enameled panels. I planned on applying a clear gloss coat over the flat white paint, and it just didn’t occur to me to use glossy white and save a step! 🙂