In 1980 and 1981, my wife and I rode round trips on the Viking and Badger, respectively, when they were still being used as railroad carferries operating between Wisconsin and Michigan. After those trips, I wanted to build an N scale version of the Viking. Unfortunately, I didn’t have the time or skills required back then, and my large Ntrak layout didn’t have room for a carferry dock.
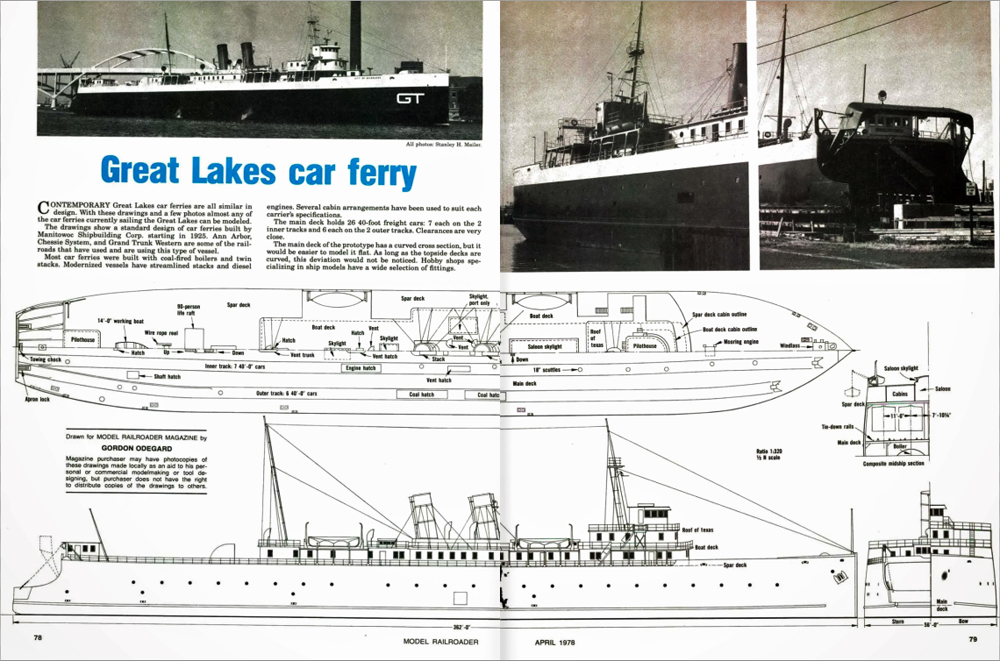
Fast forward to a model train club meeting in Dec. 2022. There, I saw a copy of the April 1978 Model Railroader, which featured a cover story on the Green Bay & Western’s carferry dock. Inside, there were drawings of a Great Lakes carferry. Seeing the magazine reminded me that I had a badly worn copy on my bookshelf. At 75 years old, I realized time was slipping by, and it was time to start building the Viking II, an N scale carferry.
Building the hull
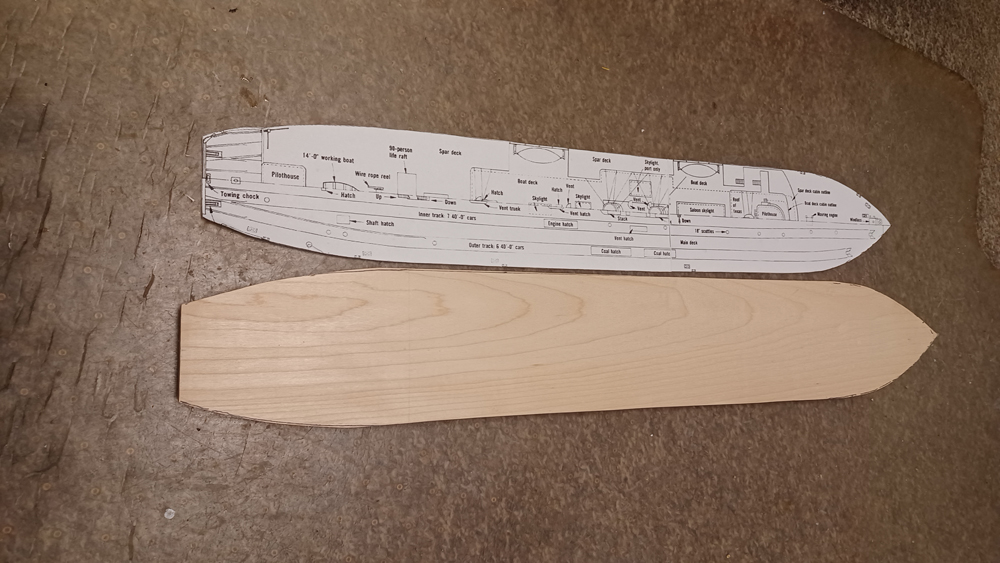
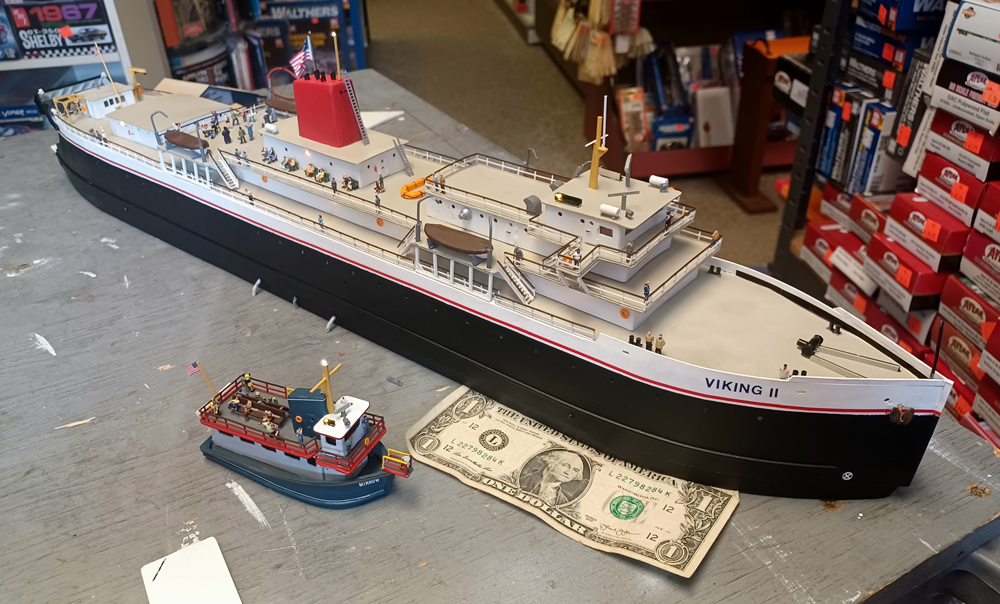
Using the ½ N scale drawings made by Gordon Odegard as a starting point, I created a 2023 version of the vessel that I called the Viking II. My story for the boat’s existence is that it’s a poor man’s cruise ship. As such, it’s a little fancier than how it looked as a railroad carferry. Since the vessel only handles vehicles, I omitted the rails from the car deck. In addition, I enlarged the pilot house to modern standards and included extra life boats.
I cut the basic hull form out of a piece of well-seasoned ¾” maple on a bandsaw. Then I used a disc sander to create the necessary hull shape just above the waterline.
I used Evergreen Scale Models .030” styrene sheet to build the boat sides, decks, and deck houses. I turned to the same company’s styrene strip for the ribs and deck beams. I used Plastruct Plastic Weld for all styrene-to-styrene joints.
The Viking had a tumblehome hull. This means the spar deck is narrower than the car deck with curved ribs. I mocked up a section of the hull based on both a curved side and slab (straight) side. The choice was pretty simple. I was going to put a lot of work into this project, and I wanted to do it right.
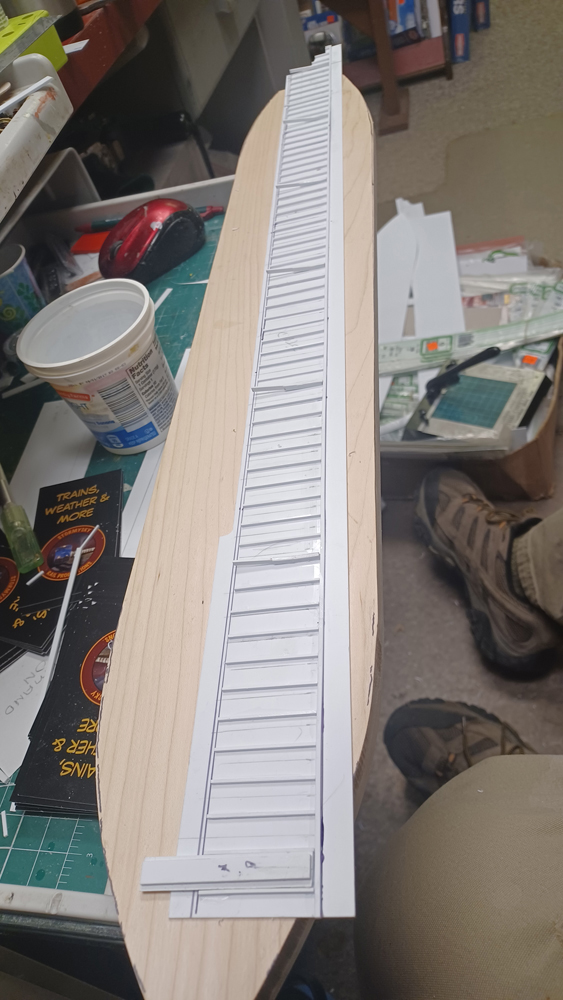
I also made a mock-up of the boat side from scrap styrene to establish acceptable rib spacing. Since the inside of the boat can be seen from the stern, this had to be modeled realistically — wide spacing wouldn’t look right. I cheated a little on the ribs, though, by making every 10th one curved. The intermediate ribs are styrene strips.
Since there are 65 ribs per side, I used a jig to ensure even spacing. An unplanned side effect of using .030” styrene and ample glue was the ribs were visible through the sides, much like the prototype.
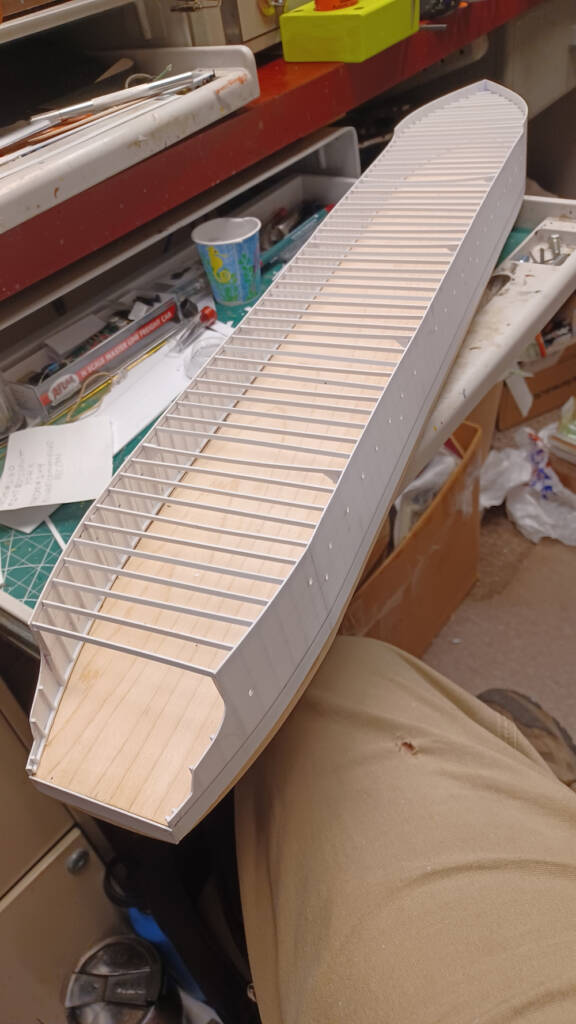
After attaching the sides to the ¾” maple hull, I added the deck beams. To strengthen the joints where the ribs and beams connect, I installed gussets. To make the gussets, I used a NorthWest Short Line Chopper II to cut styrene strip into squares. Then I eyeballed the diagonal cut to make the gussets. There’s also a row of columns down the center of the car deck that have a pair of gussets at the top.
Deck details
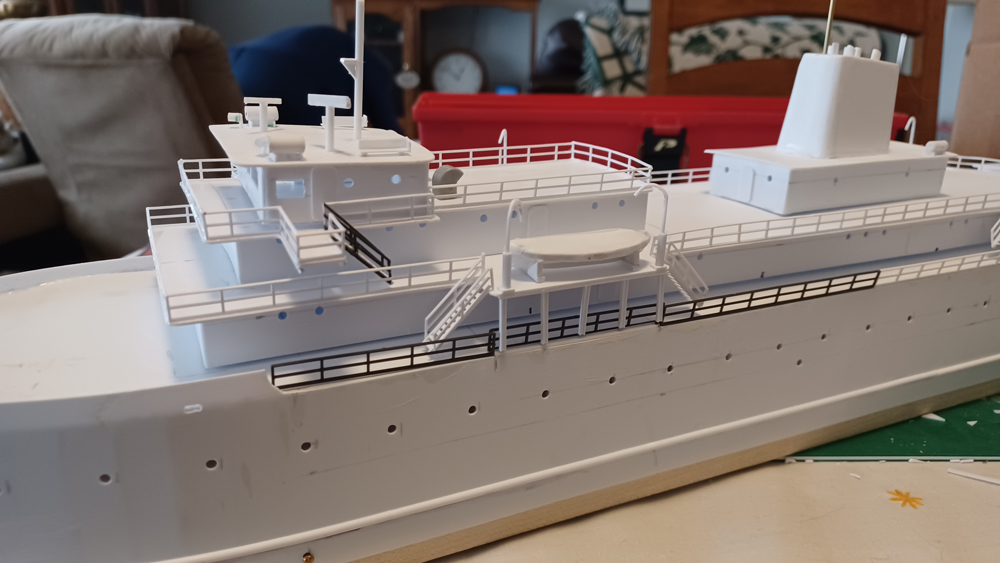
With this basic hull complete, I turned my attention to the spar and boat decks. I used Evergreen .030” styrene to build the pilot houses. I reinforced the corners and walls with styrene strip. The ends of the walls are curved on the top and bottom to conform to the deck camber.
The rub rail at car deck level on the N scale carferry is a styrene half-round. I built the anchor and winch by eye from bits and pieces of styrene in my scrap box. The frames for the side navigation lights, radar antennas, and flood lights were modeled the same way. I made the cabin air conditioners by cutting a rectangle of styrene and doing some creative painting. I’m an “eyeball engineer” and create things that have the right look and feel but aren’t necessarily an exact replica.
The railings along the deck edges, the stairways between decks, and the stairway railings are from Plastruct. Adding these parts to the model was a rather tedious process, but the end result was worth it.
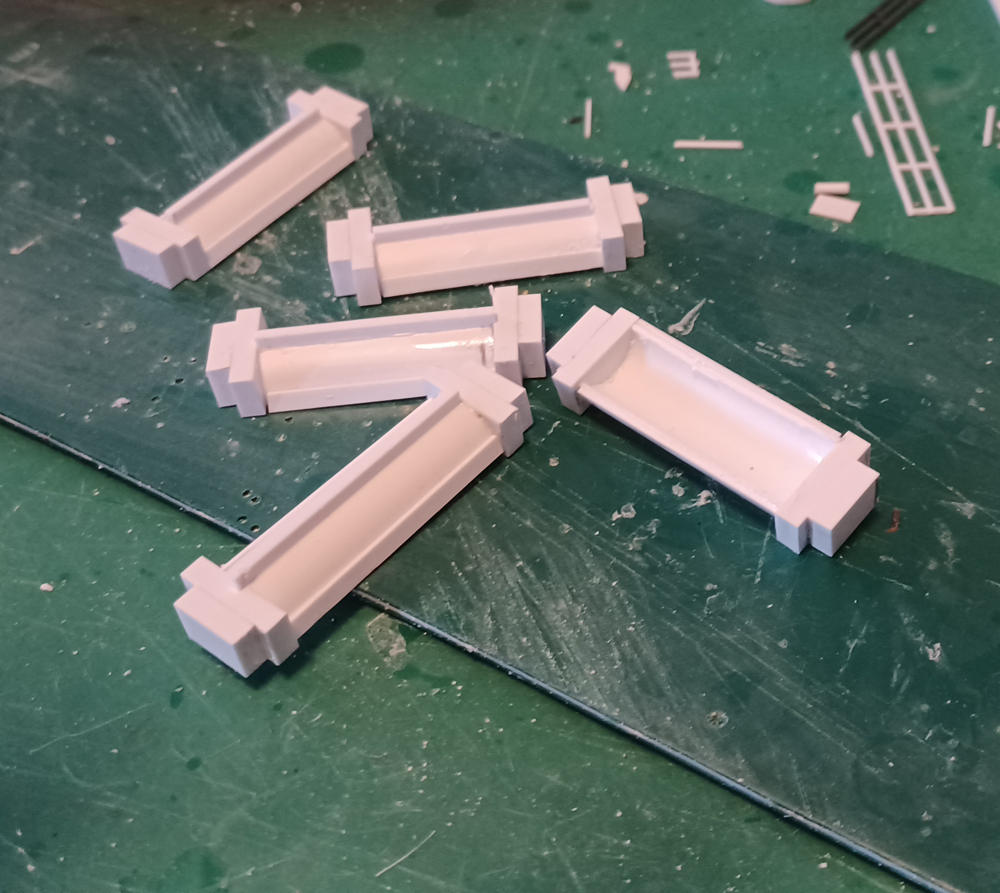
I scratchbuilt the lifeboats using a multi-step process. First, I cut Evergreen ⅜” styrene tube horizontally and fastened blocks of styrene from the scrap box to the ends. I let the glue dry thoroughly overnight, then used a flat file to give the styrene a boat-like profile.
I next cut Evergreen .005” styrene roughly to the shape of the hull, but slightly oversize, with scissors. I used multiple applications of Plastic Weld to soften the styrene to the point that I was able to carefully fold it down around the sides of the boat, capturing the look of a tarp-covered lifeboat. I used styrene tube and small-diameter piano wire for the davits.
Painting and lettering
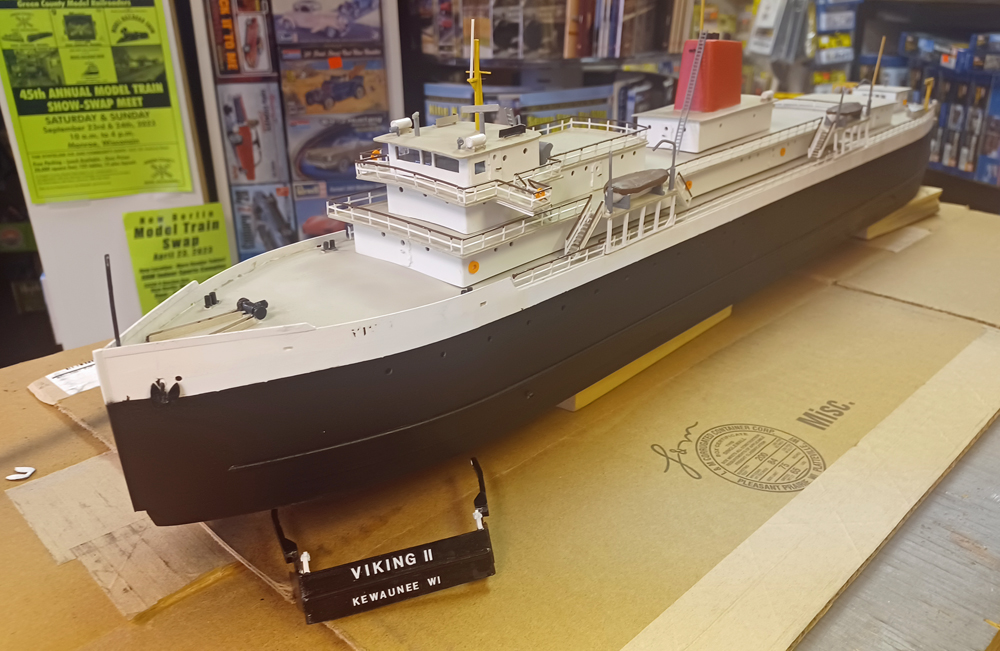
With all of the styrene work completed, I took the N scale carferry to the spray booth. I didn’t attach the deckhouses, which made the model easier to paint and light. After priming the model, I used a Paasche H airbrush to spray the model with various colors, including Badger Modelflex Gloss White (16-107), Tamiya Semi-Gloss Black (X-18), and Tamiya Deck Tan (XF-55). I applied a flat medium gray to the inside of the cabins to prevent light from glowing through the styrene.
The black-and-white sides were nice, but it wasn’t exactly the look I wanted. The fix was pretty simple — a red decal stripe just above the color-separation line. The name on the hull and seagate are from Microscale alpha-numeric decal sets.
I finished this part of the project by hand-painting the details with a fine brush. I made life rings by slicing thin slivers off styrene tubing and painting them bright orange. I added All Scales Miniatures fire extinguishers near many of the cabin doors. I used .010” clear styrene to glaze the windows in the fore and aft pilothouses. I left the portholes in the cab and hull sides unglazed as I deemed it unnecessary.
Time for lights
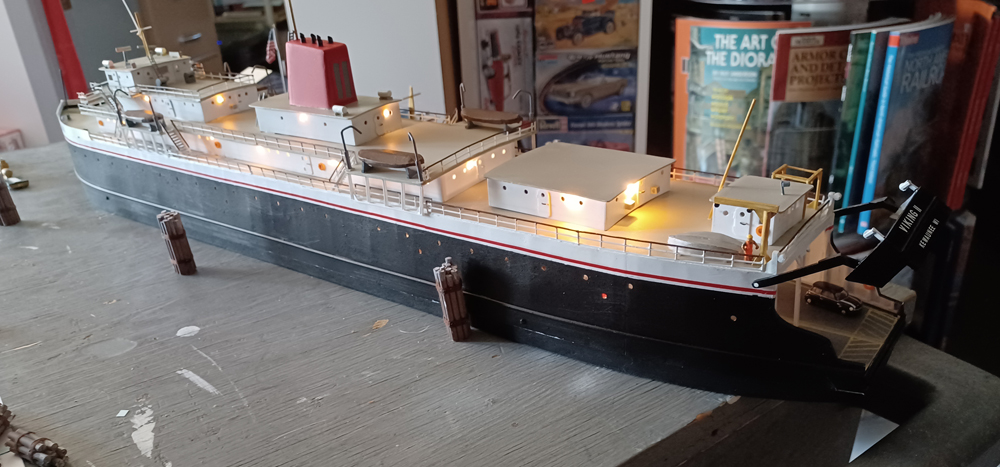
The last step was to add lighting to the boat, one deck at a time. The deck house just forward of the aft pilothouse was a perfect place to conceal two AAA battery holders. This provided the necessary 3V for the warm white SMD light-emitting diodes (LEDs) that I sourced from Amazon. I used Circuitron reed switches to control the lights. A swipe of a magnet is all it takes to turn the lights on and off.
I applied Tamiya clear paint to select LEDs to create different effects. I used red and green for the navigation lights and orange for the deck lights. I left the interior lighting warm white.
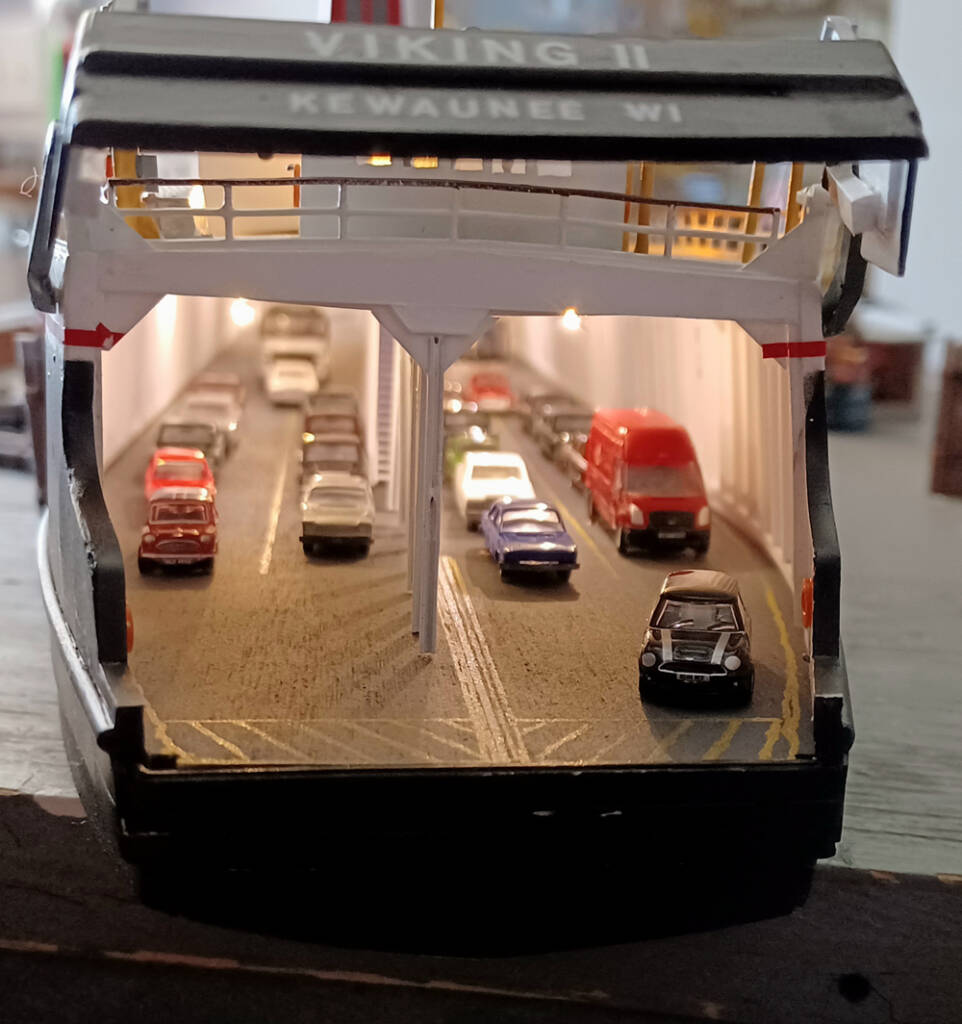
Wiring the car deck proved the most difficult. Slightly suspending the LEDs from the beams kept them from creating hot spots in the deck above. Running the wires in their chases and making the twisted, soldered, and heat-shrunk connections permanent was time consuming. Working within the hull meant that I could either see what had to be done or I could get my fingers in to do the work, but I couldn’t do both at the same time. That’s where being an electrician for a quarter century paid off.
A diorama for the carferry
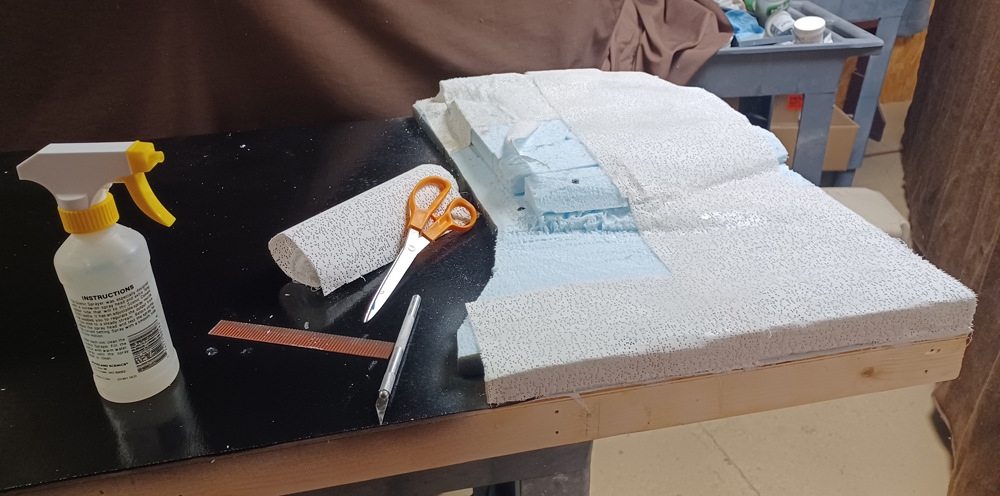
I made a diorama to showcase the Viking II and other projects I’d been working on. The benchwork consists of dimensional lumber and plywood underlayment. The backdrop uses the same underlayment, reinforced with pine strips ripped to size. After applying wood glue, I pinned all of the joints with a brad gun, resulting in a diorama that’s strong, but light. Then I applied latex primer to all surfaces.
The landforms are extruded-foam insulation board covered with strips of plaster-impregnated gauze and a painted-on slurry of hydrocal plaster. Once the plaster cured, I painted the terrain with a flat, earth-tone latex paint. I used Woodland Scenics products for the ground cover. The trees are from various sources.
I made the roads with acrylic nail hole filler and a putty knife. After sanding and painting the roads, I added cracks and expansion joints with a permanent marker. I used strips of .010” x .030” styrene strip painted yellow for the road and parking lot stripes. This technique worked well and looked better than my efforts with a marking pen.
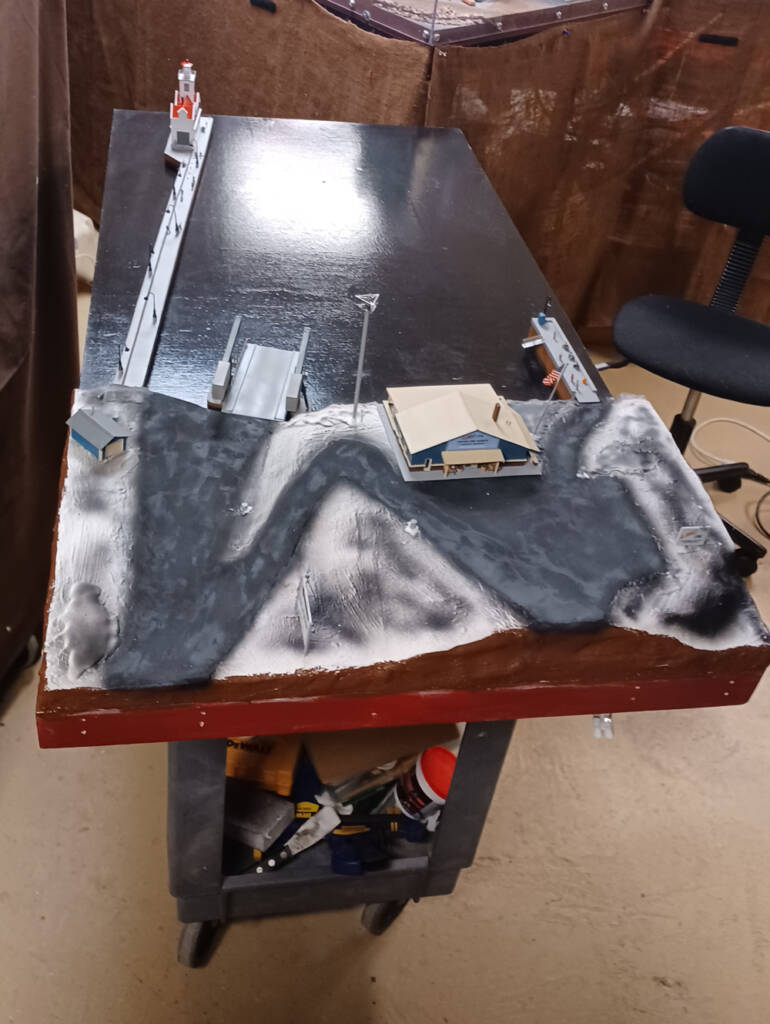
I primed and sanded the water surface twice before airbrushing it with black paint. It took several coats to get complete coverage. After the paint had dried, I used an airbrush to apply several coats of Future floor polish. This yielded a smooth, level surface. Then I used a 1”-wide sash brush to apply Woodland Scenics Water Effects to the water surface, giving the harbor a wind-blown appearance.
The land side of the diorama features the floating apron, ticket office/museum, lighthouse, pier, a dock for a tour boat, and a garage for maintenance equipment. I populated the diorama with figures and vehicles and added a variety of details, such as a tour boat, picnic tables, Dumpsters, portable bathrooms, and LP tanks.
I then placed the Viking II into the scene. The N scale carferry looks right at home on the harbor diorama. The project that took 45 years to bring to fruition was a labor of love.
Brian Stackpole, owner of The Hobby Depot in Monroe, Wis., has been modeling in N scale for 45 years. His current layout, the Bayside Southern, is a freelance Midwest regional line.


