The examples show printed forms sold by Micro-Mark, but you certainly aren’t limited to these. Shenandoah Software offers software for printing them, or you can make your own with common programs such as Microsoft Excel. The car cards shown here are about the size of a business card, making it easy to hold a small stack of them in the palm of your hand, but some operators prefer larger ones.
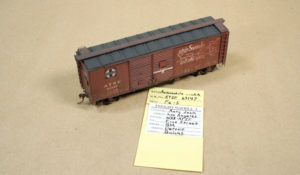
Car cards. The top of the car card has blank lines for the car’s identifying information. The Micro-Mark card has space for the car type and Association of American Railroads (AAR) car code on the first line, the car’s reporting marks (railroad initials and number) on the second line, and a generalized “description” on the third line. I use that line for the railroad class of my Atchison, Topeka & Santa Fe cars, but others prefer to enter the color or some other distinguishing feature.
You fold up the bottom of the card at a Fold Here line and tape it in place to form the waybill pocket. An Empty Car, Return To instruction shows only when there’s no waybill in place, but entering a destination there will mean that the car will always have someplace to go.
In early car card systems the empty routing instruction was often just Return To Yard, and that may still be useful on very simple layouts. For greater interest, however, you can use this line to send “foreign” cars (those from railroads other than your own) back toward home by way of a staging yard or interchange connection. Home road cars can be directed toward a concentration point on your own system, perhaps represented by a staging yard.
Note that if step two takes a car off-layout to staging or through an interchange, steps three and four may represent an entirely different sequence that has nothing to do with the first two. There’s no requirement that the four steps of a waybill describe a single logical progression, or even that all four steps have to be used. You can use three and leave one blank if you want a car to make an intermediate stop, or use only one side of a waybill if you want a car shuttle back and forth between two points.
Also, you, as the layout owner, have the option to pull the waybill at the end of any cycle and either replace it with another or let the car move on its empty routing instruction. This lets you adjust traffic flows, introduce new waybills, and start serving new industries on your model railroad.
Although the waybill form may have lines for several items of information – Micro-Mark’s has seven – only the first two are absolutely necessary. The address is the station on the railroad where the car is going, and the consignee is the industry or other location that is to receive it. The other lines can be helpful or nice to know, but the first two define where the car is going next. If at an operating session you find a car at the designated station and spotted at the consignee, that car isn’t going anywhere until the waybill’s next step is turned up.
But wait, there’s more. Although I’ve described the two basic elements of car-card-and-waybill car routing systems, it generally takes a little more to run a railroad. You’ll need card files to help keep the car cards organized, and ways to define which cars move in which trains. That’s covered in part 2.
Andy Sperandeo (1945-2015) was a longtime staff member and editor of Model Railroader magazine.


