If your layout room has a plasterboard ceiling, there’s a pretty simple way to install a valance, and, with just a little more effort, a dust cover.
Installing a valance is much easier if your layout is either not yet built or not so far along that working on the ceiling above it could be a dust and debris danger.
Planning and materials
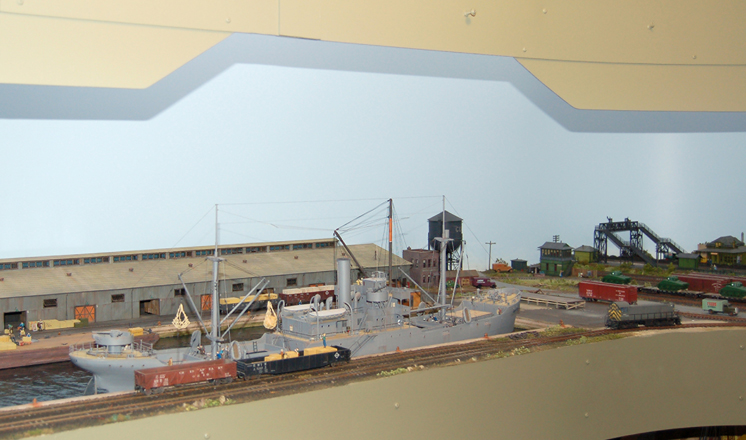
How deep should a valance be? My ceiling is 8 feet high. Since my benchwork height is 52″, the total viewing height without a valance was 44″. A 24″ valance would shrink that height down to 20″. Experimenting with a length of 24″ wide cardboard held up to the ceiling, I decided that a viewing area of 20″ would work just fine. That meant I could get 16 feet of valance out of a 4 x 8 sheet of material cut in half lengthwise.
For the valance material, I used 1⁄8″ particleboard, the cheapest I could find at my local home improvement center. It was lighter than tempered hardboard, although that would work too. I had the store cut it lengthwise. Of course, it’s unlikely that every piece of valance that you would need to enclose your layout would be exactly 8 feet long. Some cutting and fitting will undoubtedly be necessary, so you’ll also need a supply of 3″ wide strips of particleboard, the same length as the depth of your valance.
To minimize shrinking or expanding due to humidity and temperature variations, I recommend painting all sides and edges. For the back of each piece, I used the same blue paint I used for the sky on my background. [If you aren’t concerned about viewers seeing the back of the valance, white paint would do a better job of reflecting light onto the layout. –Ed.] I painted the front a color that complimented my fascia, which also coordinated with my basic ground color.
Assembly and installation
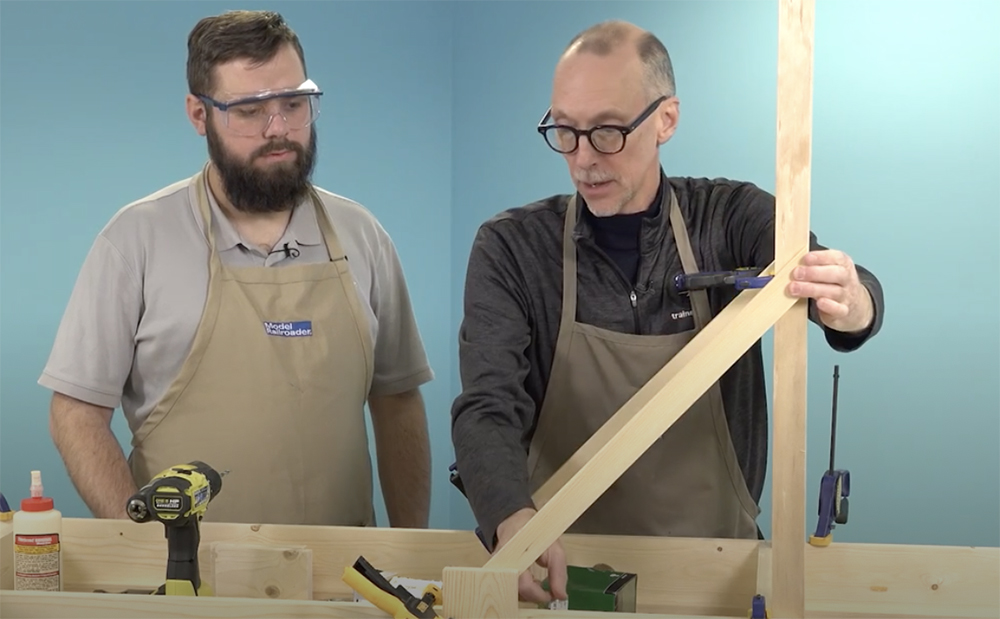
I suspended the valance from the ceiling on a series of simple brackets. Each is a 23″ length of 1 x 2 lumber screwed to a 10″ x 12″ steel shelf bracket, as shown in fig. 1. I attached the bracket assembly to the drywall ceiling with three E-Z Anchors each. No pilot holes are needed; the anchors screw right into the ceiling.

I then attached the fastening screws through the holes in the shelf brackets. I used a plumb bob to ensure I was installing the brackets directly above the edge of my layout.
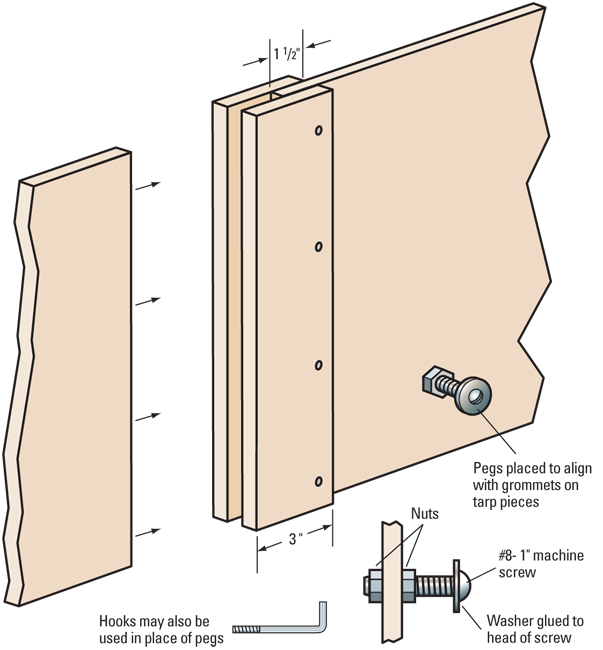
I then attached the particleboard to the wood part of the brackets with screws. The particleboard easily bends into gentle curves. But where two pieces came together at an angle, I put a bracket at the junction point and attached both pieces to the wood with screws. (Alternatively, you could glue a 3⁄4″ by 3⁄4″ strip of wood to the inside edge of one valance piece and then attach the other piece to it.) Figure 1 shows the valance from the back. I never had to use more than two brackets for an 8-foot length of valance. Sometimes I only needed one because adjacent valance pieces and bracket assemblies provided sufficient support.
You can see that in some areas I attached a supplemental valance piece, reducing the viewing height to about 17″. In those areas, I particularly wanted to discourage viewers’ eyes from wandering up toward the ceiling.
Dust cover
Dust is the bane of a model railroad. You can’t keep it off, and it’s extremely difficult to get rid of it once it’s there. However, you can take steps to minimize dust on your layout. With the valance in place, all I had to do was close off that 20″ viewing area around the layout.
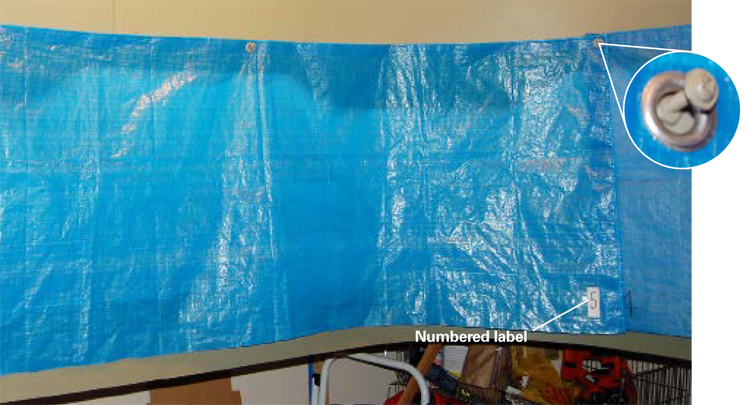
The tarps I used were originally 5 x 7 feet. I cut them in half lengthwise, and after hemming the cut edges, wound up with pieces about 28″ wide. I installed the pegs 4″ up from the bottom edge of the valance, so the strips of tarp not only cover the entire viewing area, but hang down an extra 4″ or so (all the better to keep that pesky dust out). If you need a support where there is no grommet, you can add one , or you can just insert a hook into the valance and use a hole punch to make the hole in the tarp. It’s a good idea to number each piece of tarp and put the corresponding number on the valance so you can re-hang them in the correct order.
Now that I’ve added a valance and dust cover to my layout, I can keep viewers’ eyes on the layout and dust off it. This was an easy project, and if you try it, I think you’ll be as happy with the results as I am.