Modelers have tried many different scenery methods. While each person has their own favorite techniques and preferences, there are several good, time-tested starting points for building scenery. The four most common include the cardboard strip method, the stacked foamboard system, the tape and stuffing option, and the time-honored wire screen and plaster technique. While all four shown here are somewhat different, each can yield good results. Most likely, you will eventually use a mix or even hybrids of these methods on your next layout, as all have advantages and disadvantages.
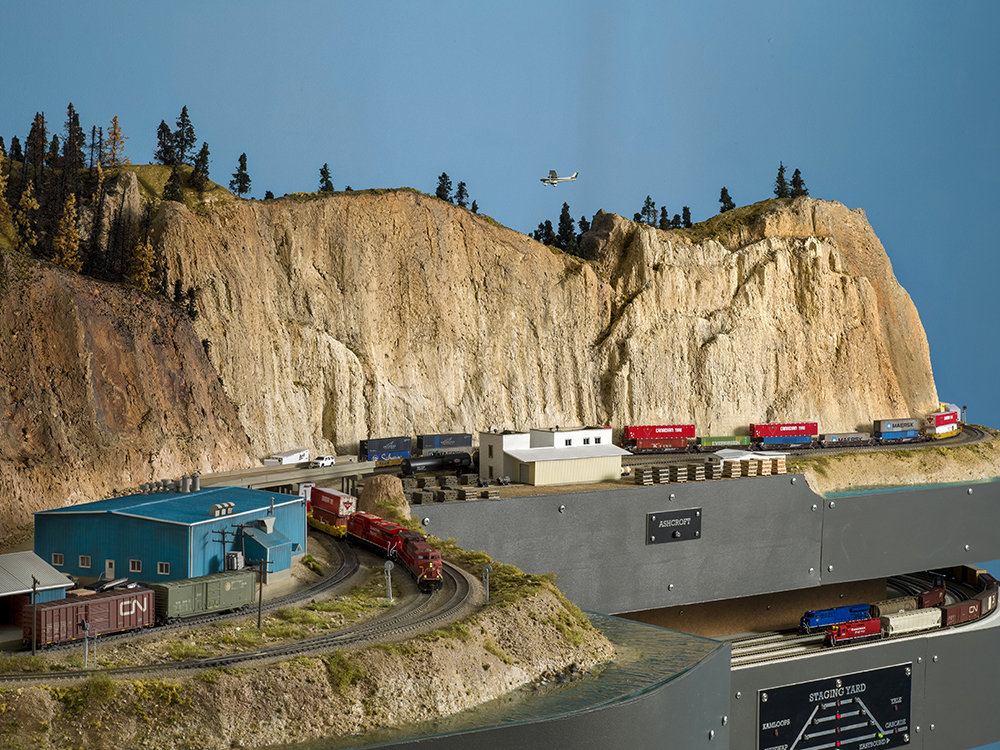
Wire screen and plaster
Let’s start with the oldest, the wire screen and plaster technique. This method works very well on L-girder and open-grid benchwork. By attaching wire screen (don’t use fiberglass) along the edges of the subroadbed and along the front and back edges of the layout, you can then shape the material into gentle rolling hills and natural-looking valleys. Most often you can attach the screen to the wood parts of the layout using a staple gun. You need a pair of tin snips to cut the wire screen itself.
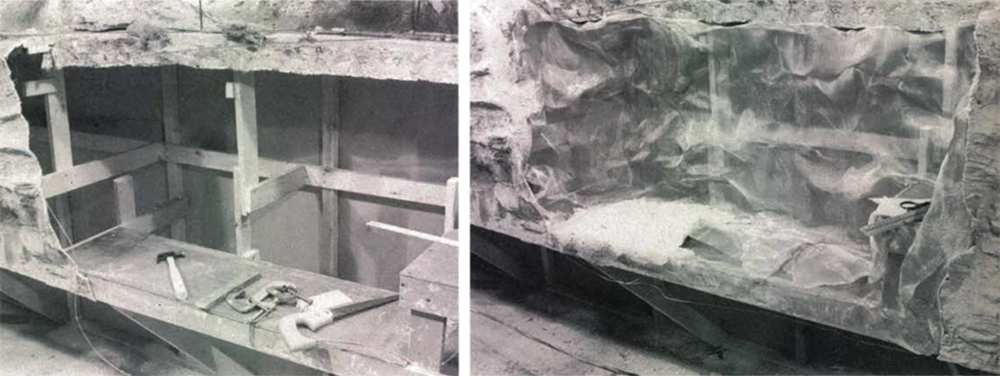
To cover the screen, you can use one of several plaster-based products. You can trowel thick wet plaster into it and then smooth it to shape. Years ago, instead of using thick plaster, I covered the screen with paper towels dipped in thin plaster, but today I’d use one of the many plaster cloth products on the market instead – it’s a lot less messy.
This technique is called a “hard-shell” scenery method. Once the plaster cures, the surface is self-supporting and very durable. You can finish the terrain with whatever scenery products you desire, including adding rock molds and other layers of scenic details.
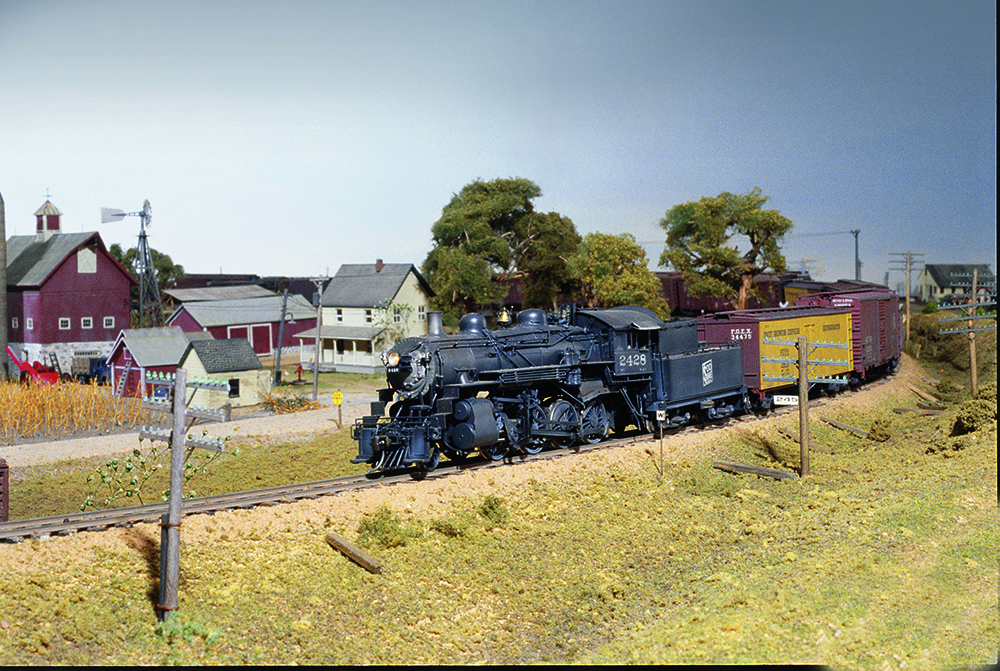
Wire screen method pros:
- This is the easiest way to get natural rolling hills and very realistic scenic contours
- It produces a firm surface when dry, however remains relatively lightweight
- If the screen is covered directly with thick plaster, rock work can be carved directly into the surface – otherwise it easily accepts plaster rock castings
- Great for permanent layouts
Wire screen method cons:
- You must wear gloves with working with wire screen, as its edges are very sharp
- Finished scenery is not easy to cut or adjust without a lot of damage to the surrounding scenic elements
- Difficult to drill holes in for large scenery items, such as tree trunks
Cardboard strip and plaster cloth
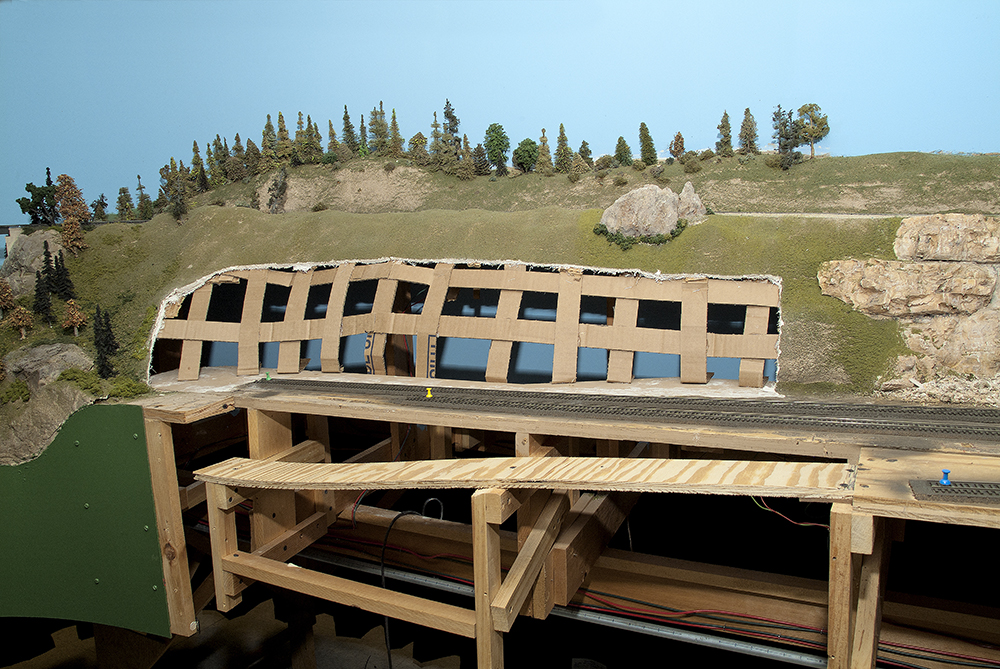
As a variation and perhaps evolution of the wire screen method, modelers eventually tried substituting a lattice of cardboard strips for the screen material. The immediate advantage was that the strips were easier to work with. The typical strip width is 1 inch, and if you don’t want to cut your own strips, Micro-Mark sells them ready-to-use.
While you can staple the strips to the layout, you can also use hot glue, which greatly speeds up your options. This method is ideal for open-grid and L-girder style layouts. Start by gluing strips between the subroadbed and either the fascia or the backdrop. Next, weave strips lengthwise between them. Again, you can use more glue to tack them or a regular heavy-duty stapler will work here too.
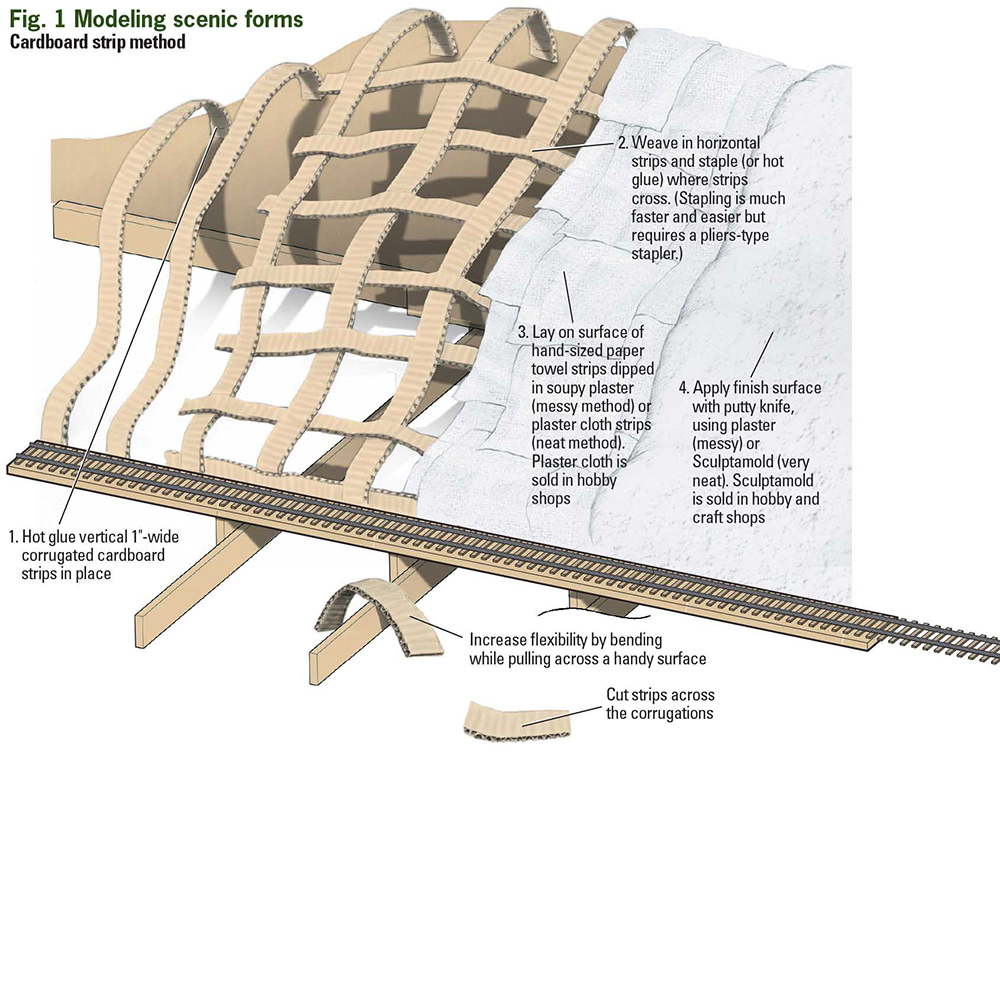
Cardboard strips can be a little rigid, resulting in angles and kinks. If you pull the strip over the edge of the benchwork or a tabletop, you can introduce a slight curl to it, allowing it to assume contoured shapes more easily.
From here, cover the cardboard lattice with layers of plaster cloth or plaster-soaked paper towels. When dry, the construction forms a rigid, yet lightweight terrain base. You can then add rock castings, roads, structures, grass, and trees to the surface to complete the layout.
Cardboard strip method pros:
- A flexible method for installing large sections of scenery over open benchwork quickly
- Produces a firm surface when dry and remains relatively lightweight
- Easily accepts plaster rock castings and other scenic elements
- Easy to cut out sections and rework the scenery
Cardboard strip method cons:
- Cutting sheets of cardboard into uniform 1-inch strips is time consuming
- Strips attach to the fascia, making it difficult or impossible to remove it later for access
- Hot glue will let go over time, requiring the strips to be reattached to prevent sagging scenery
- Because of its thin surface, trees, poles, and other objects can be difficult to get to stand straight up
Foamboard
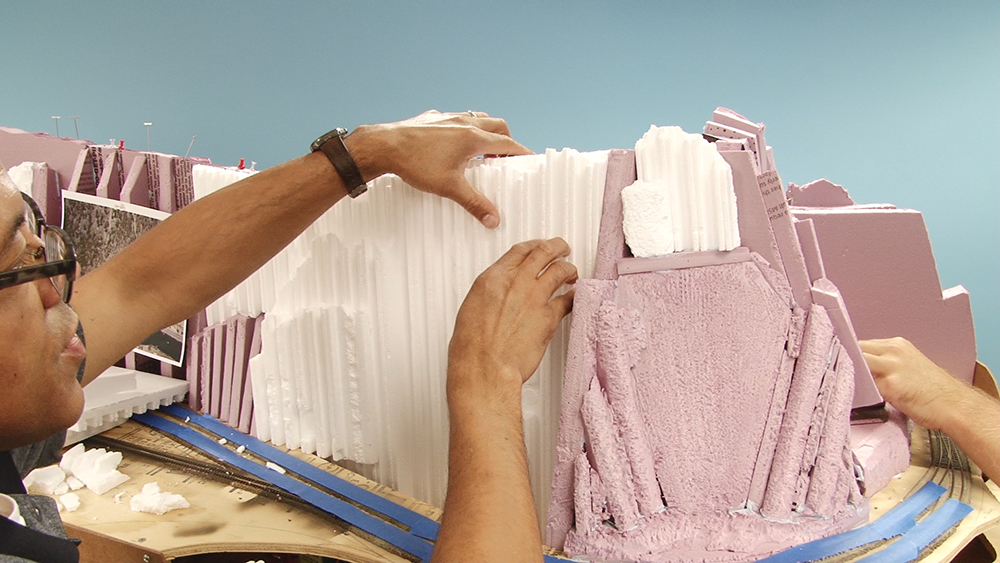
The foamboard method uses extruded foam insulation board in various thicknesses laid either flat and stacked wedding cake style or stood on end. You can cut contours into the material with knives, saws, or a special tool, called a hot-wire foam cutter. Woodland Scenics offers an easy-to-use hot-wire cutter that can cut foamboard up to 3” thick.
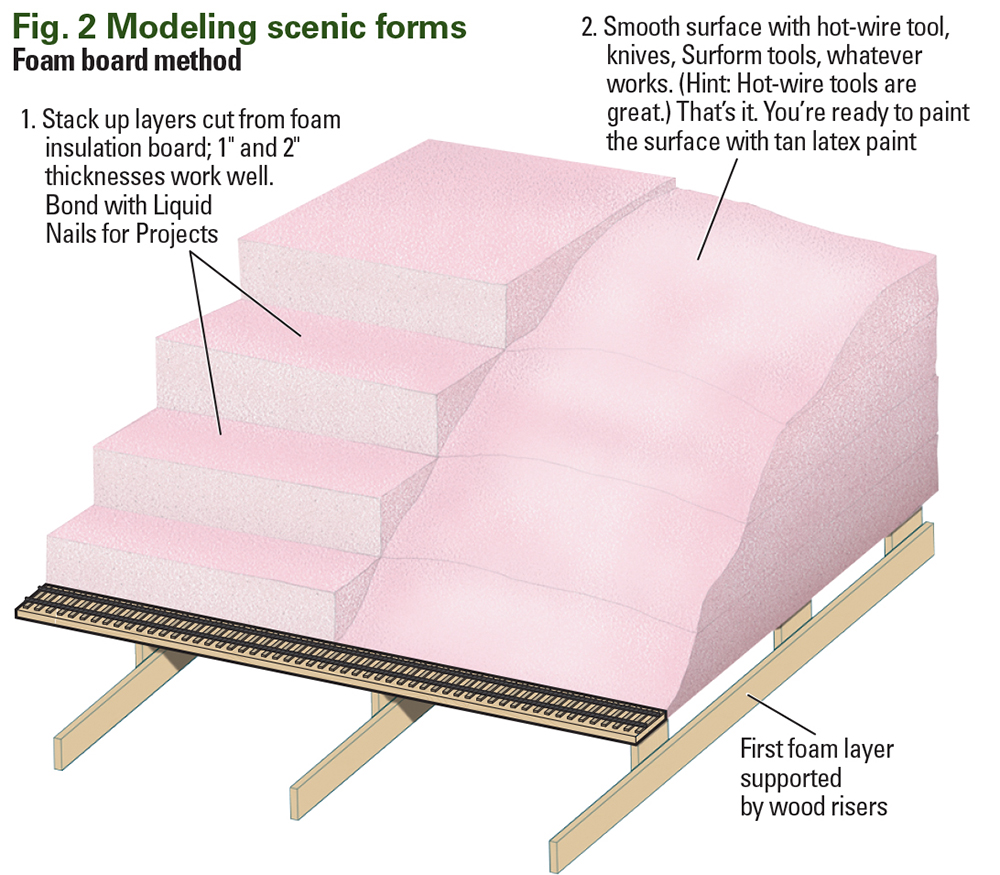
You can glue the foam stacks together using either a foam-safe construction adhesive, such as Ohio Sealant’s PL300 and Liquid Nails for Projects, or with ordinary latex caulk. Once the adhesive has set, you can continue shaping the foam by carving it with knives (a steak knife works well for this) or sanding it. A coarse sanding sponge also works well for light sanding, but I’ve also used an orbital sander for deeper cuts. Just be sure to have your vacuum handy, as this can get quite messy.
There are numerous ways to finish the foam surface. You can also carve the foam into rock shapes, then coat it with thin plaster before painting them and applying the surrounding scenery. I often use a product called Sculptamold to fill in the gaps between foam sheets and soften the edges. Sculptamold is a papier mâché art product sold by AMACO that’s made from paper fiber and plaster.
Foamboard method pros:
- Ideal for home layouts and those that must travel
- Produces a stable surface that is strong yet lightweight
- Easy to cut out sections and rework the scenery
- Best method for accepting trees and other vertically mounted details
Foamboard method cons:
- Foam insulation board thicker than 1 inch can be difficult to find in warmer climates
- Foam dust is very messy to work with
- Can be difficult to achieve smooth, naturally flowing scenic contours without adding more products, such as Sculptamold
Tape and stuffing
While this may sound odd, this is probably the fastest scenery method I know of. However, it also has more limited uses than the previous three, and it works best on flat tabletop layouts because you need to have a surface to support the stuffing components.
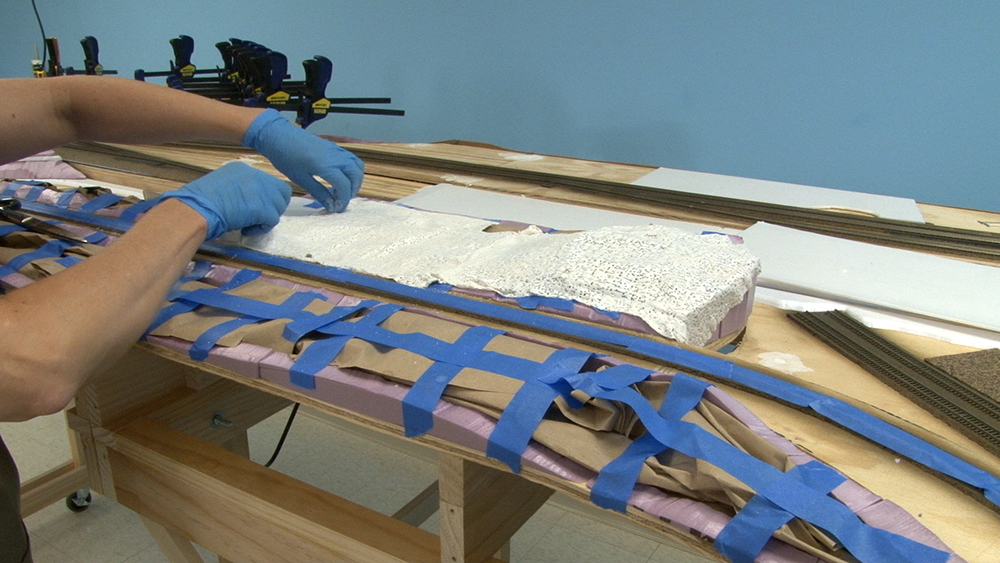
Essentially, you build up your hills on the layout’s surface with “stuffing.” No, it’s not Thanksgiving leftovers. This kind of stuffing uses either wads of crumpled paper or other shapeable, inert objects, such as packing peanuts. To hold these materials in place, lock them down with strips of ordinary masking tape. What’s nice is that in no time at all, you have a very clear idea of what the finished shape will be, and you can easily change it with more stuffing and tape before firmly attaching anything to the layout.
As shown in the photos here, I added foamboard formers along the edges of the railroad right-of-way, as well as along the fascia and backdrop. This way, unlike the cardboard strip method, which requires the fascia to support the strips, you can remove the fascia to make things such as wiring and maintenance tasks much easier and the scenery won’t collapse. The foam formers also provide a solid contour along the edges on the layout where it will matter most. I add flat foam sheets where I plan to install buildings later.
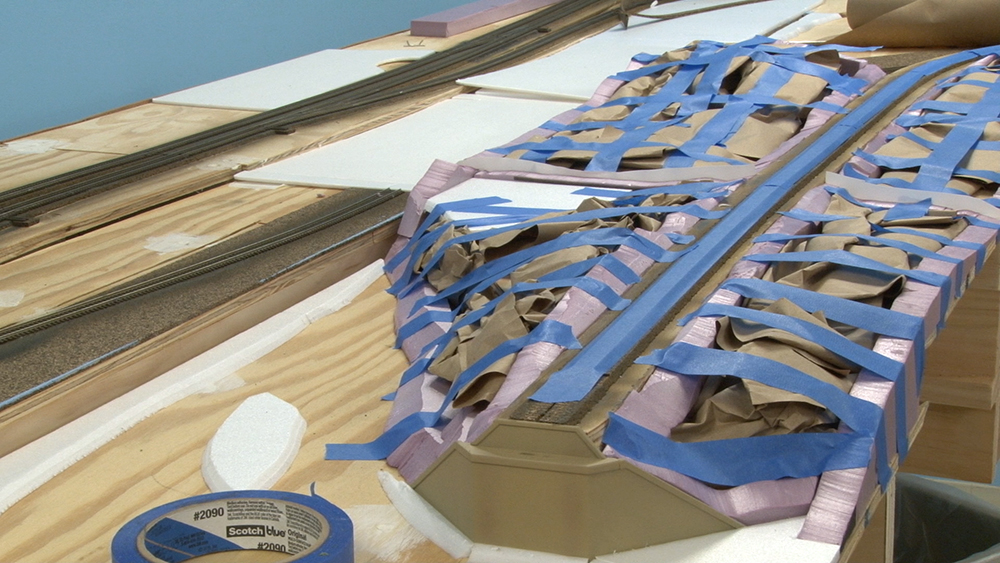
Once you have the finished shapes created, coat them with two layers of plaster cloth – this is a plaster-impregnated gauze, much like used to be used for making casts. Once the plaster cloth has dried, you’ll find you’ll likely need to make a few adjustments and smooth out the surface. To do this, apply a thin layer of Sculptamold and use it to fill in the small holes in the plaster cloth’s gauze, as well as build up any areas that may have sagged.
From there, simply paint the area, then apply your normal scenery materials to complete the scene.
Tape and stuff method pros:
- Ideal for tabletop layouts
- Easiest method to try for those who have never built scenery before
- Can make adjustments to the terrain before committing to attaching it permanently to the layout
- Fast scenery installation technique
Tape and stuff method cons:
- Needs to have support under the stuffing to work (table top or temporary boards over open benchwork)
- Stuffing can shift or collapse under the weight of the wet plaster cloth, requiring alteration later
- Often requires an additional layer of plaster over the top to smooth the surface
Options for all situations
As provided in each listing, all four methods have advantages and disadvantages. The wire screen method is probably the best for producing realistic rolling terrain shapes. The cardboard strip system is ideal for filling large open spaces on a model railroad quickly. Foamboard is the most stable and ideal for layouts that travel, as well as it’s the best at holding trees vertically. And tape and stuffing is the easiest method you can use if you’re working on a tabletop layout and have never tried scenery before.
I’ve worked with all four systems mentioned here, and I’ve achieved good results with each of them. However, keep in mind that each technique is ideally suited for specific situations – there’s no “one type fits all.” Chances are that you will end up using at least two or more before you complete your model railroad.




This article describes plaster-over-screen as “hard-shell” scenery. I remember the hard-shell technique as something invented by Lynn Westcott and it didn’t use screen. I found it in the March 1965 issue. It was paper towel soaked in hydrocal over wadded-up newspaper, similar to the “stuff” technique described here. I remember using the technique when I was in my late teens, along with zip-texturing that Mr. Westcott described in the next issue.
There’s a fifth option but I suggest that you glue everything down before you try this method.
The woodland scenics subterrain method.
It combines the cardboard and the foam method and it is less messy. The only time it gets messy is when the plaster is added.
You can still get dust with this method but it is a lot cleaner.