Looking for dirt cheap ground cover? While there are plenty of companies selling real dirt products graded and colored to match specific terrains and locales, if you’re on a budget, you might find some suitable ground cover closer to home. Specifically, in your own back yard. But you can’t just scoop up a shovel full of dirt and dump it on your plaster cloth terrain. Raw dirt has bugs, rocks, plants, germs, worms, and who knows what else in it. Here’s how to prepare dirt for scenery use.
The first step is to make sure the dirt in your yard is suitable. If you live in a part of the country with a high clay content in your soil, when you bake it in the oven to dry it, what comes out might resemble a brick more than dry dirt. Sandy, silty, or loamy soil works best. Look to a gardening website (like eartheasy.com) to determine what kind of soil you have in your yard.
Start out with a scoop or two of soil on a discarded cookie sheet or baking tray. You could also get a disposable aluminum tray from the grocery store. Break up any clumps and remove any plant matter, large rocks, living creatures, and other detritus by hand. (Examine any rocks, small sticks, and plant roots; if you wash them and let them dry, you might find scenic uses for them on your layout, too.)
If your soil isn’t a suitable type, or if you just don’t want to dig up your yard, you might do what I did and buy a bag of paver sand from your local garden center or home improvement store. Paver sand, also called leveling sand, is intended to provide a level and well-draining surface under patio or walkway pavers. It’s made up of a mix of sizes of material, from fine sand to pea gravel, and a single $5 bag will give you more than enough for your entire layout. Tube sand, traction sand, and all-purpose sand are similar products. Play sand and paver jointing sand are usually more uniform in color and grain size but cost more.
Once you have your soil or sand about an inch deep in the tray, bake it in the oven for an hour at 225 to 250 degrees. This is to not only kill any germs and insect eggs, but also to dry it out.
Once your dirt is dry, let it cool, then run your fingers through it again to break up or remove any clumps. You want your finished product to be free flowing.
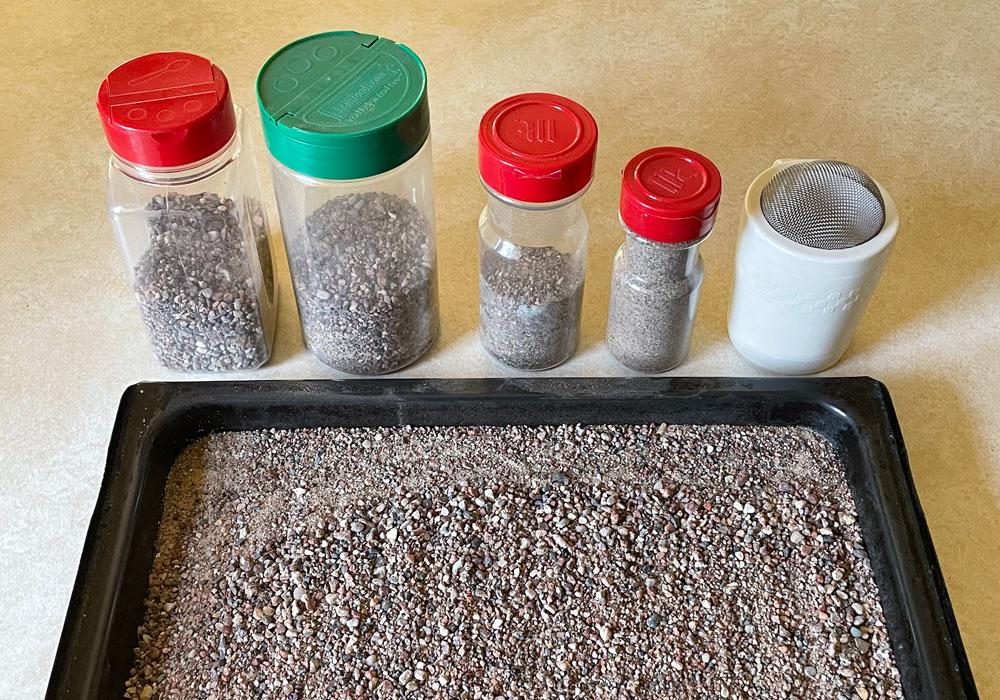
The next step is to grade it. Start out with a sifter with large holes, like an old plastic colander. Shake your sand through that, and what’s left in the sifter will be your larger gravel, great for modeling talus or riverbed stones. Switch to a medium-sized sifter, like a piece of metal window screen or a mesh sieve, and grade your material again. That sifter will separate out coarser sand, good for gravel pits and rocky shores. Finally, use a fine sifter from a kitchen supply store to separate out fine sand, good for general ground cover, from the finest powder, useful for paving dirt roads and paths.
Keep your dirt cheap ground cover in tightly sealed containers to keep it from absorbing moisture and clumping up again. Scenery vendors like Woodland Scenics and Scenic Express sell empty shaker bottles, which make application convenient. I prefer to save and reuse shaker bottles from kitchen spices. Not only are they free, but they come with different sized holes in the shaker cap, depending on what was originally in the container. Garlic powder, paprika, and chili powder containers have smaller holes, which is better for controlling application of finer sand ground cover. Parsley and Italian seasoning come in containers with medium holes, better for coarser gravel. Use a bottle that used to hold dried Parmesan cheese for the largest gravel and talus. For more precision application, remove the caps and sprinkle on your dirt with a teaspoon.
Glue your real dirt to your scenery the same way you would any other scenic product. Paint your terrain with thick earth-tone latex paint, then before the paint can dry, sift on a thin coat of dirt. Once the paint dries, wet the surface with wet water (distilled water with a few tablespoons of isopropyl alcohol or a few drops of dish detergent to cut the surface tension) and apply scenic cement, diluted white glue, or diluted matte medium to fix it in place. Once it dries, apply ground foam, static grass, or whatever other scenic materials you want. Being able to see real dirt through any gaps in your grass material makes your layout look much more realistic.


If you live in an area with a lot of clay, another good source of dirt is around construction sites where trucks and bulldozers are moving around a lot. The action of the equipment moving around a lot grinds the clay from big chunks to a very fine powder. Just be careful and do not trespass.
Been doing that for years! Paving sand a few bucks a bag.