By the time they’ve built the benchwork and installed and wired that track, the typical new layout builder starts asking a very important question: “What comes next?” The answer, of course, is scenery.
Trains, track, or a command control system can be used more or less straight from the box. Even benchwork, which starts its life as a bunch of boards and sheet goods, can be assembled with minimal woodworking skill following a plan. But scenery is made from raw materials that have to be crafted into the thing you want them to be, and often, modelers don’t know where to begin.
Having a set of steps or guides is always helpful in a project like this, particularly if you’re just getting started. Here are my 5 broad steps for installing scenery in basic layers on most any layout or module.
Step 1: Subterrain
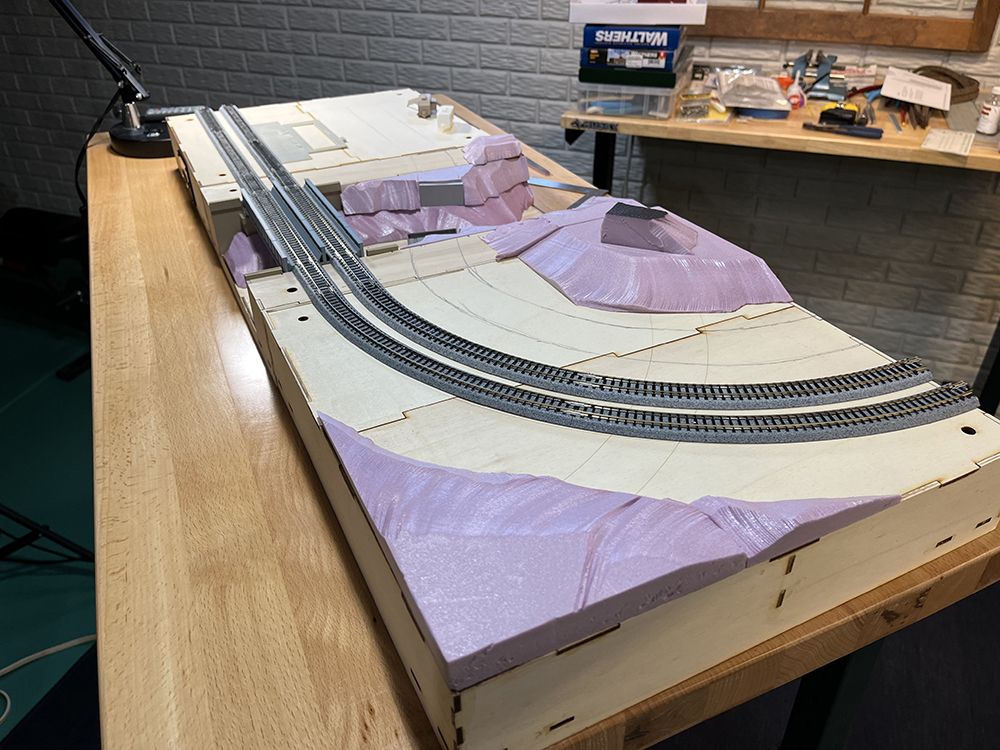
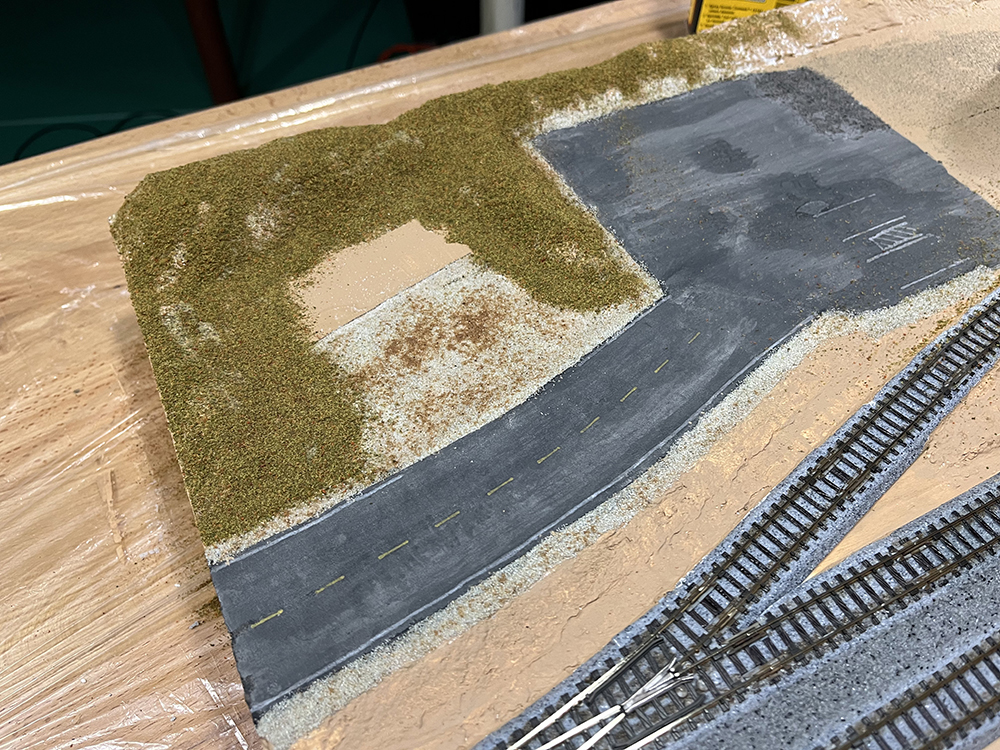
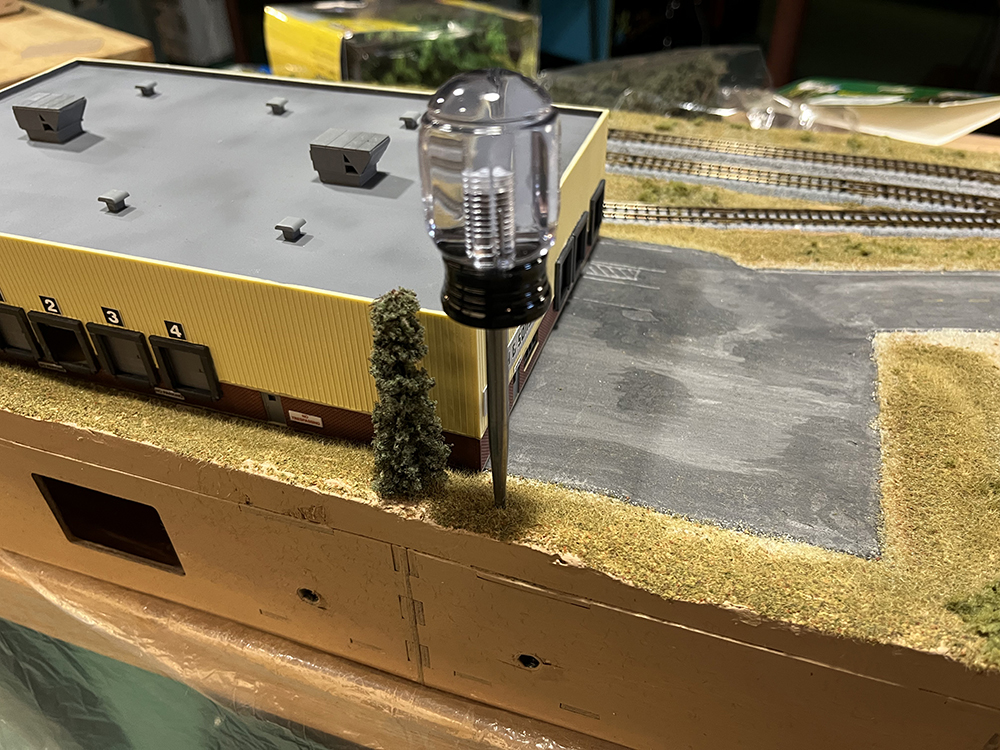
Before you can put scenery materials onto your layout, you have to have a base for them, often called the subterrain. Even if you’re working on a plywood tabletop, or a flat surface, such as that of my T-TRAK modules shown in the photo below, you still want some sort of changes in elevation to give your layout topographical realism. That’s what the subterrain does.
The four most common methods of building subterrain include the cardboard strip, stacked foamboard, tape and stuffing, and wire screen and plaster. I covered all four of these in detail in the article Four basic subterrain scenery methods.
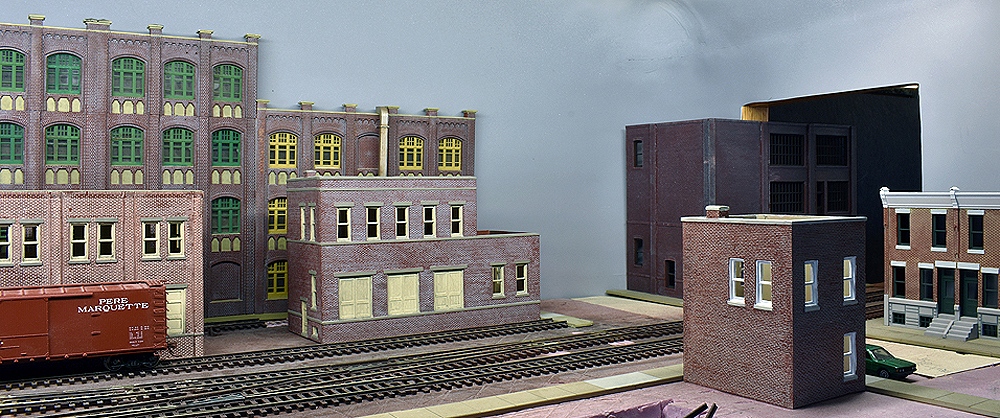
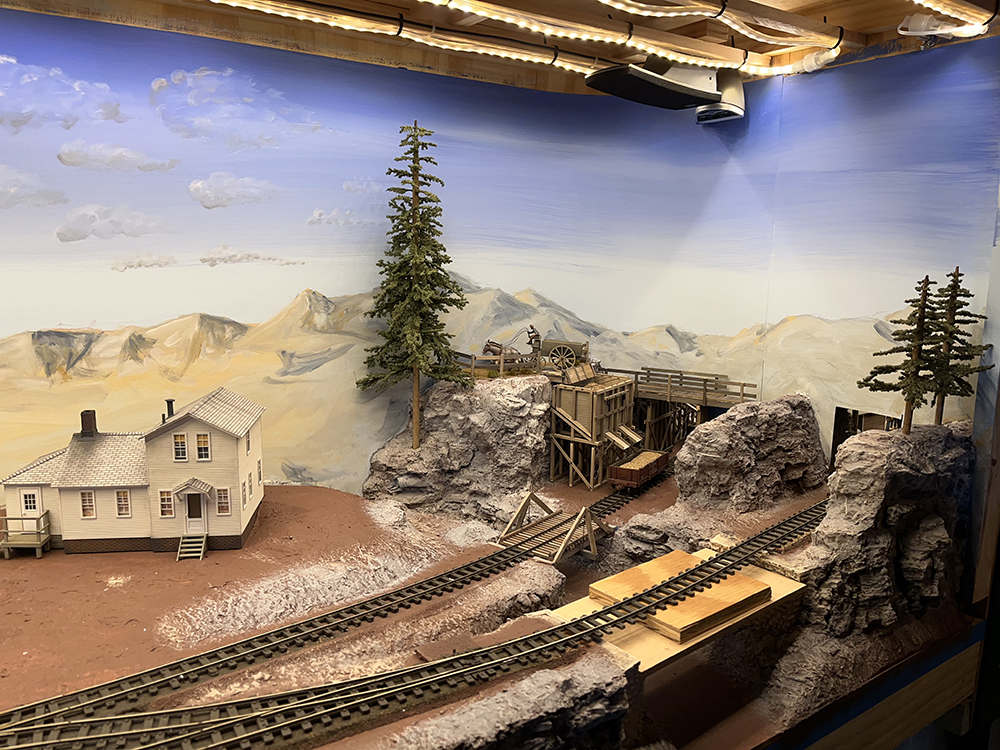
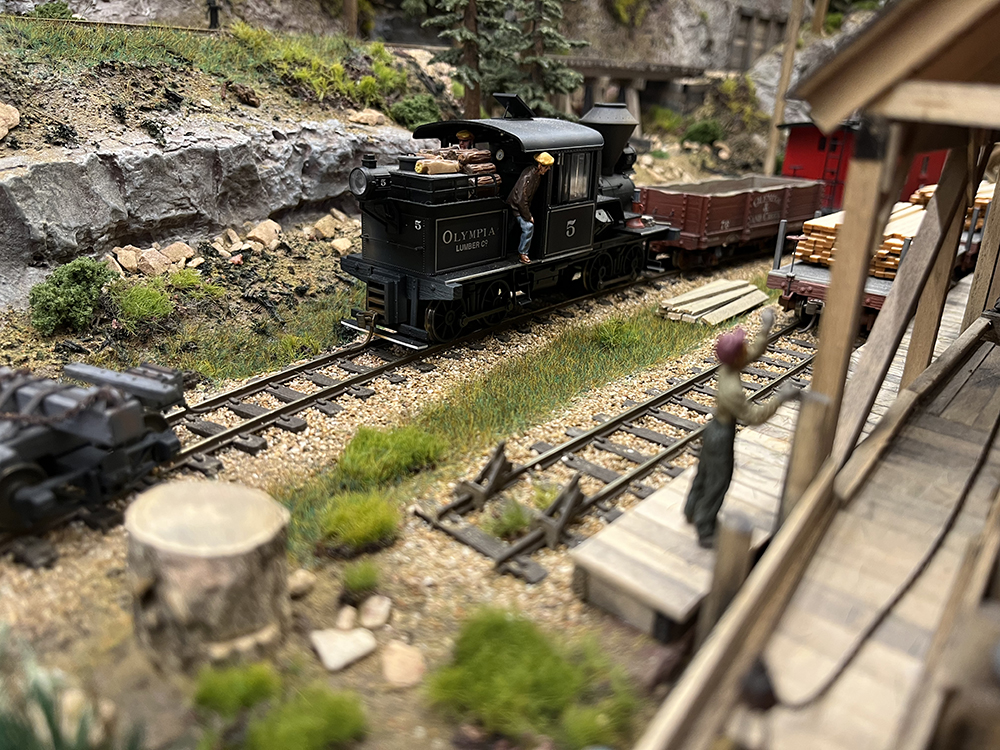
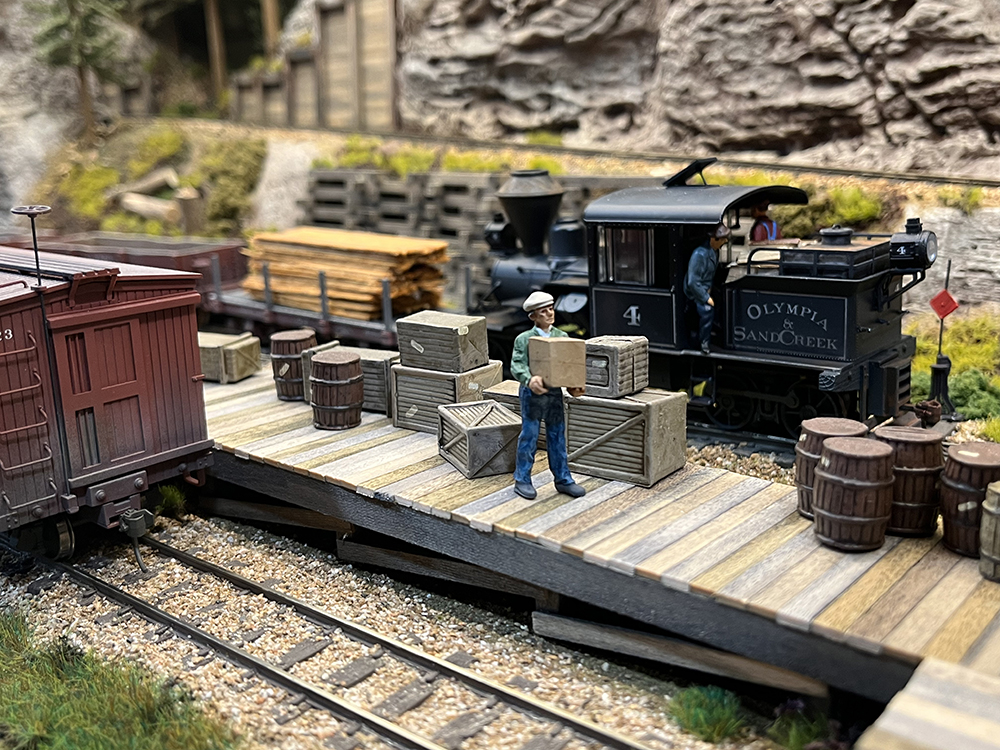
Each of the four systems have strengths and weaknesses, but if you’re looking for a good starting point, try foamboard. I’ve used stacked foamboard for a variety of projects, including my On30 Olympia layout shown in the first photo. Foam insulation board (it usually comes in pink, blue, or yellow) is available as 4 x 8-foot sheets in ½” to 2” thicknesses. It works well for building up hills, creating valleys, and even construction tunnels and rocks. You can cut it easily with sharp knives or hot-wire foam cutters, and you can score and snap it, much like styrene. Foamboard can be sanded, and you can glue it to just about any other material. It also holds other scenic features well, such as rock castings, fences, and trees.
Perhaps the best part of using foamboard to make the subterrain is that it can be self-supporting when laid on top of joists spanning open spaces of a layout. Be sure to use material that is 1” thick or greater for this application. You can attach it to the layout with wood glue, but I prefer something with more elasticity, so I use latex caulk or a foam-safe construction adhesive, such as Ohio Sealant’s PL300.
Whichever method you choose, the subterrain must be put into a layout section before any other scenery.
Step 2: Plaster, roads, and rocks
Since we used foam in the first example, we’ll continue with that method here. The subterrain is only a rough shape at this stage, and you need to smooth out the surface and edges to make it appear more natural. (You will also want to include roads and any rock castings in this step, but more on those items in a bit.) Two common materials used to smooth out the foam surface are plaster cloth and Sculptamold.
Plaster cloth is a plaster-coated gauze that when dipped in water can then be formed over foam and other surfaces. When used with foam subterrain, it can smooth contours, fill in gaps, and add texture, but it is also used in most of the other subterrain methods as well. When the plaster cloth hardens, it produces a solid base for adding many other scenery materials. Woodland Scenics offers plaster cloth in sheets and rolls of assorted sizes.
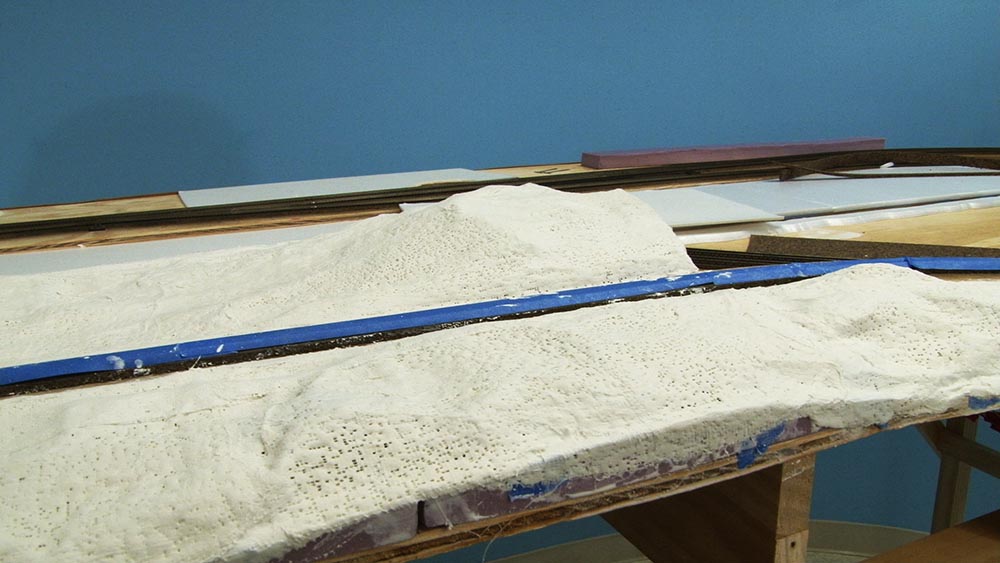
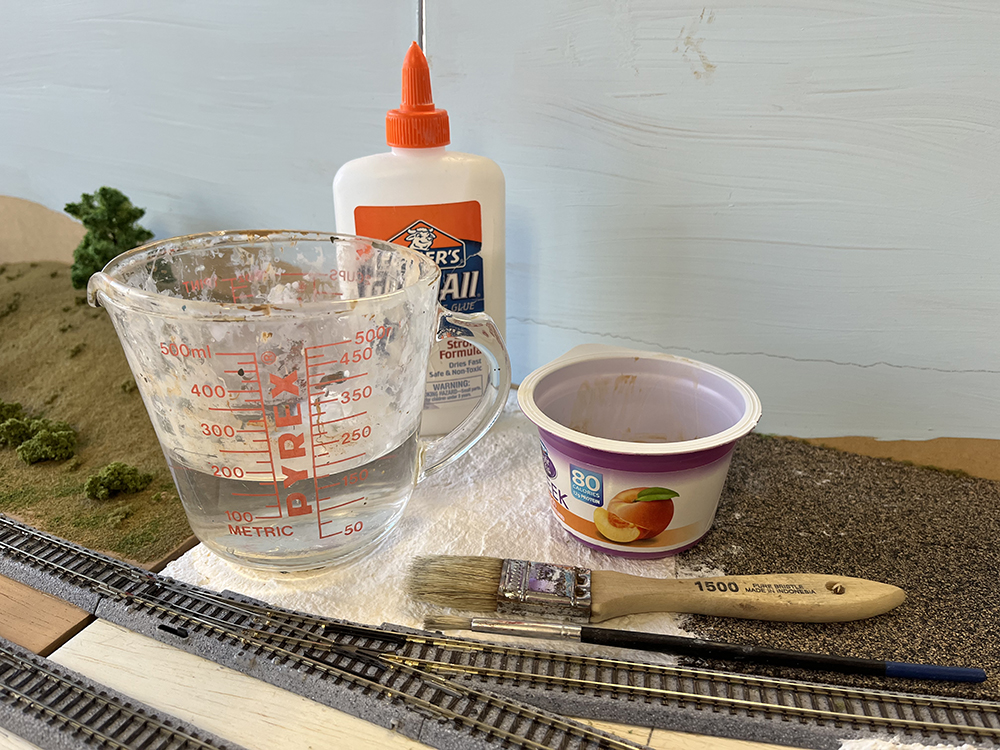
For much of my scenery work, I use Sculptamold, a modeling compound made by Amaco consisting of paper fibers and plaster.
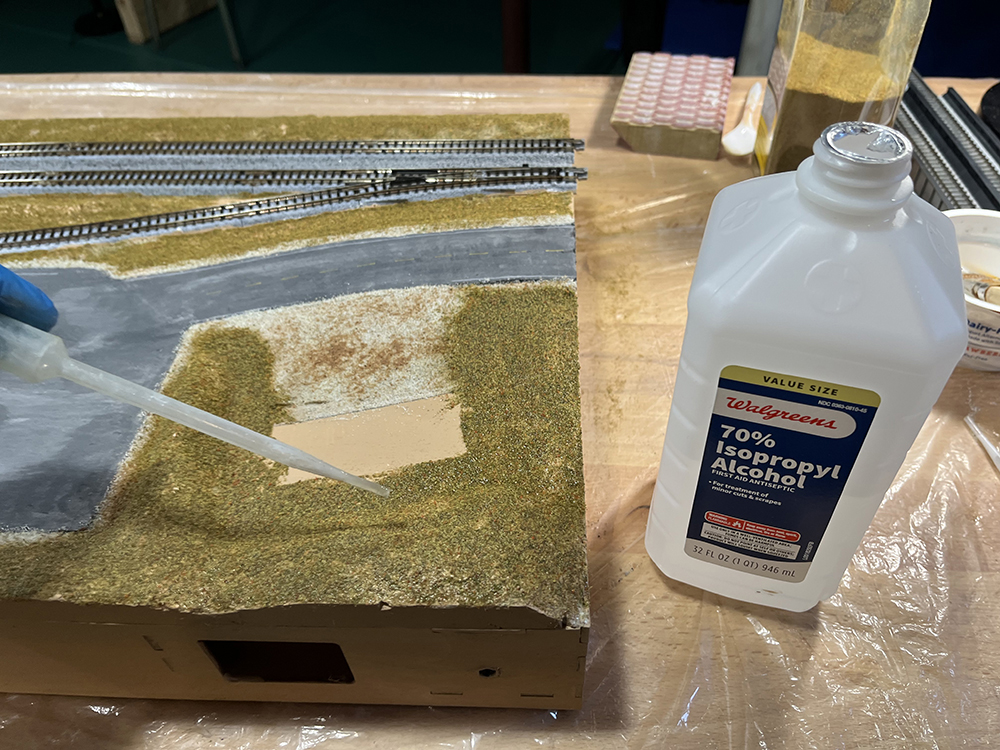
When mixed with water, Sculptamold makes a thick paste that can be used to fill gaps and smooth surfaces. But it also can be used to create small hills, rocks, and other scenic features. You can shape it while it’s wet to form rock strata or use it in rubber molds to make rock castings. Even if I use plaster cloth to cover scenic large areas quickly, I’ll also coat it later with a thin layer of Sculptamold to fill in the small holes that appear in the gauze (see the above photo). The material has a lot of uses for model railroad scenery.

Once the plaster layer is in place, it’s also a good idea to figure out the locations where roads, fields, structures, rock outcroppings, and other scenic features will go. In the example above, after I’d added the foam to the T-TRAK modules, I also installed N scale cork roadbed to form the right-of-way for the highway on the layout. With the cork in place, I then coated it with another Woodland Scenics plaster product called Smooth-It. You can also use styrene or foam sheet over the cork to simulate pavement. Whichever surface product you use, cork makes an excellent base for roads, as its angled profile makes it easy to add ditches along the sides.
In addition to roads, another important feature to add at this point is rock outcroppings. You easily can make your own plaster rock castings using commercially available rubber molds and hydrocal plaster. Hydrocal is a particularly fine type of plaster that reproduces crisp detail, which is why it is used in the molding process.
On several layouts I’ve used foam and rubber rock castings. These are just as they sound, and although they have crisp detail like the hydrocal castings, they come ready to use. Whether using foam or rubber castings, after cutting them to fit their locations, I glue them to the subterrain using latex caulk. I use pins to hold the castings in place overnight until the caulk cures.
Whichever type of rock castings you use, once they have been attached to the layout, fill in around them with Sculptamold to blend them into the scenery. Let everything dry completely before painting the rocks.
Step 3: Paint and more paint
With the subterrain, plaster, rocks, and roads in place, now is the time to paint – and by paint, I mean paint everything!
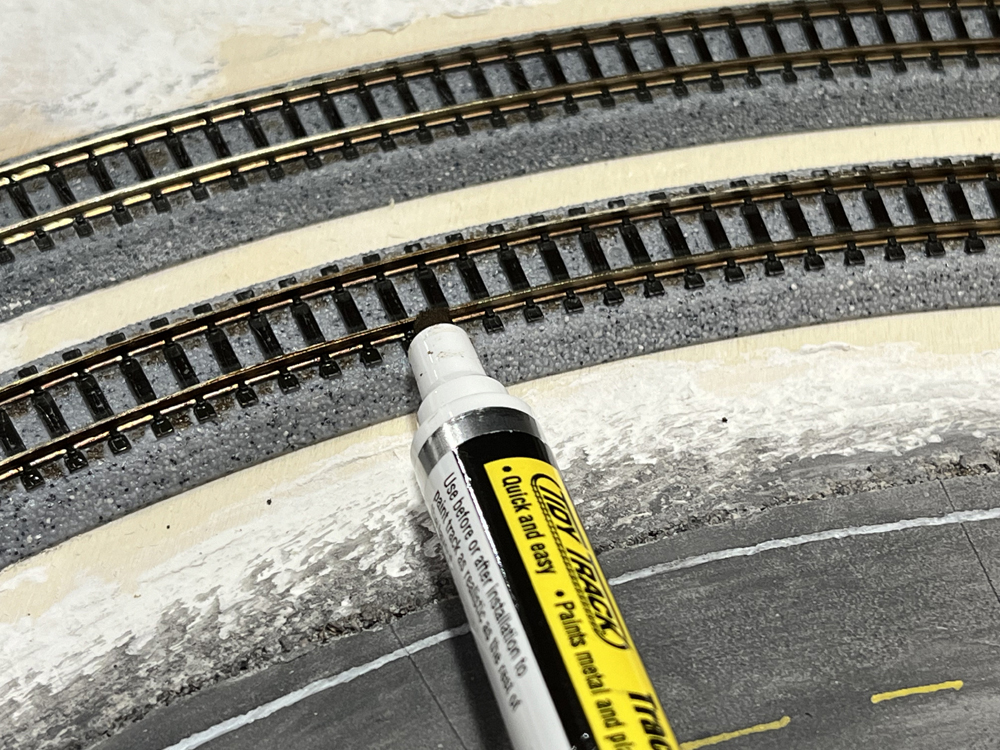
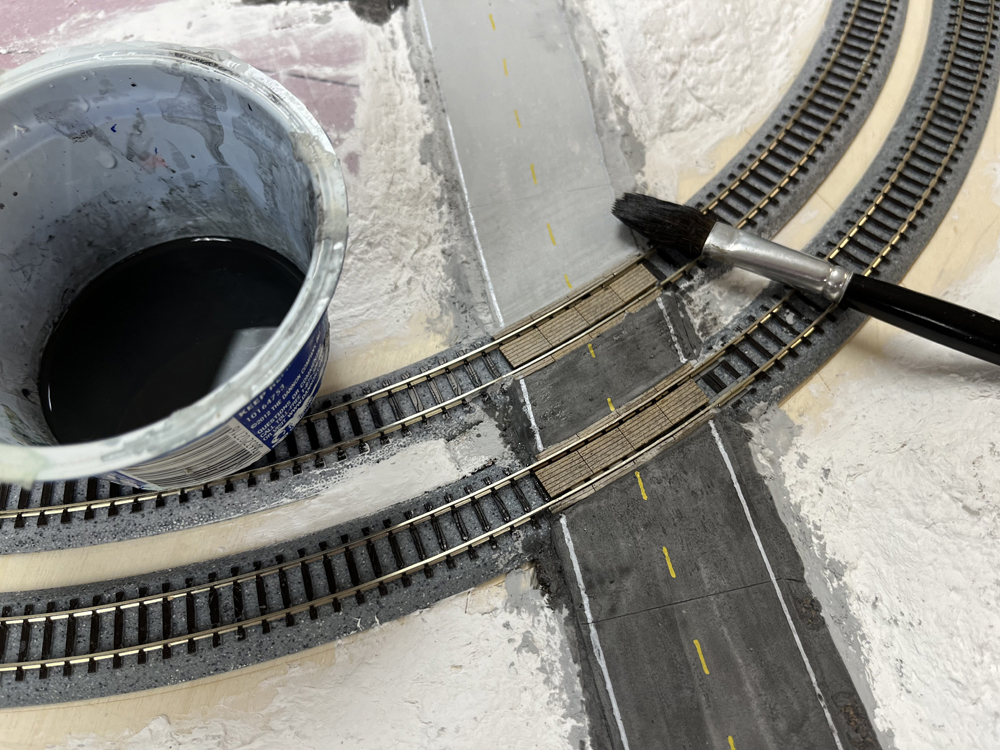
If you haven’t painted the track yet, do that first. I use an airbrush and acrylic paint for this step, but even if you use paint markers to paint just the rails, as we did on our T-TRAK modules, do this before adding any other scenery. It’s too easy to damage finished scenic elements while painting these items.
Along with painting the track, you should paint the roads too, including road stripes. Again, this activity can cause damage to finished scenery that’s already in place, particularly since you usually need to use a ruler of some sort to keep the stripes straight. Woodland Scenics paint pens work well for this project. Also, I typically use a lot of washes of thinned acrylic paint to color plaster road surfaces. Washes will soak into nearby gravel and ground foam and quickly discolor them, so it is best to get all of the road surfaces painted before adding any other scenery layers.
Rocks are easiest to paint if they are in the open and before any diluted scenery glue has been applied to the area, particularly if you’re using plaster castings. Even water-soluble white glue seals the porous surface of the castings, meaning that they won’t take stain or paint well. Diluted paints and ink stains are messy. Try as you may, these materials flow everywhere, so whenever possible, it’s best to apply them before any other layers of scenery are added.
Once the rocks are painted, paint all the remaining exposed plaster surfaces. I use flat interior latex house paint for this. Light browns work well for open spaces, such as dirt roads, gravel lots, fields, and riverbeds. I prefer dark brown for anywhere that will get turf or grass. Using darker colors here means that you don’t have to be as concerned about exposed areas of paint where static grass or ground foam didn’t fully cover.
Finally, with all the scenery painting complete, if you’re planning on adding a backdrop to the layout, now is the time to do it. I’ve installed all manner of backdrops, and even though I’m not much of an artist, paint is still my favorite option. Even with minimal artistic skill, it’s fairly easy to paint a blue sky and basic clouds. Once the foreground scenery is in place, these simple details go a long way to completing the look of a model railroad.
For something more dramatic, I’ve occasionally employed the help of my friend, Jay Smith, who is a retired professional artist. Jay painted the mountain landscape on my current layout, and you can watch some of his techniques from that project in the Olympia series on Trains.com.
Again, all major painting work should be completed before adding any trees, structures, ground foam, or static grass.
Step 4: Ground cover and static grass
By this point, we’ve done a lot of scenery work to get the terrain ready for the scenery materials. These can be applied a bit at a time, but I like to work using a “wet scenery” method. That simply means that you keep applying scenic materials in assorted layers while the scenery is still wet with glue. I used this method on both my Olympia layout and the T-TRAK modules shown in the photos.
The wet scenery method starts with a layer of nearly full-strength white glue. I call it nearly full-strength because I also keep a jar of water handy and periodically dip the brush into it to keep the glue from drying out. The water on the tip of the brush, when mixed with more glue, dilutes it slightly and makes it flow more easily over the surface and into crevices.
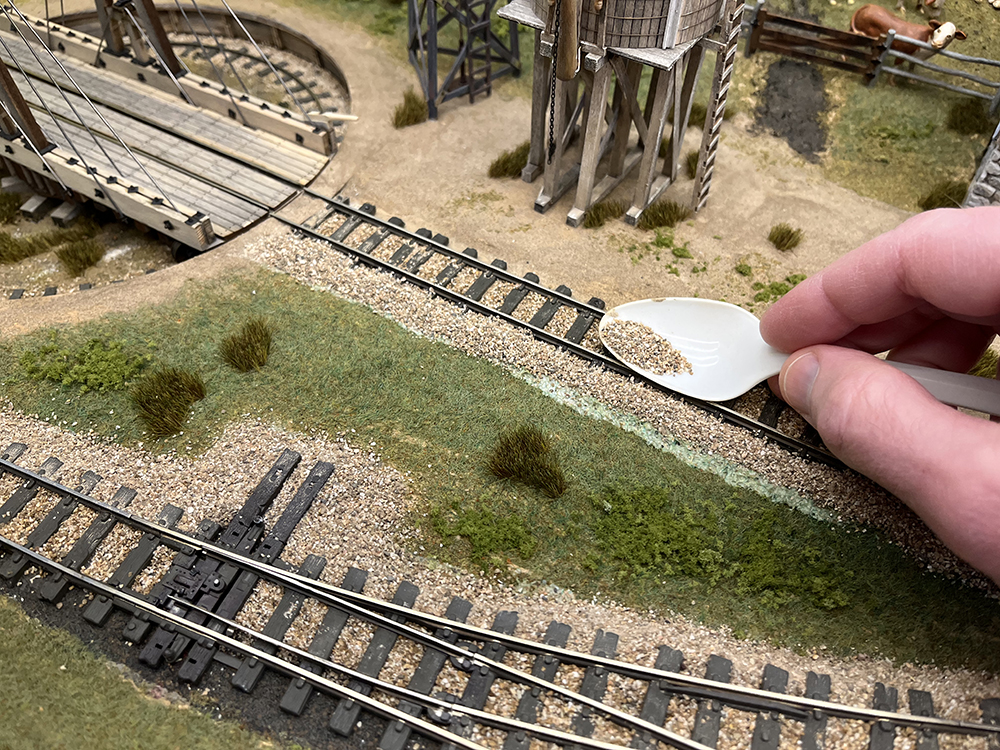
Just like real life, where nature is built up in layers, we’ll do the same thing with our model railroad, beginning at what lies on the bottom. Start by brushing white glue onto the scenery just in the places where you want to place dirt, gravel, or other soil. This forms the very first layer of finished scenery, and it will be easy to add things like turf or static grass over the top later while still being able to have some of the dirt or gravel show through. Some areas to consider for this treatment include gravel lots, road shoulders, dirt paths, and soil in farm fields.
Keeping scenery material where you want it can be tricky, so have your shop vacuum available and gently remove unwanted material before continuing.
With the gravel layer in place, next brush glue into the areas that you plan to put turf or grass. White glue can dry amazingly fast, so work in manageable zones. One square foot at a time (or smaller) is a good starting point.
I use Woodland Scenics Earth Blend fine ground foam for the turf layer. Turf covers the painted plaster surface well, gives it some texture, and serves as a great surface for adding static grass. Sift the ground foam into the wet glue in one area, vacuum up any piles or spills, then continue into the next zone with more glue. You can add some variation to the tan colored turf by sprinkling in pinches of green turf here and there. This works well for places that would have freshly mowed grass.
You don’t want the white glue layer to dry completely before the next step, so after completing a couple of zones with turf, gravel, and dirt, soak the materials with 70% isopropyl alcohol. The alcohol acts as a wetting agent, allowing the small particles of foam and gravel to more easily accept the final application of glue.
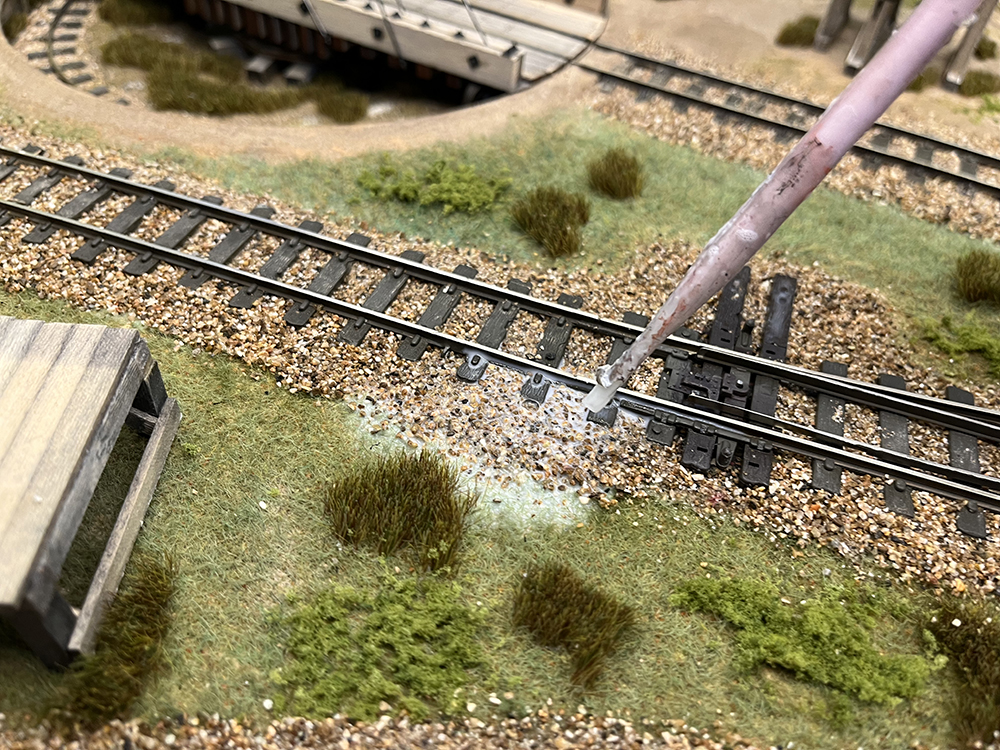
To apply the alcohol, use a small dropper or pipette and gently drip the liquid into the scenery material as to avoid creating craters and washouts. You don’t want to flood the surface, but you do want the alcohol to penetrate all of the material – it will turn dark in color when it has been soaked.
Once you have applied the wetting agent to a small patch of scenery, follow it up with an adhesive. You can make your own by mixing white glue with water, diluting it to a 50/50 ratio and adding a drop of dish soap to get it to flow well.
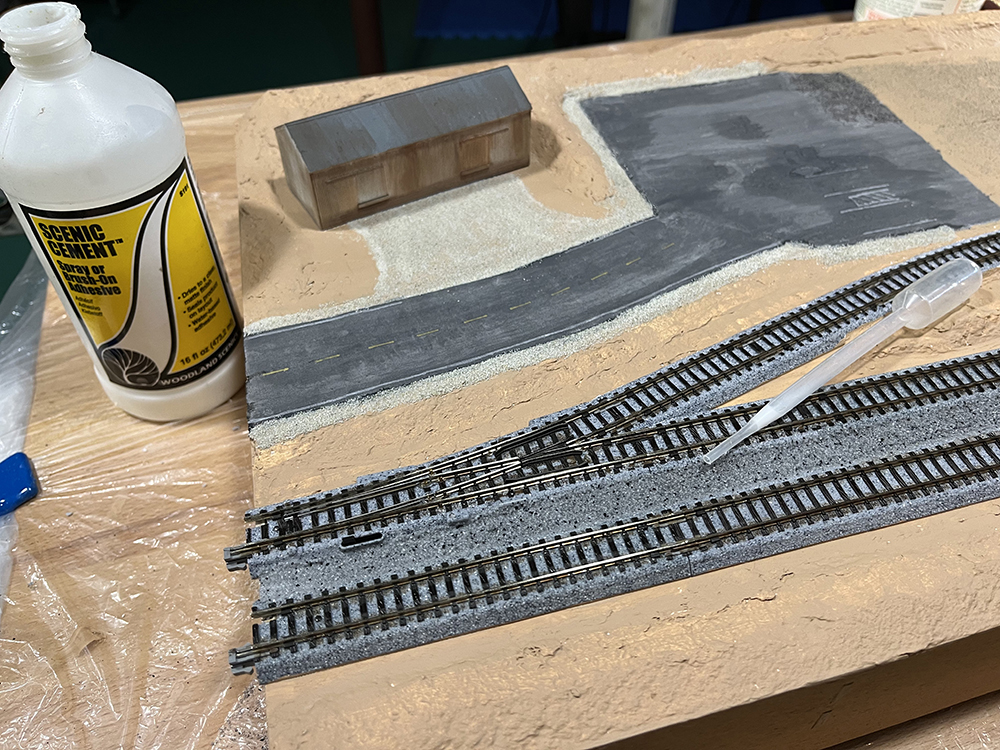
If that seems too messy, you can use a pre-mixed scenery glue. For these examples, I used Woodland Scenic’s Scenic Cement. This is a water-soluble adhesive that has already been diluted, just be sure to shake the bottle well before applying it to the layout, as the glue can settle to the bottom of the container.
Whether you use diluted white glue or Scenic Cement, use a dropper to apply it to the alcohol-soaked scenery. Be careful not to apply the glue too quickly, so as not to disrupt the surface materials. You don’t want the cement to pool on the surface, but you should be able to see some white from the glue between the granules of ballast and foam turf.
While the glue is still wet, it’s time to add the static grass, also called flocking. There are a number of static grass applicators available commercially, and I have used many of them, including those made by Peco, Faller, Grass-Tech, and Woodland Scenics.
A static applicator places an electrical charge on the wet scenery surface, which then attracts the flocking material and causes its fibers to stand on end. Once the glue dries, the fibers stay on end, simulating natural grass and are quite resilient. Grass fibers are available from many manufacturers, including those listed above. They come in a wide variety of colors and lengths, providing a lot of options for modelers. You can mix the colors and lengths as well to provide realistic variations in appearance.
At this point, you can leave everything dry if you wish, but if you do, you’re missing out; it’s really easy to add more layers to the scenery while the glue is still wet.
Look at any grassy field or roadside ditch left to grow wild and you will find a lot more than tall grass. There’s an amazing array of plant life and textures, all of which can be simulated on your model railroad.
Coarse ground foam sprinkled on top of the static grass represents weeds well. Pinches of brightly colored ground foam scattered here and there can represent wildflowers or dandelions. You can add larger clumps or clusters of ground foam to represent bushes and shrubs. And you can add pre-made static grass tufts to your existing layer of grass to create clumps of taller weeds or prairie grasses.
You can also add various other natural materials to the surface, such as large rocks and gravel. Super Trees from Scenic Express, which are made from dried plant materials, work great to make saplings that like to grow along fence lines. And you can buy all sorts of scale plants from places like JTT trees, Faller, Heki, and others.
If the glue begins to dry out, or the additional materials are not sticking well, carefully apply more diluted glue or Scenery Cement and keep working. Essentially, you want to continue building up layers of scenery on top of the base until it looks right to your eye. Once you’ve reached that point, then let everything dry completely before continuing.
One caveat, however, is structures. If you have completed structures that need to be placed in the scene, it’s easy to press them into the wet scenery materials at this time. Being pliable, the wet scenery allows the building base to sit flush with the ground, and the scenery glue will lock the building to the layout once it dries.
Step 5: Ballast, water, and details
Only after the surrounding scenery is dry should you ballast. The ballast layer needs to sit on top of almost all the other materials, including dirt, turf, and static grass. While It’s tempting to add the ballast while everything else is wet, don’t do it. You have to do some shaping of the ballast to get the correct profile, and that can easily disturb surrounding wet scenery materials. Also, ballast doesn’t always go where you want it to while spreading it, so you will likely have to vacuum it out of some of your surrounding scenery before soaking the area again with alcohol and glue.
If you want to add some grass and weeds to your ballast, you can do that during its installation by using the same materials you’ve used on the rest of your layout.
At this point, you can install the trees. If you are working with a foam base, you can poke holes in it with an awl to create holes for the tree trunks. Make a hole a bit smaller in diameter than the trunk, dip the base of the tree in white glue, then insert it into the hole. If the tree won’t stay upright while the glue dries, try clipping a clothespin to its trunk as a temporary support.
If you need to drill a hole for the tree, be sure to vacuum up the dust and debris before installing the tree.
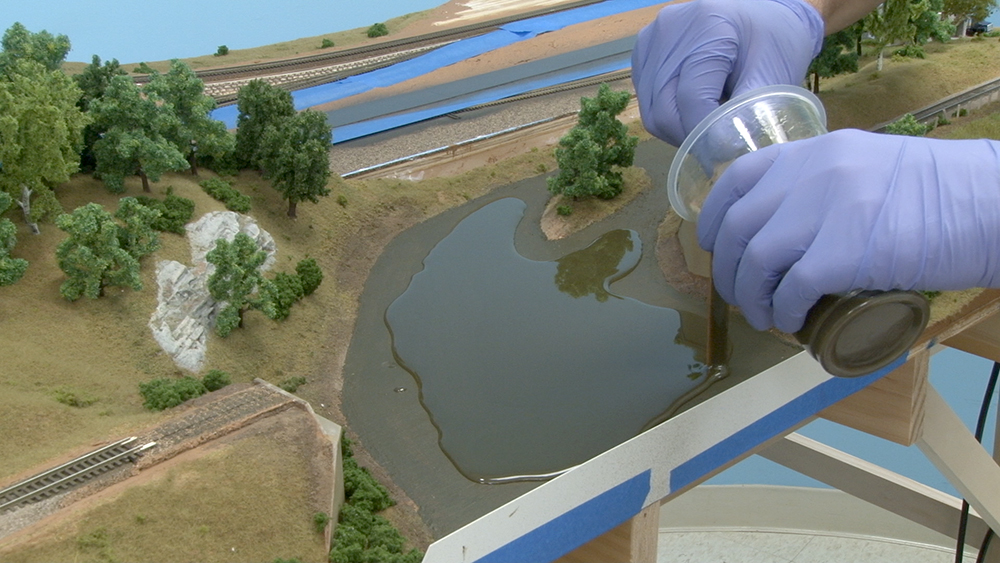
The final-layer big scenery item is water. If you are placing a water feature on your layout, such as a river or pond, you will want to wait until all the wet scenery work is complete before doing so. Alcohol and diluted glue can seep under resin through cracks in the scenery, causing it to discolor, so it is best to complete all of the other work involving those liquids first. If you need to touch up the scenery surrounding your water scenes after the resin has been poured and cured, it’s best to use full-strength white glue if possible.
There are a number of resin water products available to modelers, but for the most realistic results try to find those that can be tinted. Unless it is a small mountain stream, most water isn’t very clear, and larger bodies reflect the sky, often making the water look deep blue or black. Working from photographs is helpful when tinting water, but you can achieve good results by painting the base for deep water black or river water olive green and then pouring a single thin layer of similarly tinted resin over it.
Resin needs a minimum of 24 hours to cure. Afterwards, you can add wave detail with a variety of commercially available products.
By this point, the scenery is almost complete. All that remains are the details that reflect real life, such as fences, animals, vehicles, houses, signs, and people. As these items are the most fragile scenic elements, it’s best to place them only after all the other scenery work is finished. The more times you need to reach into a scene, the greater the chance of damaging one or more of these finished details, so the finer things should be last.
Scenery in layers
If you’re still with me at this point, by now you’ve realized there’s a lot more to scenery than 5 simple layers. Each layer has its own distinct group of subcategories, and some have more than others.
The important thing to remember is that as long as you keep adding materials in a logical order, you will end up with scenery that looks like its counterpart in nature. You’ll know if it’s right if you like how it looks to you when complete.
Scenery is one of my favorite things about model railroading. It adds the detail and interest that captivate those who see it, turning it from just a collection of tracks and trains into a miniature world!