How To Expert Tips DIY graffiti for modern model railroad freight cars

DIY graffiti for modern model railroad freight cars

By Angela Cotey | February 10, 2020

| Last updated on November 20, 2020

Paint markers and an airbrush make it easy to "tag" your modern-era model trains

Email Newsletter

Get the newest photos, videos, stories, and more from Trains.com brands. Sign-up for email today!

DIYmodeltraingraffiti_01
Like it or not, graffiti is part of the modern railroad scene. Matt Snell shares his techniques for adding different styles of graffiti to rolling stock using paint markers and an airbrush. All photos by Matt Snell.
Matt Snell
DIYmodeltraingraffiti_02
Fig. 1 Basic graffiti. Drawn or spray-painted lettering can be easily re-created on smooth-side cars and cars with exterior posts. This simple graffiti style often contains city names, as shown on the Bessemer & Lake Erie three-bay hopper above, or nicknames.
Matt Snell
Whether you think of it as an eyesore or art, graffiti is part of the modern railroad scene. Including graffiti, or “tagging,” on our model railroads is a personal choice. Those who include graffiti know it can be difficult and  expensive using the  limited selection of graffiti decals on  the market. However, by learning how to draw your own graffiti, you can  duplicate what you see trackside. Best  of all, it requires limited artistic ability. If you can draw a line, you can draw simple graffiti.

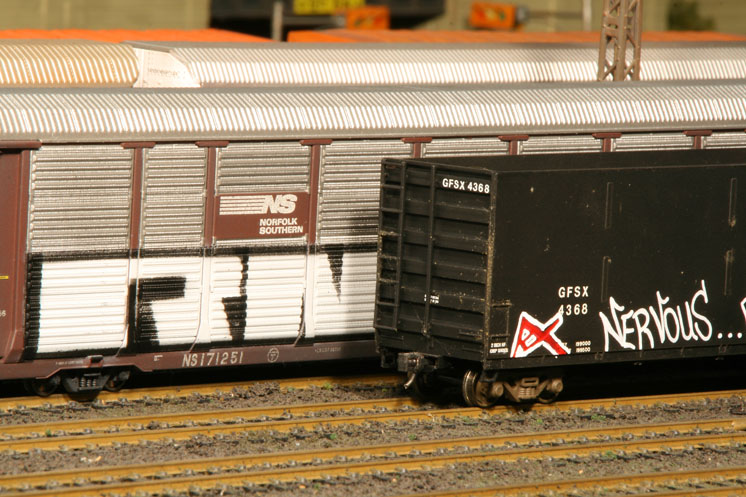
There are several types of graffiti. The first is drawn or spray-painted lettering, as seen in fig. 1. This is the easiest type of graffiti to re-create on models.

Balloon lettering is another style of graffiti, shown in fig. 2 on the next page. This style takes normal letters and turns them into wide outlines, similar to tracing around the edge of a lettering stencil. The letters may be further distorted by bending or stretching them to different sizes, angles, and shapes, leaving each with a fat, balloon-like appearance.

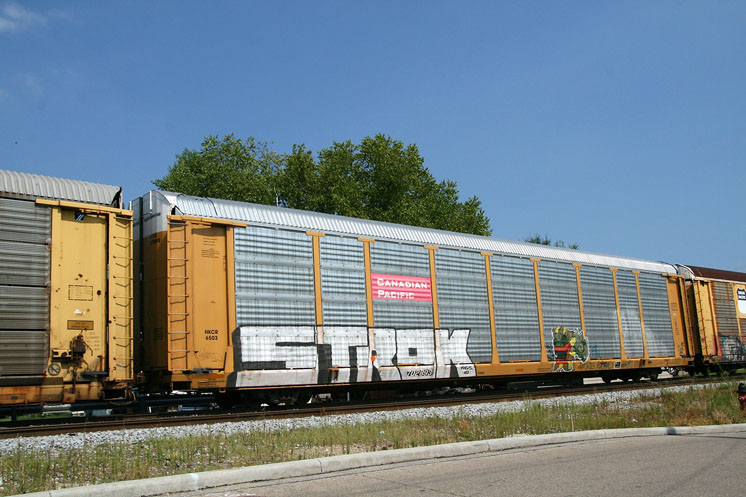
Large block lettering (fig. 3) is a third style that’s easy to reproduce. This style sometimes takes up the entire side of a railcar.

There are dozens of other styles of graffiti. Prototype photos, books, and the Internet are all valuable resources for graffiti ideas and techniques.

DIYmodeltraingraffiti_03
Fig. 2 Up, up, and away. Balloon lettering is named for the style of the characters. It may be a simple outline or a solid color with a contrasting outline.
Matt Snell
DIYmodeltraingraffiti_04
Fig. 3 Large block lettering. This style of graffiti is generally long and tall. In some cases, the letters may cover the entire side of the car.
Matt Snell
DIYmodeltraingraffiti_05a
Fig. 4 Tools of the trade. Matt uses an assortment of Sharpie paint markers to add graffiti to his models. The markers are offered with different tip sizes, including wide and extra-fine.
DIYmodeltraingraffiti_06
Fig. 5 Pencil it in. Using prototype photos as a guide, Matt first uses a sharp pencil to write the letters on the carbody. If he doesn’t like how the letters look, he can simply erase them and start over without putting paint on the car.
DIYmodeltraingraffiti_07
Fig. 6 Tracing. Next, Matt traces over the pencil with an extra-fine-tip paint marker. He uses a color that contrasts with the carbody color.
Matt Snell

Adding graffiti with paint markers

Paint markers, sold individually and in sets at art supply and big box stores, are offered in a variety of colors. One consideration when choosing a marker is the tip size, which varies from extra fine to wide. See fig. 4. The tip sizes can be used to create different effects.

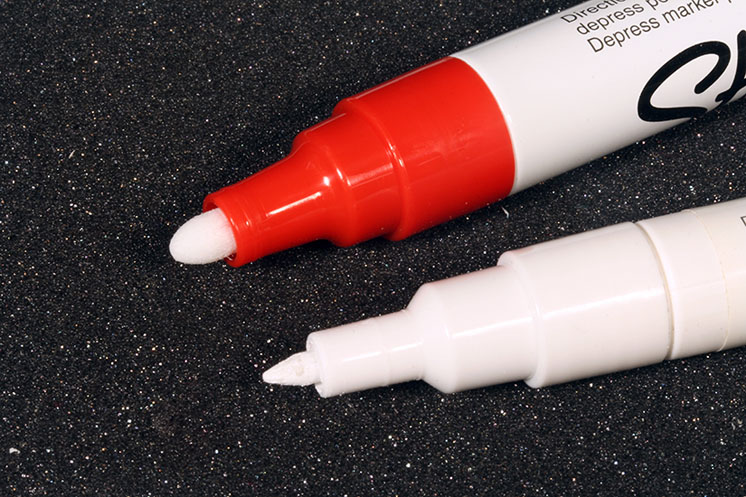
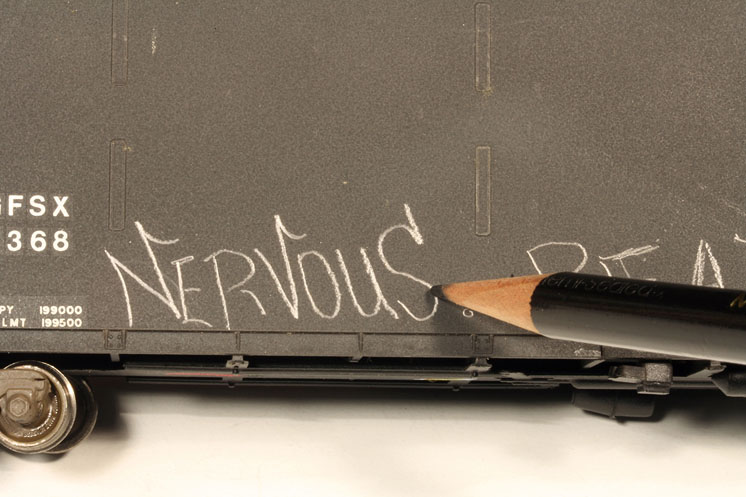
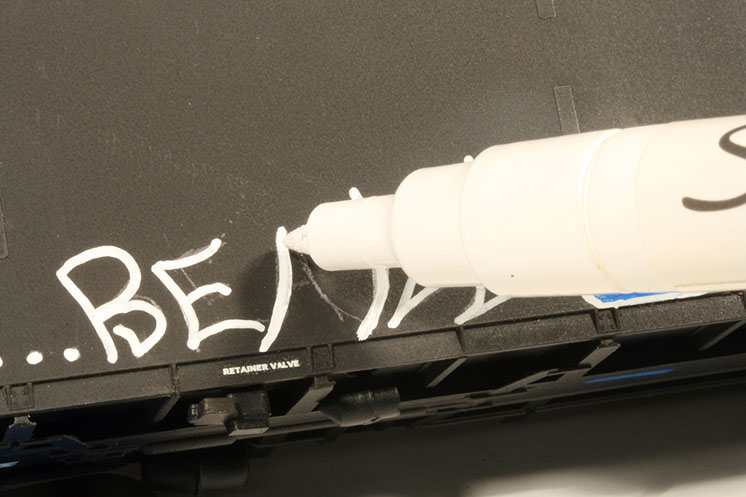
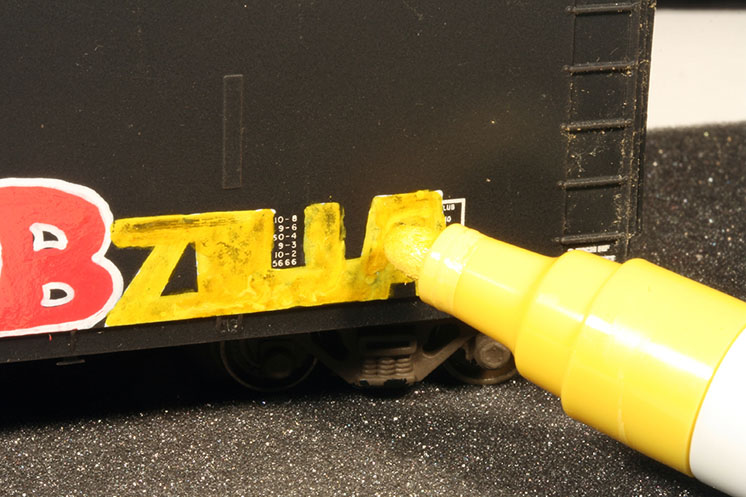
To simulate spray-painted lettering, I used a white marker with an extra-fine tip. First, I used a sharp pencil to write Nervous. . . Beatz on the side of a smooth-side trash car, as shown in fig. 5. Then I traced over the pencil with the marker, as seen in fig. 6. To make the graffiti stand out, use a color that contrasts the carbody color.

Paint markers also work well for balloon lettering. I wrote Swag in bright blue letters on the same model. As before, I used a pencil to draw the initial design. A pencil makes it easy to change the shape or size of the letters without committing paint to the model.

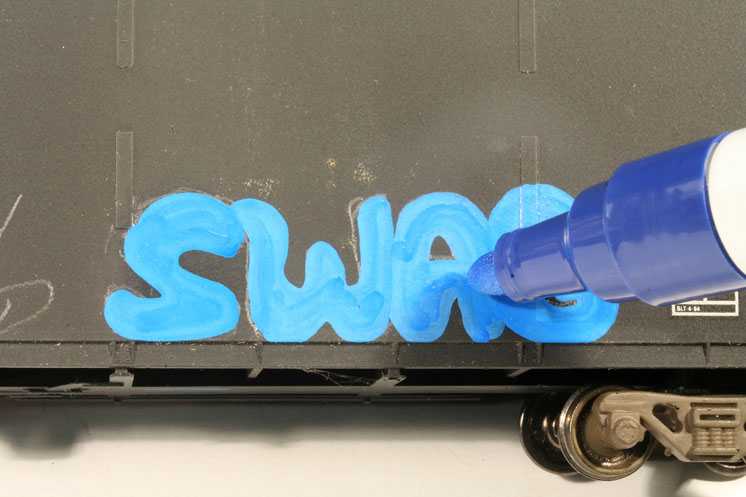
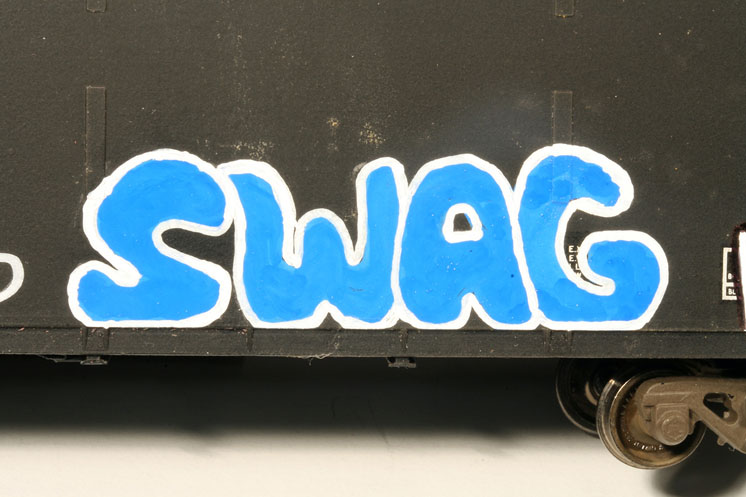
Next, I filled in the outline with a blue medium-tip marker. See fig. 7, opposite. I let the paint dry completely before tracing the outline of the letters with a white extra-fine tip marker. Not only does the white outline make the lettering pop, as shown in fig. 8, it also hides any rough edges left by the medium-tip marker.

Though blue or red will cover almost any color, what about instances where a light color must be used over a dark background? Light colors can still be used successfully, but they require an extra step. After I draw the pencil outline, I fill it in with white. After the paint dries, I color over it, as shown in fig. 9. Outline the letters with a complementary color to hide any imperfections.
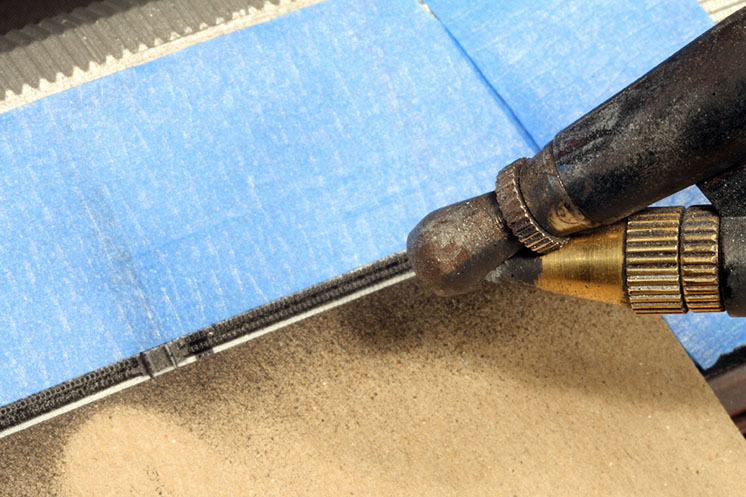
DIYmodeltraingraffiti_08
Fig. 7 Blue balloon lettering. Matt traced over the pencil outline with a blue medium-tip paint marker. He then filled in the letters to create a solid style.
DIYmodeltraingraffiti_09
Fig. 8 Popping the balloon. To make the balloon lettering “pop,” Matt used a white paint marker with an extra-fine tip to outline the letters.
DIYmodeltraingraffiti_10
Fig. 9 On the light side. After filling in the pencil outline with a white marker, Matt paints over the base coat with yellow.
DIYmodeltraingraffiti_11
Fig. 10 Prototype inspiration. Matt wanted to add the large block-style graffiti seen on this 89-foot full-size auto rack to an HO scale model. He often uses prototype photos from railfanning trips, images in books, and photos on the Internet as inspiration for his modeling projects
DIYmodeltraingraffiti_12
Fig. 11 A second mask. After masking the outline of the large block lettering and painting the area white, Matt masked the letters and painted their outlines black. He prefers using blue painter’s tape to mask models because it’s less like to leave residue or damage the model’s surface.
DIYmodeltraingraffiti_13
Fig. 12 Mobile mask. A few spots on the graffiti needed touch up. Matt used a sheet of cardboard to keep the black paint off the white.

Airbrush graffiti

Though paint markers are handy for adding graffiti to cars with smooth sides, they aren’t as effective for auto racks and cars with uneven surfaces. In these situations I use an airbrush to ensure even coverage.

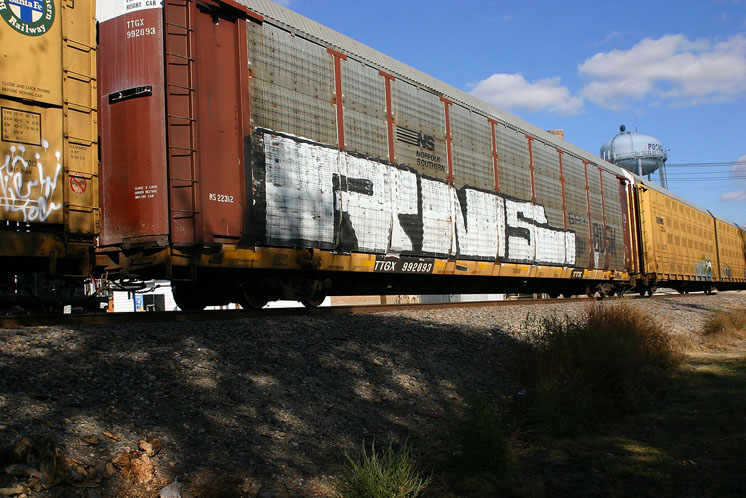
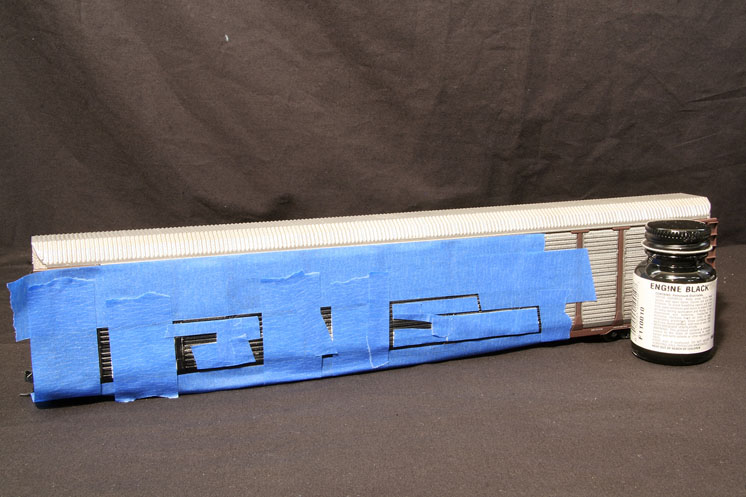
I wanted to replicate the graffiti shown on the full-size car in fig. 10. To do this, I first masked the side of an HO scale auto rack with blue painter’s tape. Then I sprayed the base color, white, with an airbrush.

Once the paint dried, I applied a second mask to cover the white body of each letter. Then I sprayed the letter outlines black, as shown in fig. 11.

After I removed the masking tape, I noticed that I needed to do some touch-up work along the edges. Instead of masking the car again, I used a piece of cardboard to keep the black paint off the white, as seen in fig. 12.

If you’re looking to give modern era rolling stock some realism, try adding graffiti. Whether you use the paint markers, an airbrush, or both, these easy techniques will bring your cars into the 21st century.

You must login to submit a comment