How To Expert Tips Easy project: Swapping loads on flatcar models

Easy project: Swapping loads on flatcar models

By Angela Cotey | February 26, 2020

| Last updated on November 20, 2020

How to use false floors to add variety to your model railroad flatcar fleet

Email Newsletter

Get the newest photos, videos, stories, and more from Trains.com brands. Sign-up for email today!

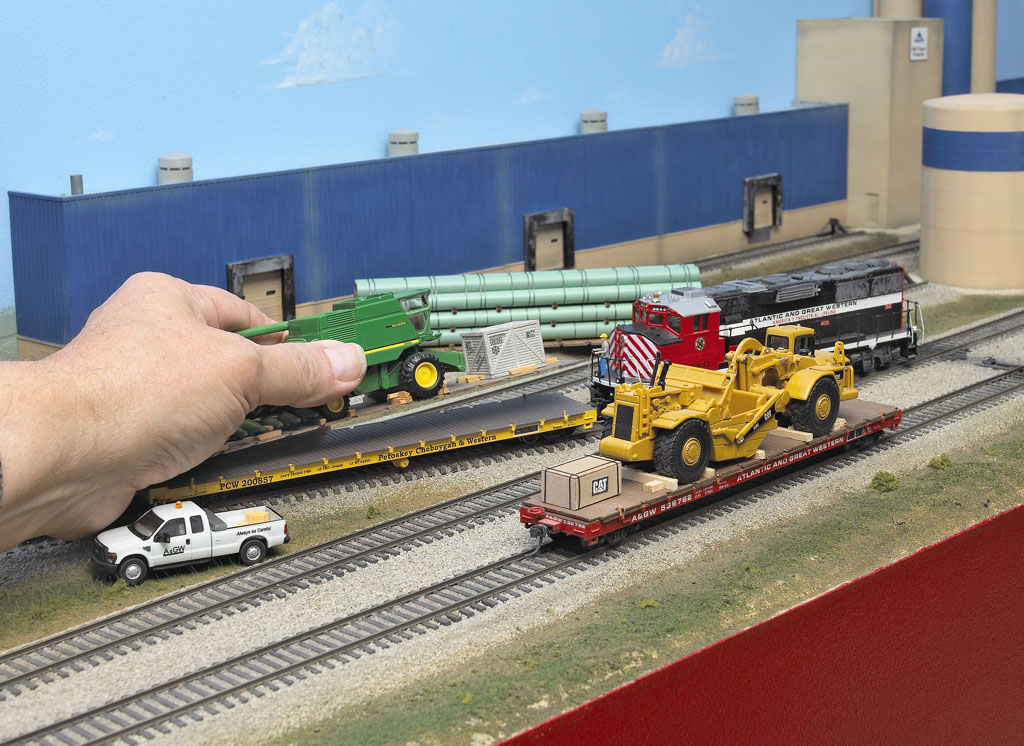
Model railroad flatcar false floor 1
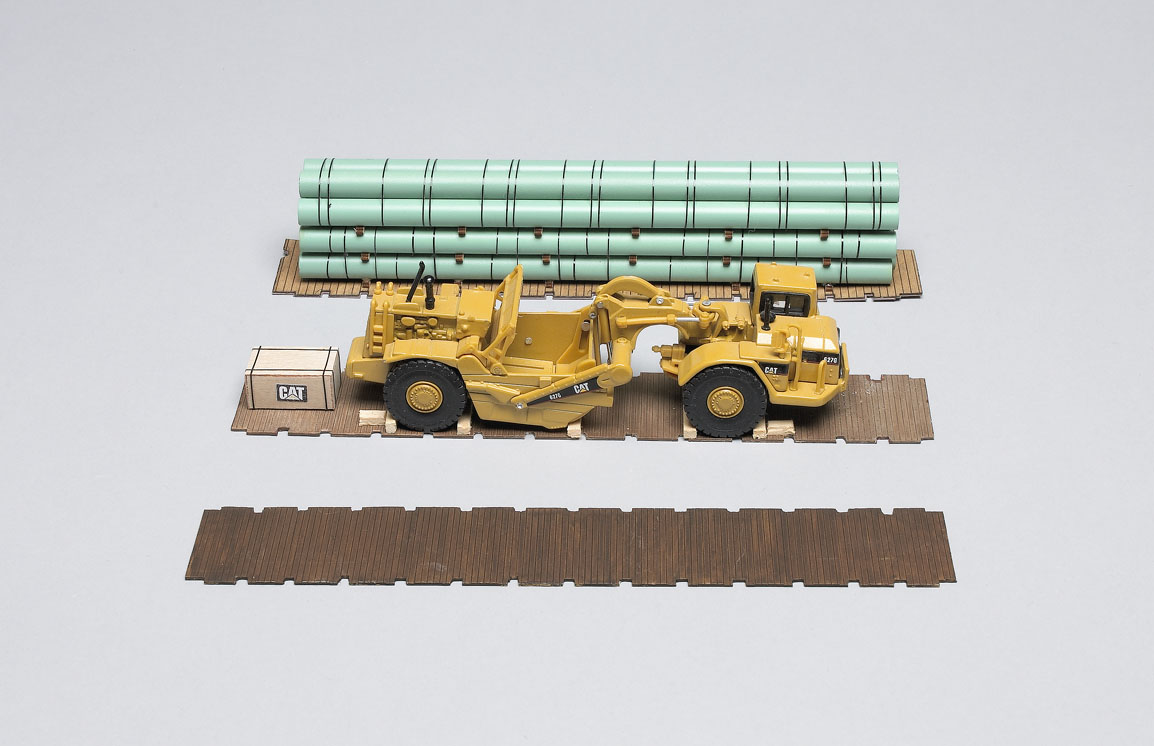
Roger Kujawa and Bruce Brantner came up with the idea of using false floors to secure heavy equipment and other loads on their HO flatcars. This allows them to run properly loaded or empty flatcars during operating sessions on Roger’s Atlantic & Great Western RR.
Jim Forbes
Model railroad flatcar false floor_02
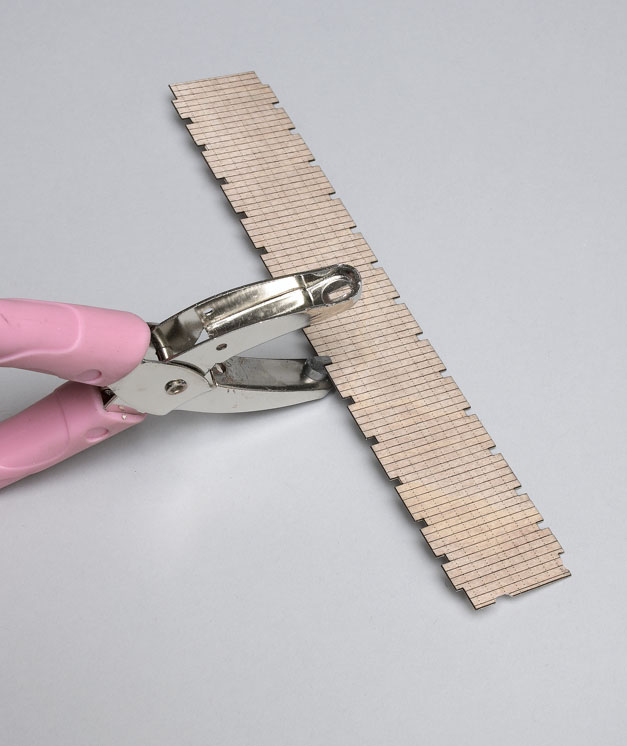
Roger used the wood deck as a template to cut false floors from scribed styrene siding and punch out the stake pocket locations along both sides.
Jim Forbes
Model railroad flatcar false floor_03
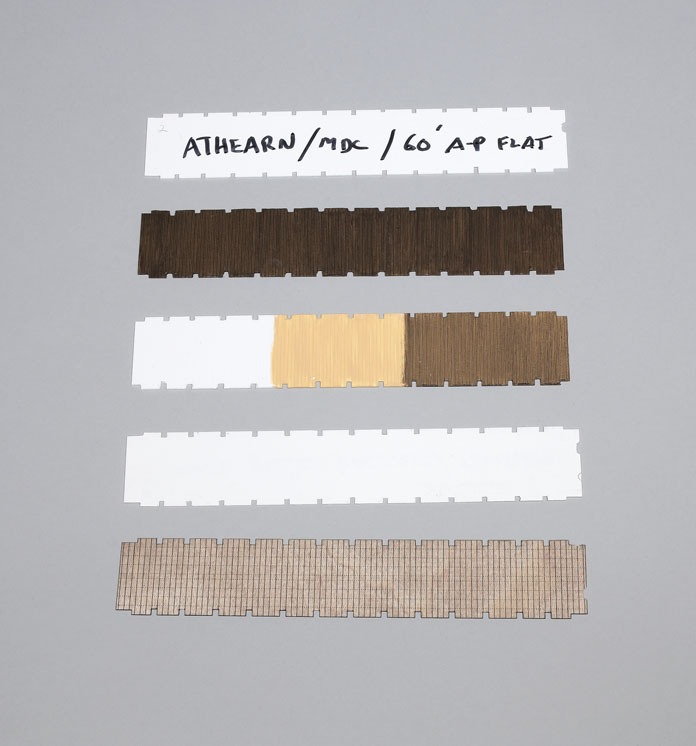
All of Roger’s styrene floors are brush painted with acrylic buff colors.  Then he stains them with grays and browns. The finished deck is shown in the middle. The car type is marked under the load (top). The bottom images shows the progression (from left to right) of bare styrene, buff paint, then stain over paint.
Jim Forbes
Model railroad flatcar false floor_04
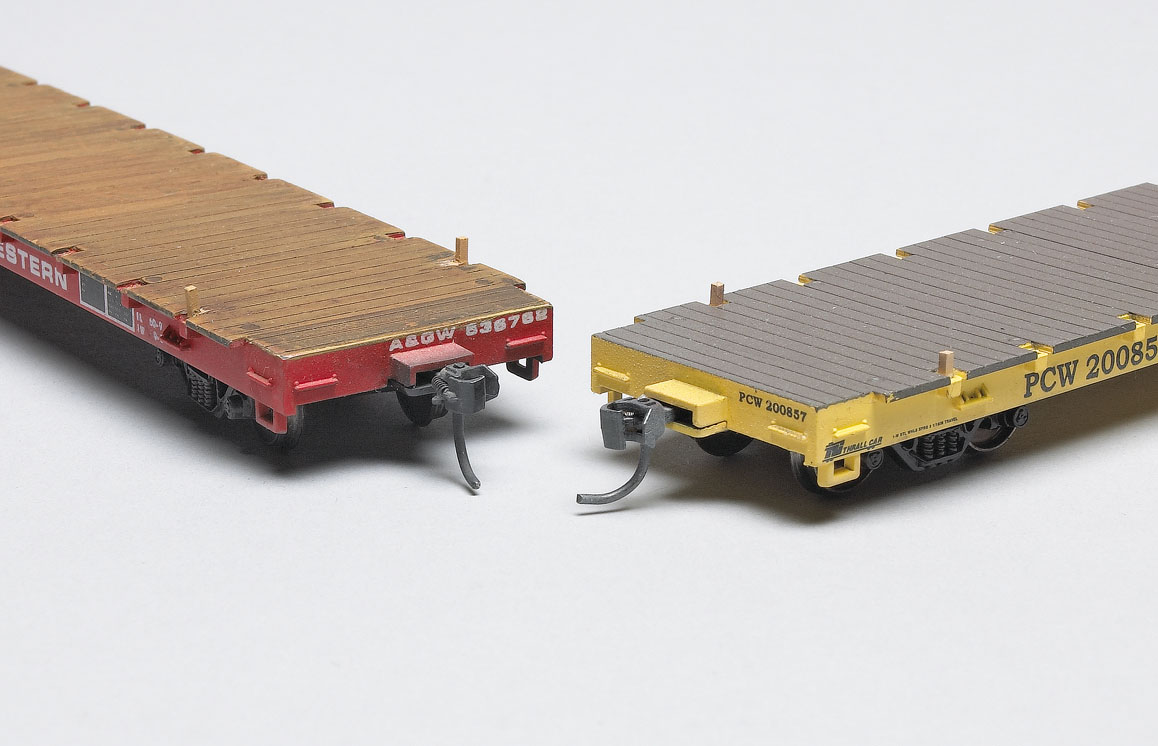
To secure the floor and its load, Roger installs scale 4 x 4 stakes in the stake pockets near all four corners. The stakes keep the load from shifting.
Jim Forbes
Model railroad flatcar false floor_05
This system allows for a variety of flatcar loads.
Jim Forbes
Realistic operation has been a goal of mine through many years of modeling. I especially enjoy the three-dimensional role playing game this involves as my operators switch cars and move trains across my Atlantic & Great Western RR.

Simulating the movement of loaded and empty cars is one of the reasons I’ve been building cars with removable loads. Enclosed cars can travel as empties or loads since there’s no way to argue the point. However, there’s no question about an open-top car as a quick glance indicates a car’s loaded or empty status.

Open hopper and gondola loads haven’t been a problem, but I was stumped when it came to an ordinary flatcar. I just couldn’t figure out how to secure farm and military vehicles, heavy machinery, and other equipment and still make them removable.

I tried using magnets that would “grab” the car’s steel weight. But vibration still made the loads slide off. Hiding a good-size magnet was also difficult in many loads. Using pins in the load seemed like they had potential, but I didn’t like the idea of a flatcar deck that looked like a pin cushion. I wound up gluing all my loads to the flatcars. Meanwhile, I passed up a lot of interesting loads since any new load required the purchase of another flatcar to haul it.

I’m a member of the National Model Railroad Association’s Layout Operation Special Interest Group, so I asked the SIG’s Internet discussion group (opsig .org) for ideas. An easy solution to my problem came from my friend Bruce Brantner, who lives only 60 miles away from me.

Bruce’s innovative idea was to make loads that were attached to removable flatcar decks. The removable deck sits on top and covers the car’s original deck. Stakes in the corner stake pockets keep the load from shifting in transit.

I took Bruce’s idea and ran with it. I obtained Evergreen no. 12040 styrene siding that matched the decking on my 60-foot all-purpose flatcars. The boards run across the 6″ x 12″ sheet, so I could make floors up to 12″ long.

I tried an American Model Builders real wood deck. However, the thin wood deck was a little too flexible, so I laminated a .010″ styrene backer underneath to make it strong enough to be removable. I used an AMB deck as a template to cut out my .020″ styrene decks. Next, I used a heavy duty rectangular punch to notch the plastic deck edges to match the width of the wood floor’s stake pockets as shown in the photo at the far left.

I purchased my rectangular paper punch at Hobby Lobby, and it’s an exact match to the width of the AMB stake pocket openings. I also cut a notch in the end of each floor for the brake wheel.

To simulate wood decks, I brush painted my styrene decks with a variety of buff colored acrylic paints. After the paint dried, I applied thinned light stains of different gray and brown colors. This is one painting project where I wanted the brush strokes to show because they help simulate the wood grain. I was careful to keep my brush strokes parallel to the boards to get the most realism.

On my 60-foot flats, I put four small 4 x 4 stakes in the end stake pockets to secure the loads on the cars. Other cars, like the original Athearn 40 and 50-foot plastic flatcars, may require adjustments if the stake pockets are outside the deck. The stakes would keep the load from shifting side to side, but not end to end. In this case an extra stake or pin might be needed at the car end so the load won’t shift forward or back.

My friend Bruce also adds a label on the underside of each load indicating the cars the load fits. Additional routing data could also be placed on the label to help keep the loaded car moving in the proper direction.

Thanks to Bruce for energizing my search for more potential flatcar loads. All it takes is a little imagination to add new flatcar loads that may turn out to be some of the most interesting cars on your layout

2 thoughts on “Easy project: Swapping loads on flatcar models

  1. Roger and Jim,

    Great idea! I’ve been trying off and on to find a hole punch that will work for this. Looked at Hobby Lobby, but all these are way too big. It looks to me like I only need a 3/32″ square hole.

    Not much luck online either. Already have the appropriate sheet styrene and some flatcars. Just need the punch. Any help would be appreciated!

    Eric Carlson
    Crooks, SD

You must login to submit a comment