


Structure building is one of the most popular aspects of model railroading. Many modelers enjoy this endeavor for the challenge and satisfaction of completing a unique railroad structure that’s rich in architectural detail or complexity. For this segment of modelers, time spent at the workbench is often the most relaxing and enjoyable part of the effort.
But then there’s another segment of structure builders, including me, who strive for realism, plausibility, and historical accuracy. For many of us, the ultimate objective is to assemble a model railroad with a cohesive and authentic appearance.
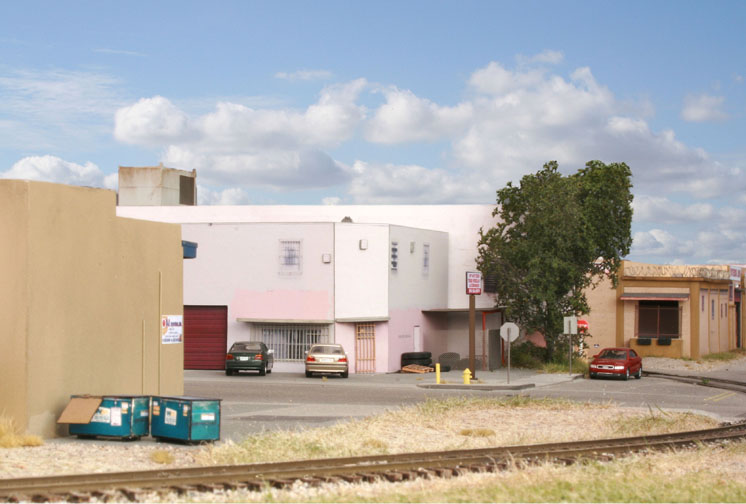
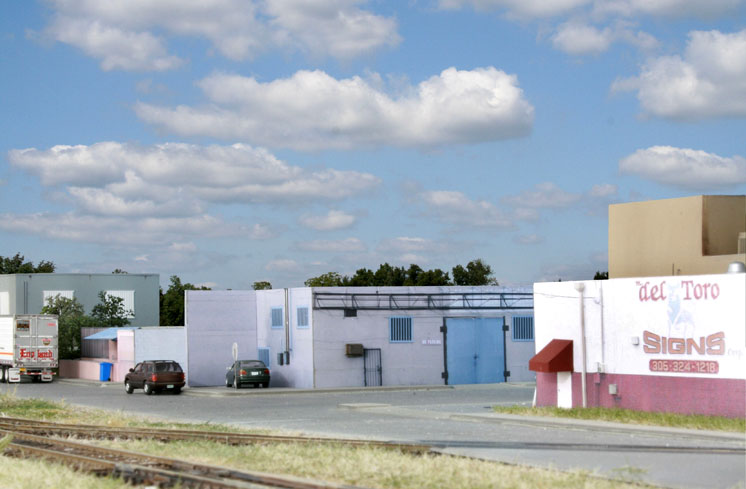
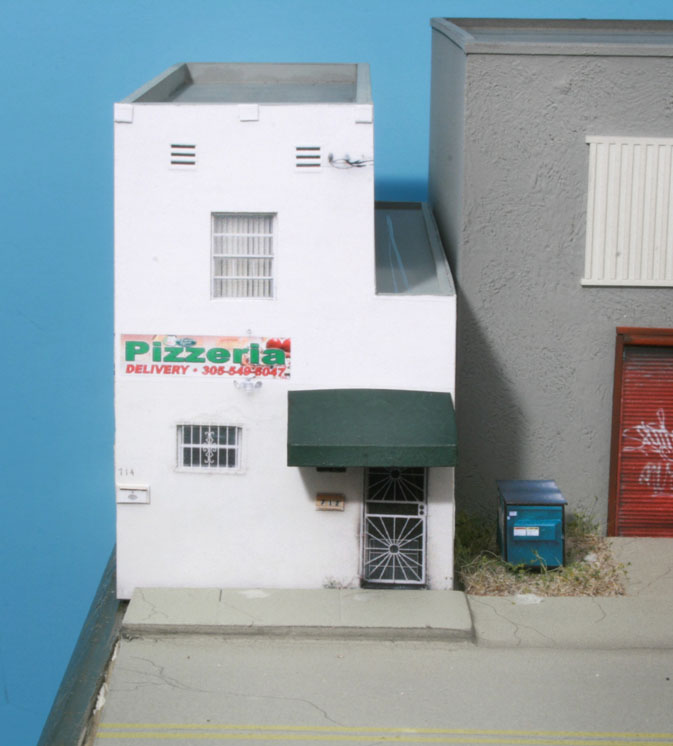
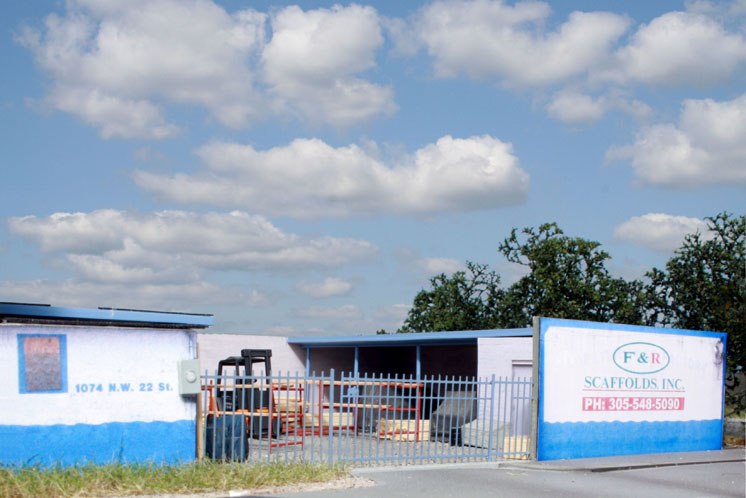
The approach I take when building structures for my contemporary HO scale Downtown Spur layout has three parts. First, how structures are grouped becomes more important than any individual building. Next, I model only the structures that actually exist in the prototype scene, regardless of whether I find them particularly interesting or not. Finally, I’m willing to concede that a large percentage of the structures that I’ll model aren’t served by rail.
Builders who venture into modeling what’s often dismissed as “bland” or “boring” layout structures are rewarded on several fronts. While an individual structure may appear featureless, a well-composed group of mundane buildings can yield a captivating overall scene. We also have a tendency to take only a quick look at a structure and then make a snap judgment about how interesting it is. Often, what first appears to be a lackluster subject, upon closer examination, contains a number of architectural features, details, and subtleties.
There really isn’t an instructional article to write when it comes to modeling mundane structures – they’re assembled using the same techniques as any other building. For prototype modelers, it’s simply a mater of re-creating the structures and views that exist along the right-of-way. For the freelance modeler, it’s best to select photos of a prototype that closely match your theme and copy the structures you see. Whether you’re a strict prototype or “proto-freelance” modeler, the key is to avoid handpicking what to model. As the examples on the following pages show, you’ll discoverarchitectural treasures that were hidden in plain sight.

From flat prints to full-featured structures
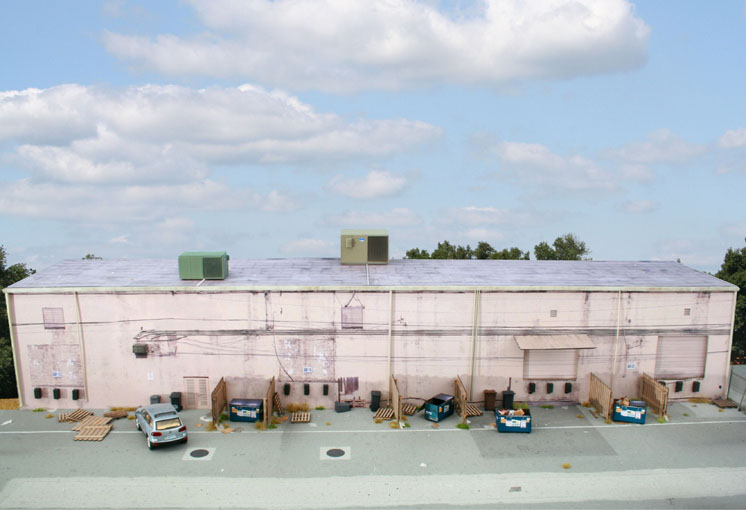
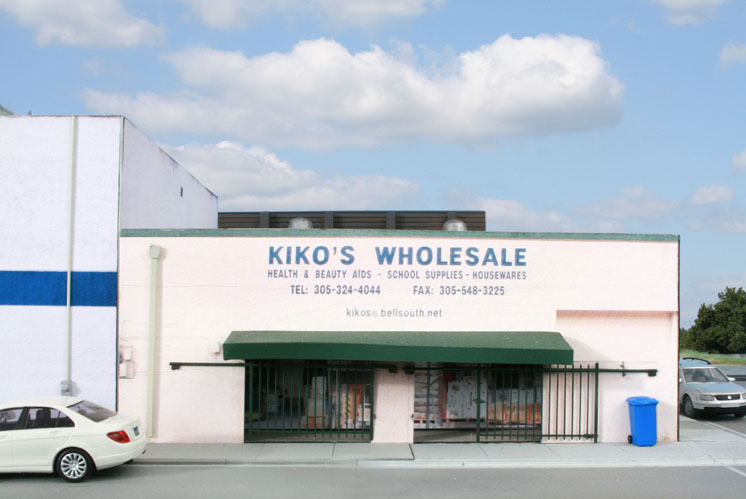
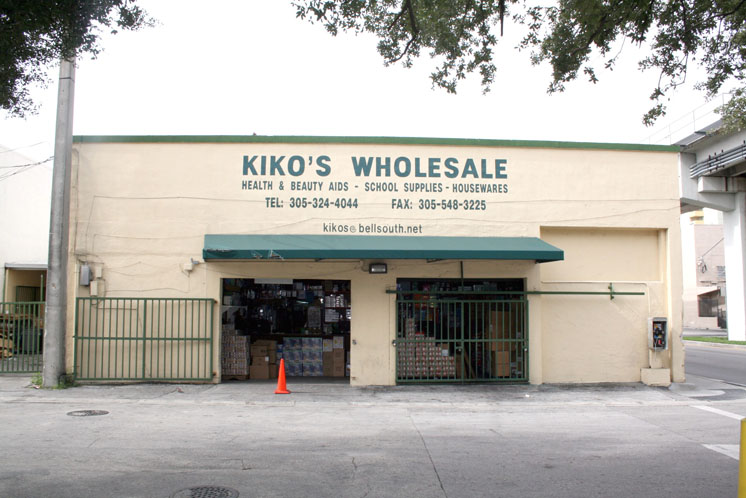
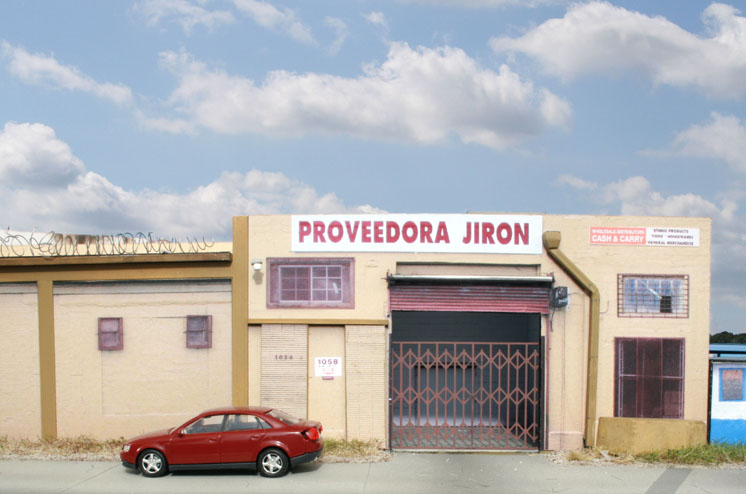
One advantage of modeling a modern-era railroad is the ability to visit your prototype site and photograph the structures. When I’m modeling a building with complex color patterns and paint schemes I’ve had great results from essentially gluing photographs of the actual structure to a styrene core. When I add appropriate details, it’s especially hard to detect that the structure isn’t a full-featured model – even when viewed from a close distance. Here’s the process I follow to capture and re-create existing structures.
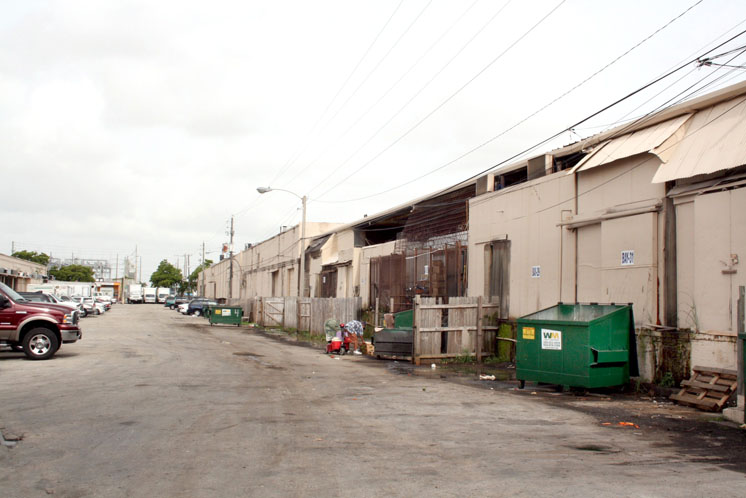
Step 1: Photograph the structure sides from as close to a 90-
degree angle as possible. If space and conditions allow, try to position yourself at least 50 feet away to minimize distortion. Also, it’s best to
have the sun at your back.
Step 2: Use photo-editing software to prepare your photograph.
First, square and straighten the image. Next, remove perspective and barrel distortion. With the aid of editing software, these processes typically don’t involve more than a few clicks of the mouse. Finally, use the clone or cut-and-paste tools to remove unsightly obstructions, including poles or vehicles.
Step 3: Print the photo to scale. There are two handy reference points that I use for setting the print size for an HO scale building. I use the standard height of a door (80″) and the standard cinder block dimensions (8″ x 16″).
Step 4: Use a hobby knife to cut out the photo and glue it to the styrene structure surface. I use .060″ styrene sheets for the base. Options for adhesives include 3M Super 77 spray adhesive, DAP adhesive caulk, and glue sticks.
Step 5: Add stand off details. I tend to use commercial detail parts to add gutters, awnings, downspouts, and other architectural features to my printed structures.


Printed to scale. I often use the millimeter scale in Affinity Photo as a reference. With 3.5 mm equal to an HO foot the conversion is quite easy. Moving a rectangle with a known dimension around the drawing/photo also helps to measure elements.
I’ve done some “printing to scale” by importing or editing the photo into a program that has a ruler function. I’ve mostly used PowerPoint or Libre Office. I think many image editing programs also have rulers. When you select an edge or corner, the program puts a marker on the appropriate ruler. You have to do the scale to inches/centimeters conversion separately.
I would love to try this. Any more guidance on “print to scale”? Where do you start with that?