A circular saw is often the tool of choice when constructing the benchwork for your layout. But in order to get those clean cuts and smooth edges, it’s important to have a sharp blade. This will help avoid splintering in the wood. From prioritizing safety to performing essential maintenance, here’s how to replace a circular saw blade.
Step 1: Prioritize Safety
Before starting, always disconnect power — turn off the switch and unplug the cord or remove the battery.
Step 2: Access the Blade
![Finger point towards screw in a circular saw.](https://www.trains.com/wp-content/uploads/2025/02/MRR-circular-saw-blade-replacement-safe-guard.jpg)
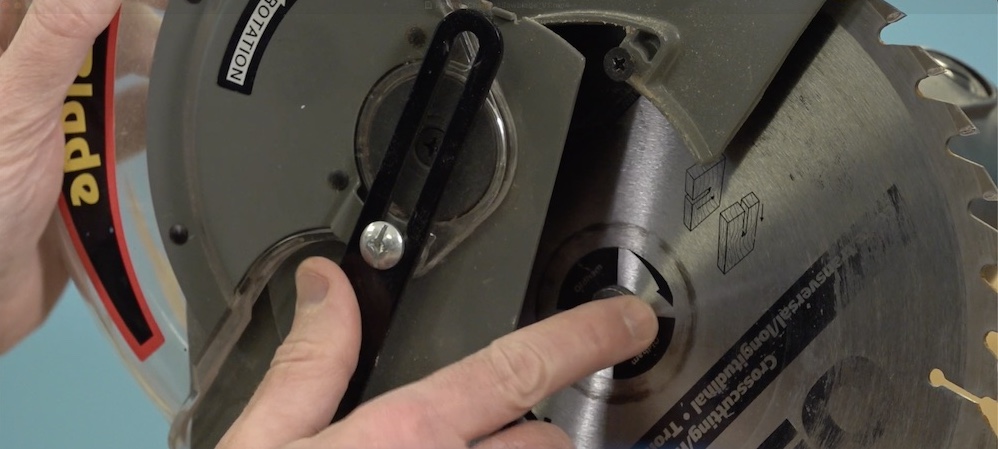
Most circular saws will have a blade guard secured by a screw. Unlock and remove the guard to access the blade bolt. Locate the saw’s locking mechanism, typically either a switch or button, to prevent the blade from rotating when loosening the bolt. Make sure to locate both the safe guard and locking mechanism before turning your attention to the bolt itself.
![Finger point to red button on a circular saw.](https://www.trains.com/wp-content/uploads/2025/02/MRR-circular-saw-blade-replacement-locking-mechanism.jpg)
Step 3: Remove the Old Blade
Using a wrench, loosen the bolt and unscrew it by hand. Note the printed arrow on the side you’re removing it from — that indicates the orientation of rotation, and you’ll need to remember that to install the blade in the same direction.
Remove the mounting ring, then carefully slide out the old blade. Properly discard the blade.
Step 4: Perform Maintenance
![Saw dust inside a circular saw.](https://www.trains.com/wp-content/uploads/2025/02/MRR-circular-saw-blade-replacement-cleaning.jpg)
Take this opportunity to clean sawdust and debris near the motor and moving parts. Use a small brush and shop vacuum to remove buildup, especially sawdust that might have gotten caked into the lubrication grease.
Step 5: Install the New Blade
Slide the new blade into position, aligning its rotation arrow with the previous blade’s direction. Reattach the mounting ring and tighten the bolt with the locking mechanism turned on.
Step 6: Reassemble and Test
![Two workers putting a new blade into the circular saw.](https://www.trains.com/wp-content/uploads/2025/02/MRR-circular-saw-blade-replacement.jpg)
Refit the safe guard back into its original position. Before using the saw, double-check that all components are secure.
By following these steps, you ensure both the safety and peak performance of your circular saw. Regular blade replacement and maintenance will extend the life of your tool.
Members can watch a Trains.com Video on how to replace a circular saw blade, coming soon.