Computer-aided design (CAD) software is an essential tool and great option in helping to experiment and track plan your model railroad in a timely manner. There can be a learning curve in understanding the program of your choosing. However, understanding the basics of using track planning software can go a long way when preparing to lay the groundwork for your dream layout.
First and foremost, there are a vast number of software programs available to download for free or purchase. Visit Gerry Leone’s Track planning software roundup article for a list of recommended titles. Also note that while these programs will help ease the designing of a track plan, it will not design it for you. Visit the Trains.com Store for books, DVD, and digital downloads for additional information on track planning tips and tricks.
Getting started
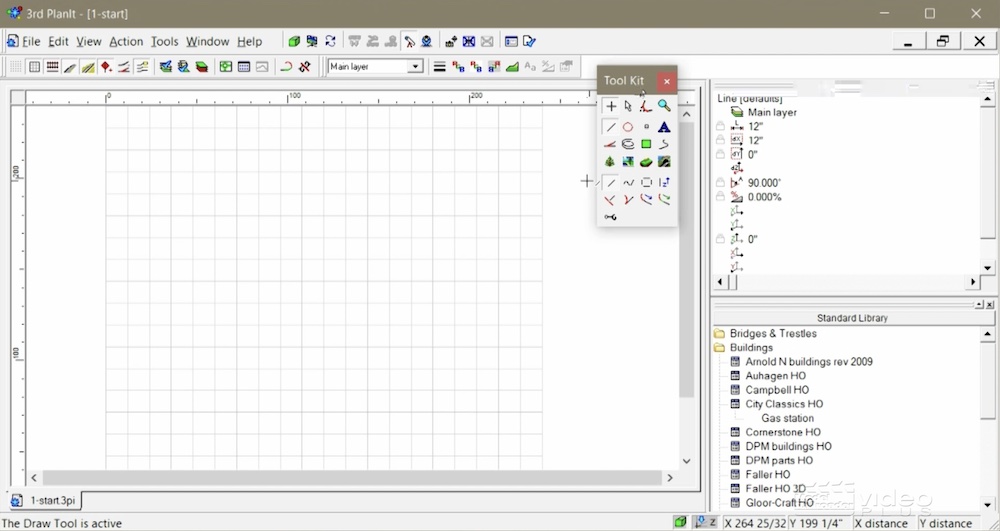
When starting up your preferred software, you’ll typically come across the following on-screen:
- A large canvas with grids where your track planning design will take place.
- The top bar with pull-down menus and a tool kit — chances are you’ll be using up to three tools for the basics.
- Sidebars on either or both sides will normally contain an object data window and library filled with track, structures and scenery for test fitting and placing.
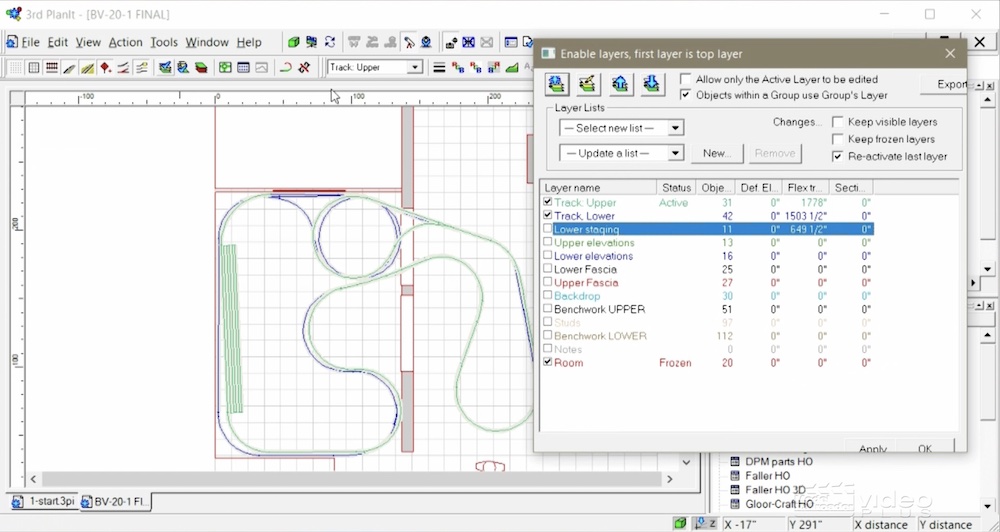
Most programs rely on layers, similar to what you find in editing and design software. You can add different objects on top of one another, but they aren’t permanent and can be easily edited. A “modify layer“ tool from the kit will list all of the added layers within your design with the ability to add and remove one or many. You can also temporarily lock specific layers so they won’t succumb to additional edits. And, you can make them invisible to obscure objects and have a better visual of certain areas of the layout.
The first layer you’ll want to add is usually the exact dimensions of your layout room. Make sure the “creating track object” option when building the layer is turned off as all you’re doing is drawing out the lines for the walls, doors, window sills, and other objects. Giving the lines a different stand-out color and style can also go a long way in differentiating objects as more layers are added.
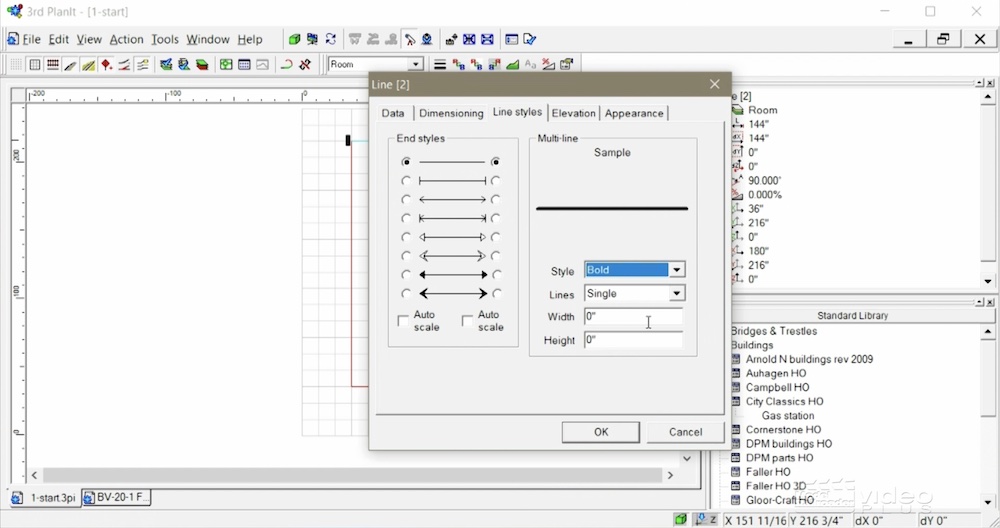
Select “draw line” from the tool kit, click your starting point within the canvas with your mouse, and drag it to any direction and length. Make sure to hold the shift key when drawing the line straight.
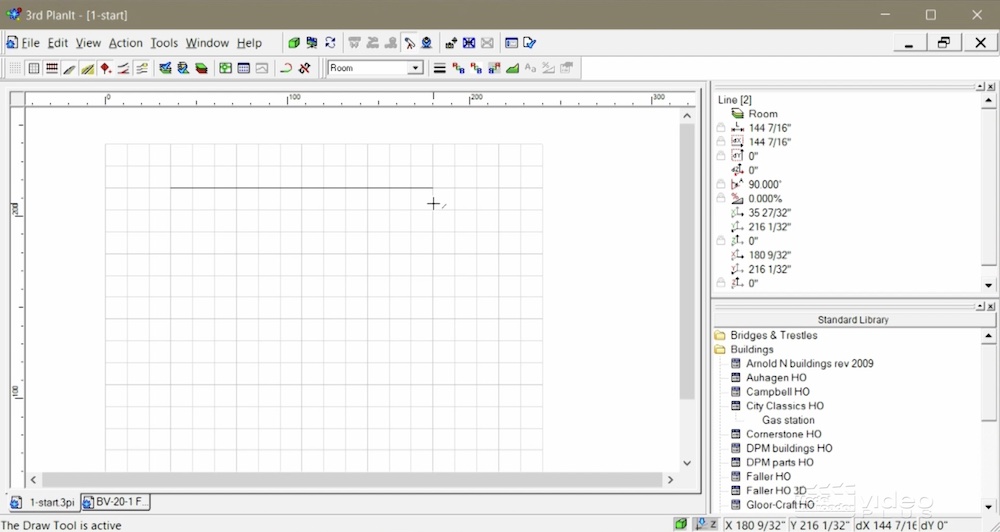
When going back to your cursor, click the line and its information will appear in the object data window, including its drawn-out length. Most programs will have the option of adjusting an object size through this window by simply typing in the preferred numbers.
Additional lines can then be drawn and adjusted for the room to take shape. It’s recommended to draw the room’s dimensions on the grid lines to ensure accuracy.
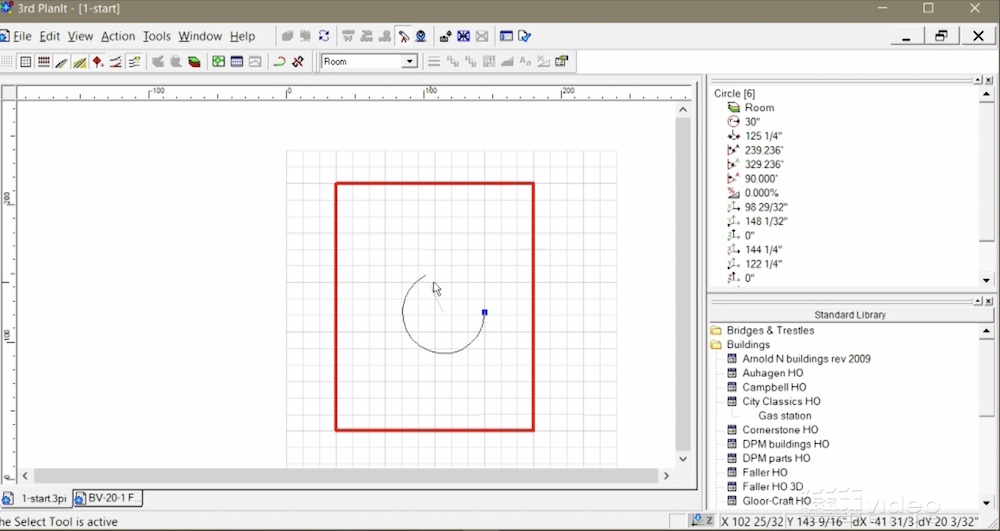
When making a doorway, click the “draw a circle” tool from the kit and drag your mouse across the canvas to determine the initial size. Once created, go to the circle’s object date window to adjust its radius at the exact length of your room’s doorway while setting its arc to 180 degrees. Based on where the doorway is, rotate your half circle and have the curve line ends flushed at the designated wall line.
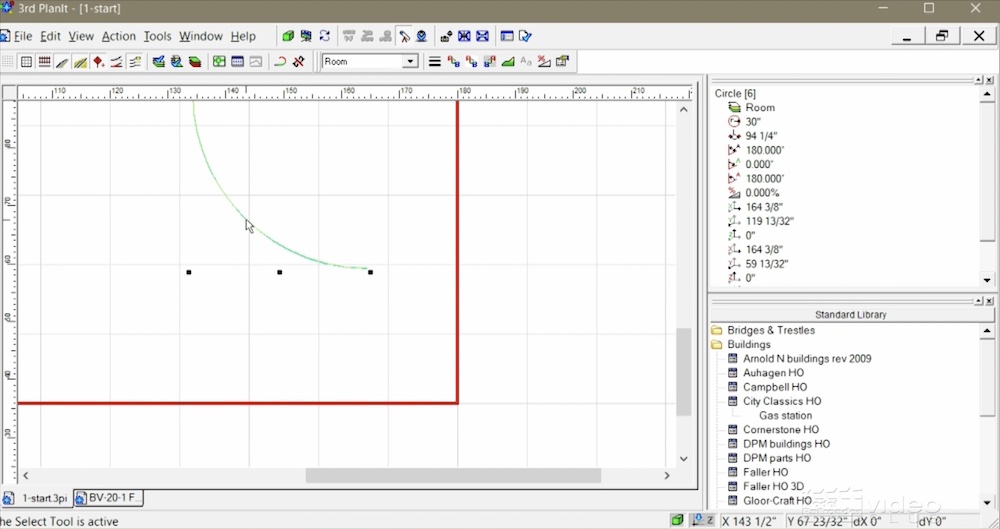
Drawing both lines and shapes [in addition to circles] can also be used to design objects such as the benchwork and furniture to get a feel of the space you have available for your layout.
Adding track
When laying down track as a new layer, make sure the “creating track object” feature is turned back on.
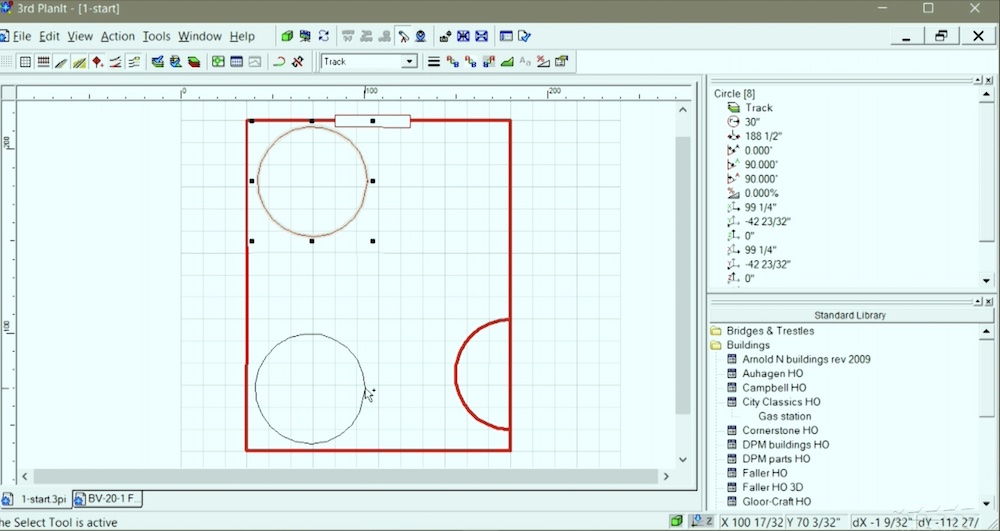
Then comes the decision of your preferred minimum curve radius. Leone recommends drawing a circle from the tool kit with a determined radius to start with. Then, duplicate (select object with the cursor, press the control button, and drag with the mouse) and move the copies to each corner of the room where the layout is going to be built. Adjusting the circles’ size will help determine the minimum radius for the overall layout size.
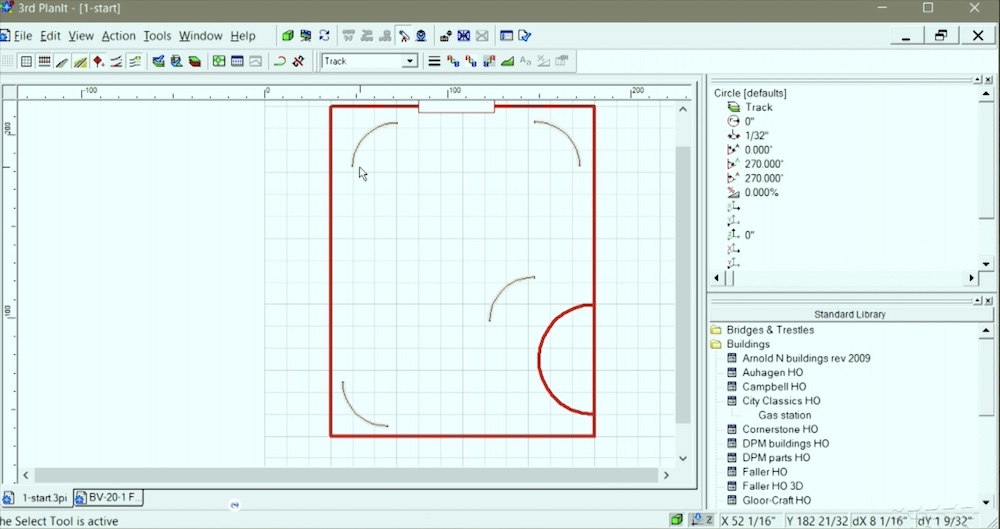
Once a minimum radius is determined, you can make the circles into actual curve sections by changing their angle degrees. Then, rotate and place them throughout the layout, and you’ll see the track plan begin to take shape. Additional curves can be added by duplicating previous copies or drawing new circles.
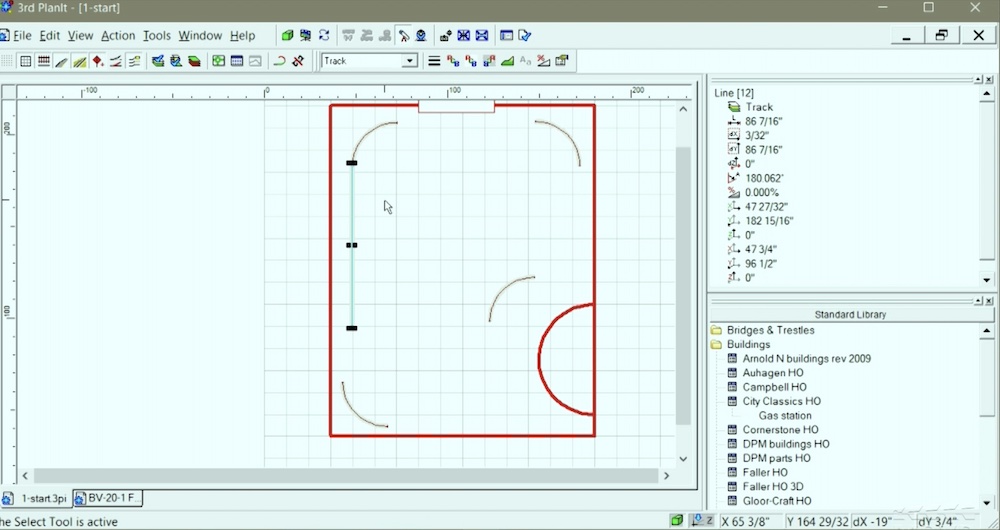
Straight track can be drawn with the same process as if you’re drawing a line from the tool kit. Outside of the object data window, the length can also be extended or reduced by clicking the ends with your cursor and dragging with your mouse. Most programs will have the capability to automatically link track pieces together when you move and connect them together.
Certain programs will also have a feature that lays track automatically to connect sections that are spread apart. 3rd PlanIt Track Planning, for example, has a “connect” button in the tool kit. Simply click one end of your track, then hold and drag the mouse to the end of the other track you would like to connect. That new stretch is automatically created with a set spiral easement (a transition between curve and straight sections), angle, length and track type.
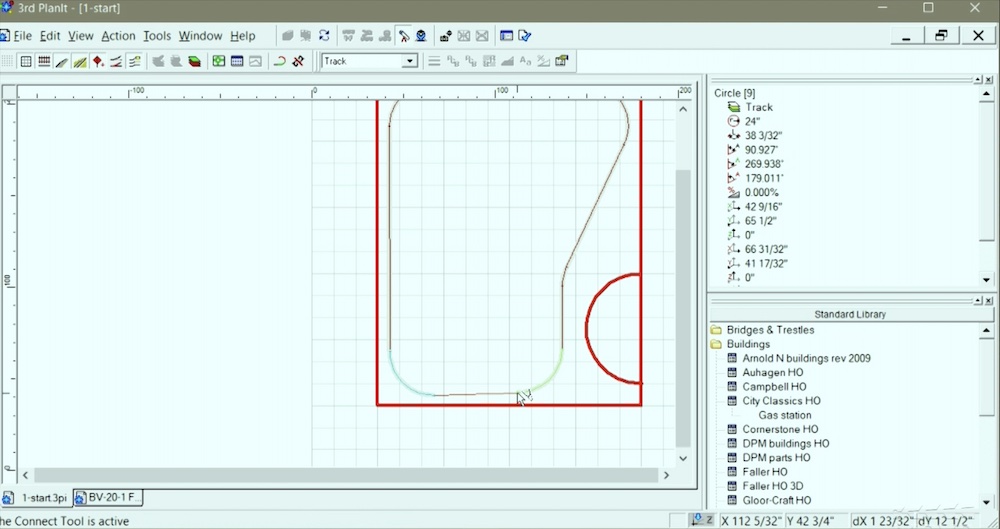
The remaining track-laying process will involve connecting sections while trying out different ideas, such as peninsulas, that’ll fit your needs and desires.
Elevations and turnouts
Track planning software also shines when assisting in a layout’s grade and elevation — whether it be for track looping over each other or constructing multiple decks. Keep in mind that most, if not all, programs will include this powerful feature. This is something to focus on while researching the software titles to choose from.
3rd PlanIt is presented here to have a similar feature that is under the “connect” button in the tool kit called “Make a path.” The tool will involve clicking the start and end points where the elevation will take place. When the section is highlighted, right click and go to “Elevation and Grade.”
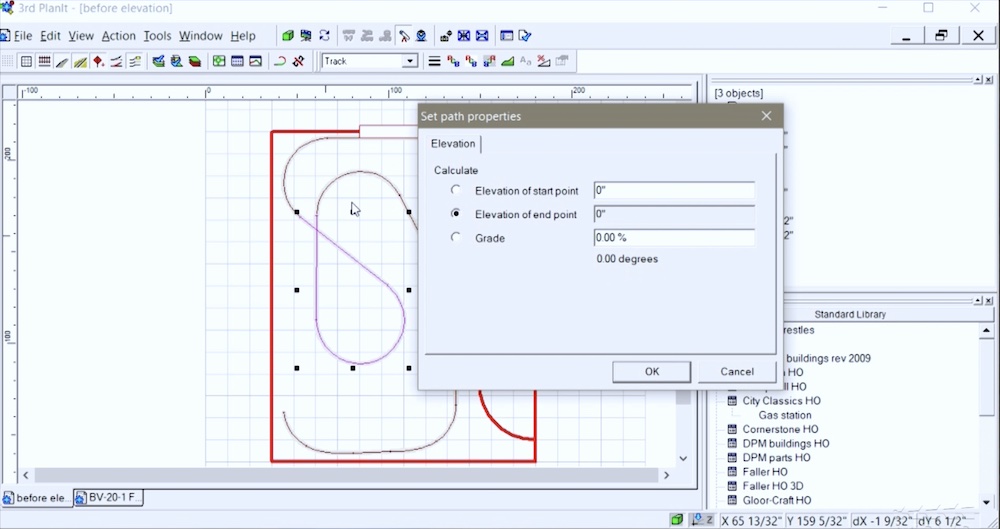
This menu will have entries for measuring the elevation heights at the start and end points as well as grade percentages. The software will then make the appropriate calculations. You can make adjustments to either elevation points or the grade percentage based on preference.
Turnouts and switches are usually found in the track template section of a software’s library. It’ll cover almost all the scales, manufacturers, brands and types for track, structure, and scenery. Before choosing your preferred turnouts, make sure your track layers are still active and selected for editing. Some free software is limited to a few or a single brand of track. This is another feature you’ll want to research during your selection process.
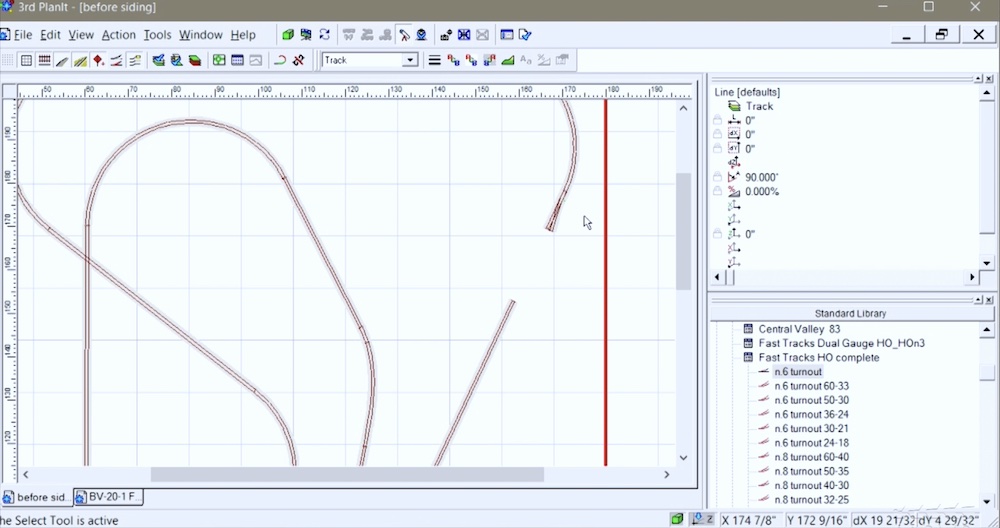
Double clicking a turnout from the library will then have the separate piece appear randomly on the canvas that’ll need to be rotated, flipped, and dragged to where it’ll be placed. This will also involve disconnecting and shortening sections of established track for the turnout to be fitted in and connected. From the turnout, additional track can be built, whether it be for sidings, yards, or feeder lines.
To learn more about the basis of using track planning software, check out Trains.com Video three-part series presented by Leone: Parts 1, 2, and 3.


