


Fortunately, if the surface is relatively flat, another technique is viable. Digital photography, easy-to-use photo-editing software, and low-cost printers can create photo decals to represent these textures. John Nehrich explained this in his article “Brick wall decals” in the December 2001 Model Railroader.
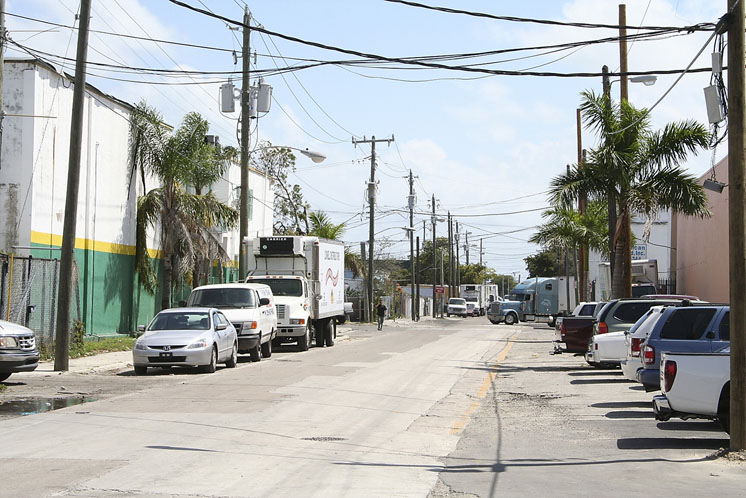
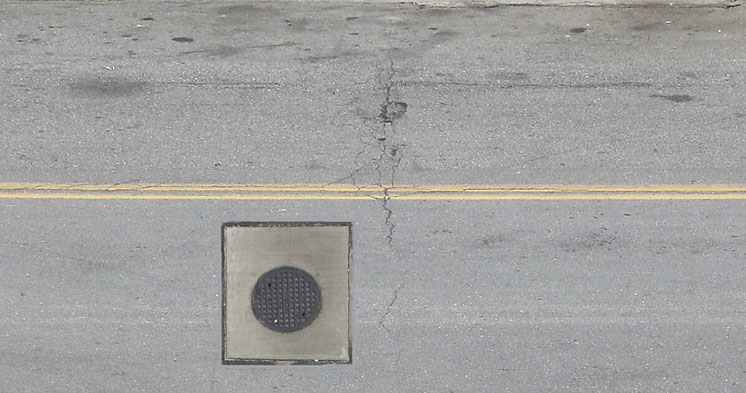
Roads are some of the more difficult layout features to model realistically. Over time, streets weather into a complex patchwork of shades, cracks, and patterns, as seen in fig. 1. As roads age and utility crews repair them, the color combinations become even more challenging to model.
John’s technique of combining photography and decals is ideal for streets. Follow along as I take images of a typical neighborhood street and show you how I transform them into photo decals ready to apply on a layout.
Take the photo
The first step, and probably the most challenging, is getting photos of roadways. There aren’t that many locations where you can take a photo at a true overhead angle. Fortunately, with the perspective-correcting feature of photo-editing software, you don’t need to rent that cherry-picker. Any location several stories up with a clear view of the street will do. I found some of the best vantage points for taking overhead photos to be parking garages and pedestrian overpasses such as those found at shopping malls, hotels, or convention centers. (If your chosen vantage point isn’t public property, be sure to get permission. – Ed.)
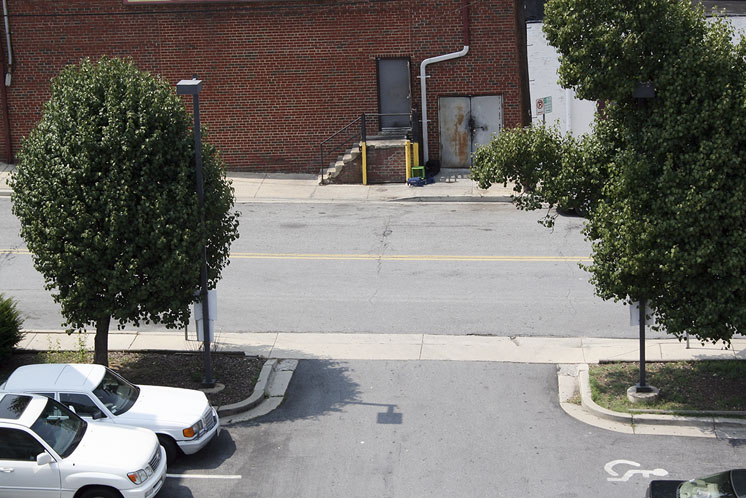
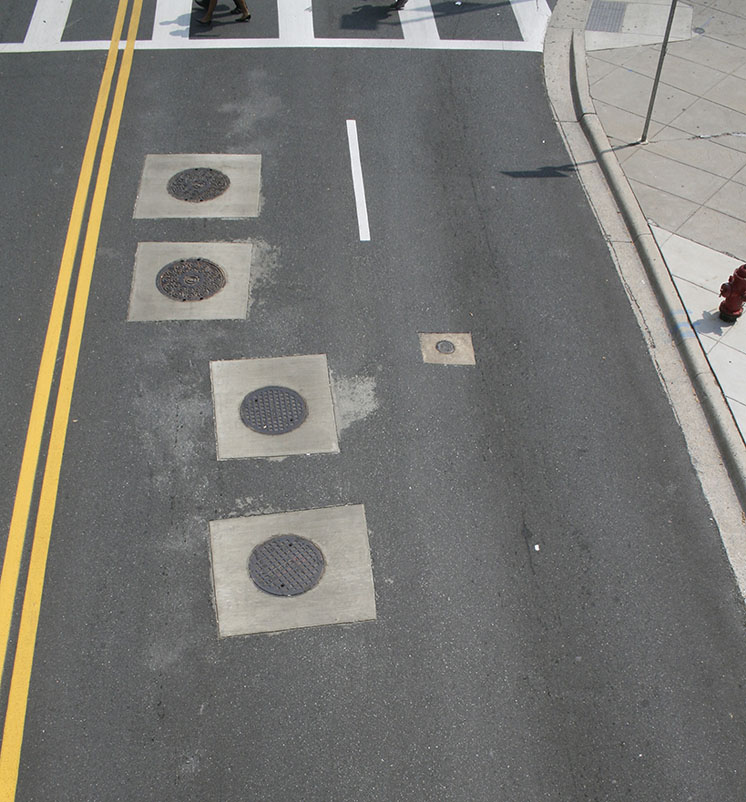
Once you’ve found a good location, orient yourself as squarely as possible with the street below and take the photo. Frame your shot so there are no shadows from trees or nearby buildings. Figure 2 is a photo I took from the roof of a parking garage. Also take supplemental photos of any interesting patches, grates, or manhole covers you may see, like those in fig. 3.
After you’ve taken your photo, it’s time to head to your computer. Don’t worry, this isn’t as hard as you think. We’re only going to do a few simple things to the photo: crop out the excess, remove the perspective distortion, and possibly add some manhole covers.
First, open your photo of the street in your photo-editing program, and remove anything that’s not part of the street itself. Chances are you weren’t able to get a photo from directly overhead, and there will be some perspective distortion – that is, the far side of the street will appear smaller.
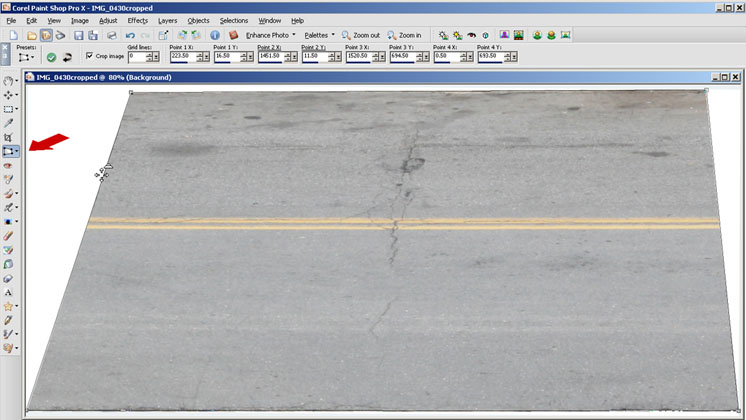
Many image-editing programs have an easy-to-use tool that allows you to correct for this distortion. (In Adobe Photoshop or Photoshop Elements, it’s a function of the Crop tool.) When you open the software’s perspective correction tool, four darts or boxes will appear on the screen. Drag a dart to each corner of the area you want to correct, then hit enter. See fig. 4. The software will then stretch the image to arrange each of the four corners in a perfect rectangle, as if you were viewing it directly from above. If you were reasonably high up when you took the picture, the perspective correction will give you a good image to work with.
After some experimenting, I found that decal lengths in the 6″ to 8″ range are easiest to use. Too long is awkward to handle; too short, and you need too many pieces. If your picture is short, copy and paste several together to make a longer one. With a little touch-up in your editing software, it won’t be that apparent. Copy smaller, irregular sections to disguise any obvious joints or duplicated distinctive features.
An interesting touch is to copy manhole covers from other photos (after you correct perspective on them, of course) and paste them onto your master street photo. Figure 5 on the next page shows a section of road on which I did this. On real streets, you often find several manhole covers together, sometimes of different ages and styles, so don’t worry about making them look neat and uniform. Real streets aren’t.
Size and print the decal
The next step is to print your photo to scale on the decal paper. Decal film comes in both clear and white. You’ll get much better results if you use white; if you use clear, the resulting image will be too translucent.
I applied my finished decals to styrene HO scale asphalt street sections from Walthers. Any hard plastic surface will work, such as a sheet of .060″ styrene cut to the appropriate width. I prefer the Walthers asphalt streets because they have a slight crown to them, and just a hint of texture.
The Walthers road sections are 2 3⁄4″ wide. To give myself a little margin to work with, I set the print options on my image so it would print out at a slightly larger 2 7⁄8″ wide. I also set the printer for glossy photo paper, then used a sharp blade to trim the printed section from the page.
Left untreated, the printer ink will dissolve as soon as the decal is immersed in water. To prevent that, the sheet must be coated with a clear waterproof protectant. Reading the decal manufacturer’s directions is critical, as this is probably the most important step in the whole process.
I first tried Krylon Crystal Coat. I followed the directions on the Crystal Coat and applied three coats a few minutes apart. But I still had some problems with the ink running. I added a spray of Testors Dullcote after the Crystal Coat dried, and that helped considerably. I also found that using Dullcote alone worked.
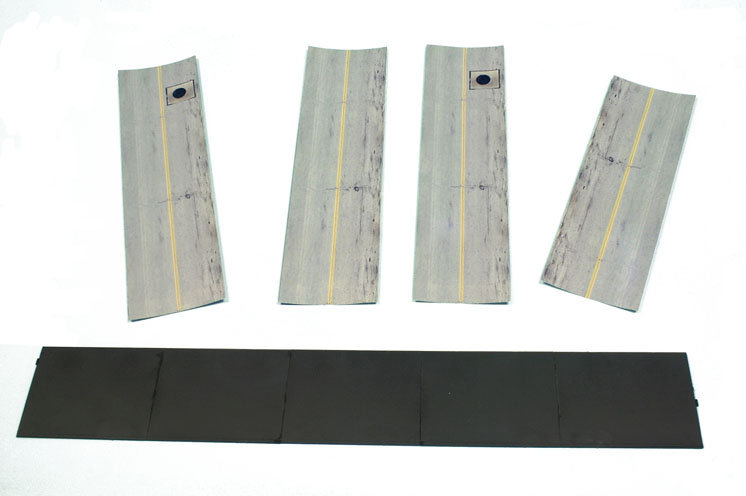
Even if you’re careful, it’s likely some of your decals will still run when put in water. Simply make more than you need and pick the best. You can see some of my finished decals in fig. 6.
Apply the decal and seal
Working with inkjet-printed custom decals is a little trickier than what you might be used to with commercially screen-printed decals. Practice first by applying smaller decals to a scrap piece of plastic.
Place your decal in a pan of water for a few minutes to loosen it from the backing paper. The directions say to wait one minute, but my decals seemed to take a bit longer.
While the decal is soaking, lightly brush a thin application of Micro Set on the road surface. After the decal begins to loosen from its backing, slide it onto the street surface. Use a soft brush dampened with water if you need to push it around or straighten any wrinkles. Once the decal is in place, press it down gently but firmly with a folded T-shirt or similar clean, soft cloth. You may see some curling around the edges of the decal. Gently flow more Micro Set around the edges with a small brush and work the curls out by pressing lightly with your cloth.
Mount on the layout
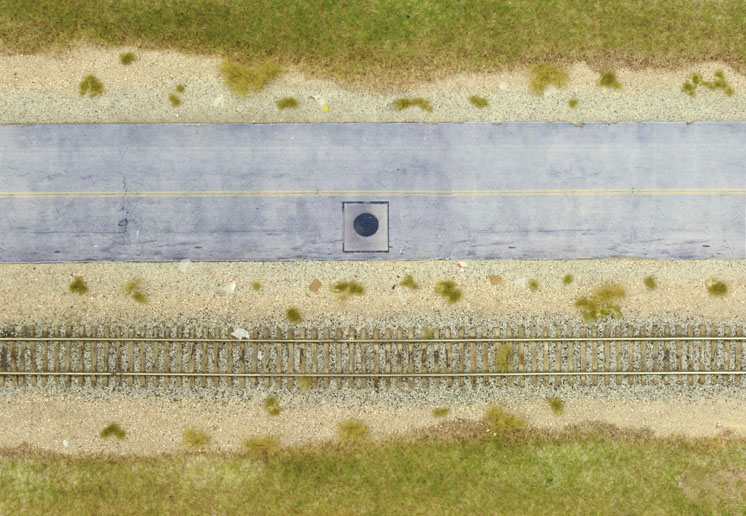
After allowing the decal to dry overnight, give it one more spray of Dullcote and you’re ready to mount it on the layout. Place the street on the layout and secure it in place with white glue. The surrounding scenery will provide most of the adhesion. For road shoulders, I use N scale ballast. Add some weeds and a bit of roadside trash and you now have a realistically colored and detailed street, as seen in fig. 7.
Homemade decals aren’t as forgiving or predictable to work with as the commercial products you may be used to. However, if you’re willing to experiment, make extras to compensate for imperfections, and be patient, you can model streets more realistically than you could by most other means.
Materials List
BelDecal 10W white inkjet decal paper
Krylon 1303 Crystal Clear acrylic spray
Walthers 933-3194 asphalt street system
Microscale 104 Micro Set decal setting solution
Testors 1260 Dullcote
Photo-editing software with perspective correction tool
BelDecal 10W white inkjet decal paper
Krylon 1303 Crystal Clear acrylic spray
Walthers 933-3194 asphalt street system
Microscale 104 Micro Set decal setting solution
Testors 1260 Dullcote
Photo-editing software with perspective correction tool


When adding manhole covers to your roads, keep in mind that same utilities most often run in a very straight line, same lane, and are always located at buildings for local drops, and in intersections for splices.
Great article, but I don’t understand why you go through the extra of work of making these images into decals. Why don’t you just print them on paper and affix them onto thin styrene or FomeCor?
Excellent; “It’s in the details.” addition to the roadway! You might want to make sure that all vehicles are pointed in the right direction of travel though. 😉
Why decals instead of paper?