- Helixes take up a lot of space, so unless you’ve got a large area in which to build, you aren’t gaining much layout.
- If you have enough space available for a helix, you probably have room for more single-deck layout than you can ever manage.
- Helixes are usually used to connect the levels of double-deck layouts, putting neither deck at a comfortable height for building or viewing.
- Operators have been known to become gibbering idiots while waiting for a train to emerge from a helix, wondering if it’s still moving or even still exists.
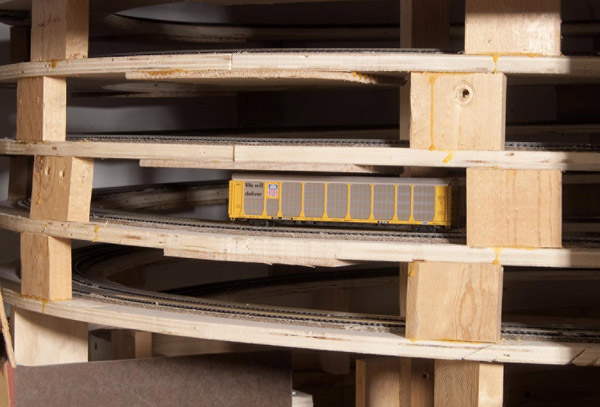
Even so, there are layout design situations in which helixes make sense, and I encountered one which is especially applicable for N scalers – the helix in a closet or storage space. The typical closet is too small for an HO helix, but will accommodate one in N scale. My basement has a 34″ x 44″ niche that let me run the railroad along the adjacent wall, spiral down inside the closet, and return along the same wall at a lower level.
I actually ended up building a double helix, since the line represented on this part of my layout is the Southern Pacific’s double-track main from Tehachapi to Mojave, Calif. The track in the helix is 52 feet long, so a single track would have created a bottleneck. Double track lets traffic keep moving in both directions.
The N scale helix problem – Helixology for N scalers
Designing a helix for N scale isn’t as easy as you might think. Let’s look at some math. Most HO scale modelers I know would consider a 30″ radius the minimum for curved track in a helix. Given that the circumference of a circle is pi (3.14) times its diameter (double its radius), a 30″-radius circle yields a run of 188.4″ (15.7 feet) per turn.
Most modelers of any scale would consider 2 percent a stiff grade, and at 2 percent our 30″ radius helix would ascend about 3 3⁄4″ with each turn. Once we subtract about 1″ for the thickness of the track, roadbed, and subroadbed, we’re left with 2 3⁄4″, barely enough room to reach in and rerail equipment, clean track, and make minor track corrections.
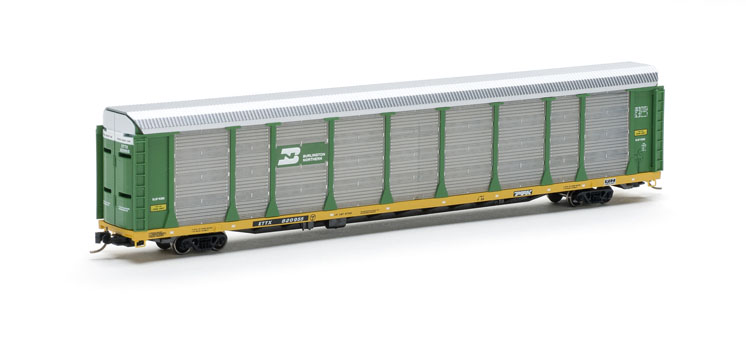
Now back to N scale. For my layout, I’ve established 18″ as my mainline curve minimum. For a minimum-radius helix, this translates to 113″ per turn. If we assume the same 2 percent grade, we get a separation of about 2 1⁄4″. Good luck with that! Subtract 3⁄4″ for subroadbed, roadbed, and track, and we’ve got a space only 1 1⁄2″ high, the same height as a tri-level autorack.
The problem is obvious – the human hand is too big. Hand reduction is not viable, so we either have to increase the curve radius or the grade, and in my case 18 3⁄4″ was the largest minimum radius I could get into that basement niche.
I figured I needed 2″ of clearance to reach in and clean track, so I separated the 1⁄2″ plywood helix turns with 2″ wood blocks, giving me a total rise per turn of 2-5/8″ (including the thickness of the roadbed and track). This means the grade in my helix is 2.2 percent.
That’s pretty darn steep, but I believed it would work – maybe. My shaky faith was based on the fact that the maximum grade on the open portion of the layout that was already built and running was 2.6 percent. On those grades, I can run 10-foot-long trains (my maximum) with three locomotives.
There’s a pretty big difference, though, between what happens on the layout and what goes on in a helix. On the open layout, the train seldom traverses more than 180 degrees of curvature. In the helix, it’s 360 degrees, coupled with a grade. Those two factors can drag motive power to its knees.
To sum up, in a minimum-radius helix, you’re placing your most difficult track situation in your least accessible location. You need to build that helix and lay that track as perfectly as you can.
My helix now does what I ask it to do, but some of those early runs were pretty grim. It’s not fun to hear freight cars hitting the floor. Almost always the problem was that for several inches one rail dipped lower than the other, and under all that sideways stress, a wheelset would come off.
On an open layout, this problem is easily addressed by using a flat file to even up the rail heights. It’s tougher, though, when you’re inside a helix and working in a space only 2″ high.
Would I do it again? Yes, but I’d do it better. For firmer support I’d fasten the track directly to the plywood with no cork. I used track recycled from the previous layout, and mixed codes 55 and 80. Next time I’d use new track, all the same brand and size, and check everything very carefully.
Youngsters visiting my layout invariably end up watching trains inside the helix, but I much prefer to stay out.
For more information on helixes, see Guide to helix and staging design available on the Kalmbach Hobby Store.


