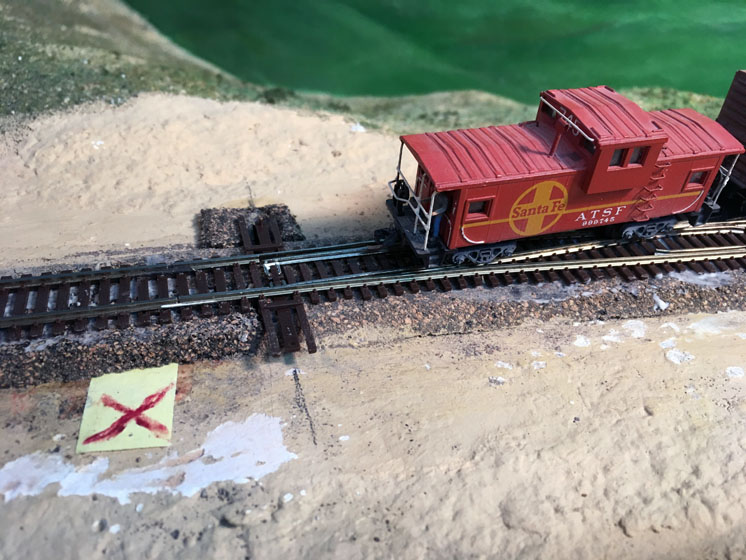
In a situation like that the show must go on, so I pulled the car out of the train and waited until the visitors had left and the dust had settled to try to solve the problem. I put the car back where it had been, right behind the engine, and ran up the hill. The car derailed again in the same way at the same spot. That’s a good thing – the most difficult problems to solve are those that occur inconsistently.
The curious thing, though, was that when I backed the train up a few feet and ran at the turnout again, the car would cruise right on through. Then I’d run the train around the layout again and the car would derail at that same spot.
Finally that little light bulb above my head blinked on. The car was coming off the track at the turnout because it had derailed somewhere farther back. I’ve learned from experience that a car can run a considerable distance with a wheelset off the rails before the car finally comes off the track, usually at a turnout.
Sure enough the wheels were actually derailing at the switch exiting the Tehachapi Loop. Now I knew where the problem was, but I still didn’t know what was causing it.
I can’t honestly say that I ever did. I watched that wheel climb up and out again and again, finally replaced the coupler, and all was well.
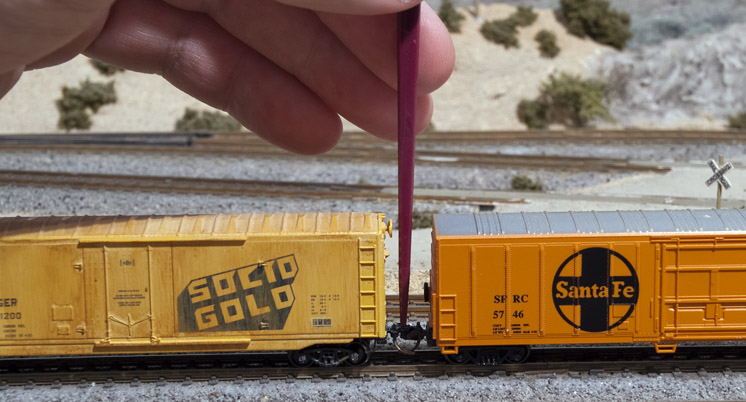
As I’ve stated before, I body-mount all my couplers, and I usually re-use the cut-off, truck-mounted couplers to save money. I use Micro-Trains brand exclusively because I find them to be reliable and readily available. Studying the coupler I’d removed, I could see that the knuckle didn’t have as much side-to-side swing as my other M-Ts did. I suspect the culprit might have been an older version. Ordinarily this wouldn’t be a problem, but here it was because the car was right behind the engine.
Longer can be better
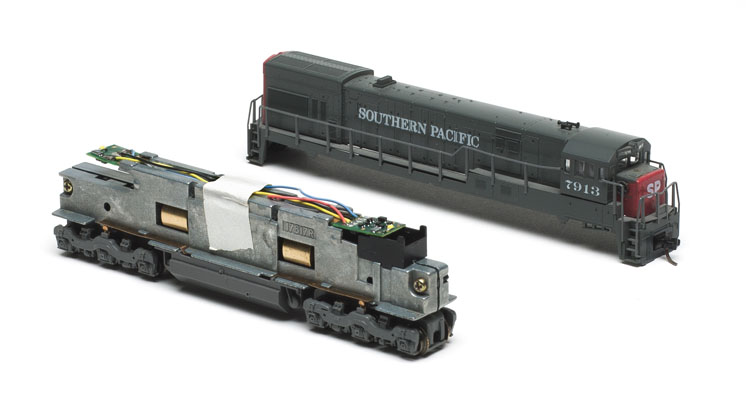
Let me explain. Micro-Trains gives you two options on its 1015/1016 couplers. (The 1015 is the universal coupler you can use on just about any locomotive or car.) For locomotives, I used the short shank versions, figuring they looked more realistic, which they did. With my fairly generous 18″ minimum radius curves I figured they would operate just fine. I was wrong.
The medium-length couplers work better because of the longer reach of the shank. Because the pivot point for locomotive trucks is often an inch or more inboard, the rear end swings a long way out on a curve. With a short shank, this wide swing tends to pull the car behind the locomotive off the track.
A longer shank allows the coupler head to shift toward the middle of the track, relieving sideways pressure.
With cars, the kingpins are usually nearer the end of the car and the length of the coupler shank isn’t a factor.
Even so, I would never install short couplers on long cars like 89-foot flats where the kingpin is a considerable distance inboard.
I could’ve used that offending car elsewhere in the train and it would’ve worked fine, but I don’t want a railroad with a lot of restrictions about which cars can go behind locomotives. If you’re trying to run prototypically, there’s already enough of that kind of thing. For example, you don’t run cars loaded with gasoline or other hazardous cargo right behind the locomotive.
Other derailment causes
The number one cause of derailments on my layout is low-hanging coupler pins. I don’t know how I manage to put cars out there without checking pin height, but I sometimes do. My standard is to clear the Micro-Trains height gauge and to clear it by a little extra. I don’t do any uncoupling over magnets, so the pins don’t need to be at the correct height for magnetic uncoupling. Some modelers don’t like the appearance of the pins and clip them off short, but they resemble air hoses well enough to suit me. Don’t pull them out altogether, or the coupler won’t work.
Give turnouts a fighting chance
Lots of derailments can be avoided before you ever run a train just by doing a good, careful job of laying track. The photo shows one of several locations that were prone to derailments because I wanted to make a passing track as long as possible. To achieve that end, I would lay track directly from a curve into the heel of a turnout.
The result was just enough derailments to drive me crazy, and I’d file and bend track to no avail. Finally, having pretty much filed the turnout to death, I’d replace it and move it so a locomotive had several inches of straight track to sort itself out before entering the turnout. It all goes back to that temptation to try to squeeze in a little too much.
With a bit more tinkering, I should banish most of the derailments from my layout. That should keep the operations chief happy.




Hello,newbie working with N scale. I’ve have intermittent derailments from the car right behind the locomotive as well.The track seems fine, smooth as glass. I was thinking it had to something with the coupler on the locomotive (Atlas GP-9) being attached to the frame and the car coupler being attached to the trucks. Not enough “swing” makes sense as the locomotive might be pulling the car off the tracks from the sideways torque. Does this seem logical?
Still laying track so this is very useful info.
Elnar, an interesting question and I don’t know the answer, ie are buffer cars loaded.
A useful summary. Thanks.
I had a similar problem with a unit coal train in my staging yard. The first car would always derail when going
thru a curve. Didn’t mater which car it was always the one coupled to the engine. Solved the problem by changing the 1015 coupler on the engine with a 1016. There wasn’t enough swing with the 1015 coupler on the engine.
Good article Jim as I’ve enjoyed coverage of your Tehachapi Loop layout for sometime now. I too had a pesky derailment problem with what I thought was in the turnout. Problem was the front wheel of a 6-axle IC locomotive was riding up/over the outside rail on a curve prior to entering a turnout and then the turnout finished the derailment. Took me a couple of days to figure out that my problem was the outside rail sat a little lower due to my not adding the missing crossties that had been removed for a rail joiner. Very frustrating, but persistence paid off and now I try to be perfect in laying track the first time!
Thank you Jim – another very useful article.
Regarding hauling tank cars with flammable load, and that they are not placed right behind the locomotive. I see that boxcars were used as a buffer. Were those buffer cars empty, or were they filled with any kind of material, perhaps to reduce the impact of an explosion?
Best regards,
Einar
HO. Sorry.
Interesting title and was hoping it covered my derailments. Wheels drop into frog on Atlas code 100 ns switches. Not all but 2-3. Not sure why not all. Any ideas, fixes, etc?
Thanks.
Good common sense article Jim. These types of derailments can drive you crazy, yet most of the time the culprit is staring us in the face. Derailments almost beg for the creation of a problem solving checklist.
Jim, You are “spot on”. Micro Trains couplers are the best. However even with MT couplers if you get a stiff one don’t use it. I have filled the coupler box of stiff couplers with graphite powder and believed they would free up only to later replace them.
My locos and cars run much better with MT couplers replacing the other brands.
Jim, You are so right about coupler trip pin height. Even cars fresh out of the box from a reputable manufacturer have low-hanging pins. Either check them when the car or locomotive goes into service or fix them after the first derailment.