


Other companies were in the business of leasing locomotives, but their paint schemes, to the extent they had them, were spartan. Often they’d buy used locomotives, overhaul them, slap on a coat of dark paint and some initials, and start leasing them out.
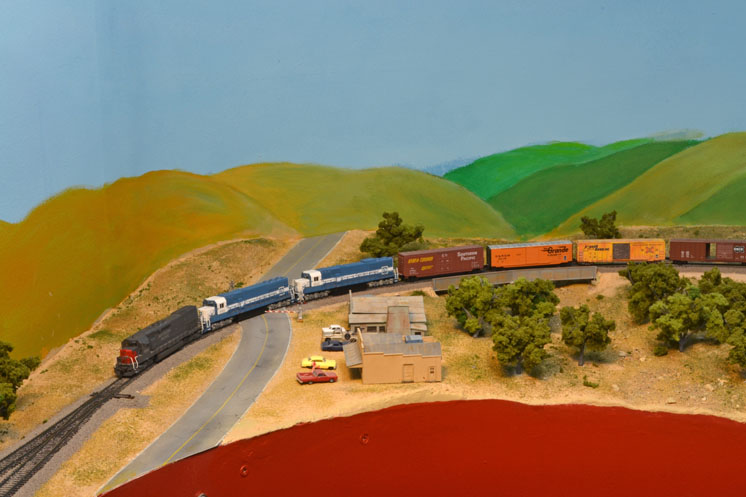
These blue-and-white EMD jobs, on the other hand, were bound to look great on my Tehachapi Pass layout, and I assigned them to the Southern Pacific, which could always use some help in the color department.
Both the Southern Pacific, which owned the line, and the Santa Fe, which had running rights, were short on motive power in the mid-’80s, and on the pass you’d often see leased power as well as locomotives borrowed from other lines. This was a great boon to the modeler who wants to follow a prototype but still have some variety.
Go, no-go performance – Improving N scale engine performance
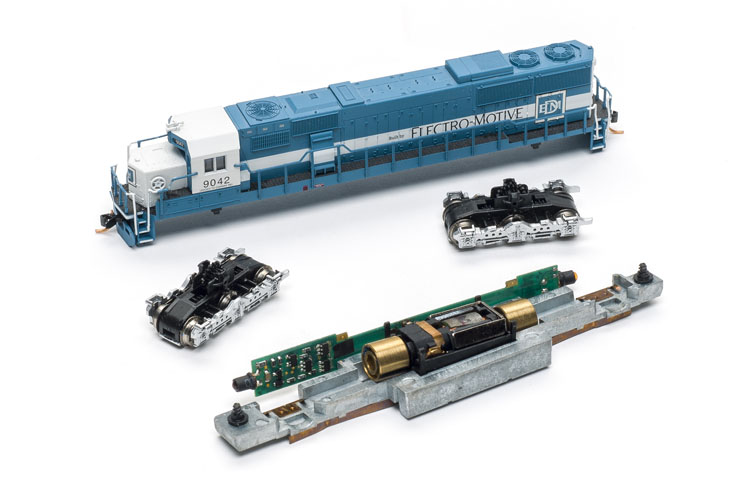
I’d bought these two engines with factory-installed decoders, and when I first put them on the tracks, they were a delight to watch. They ran silky smooth and so quiet you could barely hear them at all. Unfortunately, that super performance didn’t last.
Those Oakways would be going along great, but then one or the other would just quit. I’d take off the body shell, fool with the mechanism, jiggle the Digital Command Control (DCC) board around in its notches as best I could, and eventually get it going. Then after putting the shell back on, it might run or it might not, and for how long was anyone’s guess.
The headlights stayed on, so contact between the decoder and the locomotive frame was good. That meant the culprit had to be poor contact between the motor and the decoder.
Now, over the years I’ve learned that if you’ve installed a plug-and-play decoder and the engine won’t run, the problem is almost always the contact between the decoder and the motor. Usually the fix is to take the decoder back out and clean its contact pads. I do this with the eraser on a common, ordinary lead pencil, and most times that solves the problem.
I’ve tried to make this step part of my installation procedure, but forget to do so more than I remember. You may also have to bend the motor leads a bit to get sufficient pressure for good contact, but as a general rule, once you get an engine going it’ll keep on. This intermittent on-off behavior was a mystery to me.
A solution
Finally, I concluded the leads from the motor brushes were too flimsy and didn’t exert enough pressure on the decoder to maintain reliable contact. I’d never encountered this problem, so I turned to the internet, which had come to my rescue many times before. I searched two discussion groups, TrainBoard and The Railwire, and found that I wasn’t alone.
The solution I used, which I found in one of the discussion threads, was to solder the motor leads to the board. This may not be the only solution or the best one, but it is sure-fire.
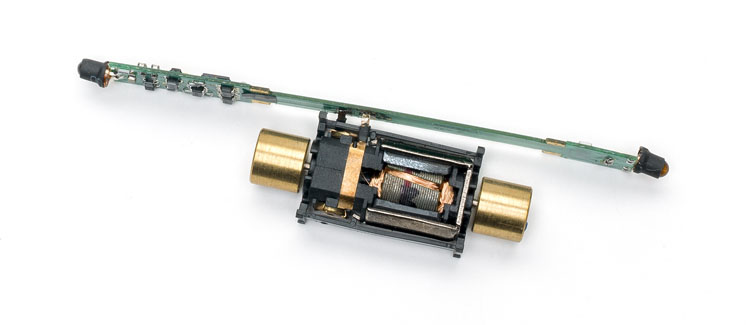
First, I took the motor out of the locomotive and lashed it to my worktable with masking tape. Then I carefully and quickly tinned the tips of the motor leads and the contact pads on the decoder, held my breath, and made the connections.
I made sure my small iron was good and hot, used rosin core flux, and got that soldering iron in and out in about a second. The flux helps distribute the heat very quickly, and I only used a tiny droplet of solder. This was scary, but not as hard as it sounds.
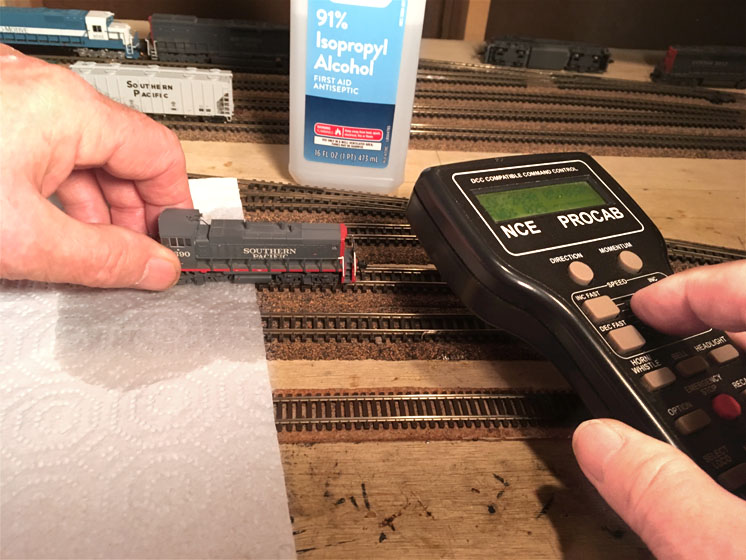
Many of you will recognize that last paragraph covers some tricky ground. I’d cross it only as a last resort. But the result was well worth it. Those beautiful locomotives now run just as good as they look.


Just curious. How did you know where to position the contacts for soldering so that there was no short on reassembly